Recover from catastrophic failure with disaster recovery replication
A disaster recovery (DR) strategy to protect your Vault deployment from catastrophic failure of an entire cluster helps reduce recovery efforts and minimize outage downtime. Vault Enterprise supports multi-datacenter deployments, so that you can replicate data across datacenters for improved performance and disaster recovery capabilities.
Challenge
When a disaster occurs, a Vault operator must be able to respond to the situation by performing failover from the affected cluster. Similarly, failing back to an original cluster state is typically required after you resolve the incident.
Solution
Vault Enterprise Disaster Recovery (DR) Replication features failover and failback capabilities to assist in recovery from catastrophic failure of entire clusters.
Learning to failover a DR replication primary cluster to a secondary cluster, and failback to the original cluster state is crucial for operating Vault in more than one datacenter.
Use the basic example workflow in this tutorial scenario to get acquainted with the steps involved in failing over and failing back using the Vault API, CLI, or UI.
Prerequisites
This intermediate Vault Enterprise operations tutorial assumes that you already have some working knowledge of operating Vault with the API, CLI, or web UI. If you aren't familiar with the Vault Enterprise Disaster Recovery replication functionality, you should review the Disaster Recovery Replication Setup tutorial before proceeding with this tutorial.
You also need the following resources to complete the tutorial hands-on scenario:
Docker installed.
Vault binary installed on your
PATHfor CLI operations. You must use a Vault Enterprise server throughout this tutorial, but you can use the Vault Community Edition binary for all CLI examples.curl to use the API command examples.
jq for parsing and pretty-printing JSON output.
A web browser for accessing the Vault UI.
Policy requirements
You must have a token with highly privileged policies, such as a root token to configure Vault Enterprise Replication. Some API endpoints also require the sudo capability.
If you aren't using the root token, expand the following example to learn more about the ACL policies required to perform the operations described in this tutorial.
# To enable DR primary
path "sys/replication/dr/primary/enable" {
  capabilities = ["create", "update"]
}

# To generate a secondary token required to add a DR secondary
path "sys/replication/dr/primary/secondary-token" {
  capabilities = ["create", "update", "sudo"]
}

# To create ACL policies
path "sys/policies/acl/*" {
  capabilities = ["create", "update", "list"]
}

# Create a token role for batch DR operation token
path "auth/token/roles/*" {
  capabilities = ["create", "update"]
}

# Create a token
path "auth/token/create" {
  capabilities = ["create", "update"]
}

# To demote the primary to secondary
path "sys/replication/dr/primary/demote" {
  capabilities = ["create", "update"]
}

# To enable DR secondary
path "sys/replication/dr/secondary/enable" {
  capabilities = ["create", "update"]
}

# To generate an operation token
path "sys/replication/dr/secondary/generate-operation-token/*" {
  capabilities = ["create", "update"]
}

# To promote the secondary cluster to be primary
path "sys/replication/dr/secondary/promote" {
  capabilities = ["create", "update"]
}

# To update the assigned primary cluster
path "sys/replication/dr/secondary/update-primary" {
  capabilities = ["create", "update"]
}

# If you choose to disable the original primary cluster post-recovery
path "sys/replication/dr/primary/disable" {
  capabilities = ["create", "update"]
}
Scenario introduction

To successfully follow this tutorial, you will deploy 2 single-node Vault Enterprise clusters with integrated storage:
- Cluster A is the initial primary cluster.
- Cluster B is the initial secondary cluster.
You will use these 2 clusters to simulate the following failover and failback workflows.
Failover to DR secondary cluster

In the current state, cluster A is the primary and replicates data to the secondary cluster B. You will perform the following actions to failover so that cluster B becomes the new primary cluster.
- Generate batch DR operation token on cluster A.
- Promote DR cluster B to become new primary.
- Demote cluster A to become secondary.
- Point cluster A to new primary cluster B.
- Test access to Vault data while cluster B is the primary.
Failback to original primary cluster

In the current state, cluster B is the primary and replicates data to the secondary cluster A. You will perform the following actions to failback to the original cluster replication state.
- Generate secondary token on cluster A.
- Promote cluster A.
- Demote cluster B.
- Point cluster B to cluster A, so cluster B is a DR secondary of cluster A.
- Test access to Vault data while cluster A is the primary cluster.
Prepare environment
The goal of this section is for you to prepare and deploy the Vault cluster containers.
You will start the Vault cluster Docker containers, and perform some initial configuration to ready the Vault clusters for replication.
This tutorial requires a Vault Enterprise Standard license, so you need to first specify your license string as the value of the
MY_VAULT_LICENSEenvironment variable.$ export MY_VAULT_LICENSE=C0FFEEU43BK5HGYYTOJZW2QNTNNNEWU33JJYZE26SNK52G2TLNJV22SNSZP2GWSNDYL2V2E3KNKRDGYTTKKV2E42TLGNH2IZZQLJCESNKNNJNXOSLJO5UVSN2WPJSEOOLULJNEUZTBK5IWST3JJE2U6V2WNVN2OVJSL2JTZ52ZNV2G2TCXJUYU2RCVORNVIWJUJVBTZ6CNNVNGQWJSLE2U42SCNRNXUSLJJRBUU4DCNZHDZWKXPBZVSWCSOBRDENLGN2LVC2KPN2EXCSLJO5UWCWCOPJS2OVTGNRDWY5C2KNETNSLKJ23U22SJORGUI23UJVKE4VKNKRKTNTL2IU3E22SBOVHGUVJQJ5KEK6KNKRRTGV3JJ2ZUS3SOGBNVQSRQLZZVE4DCK5KWST3JJ24U2RCJP2G2IQJVJRKEK6SWIRZXOT3KI23U62SBO5LWSSLTJ2WVNNDDI5WHSWKYKJYGENRVNZSEO3DULJJUSNSJNJEXOTLKKV2E2VCBORGUIRSVJVCECNSNIRZTNTKEIJQUS2LXN2SEOVTZNJLWY5KZLBJHZYRSGVTGIR3NORN2GSJWJ2VES52NNJKXITKUI22E2RCKKVGUIQJWJVCECNSNIRBGCSLJO5UWGSCKOZNEQVTKNRBUSNSJNZNGQZCXPZYES2LXN2NG26DILIZU22KPNZZWSYSXH2VWIV3YNRRXSSJWK54UU5DEK54DZYKTG2VVS6JRPJNTERTTLJJUS42JNVSHNZDNKZ4WE3KGOVNTEVLUNNDTS43BK5HDKSLJO5UVSV2SGJNVONLKLJLVC5C2I5DDZWKTG23WG3JZGBN2OTRQN2LTS5KJNQYTSZSRHU6S4RLNNVTE2WL2J5NWYV3NJJGUS52NIJLSWZ2GN55GUT2KKR2W443VO43XGWSVOJSGON22IVNUYVTGOZLUOSLRIRRE6WTNOVWHERKJIRJUO3KGIJGHE2TOOZSHI5DD25DVGTRWK4YUCNJRNRZWWY3BGRS2NNBTGN42Z53NKZWGC5SKKZ2HZSTYJ2ETSRBWKVDEYVLBKZIGU22XJJ2GGRBWOBQWYNTPJ5TEO3SLGJ52ZS2KKJWUOSCWGNSVU53RIZSSW3ZXNNXXGK2BKRHGQUC2N5JS6S2WL2TS6SZLNRDVZ52NG5VEE6CJG5DU6YLLGZKWC2LBJBXWK2ZQKJKG6NZSIRIT2PIExport the environment variable
HC_LEARN_LABwith a value that represents the lab directory,/tmp/learn-vault-lab.$ export HC_LEARN_LAB=/tmp/learn-vault-labMake the directory.
$ mkdir $HC_LEARN_LABChange into the lab directory.
$ cd $HC_LEARN_LABYou will perform all steps of the tutorial scenario from within this directory.
Create directories for Vault configuration and data for the 2 clusters.
$ mkdir -p cluster-a/config cluster-a/data cluster-b/config cluster-b/dataPull the latest Vault Enterprise Docker image.
$ docker pull hashicorp/vault-enterprise:latest
latest: Pulling from hashicorp/vault-enterprise
...snip...
Status: Downloaded newer image for hashicorp/vault-enterprise:latest
docker.io/hashicorp/vault-enterprise:latest
Create a Docker network named
learn-vault.$ docker network create learn-vault d6a8247e3f138344c4686a517834ec2e2af68be9d728afb08bcfe21aae616785
Start the cluster A container
Each cluster container uses a unique Vault server configuration file.
Create the cluster A configuration file.
$ cat > cluster-a/config/vault-server.hcl <<EOF ui = true disable_mlock = true listener "tcp" { tls_disable = 1 address = "[::]:8200" cluster_address = "[::]:8201" } storage "raft" { path = "/vault/file" } EOFStart the cluster A container.
$ docker run \
      --name=vault-enterprise-cluster-a \
      --hostname=cluster-a \
      --network=learn-vault \
      --publish 8200:8200 \
      --env VAULT_ADDR="http://localhost:8200" \
      --env VAULT_CLUSTER_ADDR="http://cluster-a:8201" \
      --env VAULT_API_ADDR="http://cluster-a:8200" \
      --env VAULT_RAFT_NODE_ID="cluster-a" \
      --env VAULT_LICENSE="$MY_VAULT_LICENSE" \
      --env SKIP_SETCAP=true \
      --env SKIP_CHOWN=true \
      --volume $PWD/cluster-a/config/:/vault/config \
      --volume $PWD/cluster-a/data/:/vault/file:z \
      --cap-add=IPC_LOCK \
      --detach \
      --rm \
      hashicorp/vault-enterprise vault server -config=/vault/config/vault-server.hcl
Confirm that the cluster A container is up.
$ docker ps -f name=vault-enterprise --format "table {{.Names}}\t{{.Status}}"Example expected output:
NAMES                        STATUS
vault-enterprise-cluster-a   Up 3 seconds
Initialize the cluster A Vault, writing the initialization information including unseal key and initial root token to the file
cluster-a/.init.$ vault operator init \ -address=http://127.0.0.1:8200 \ -key-shares=1 \ -key-threshold=1 \ > $PWD/cluster-a/.initExport the environment variable
CLUSTER_A_UNSEAL_KEYwith the cluster A unseal key as its value.$ export CLUSTER_A_UNSEAL_KEY="$(grep 'Unseal Key 1' cluster-a/.init | awk '{print $NF}')"Export the environment variable
CLUSTER_A_ROOT_TOKENwith the cluster A initial root token as its value.$ export CLUSTER_A_ROOT_TOKEN="$(grep 'Initial Root Token' cluster-a/.init | awk '{print $NF}')"Unseal Vault in cluster A.
$ vault operator unseal -address=http://127.0.0.1:8200 $CLUSTER_A_UNSEAL_KEYSuccessful output example:
Key                     Value
---                     -----
Seal Type               shamir
Initialized             true
Sealed                  false
Total Shares            1
Threshold               1
Version                 1.12.2+ent
Build Date              2022-11-23T21:33:30Z
Storage Type            raft
Cluster Name            vault-cluster-5d1417f7
Cluster ID              0aa8c2eb-be93-03b3-bc22-a0b349fd8938
HA Enabled              true
HA Cluster              n/a
HA Mode                 standby
Active Node Address     <none>
Raft Committed Index    57
Raft Applied Index      57
Upon unsealing Vault, it returns a status with Sealed having a value of
false. This means that Vault is now unsealed and ready for use in cluster A.
Start the cluster B container
Repeat a variation of the earlier workflow to start cluster B.
Create the cluster B configuration file.
$ cat > cluster-b/config/vault-server.hcl << EOF ui = true listener "tcp" { tls_disable = 1 address = "[::]:8220" cluster_address = "[::]:8221" } storage "raft" { path = "/vault/file" } EOFStart the cluster B container.
$ docker run \
      --name=vault-enterprise-cluster-b \
      --hostname=cluster-b \
      --network=learn-vault \
      --publish 8220:8220 \
      --env VAULT_ADDR="http://localhost:8220" \
      --env VAULT_CLUSTER_ADDR="http://cluster-b:8221" \
      --env VAULT_API_ADDR="http://cluster-b:8220" \
      --env VAULT_RAFT_NODE_ID="cluster-b" \
      --env VAULT_LICENSE="$MY_VAULT_LICENSE" \
      --env SKIP_SETCAP=true \
      --env SKIP_CHOWN=true \
      --volume $PWD/cluster-b/config/:/vault/config \
      --volume $PWD/cluster-b/data/:/vault/file:z \
      --cap-add=IPC_LOCK \
      --detach \
      --rm \
      hashicorp/vault-enterprise vault server -config=/vault/config/vault-server.hcl
Check the container status.
$ docker ps -f name=vault-enterprise --format "table {{.Names}}\t{{.Status}}"
NAMES                                STATUS
vault-enterprise-secondary-cluster   Up 6 seconds
vault-enterprise-primary-cluster     Up About a minute
Initialize the cluster B Vault, writing the initialization information including unseal key and initial root token to the file
secondary/.init.$ vault operator init \ -address=http://127.0.0.1:8220 \ -key-shares=1 \ -key-threshold=1 \ > cluster-b/.initExport the environment variable
CLUSTER_B_UNSEAL_KEYwith the cluster B unseal key as its value.$ export CLUSTER_B_UNSEAL_KEY="$(grep 'Unseal Key 1' cluster-b/.init | awk '{print $NF}')"Export the environment variable
CLUSTER_B_ROOT_TOKENwith the cluster B initial root token as its value.$ export CLUSTER_B_ROOT_TOKEN="$(grep 'Initial Root Token' cluster-b/.init | awk '{print $NF}')"Unseal Vault in cluster B.
$ vault operator unseal -address=http://127.0.0.1:8220 $CLUSTER_B_UNSEAL_KEYSuccessful output example:
Key                     Value
---                     -----
Seal Type               shamir
Initialized             true
Sealed                  false
Total Shares            1
Threshold               1
Version                 1.12.1+ent
Build Date              2022-10-28T12:10:32Z
Storage Type            raft
Cluster Name            vault-cluster-4ccfd107
Cluster ID              0fc163cd-b3bf-1921-f740-c03f645065d2
HA Enabled              true
HA Cluster              n/a
HA Mode                 standby
Active Node Address     <none>
Raft Committed Index    59
Raft Applied Index      59
You are now prepared to configure DR replication between cluster A and cluster B using the Vault CLI, HTTP API, or UI.
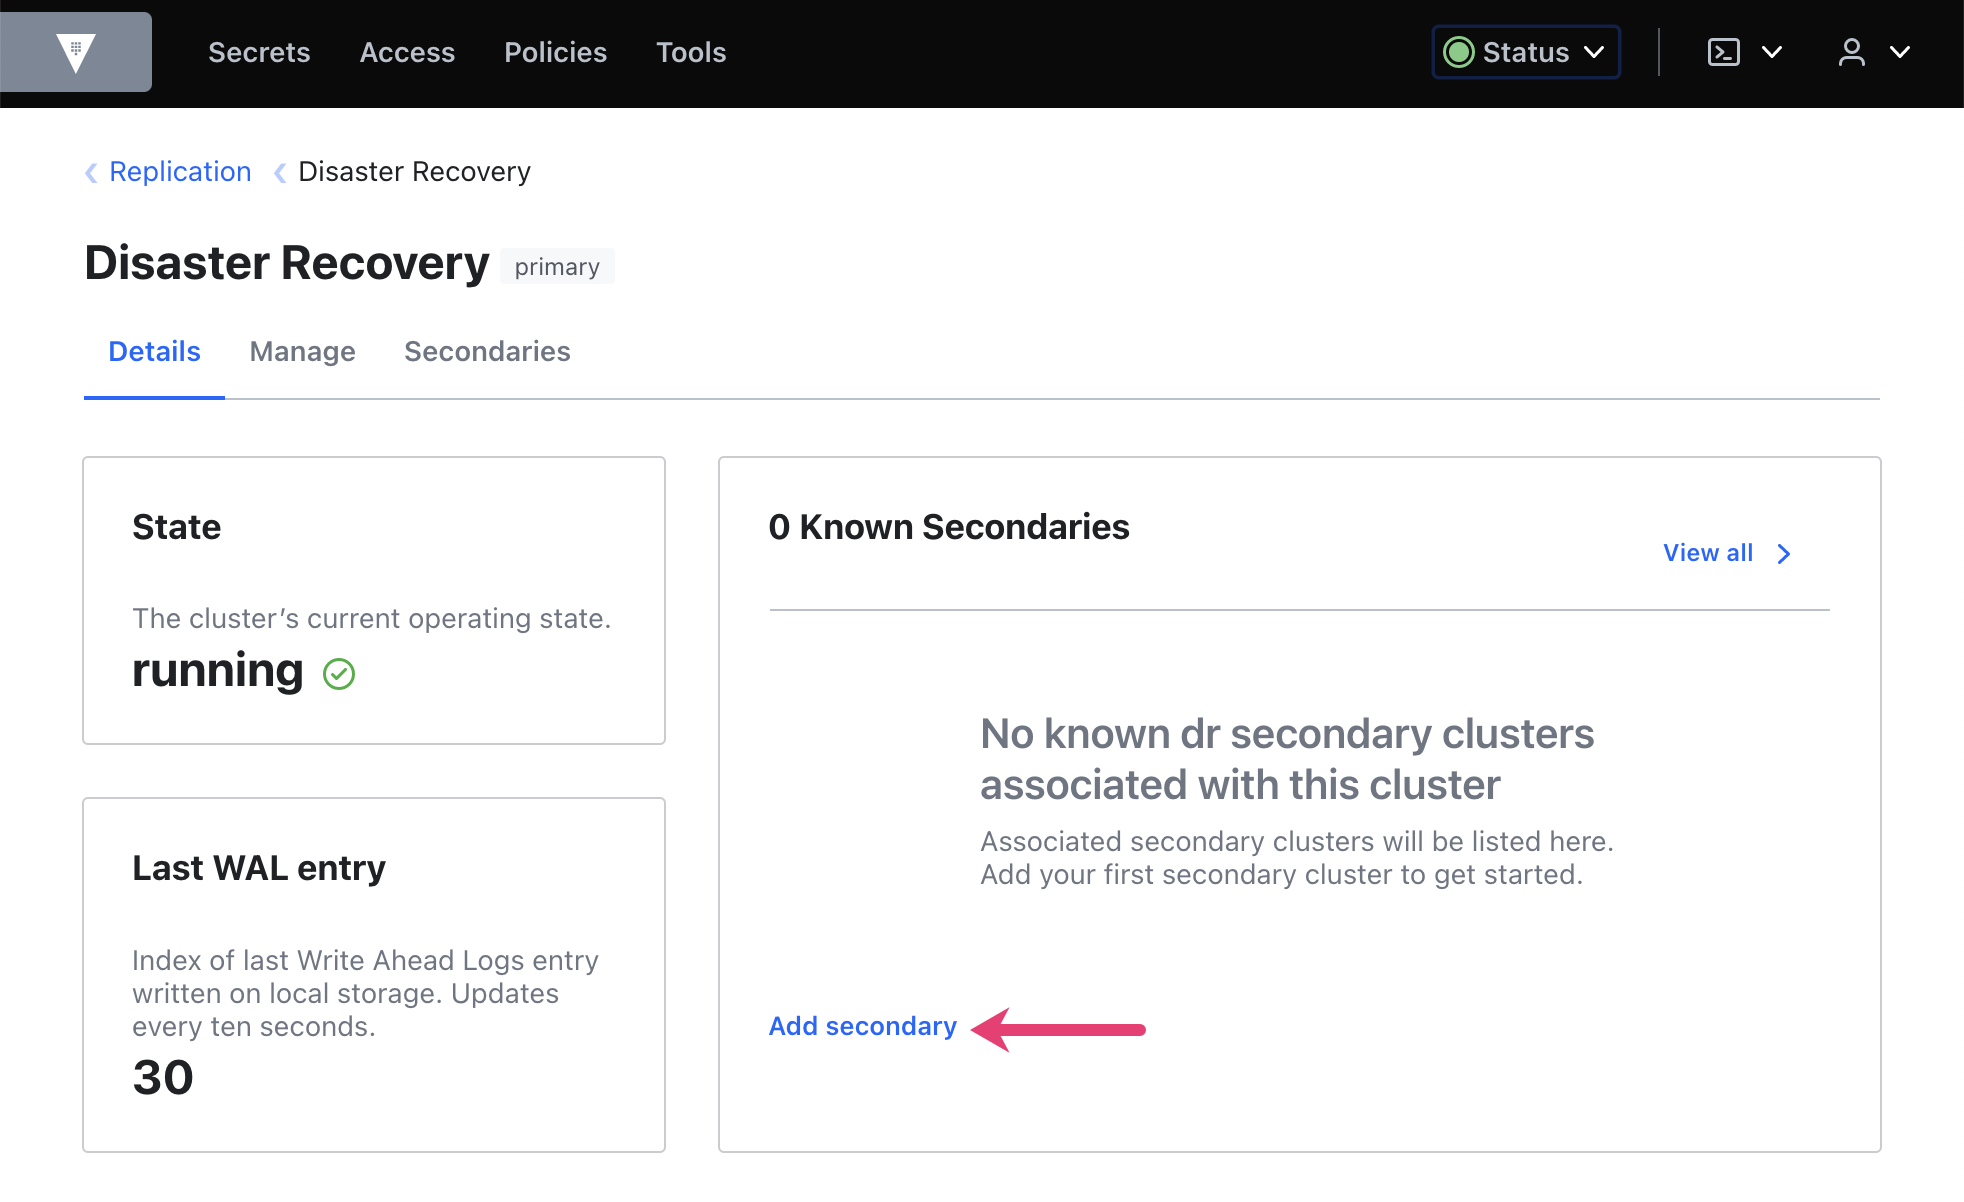
Configure replication
The basic steps to configure DR replication are as follows:

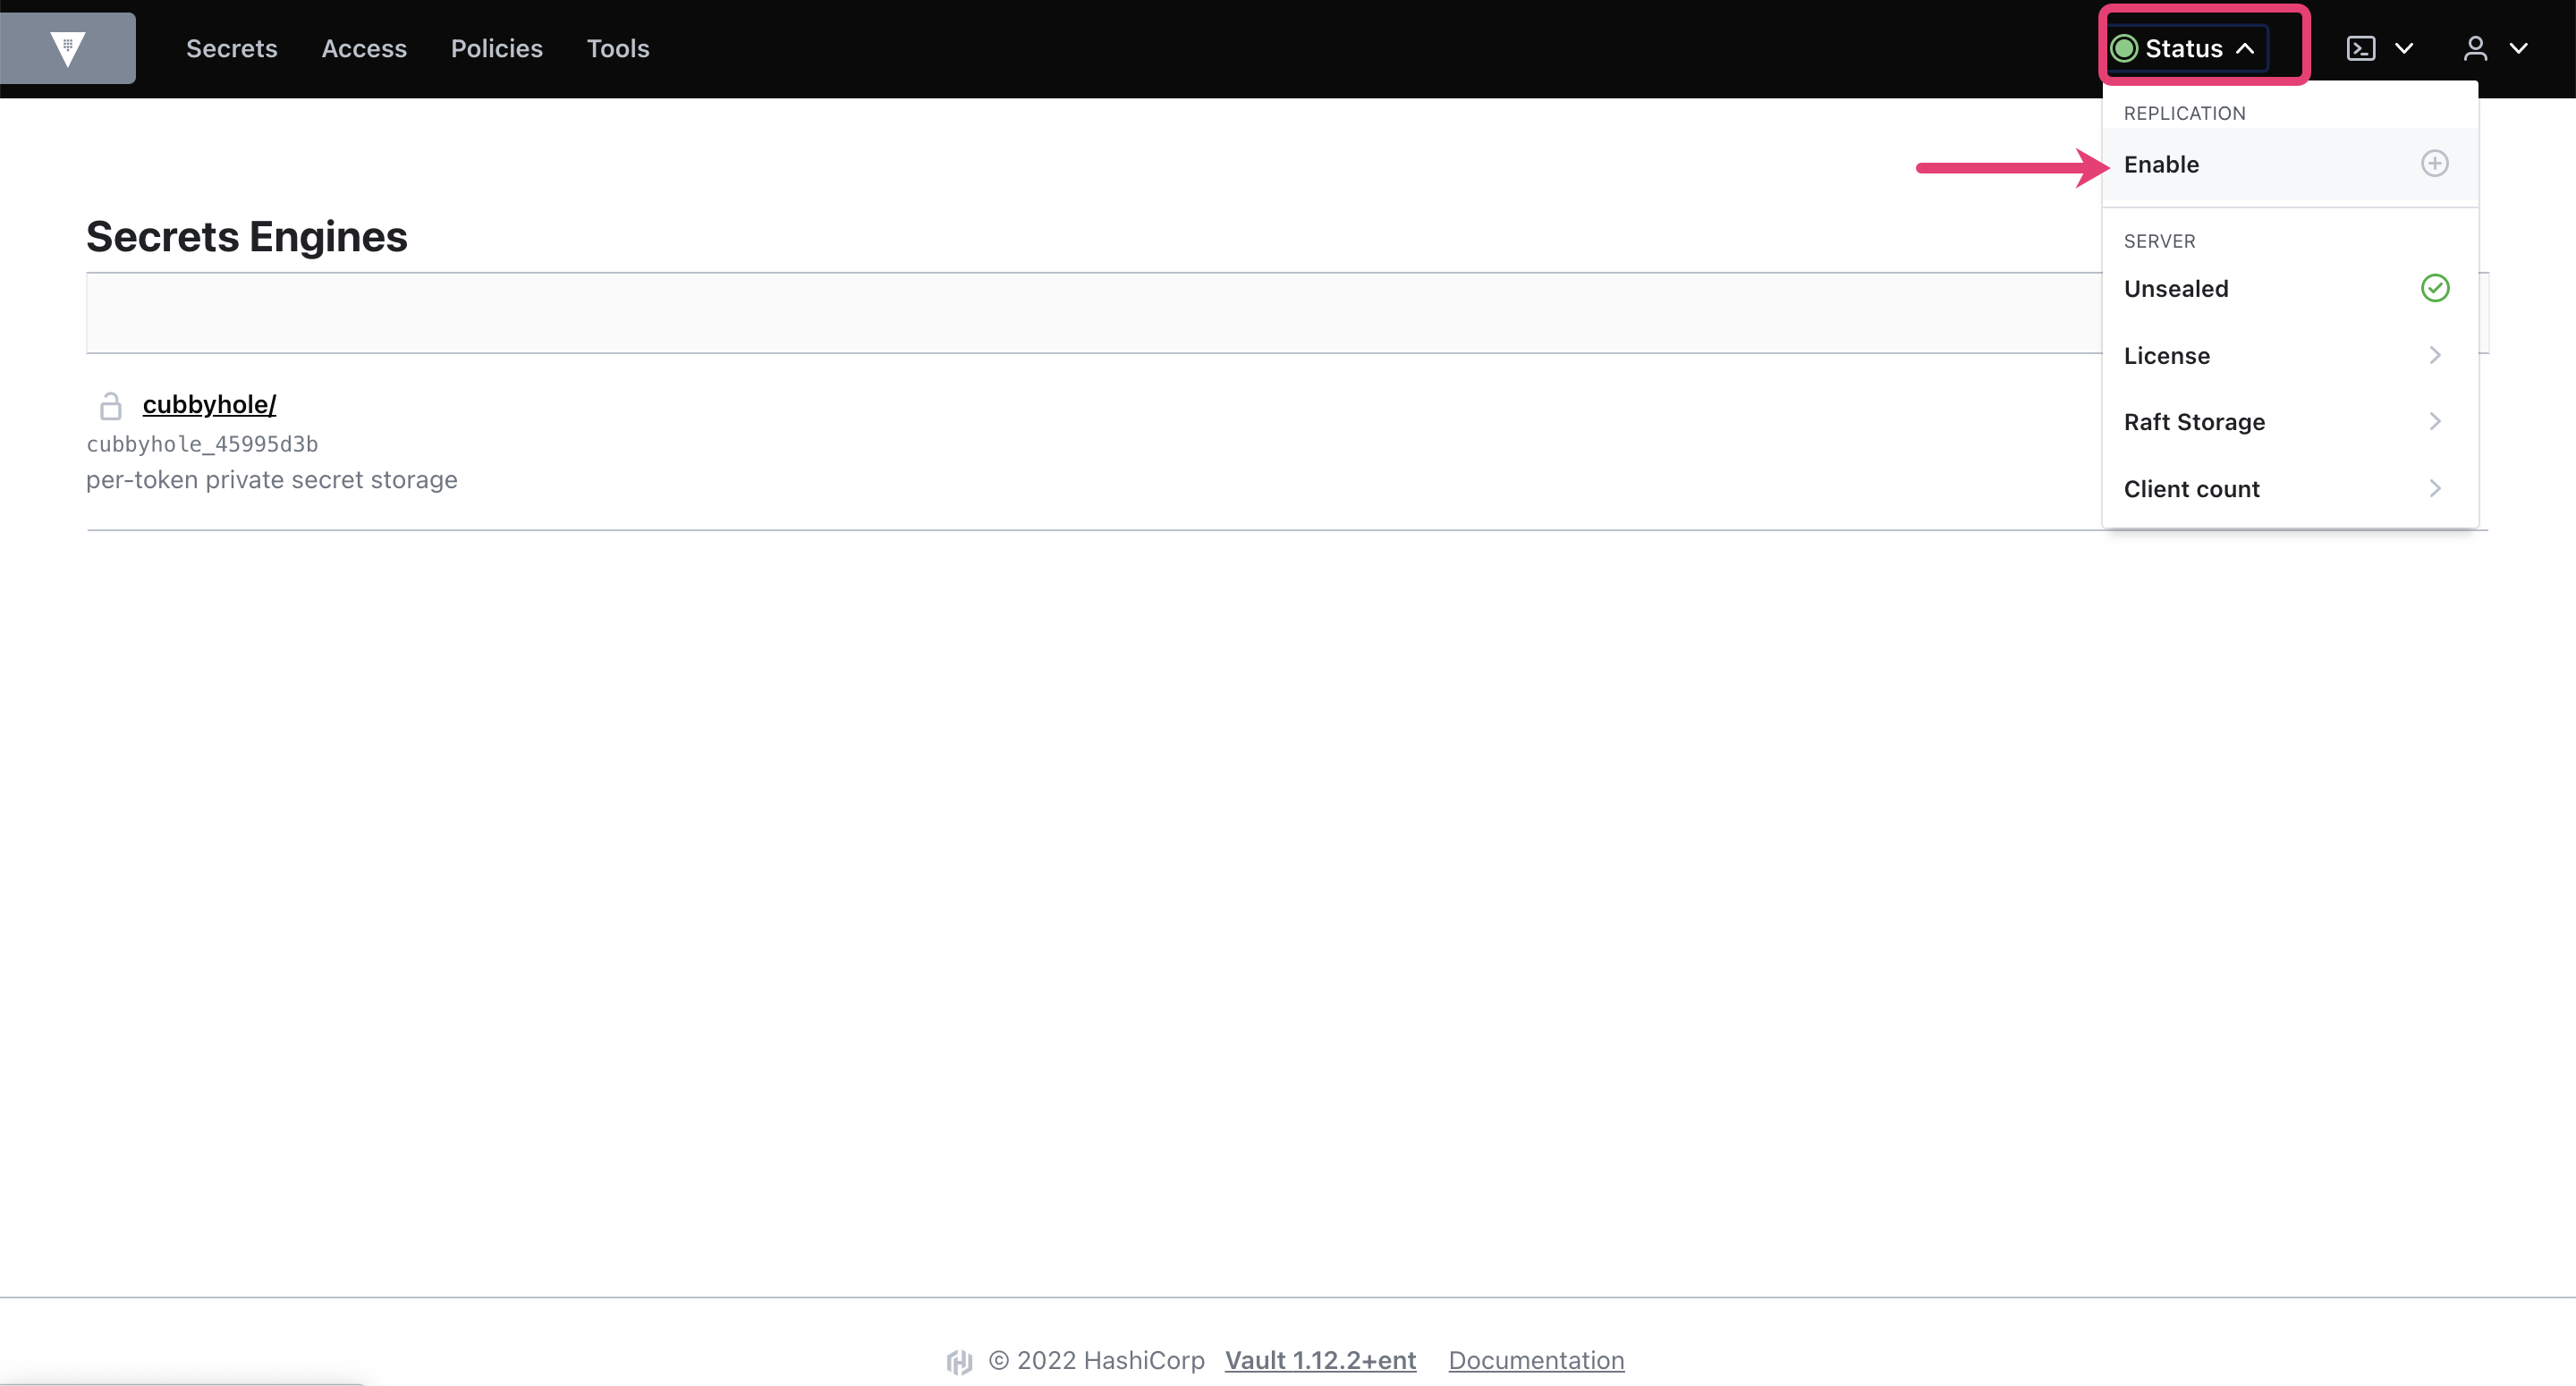
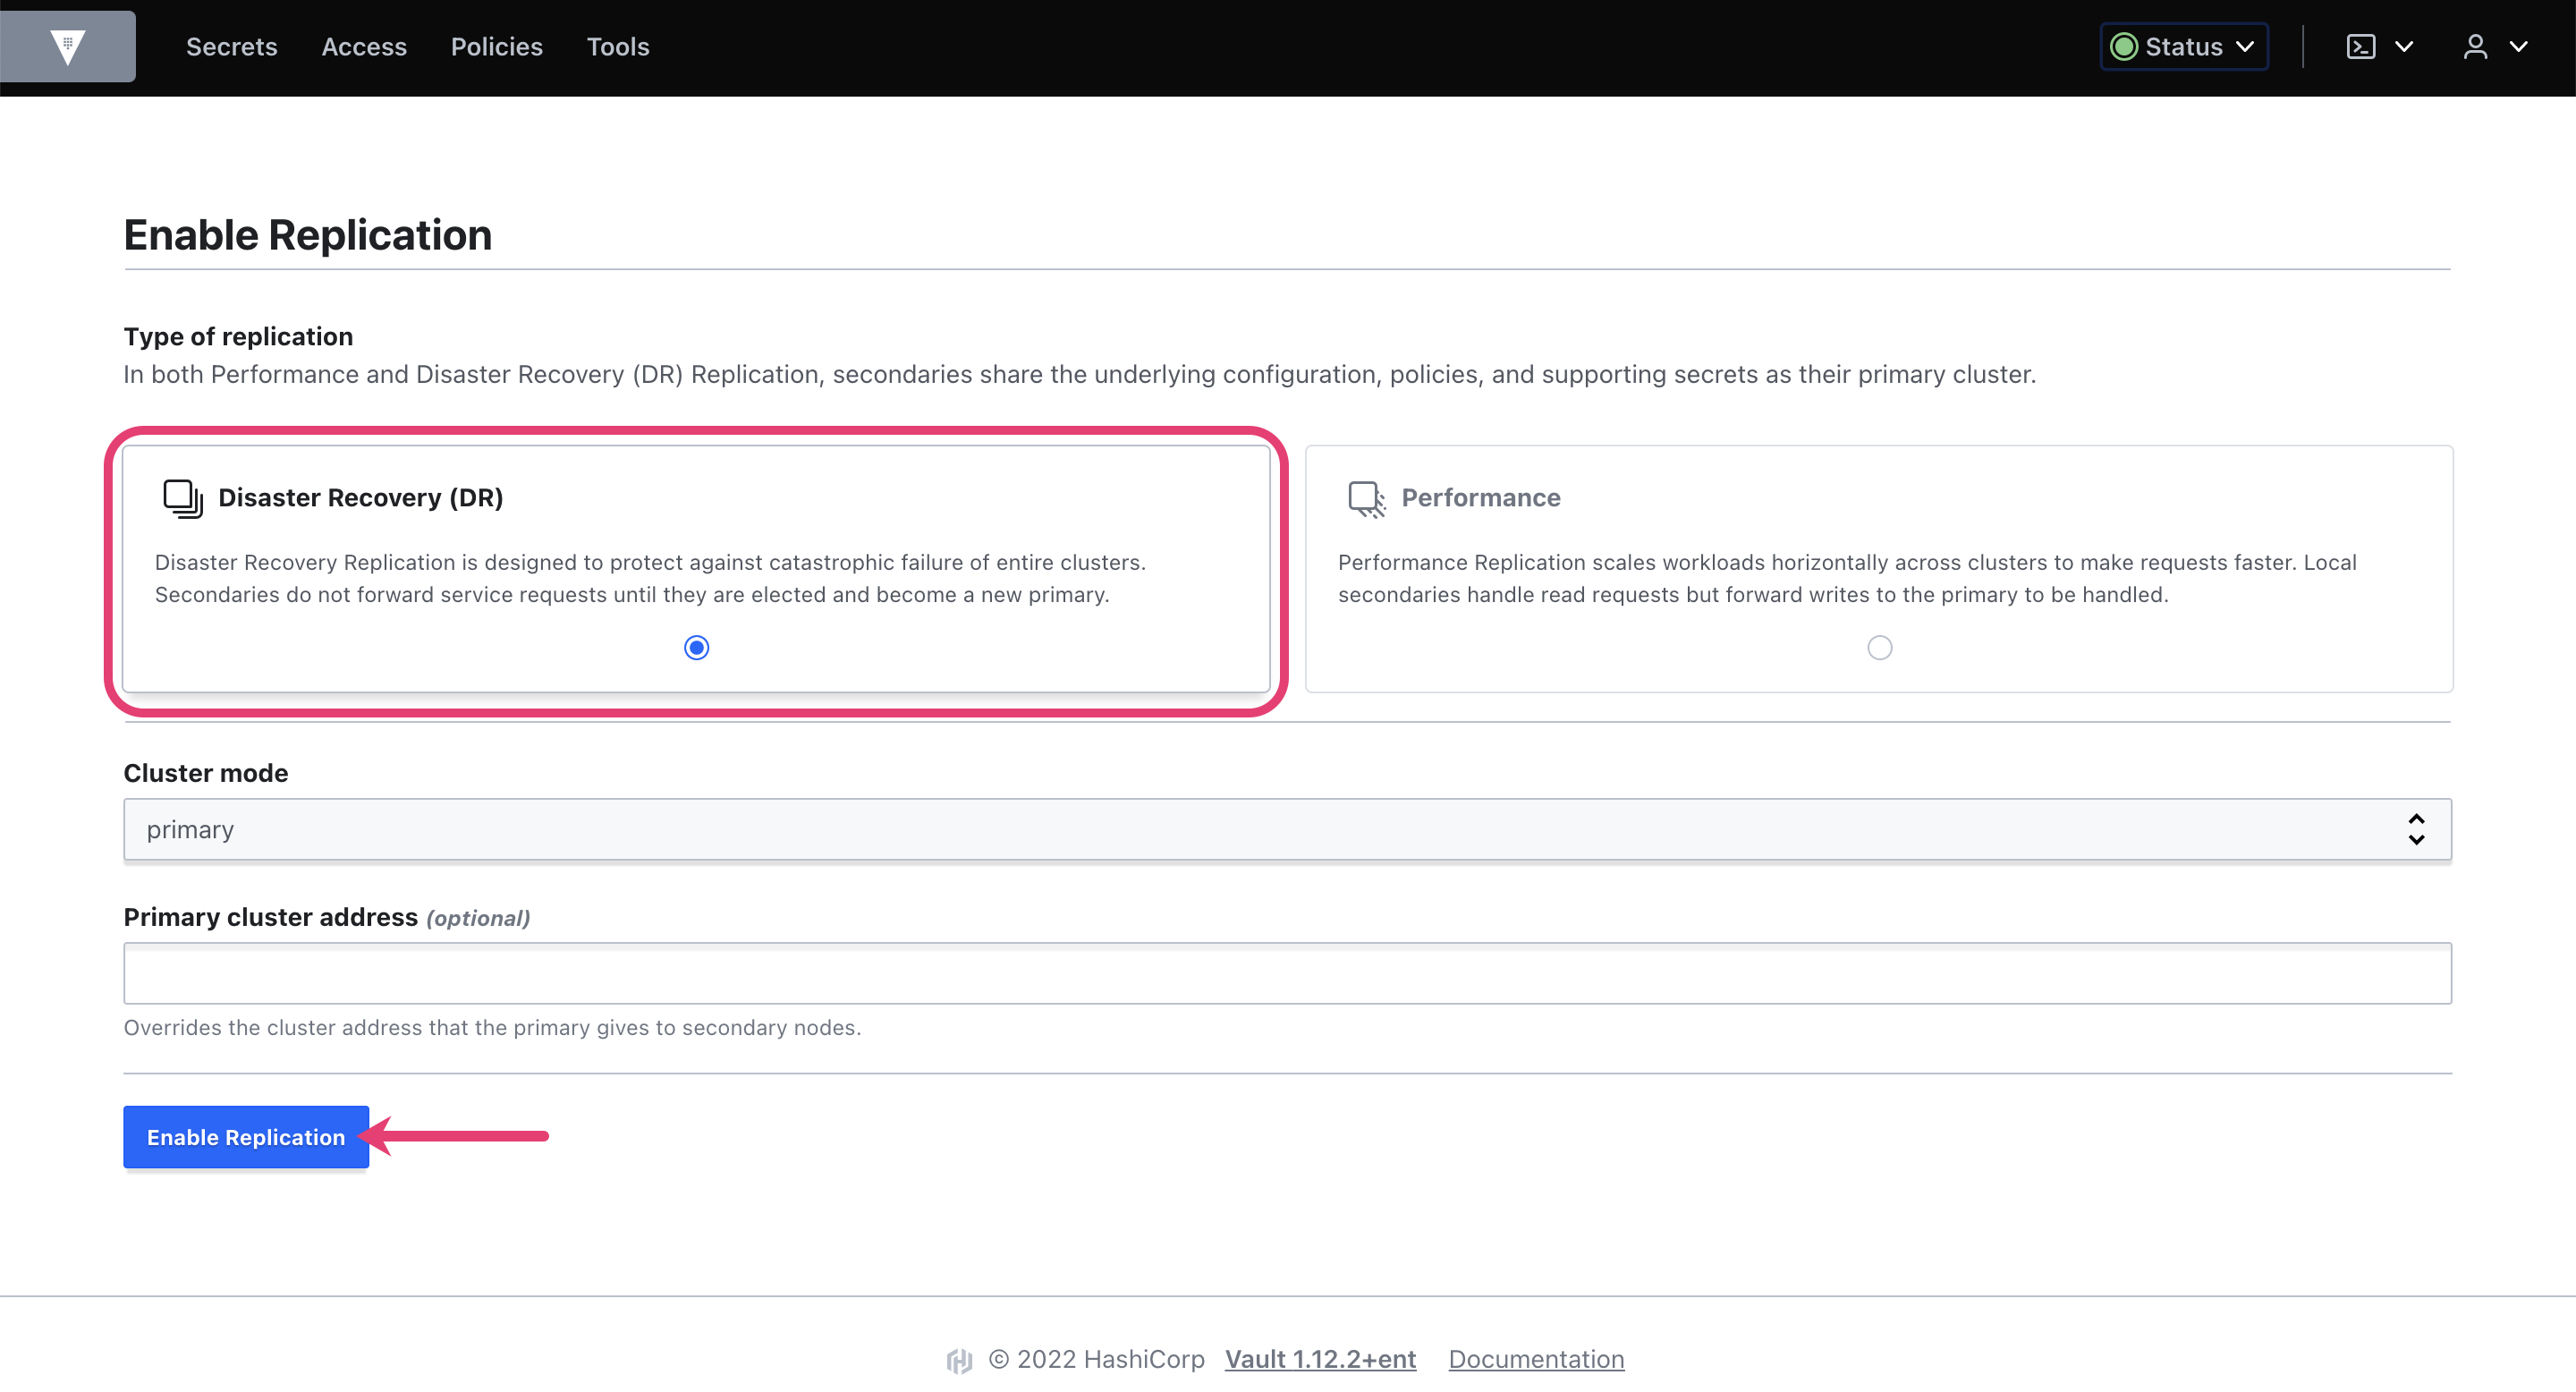
- Enable DR primary replication on cluster A.
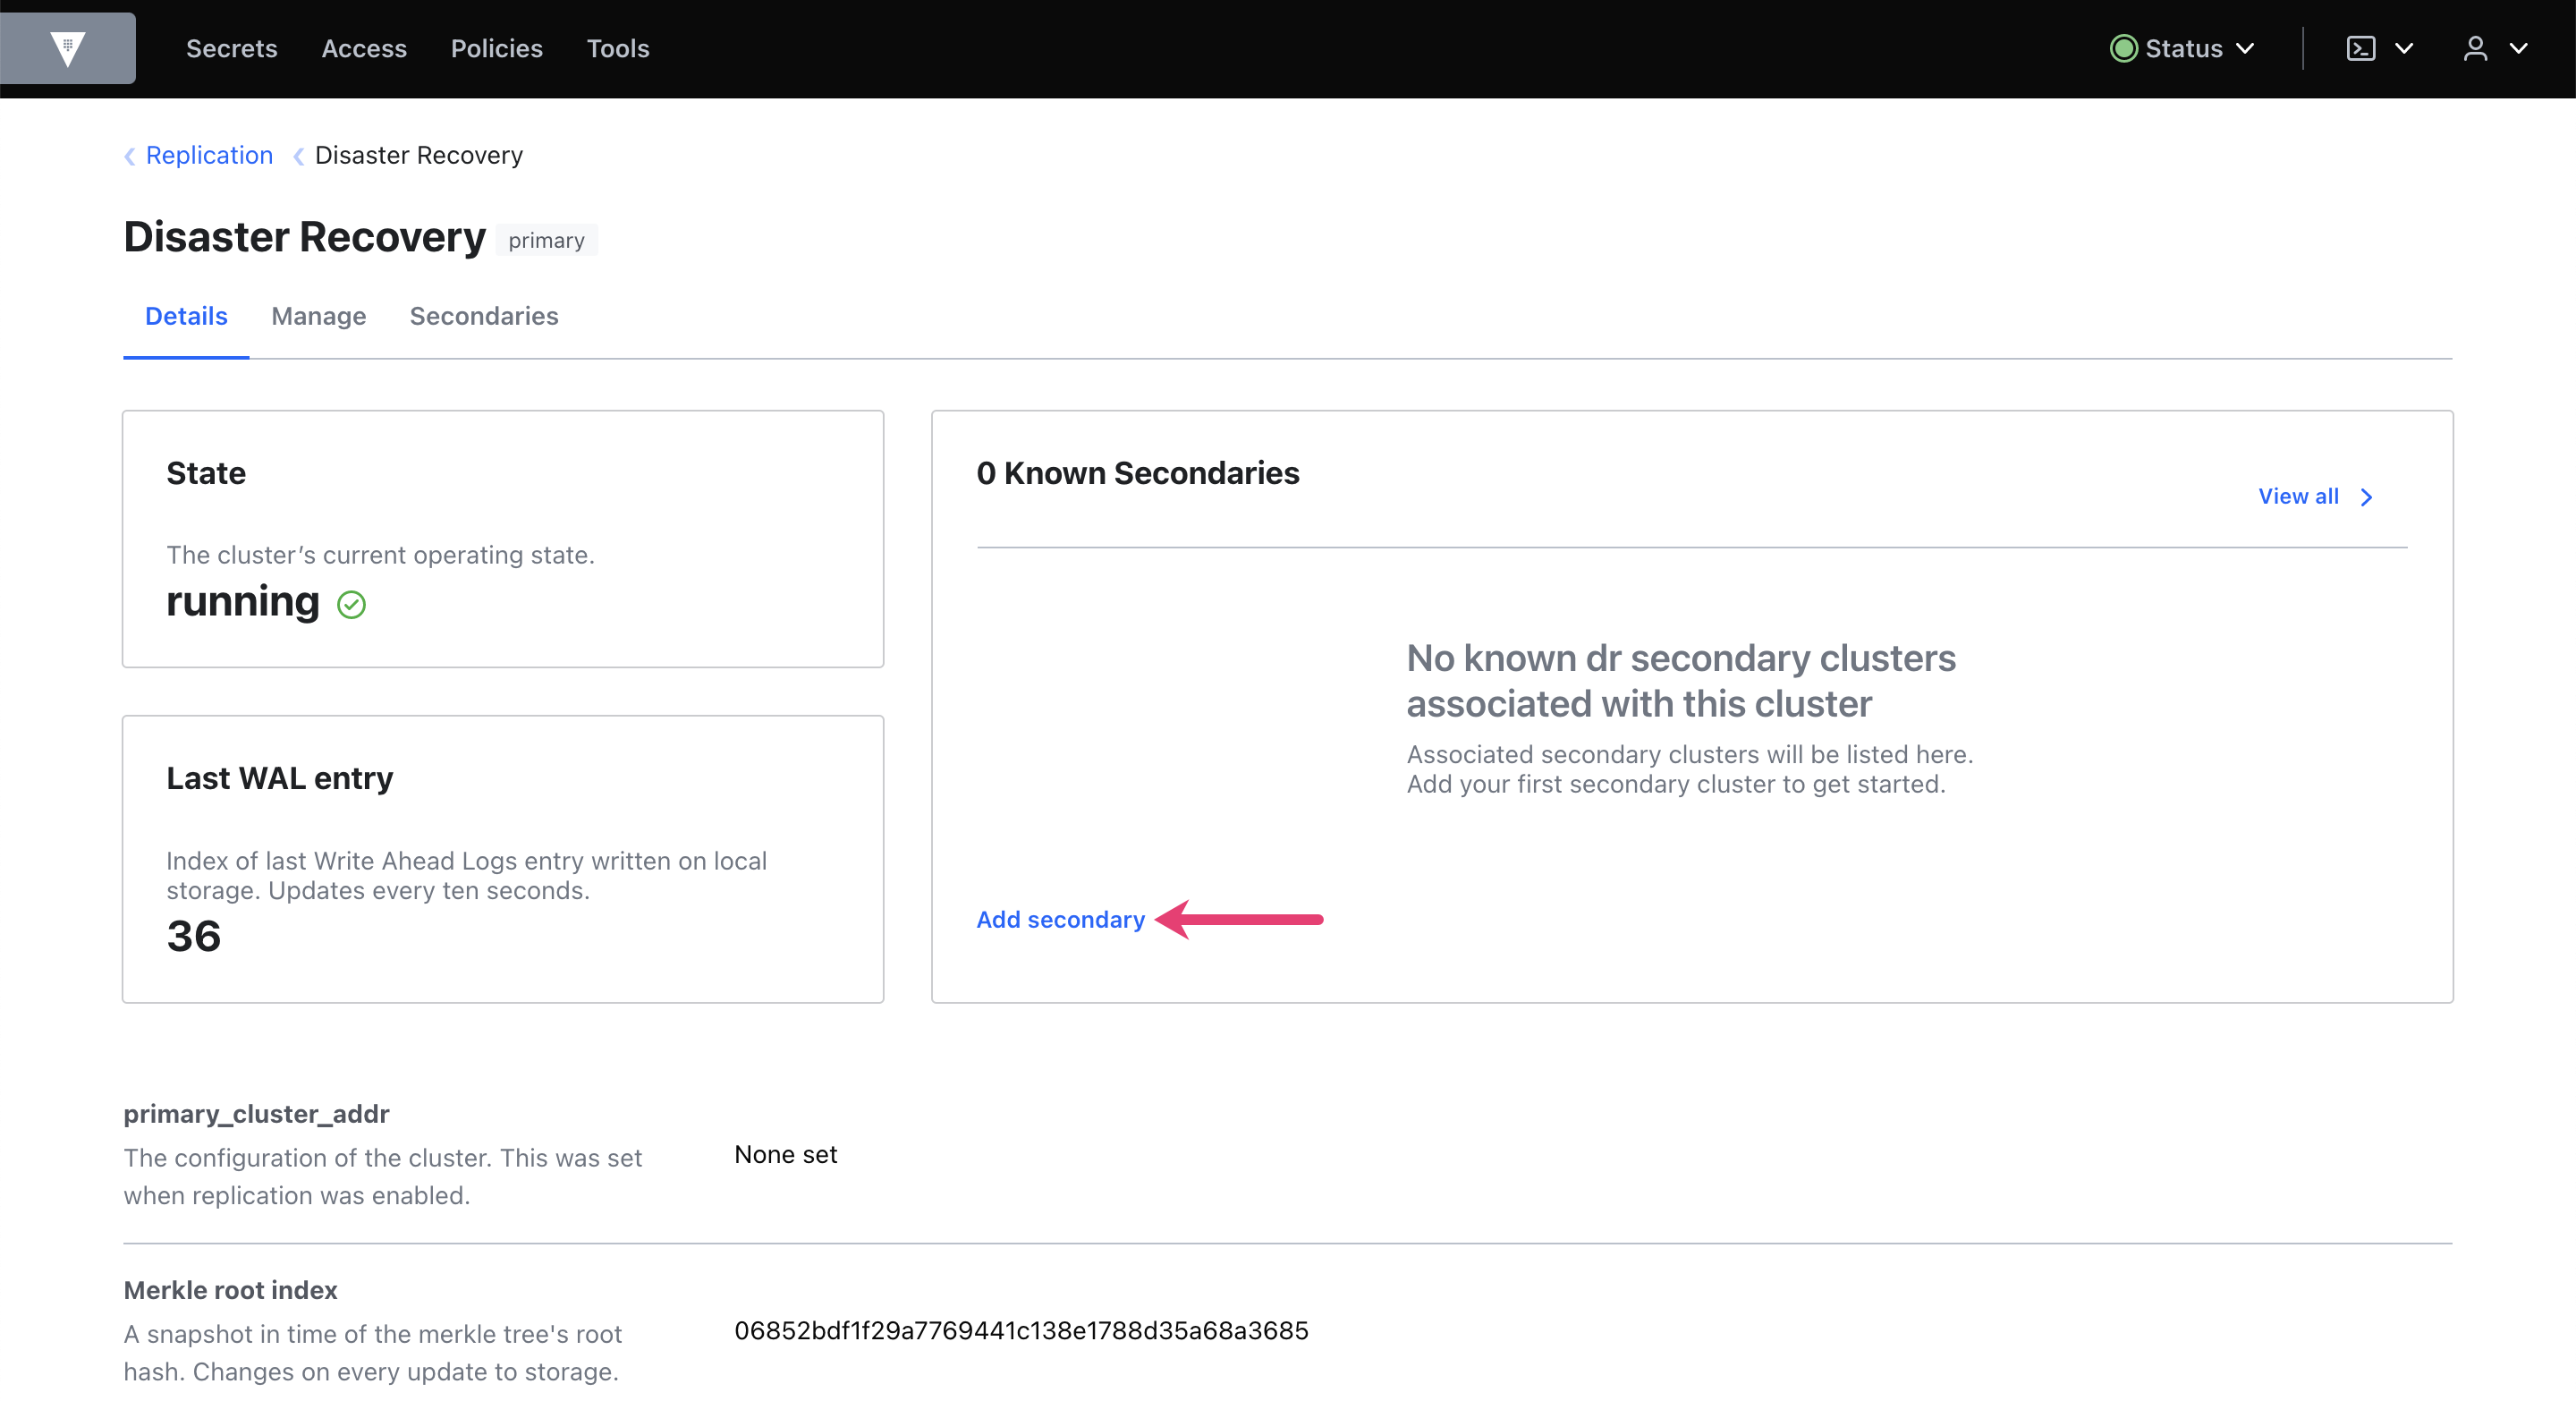
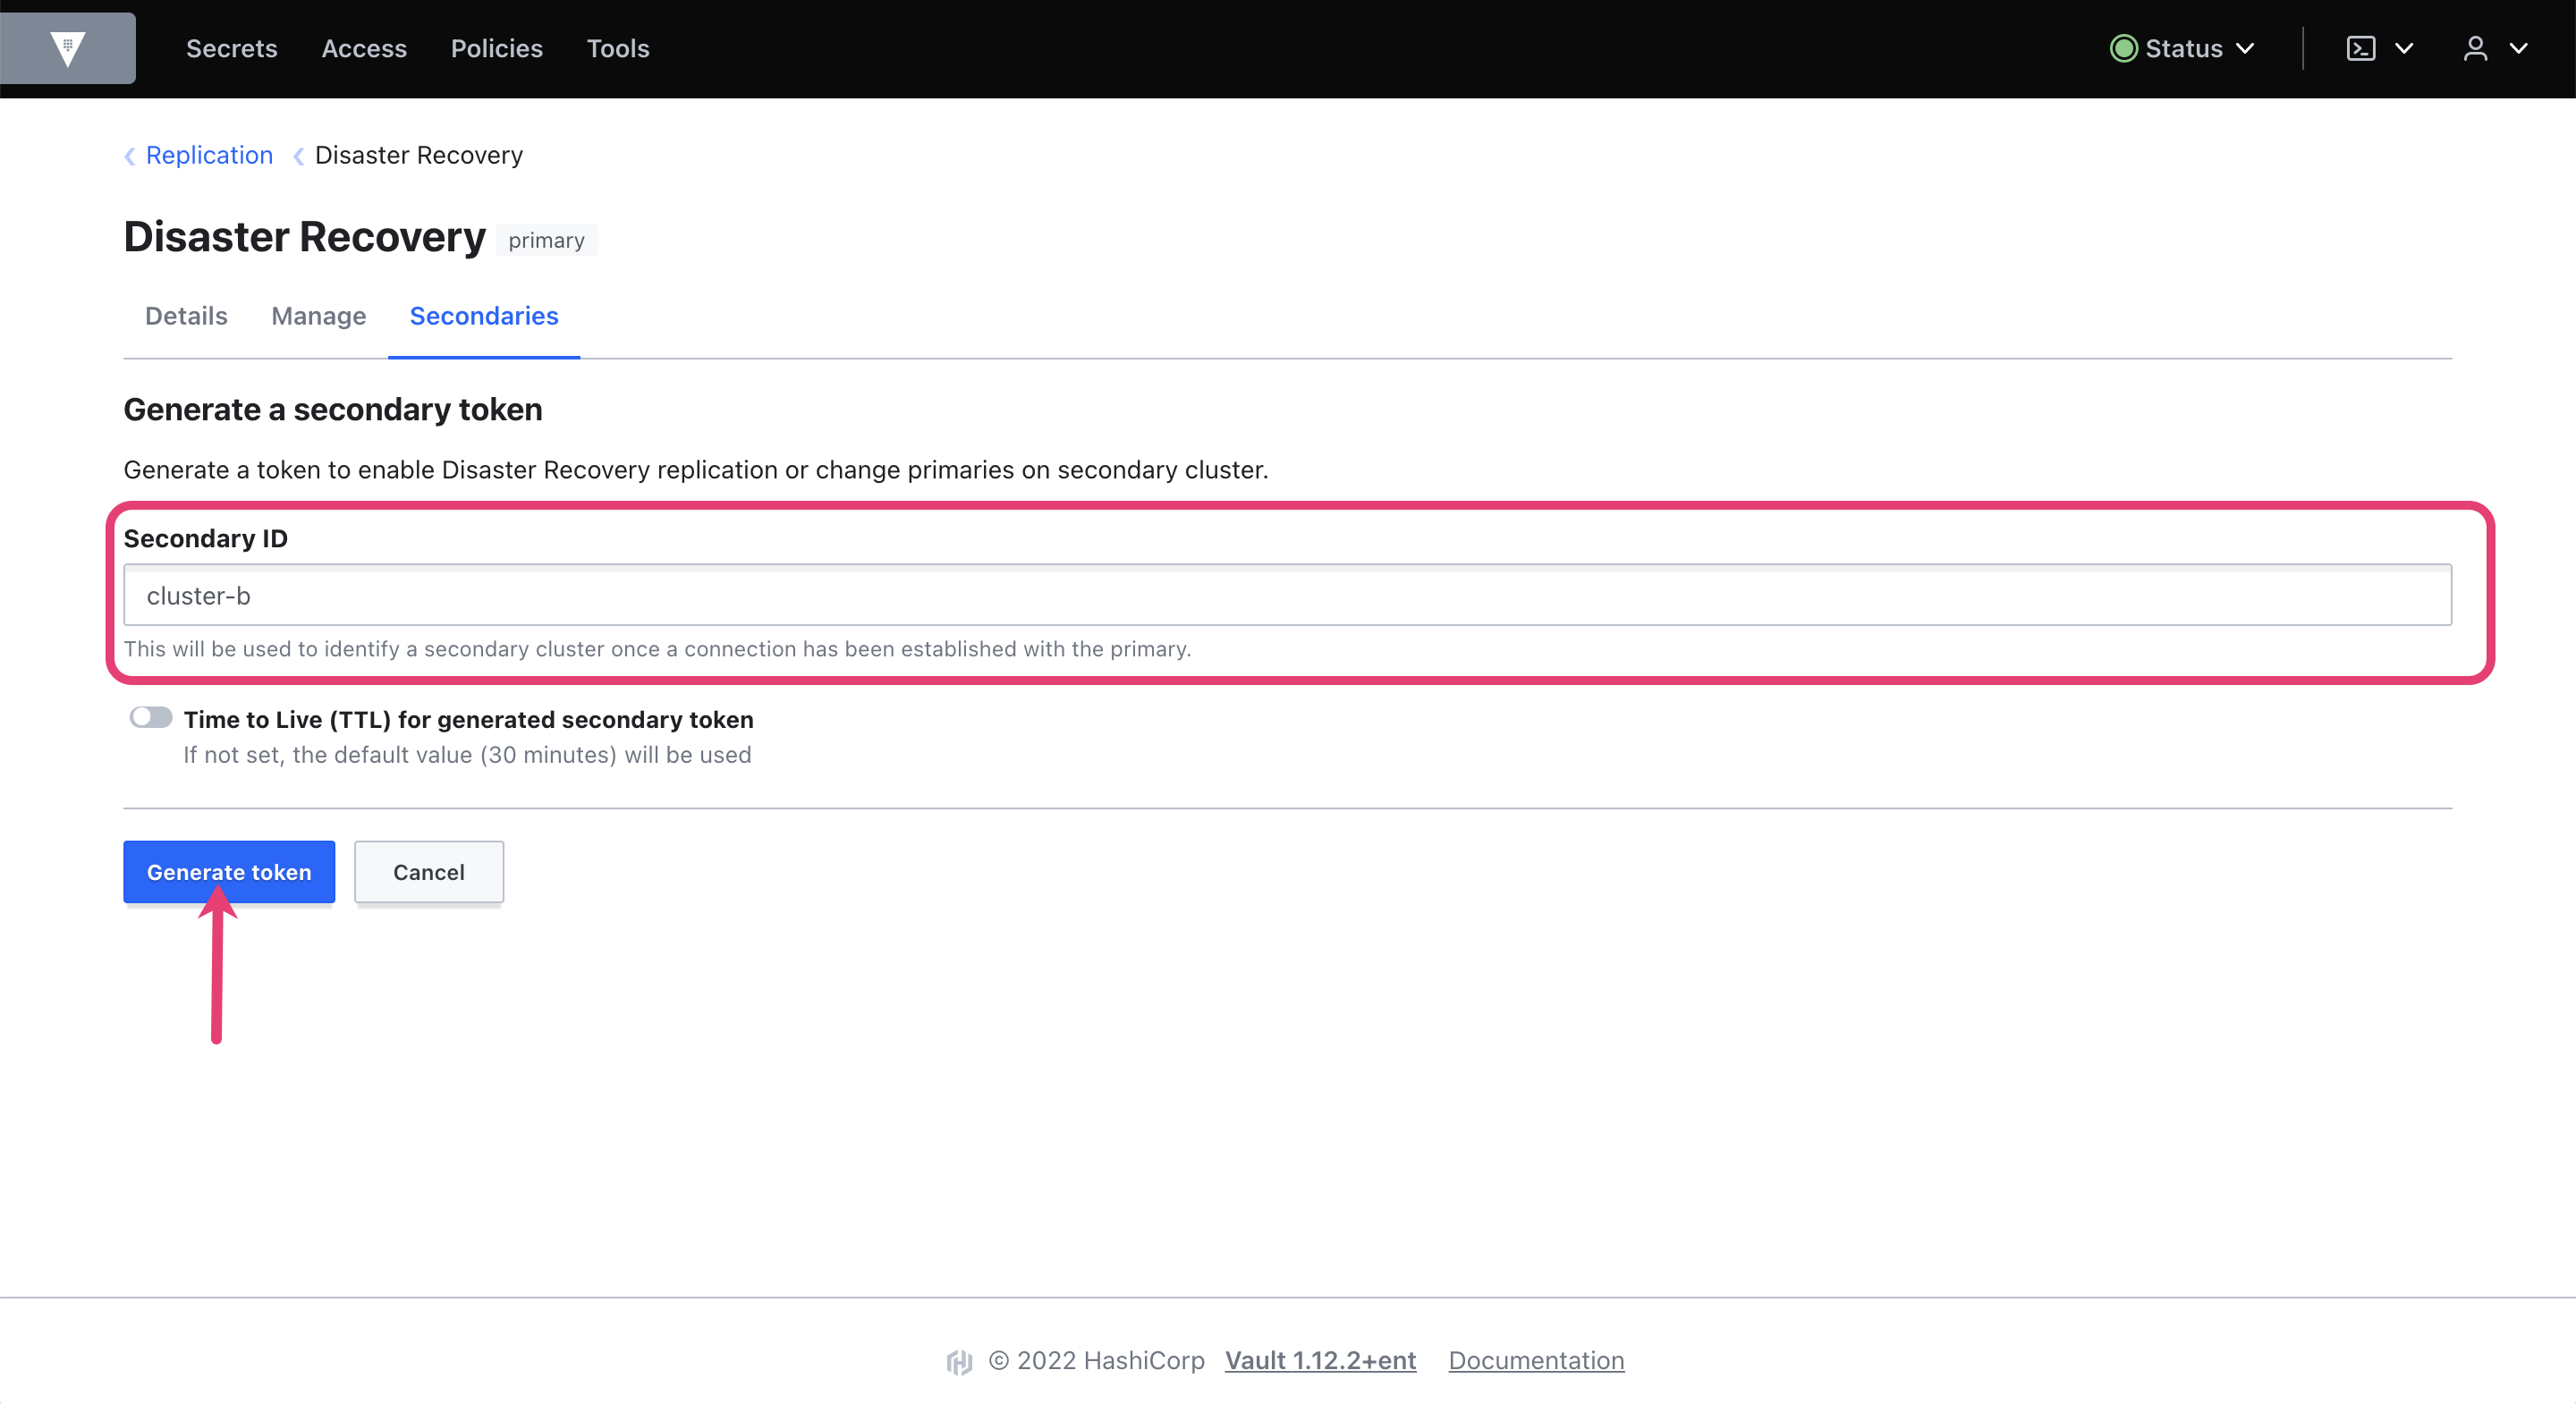
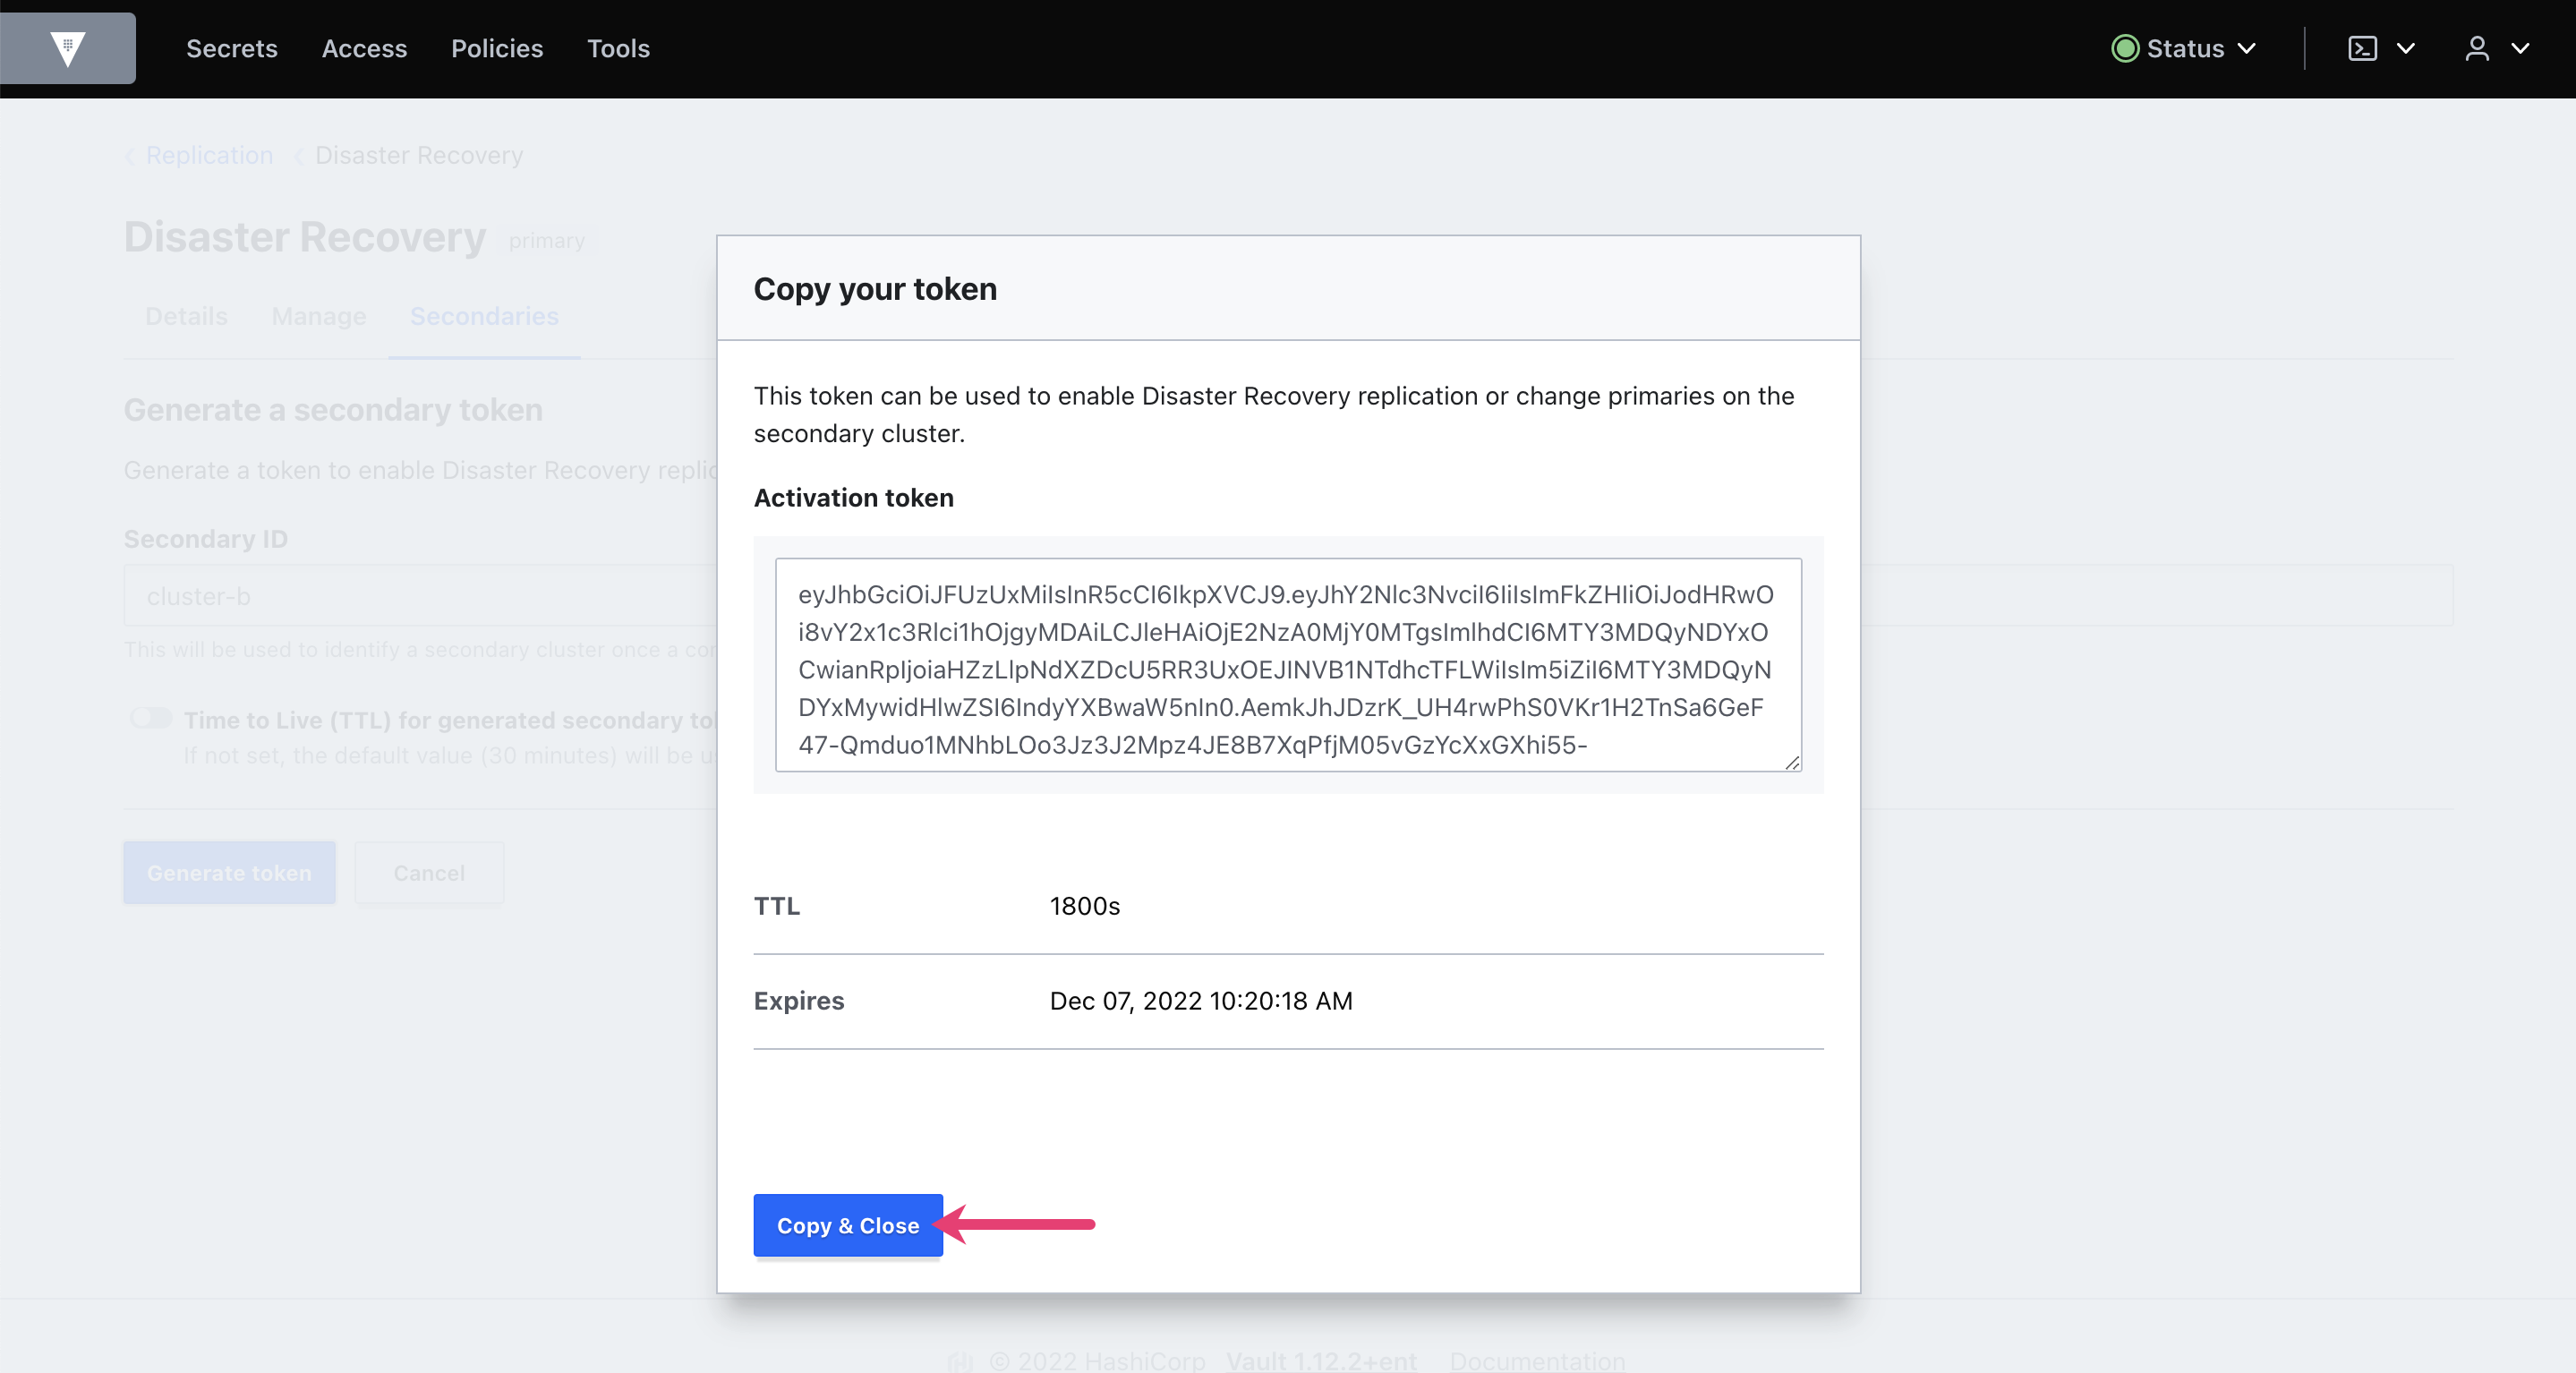
- Generate secondary token on cluster A.
- Enable DR secondary replication on cluster B.
- Confirm replication status on both clusters.
Enable replication on cluster A
Export a VAULT_ADDR environment variable to communicate with the cluster A Vault.
$ export VAULT_ADDR=http://127.0.0.1:8200Login with the initial root token.
$ vault login -no-print $CLUSTER_A_ROOT_TOKENEnable DR replication on cluster A.
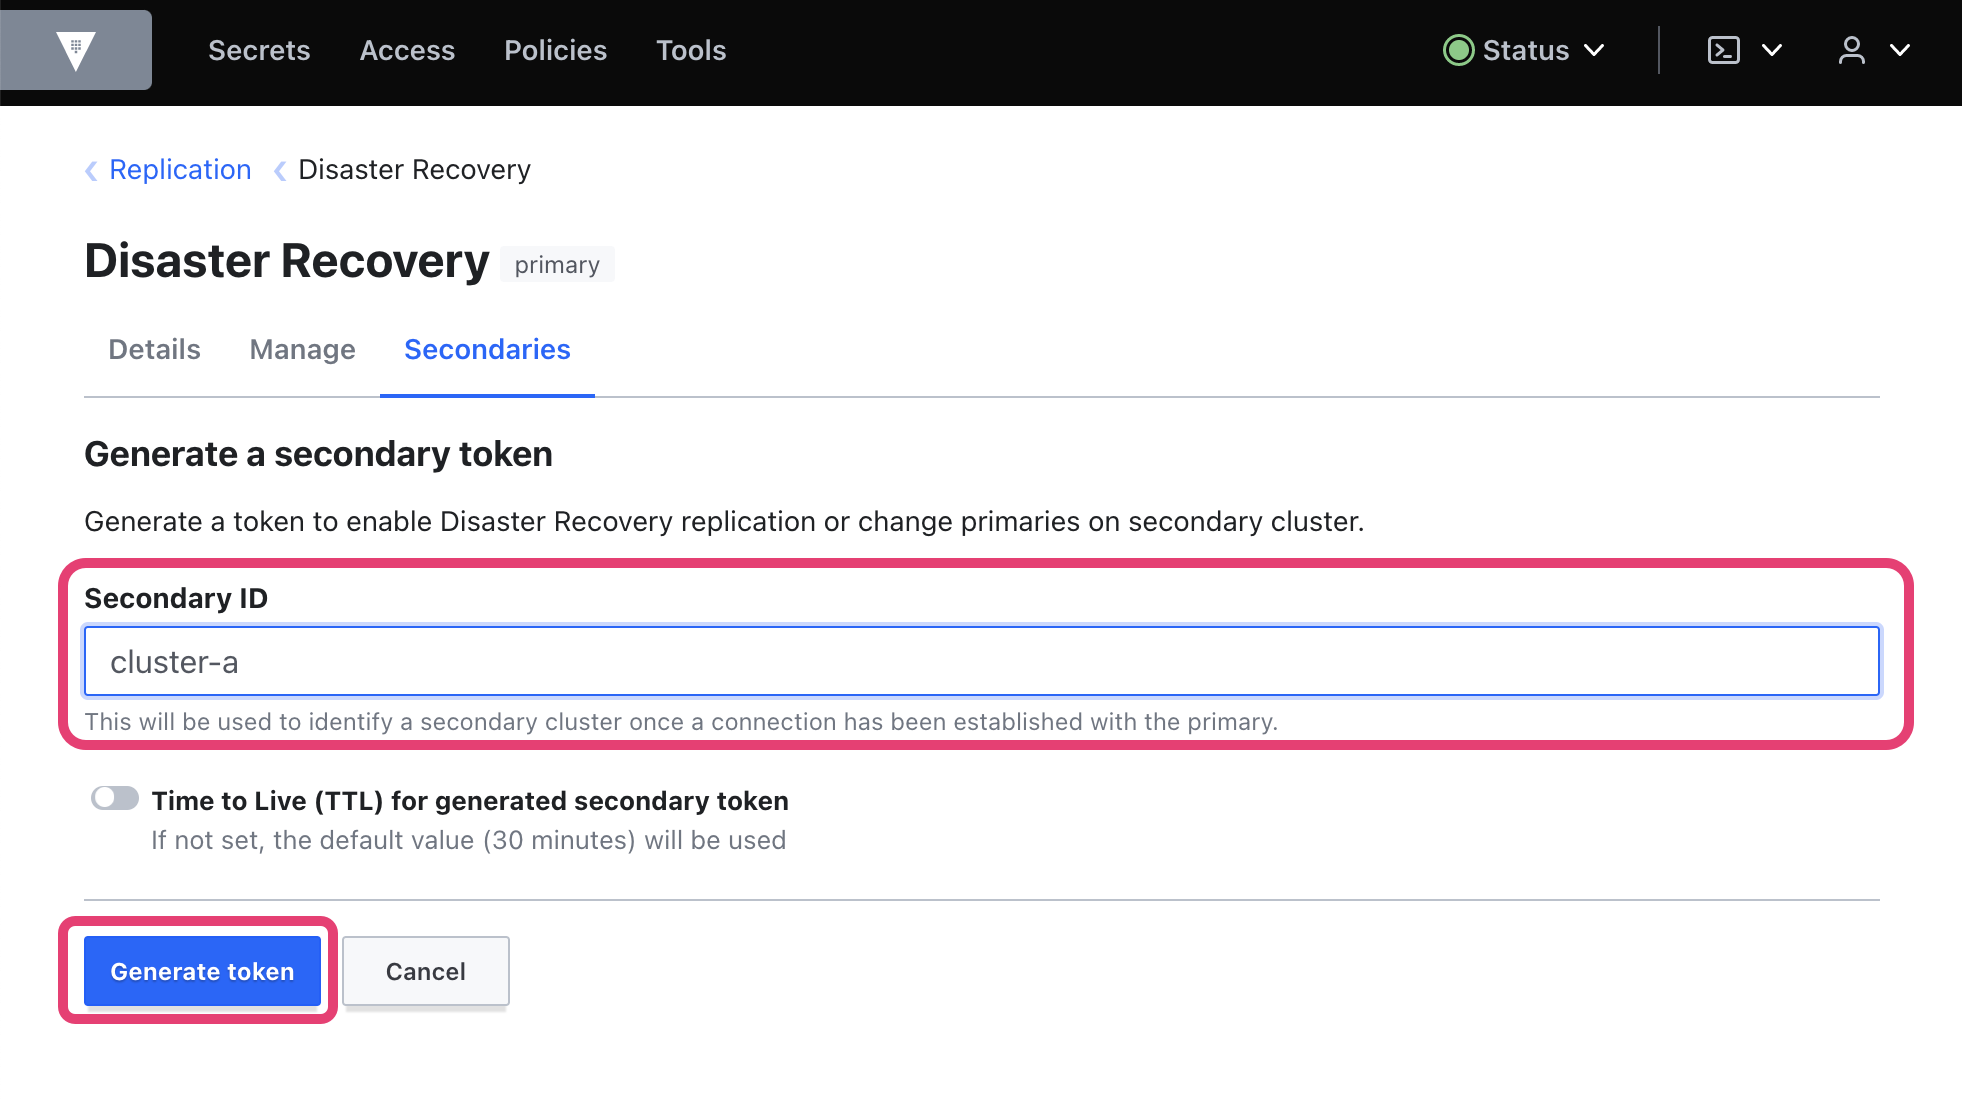
$ vault write -f sys/replication/dr/primary/enable
WARNING! The following warnings were returned from Vault:

* This cluster is being enabled as a primary for replication. Vault will be
unavailable for a brief period and will resume service shortly.
Generate a secondary token and assign its value to the exported environment variable
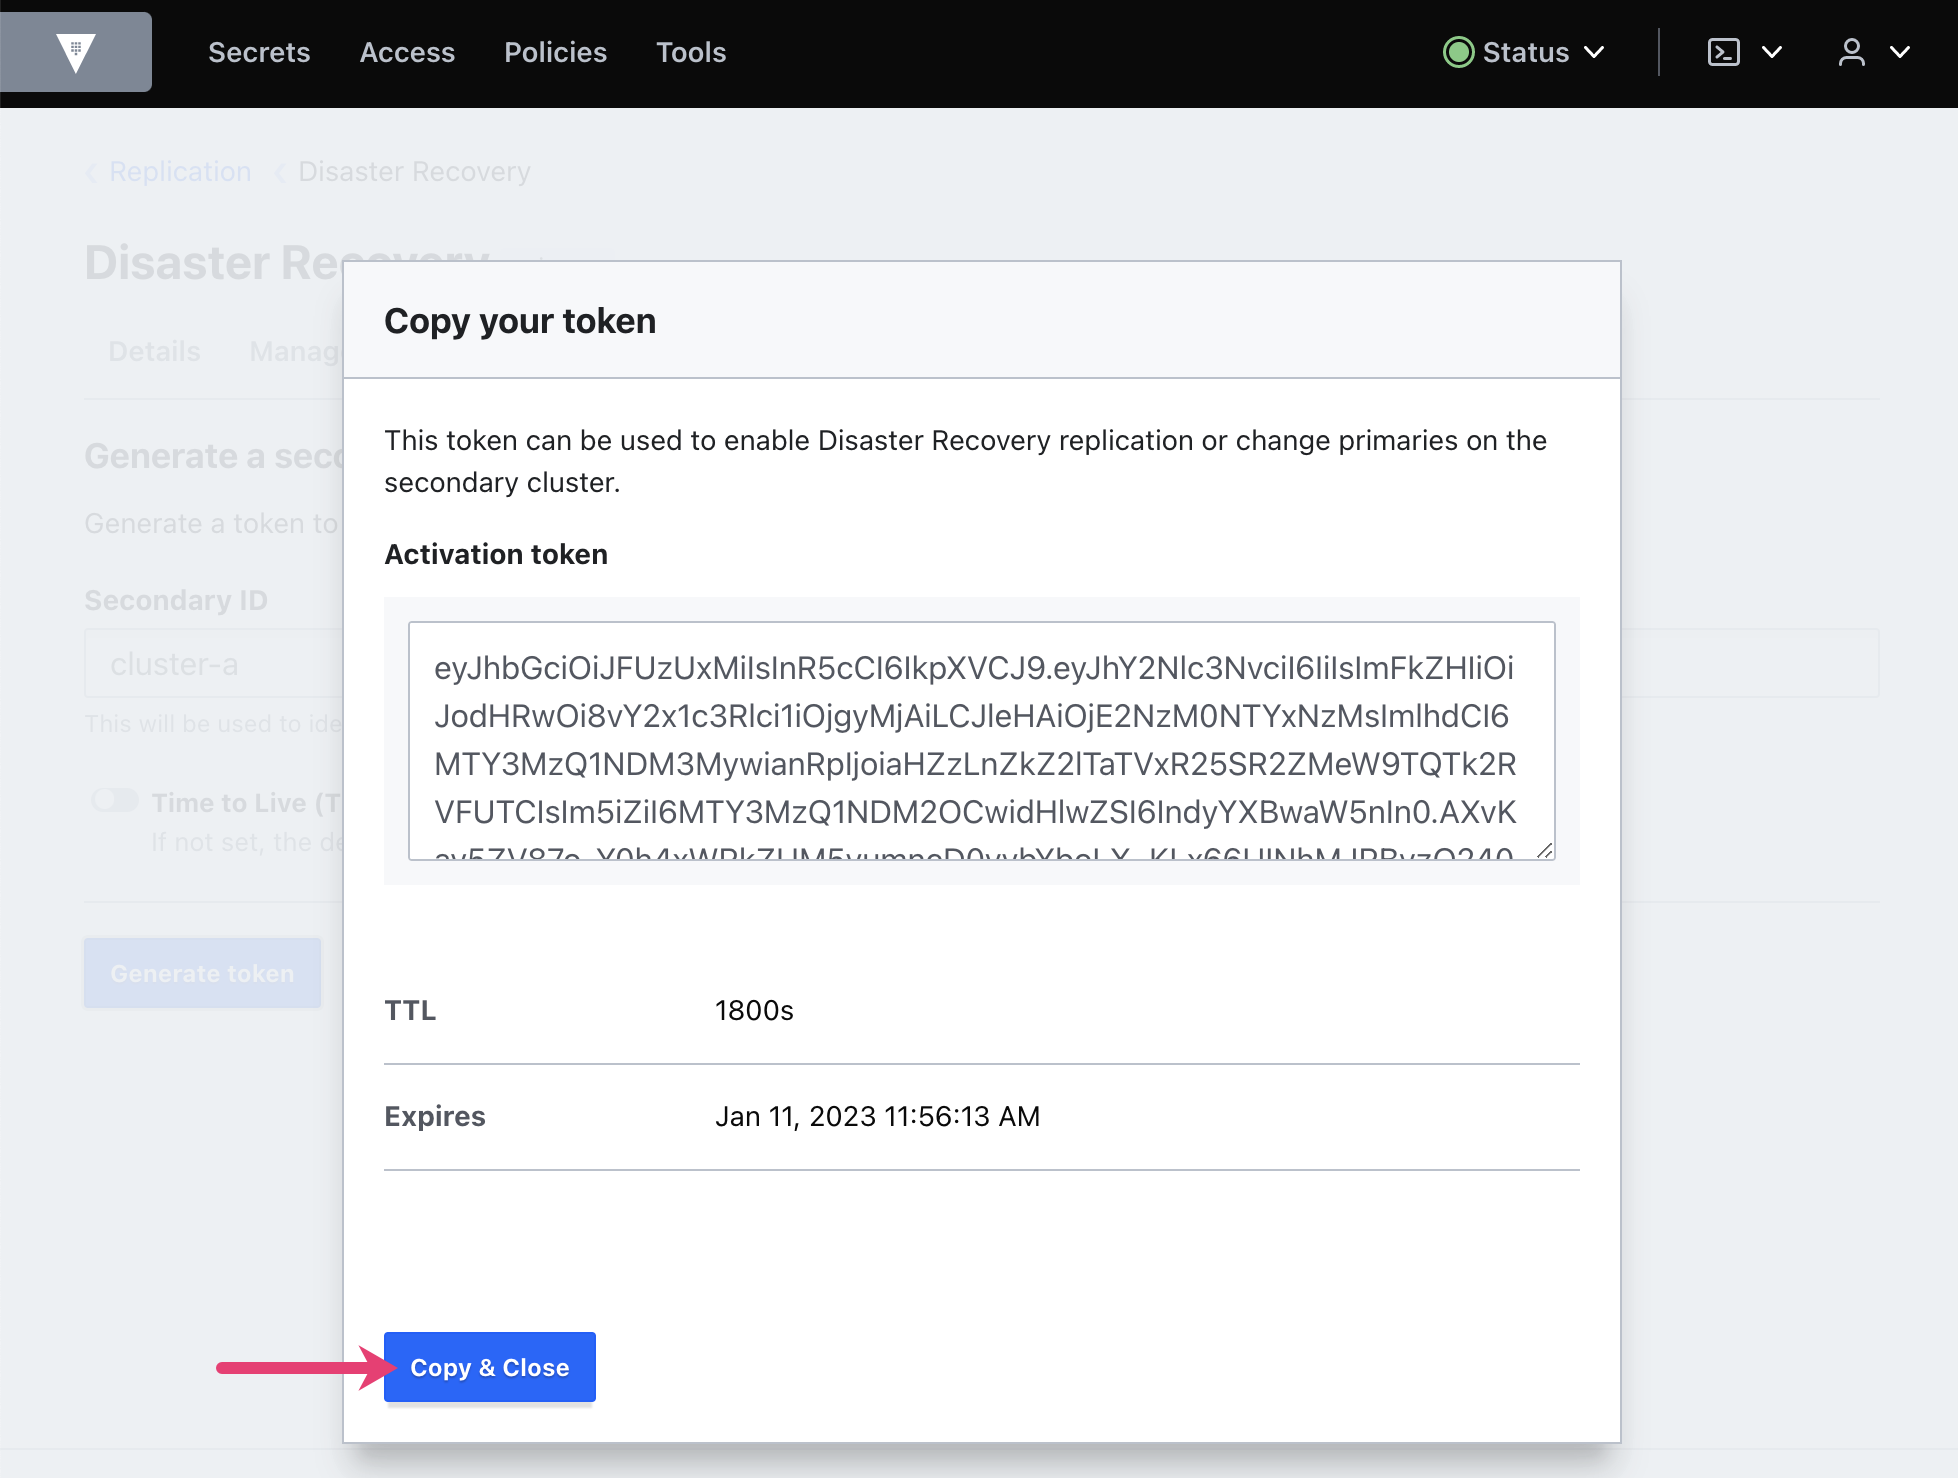
DR_SECONDARY_TOKEN.$ export DR_SECONDARY_TOKEN="$(vault write -field wrapping_token \ sys/replication/dr/primary/secondary-token id=cluster-b)"Confirm the
DR_SECONDARY_TOKENenvironment variable value.$ echo $DR_SECONDARY_TOKENThe output resembles this example:
c0ffeeciOiJFUzUxMiIsInR5cCI6IkpXVCJ9.eyJhY2Nlc3NvciI6IiIsImFkZHIiOiJodHRwOi8vcHJpbWFyeTo4MjAwIiwiZXhwIjoxNjYzMTcxMTQ1LCJpYXQiOjE2NjMxNjkzNDUsImp0aSI6Imh2cy4waElpSHlGN2MwaWIweG5nNjJlbFJSYXMiLCJuYmYiOjE2NjMxNjkzNDAsInR5cGUiOiJ3cmFwcGluZyJ9.AOgAK6_-V0rXnTNZid1M0BHQBhsdg_W2RcJTydY-v5NAOBUW6LIjFv00pYpjVXYuTXYolTOmcu0Vwja2l2FXNEBNABzsdzo-lfu0J9vudhgh98Z543YsZuDZ1Y4PBb2WbJIx0Qvtw1P5-DqutEAtl-oJejm9wsVVlzjcMgMdLJLBOF-6
Enable replication on cluster B
You must perform following operations on cluster B.
Now you can enable replication on cluster B. Vault will use the secondary token to automatically configure cluster B as a secondary to cluster A.
Export a VAULT_ADDR environment variable to communicate with Vault in cluster B.
$ export VAULT_ADDR=http://127.0.0.1:8220Log in with the cluster B initial root token.
$ vault login -no-print $CLUSTER_B_ROOT_TOKENEnable DR replication on the secondary cluster.
$ vault write sys/replication/dr/secondary/enable token=$DR_SECONDARY_TOKENExpected output:
WARNING! The following warnings were returned from Vault:

* Vault has successfully found secondary information; it may take a while to
perform setup tasks. Vault will be unavailable until these tasks and initial
sync complete.

Confirm replication status
Now that you have successfully enabled DR replication, you will enable a new secrets engine and create a secret on cluster A, then confirm replication status between the clusters.
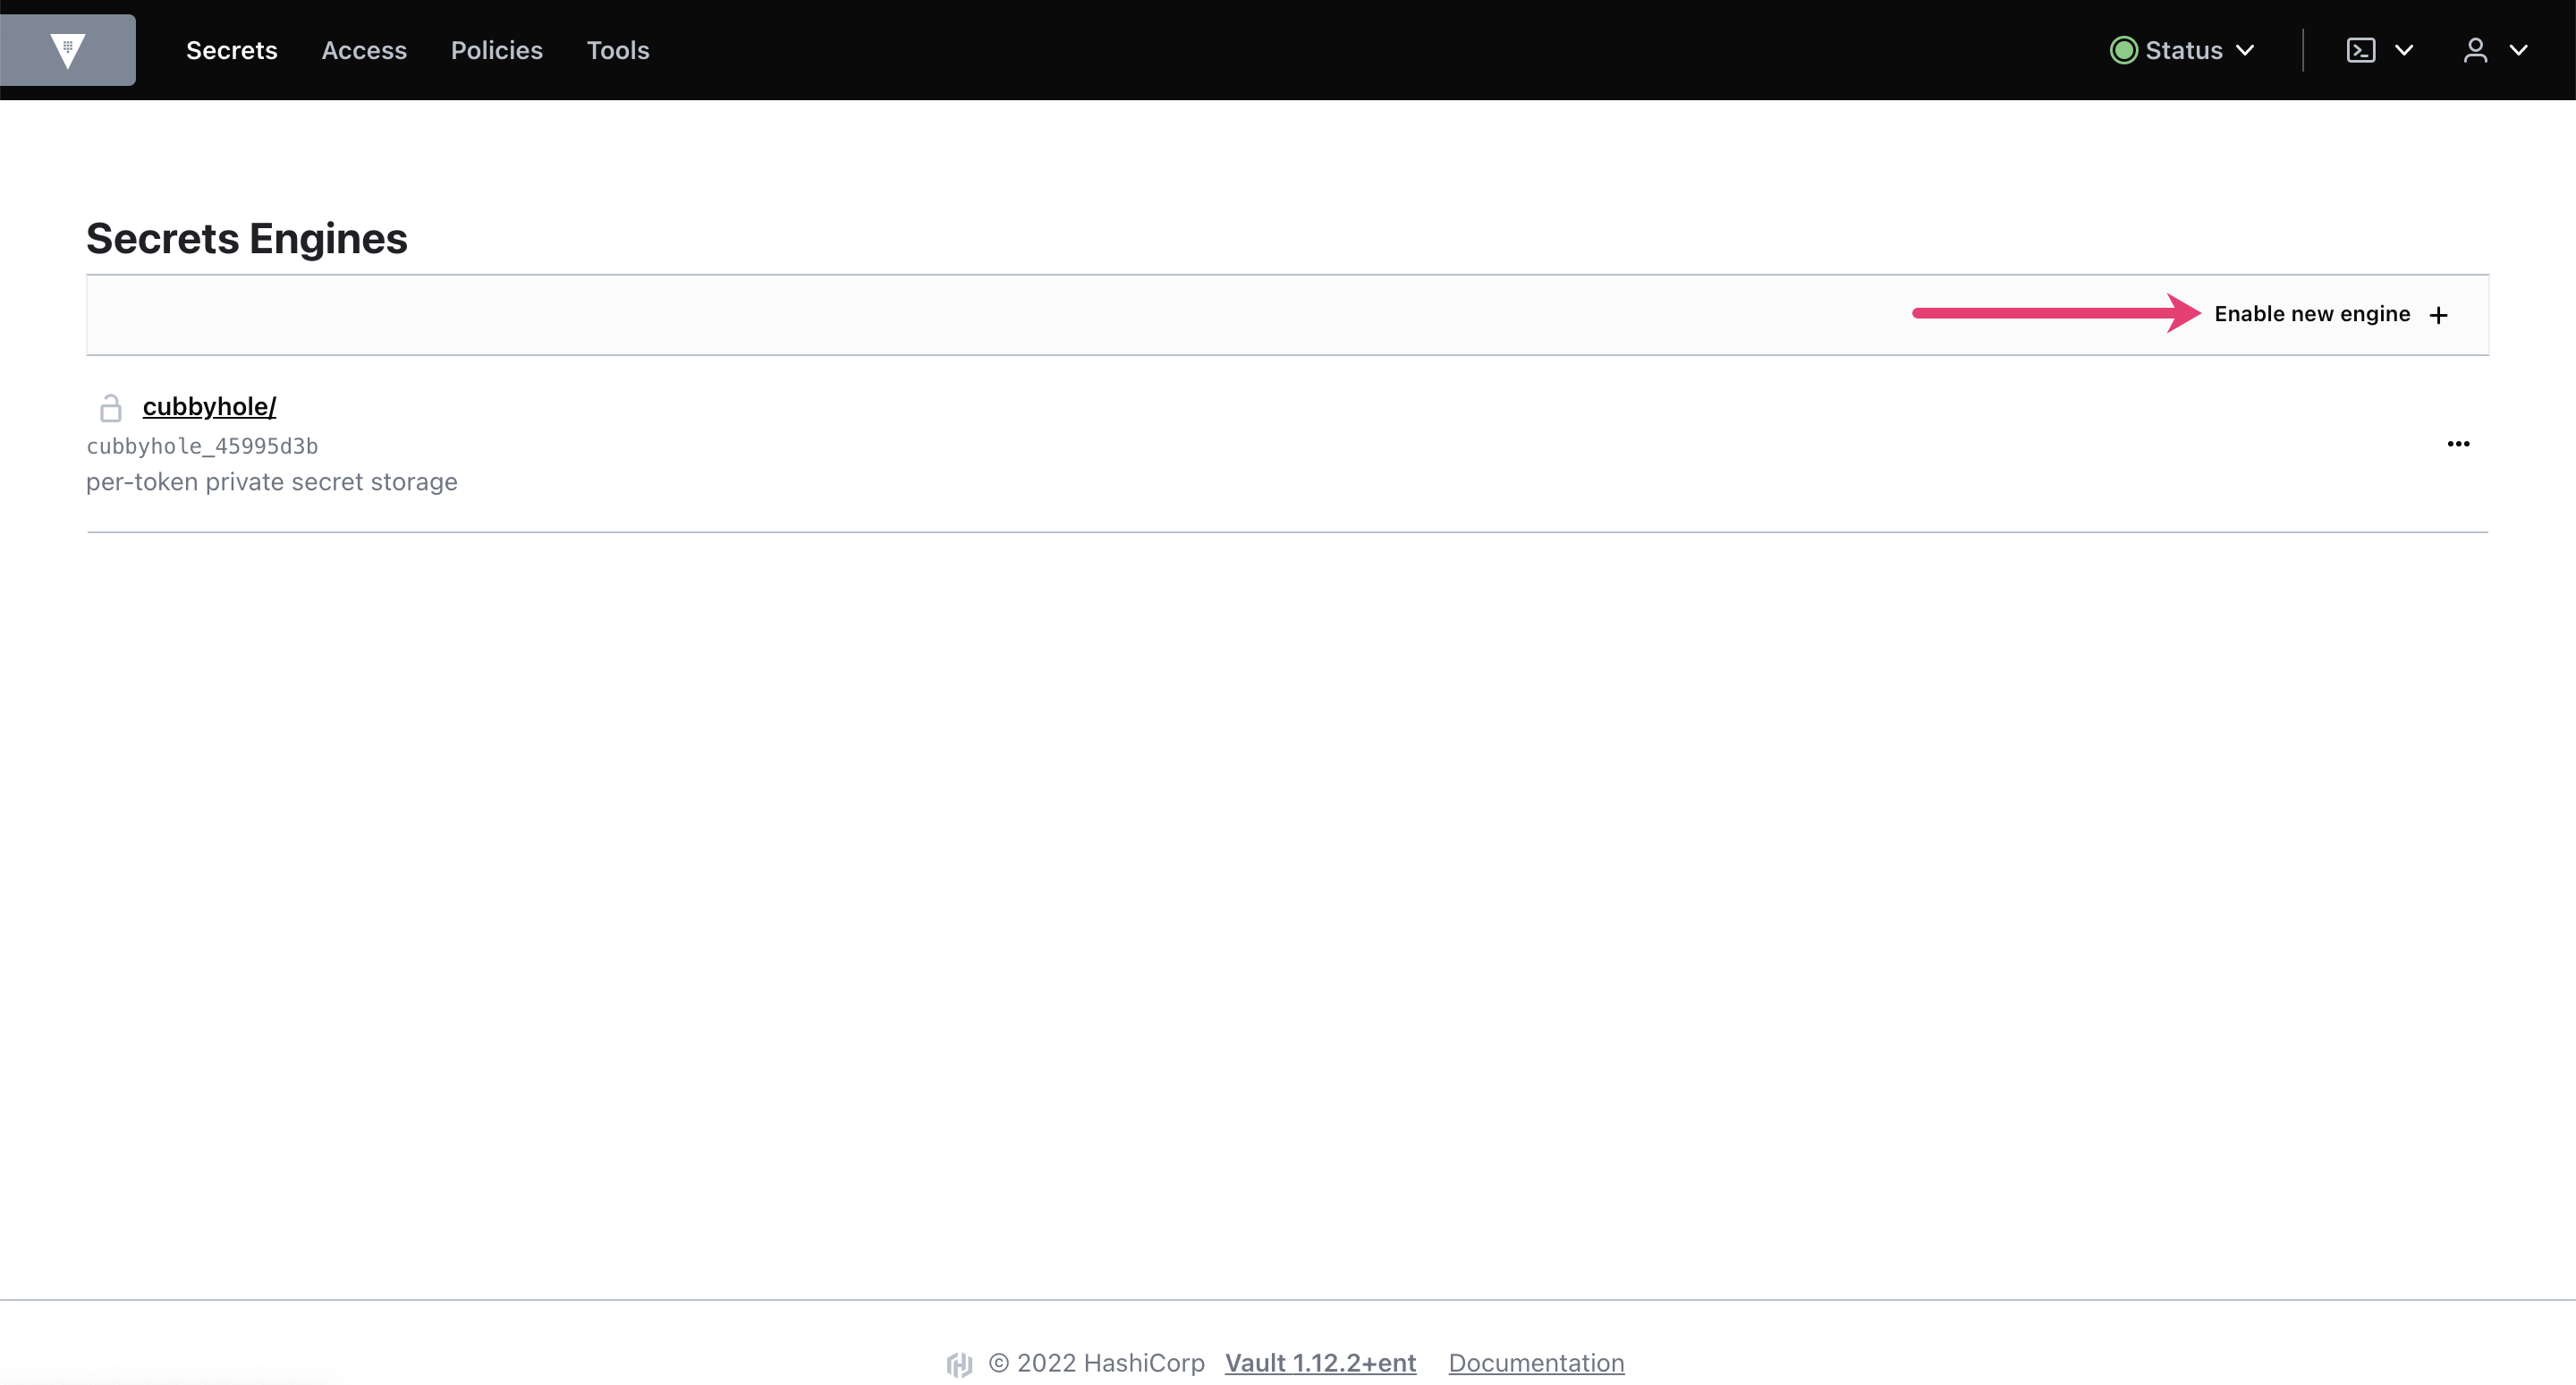
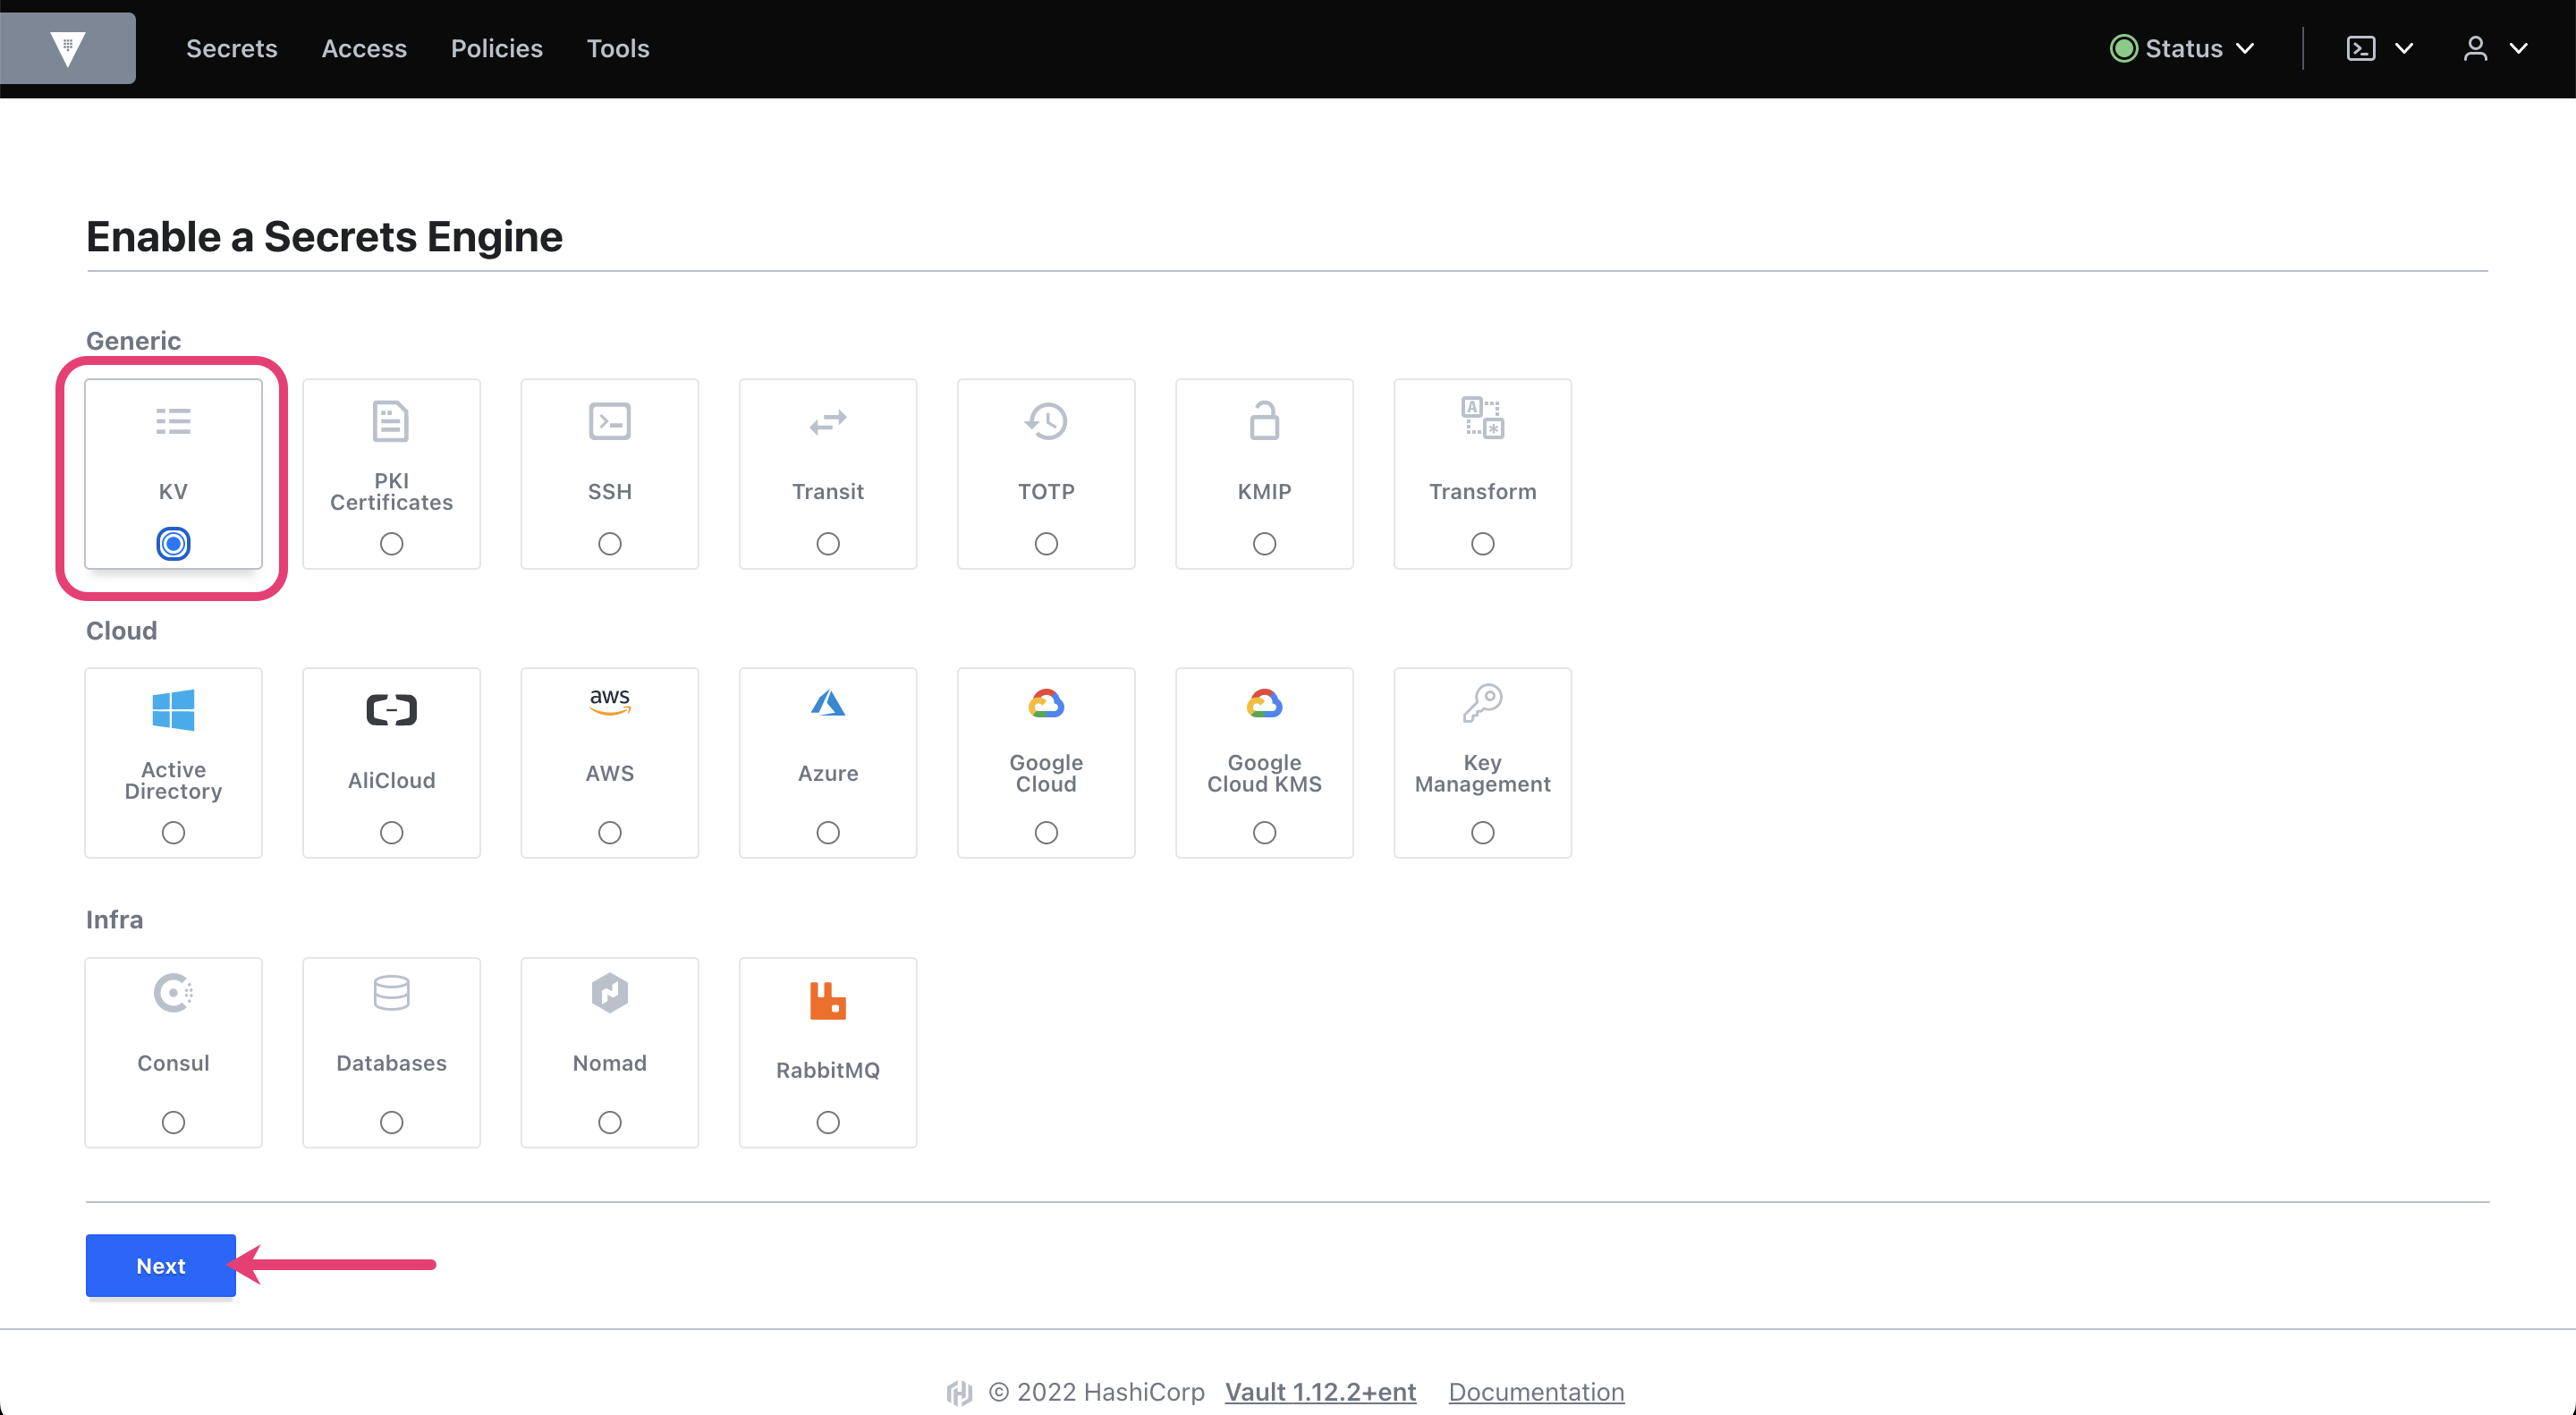
Enable the KV version 2 secrets engine, write a secret, and verify the replication status.
Export a VAULT_ADDR environment variable to communicate with the primary cluster Vault.
$ export VAULT_ADDR=http://127.0.0.1:8200Login with the root cluster A root token.
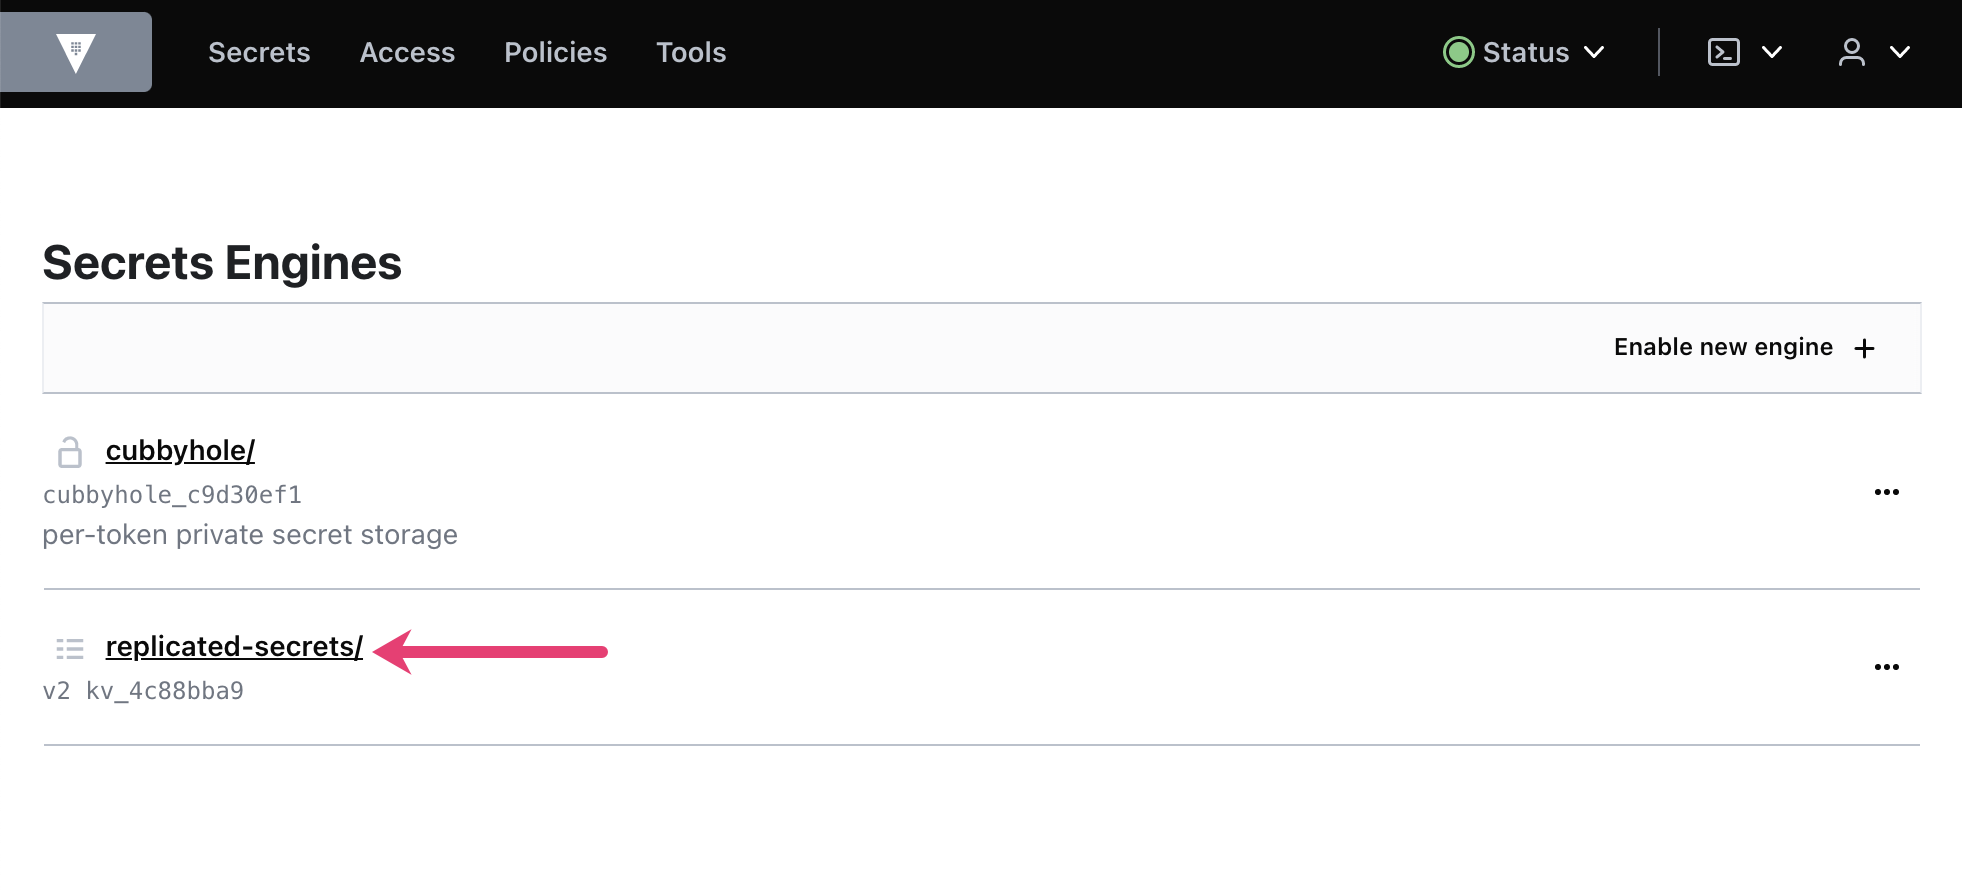
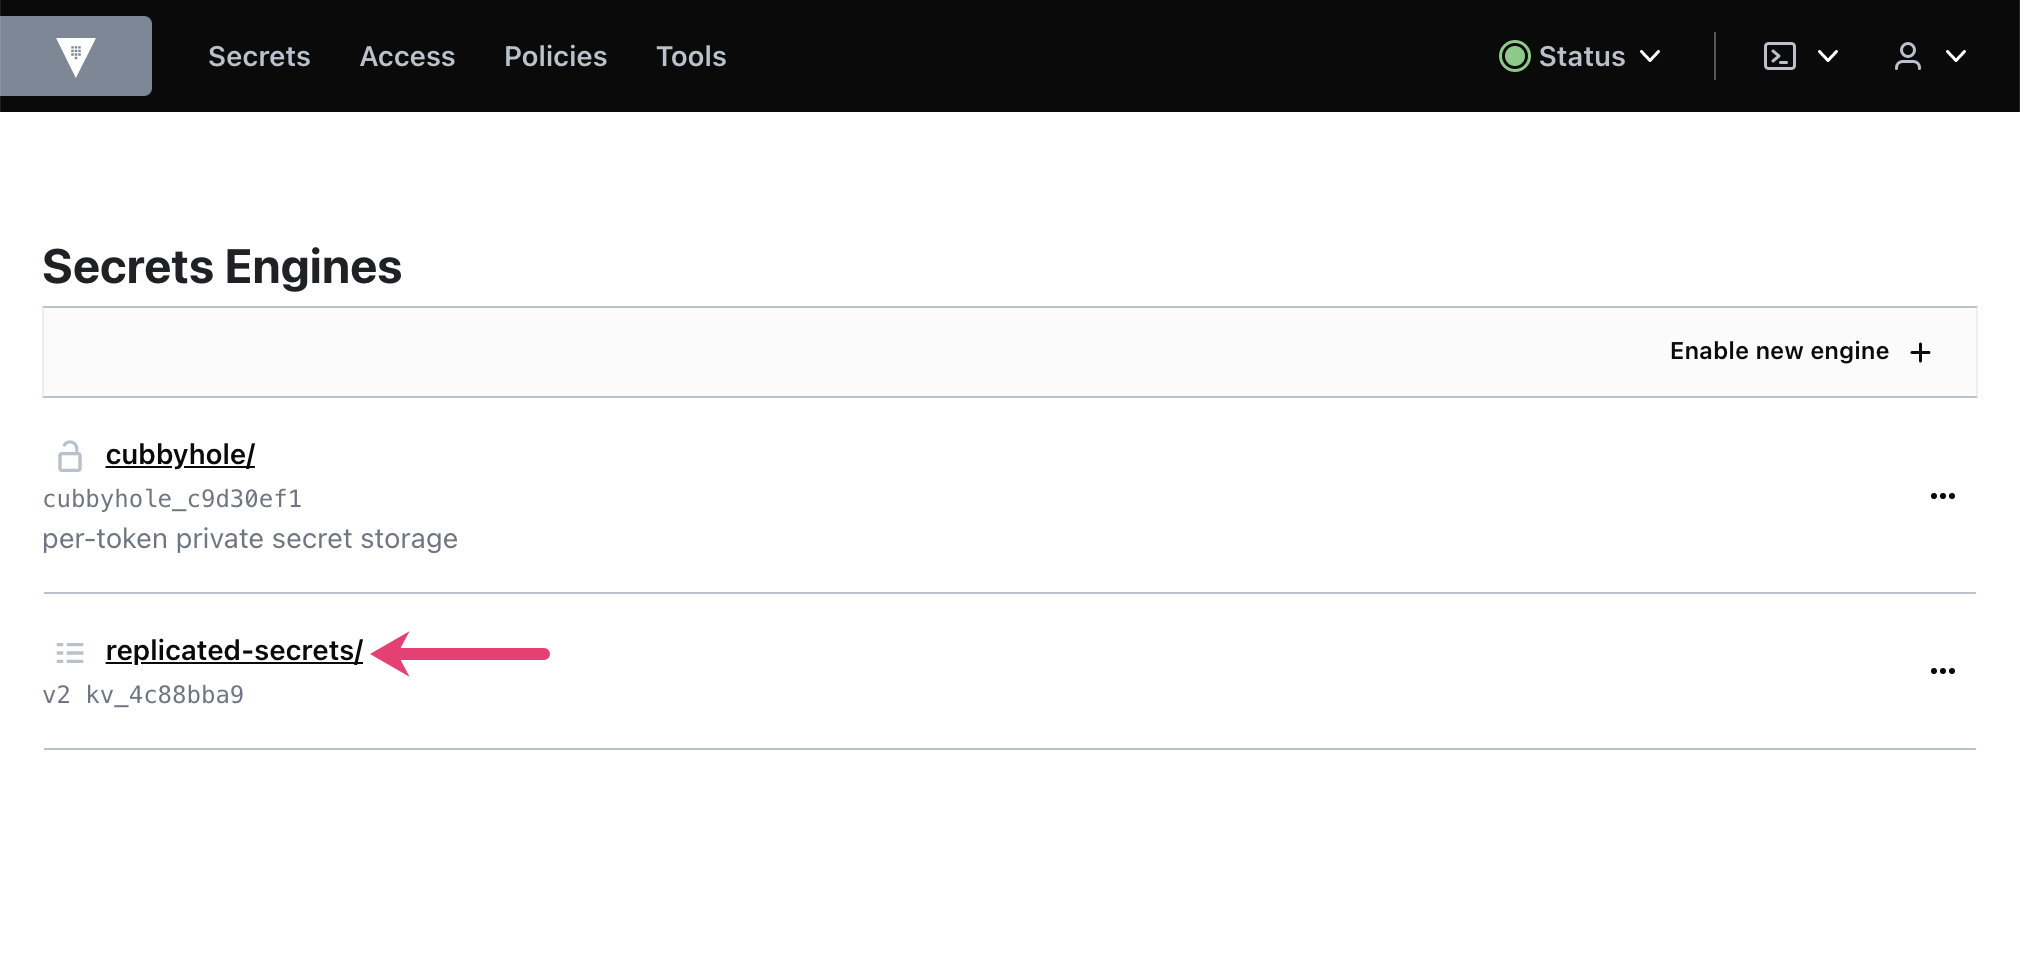
$ vault login -no-print $CLUSTER_A_ROOT_TOKENEnable a Key/Value version 2 secrets engine at the path
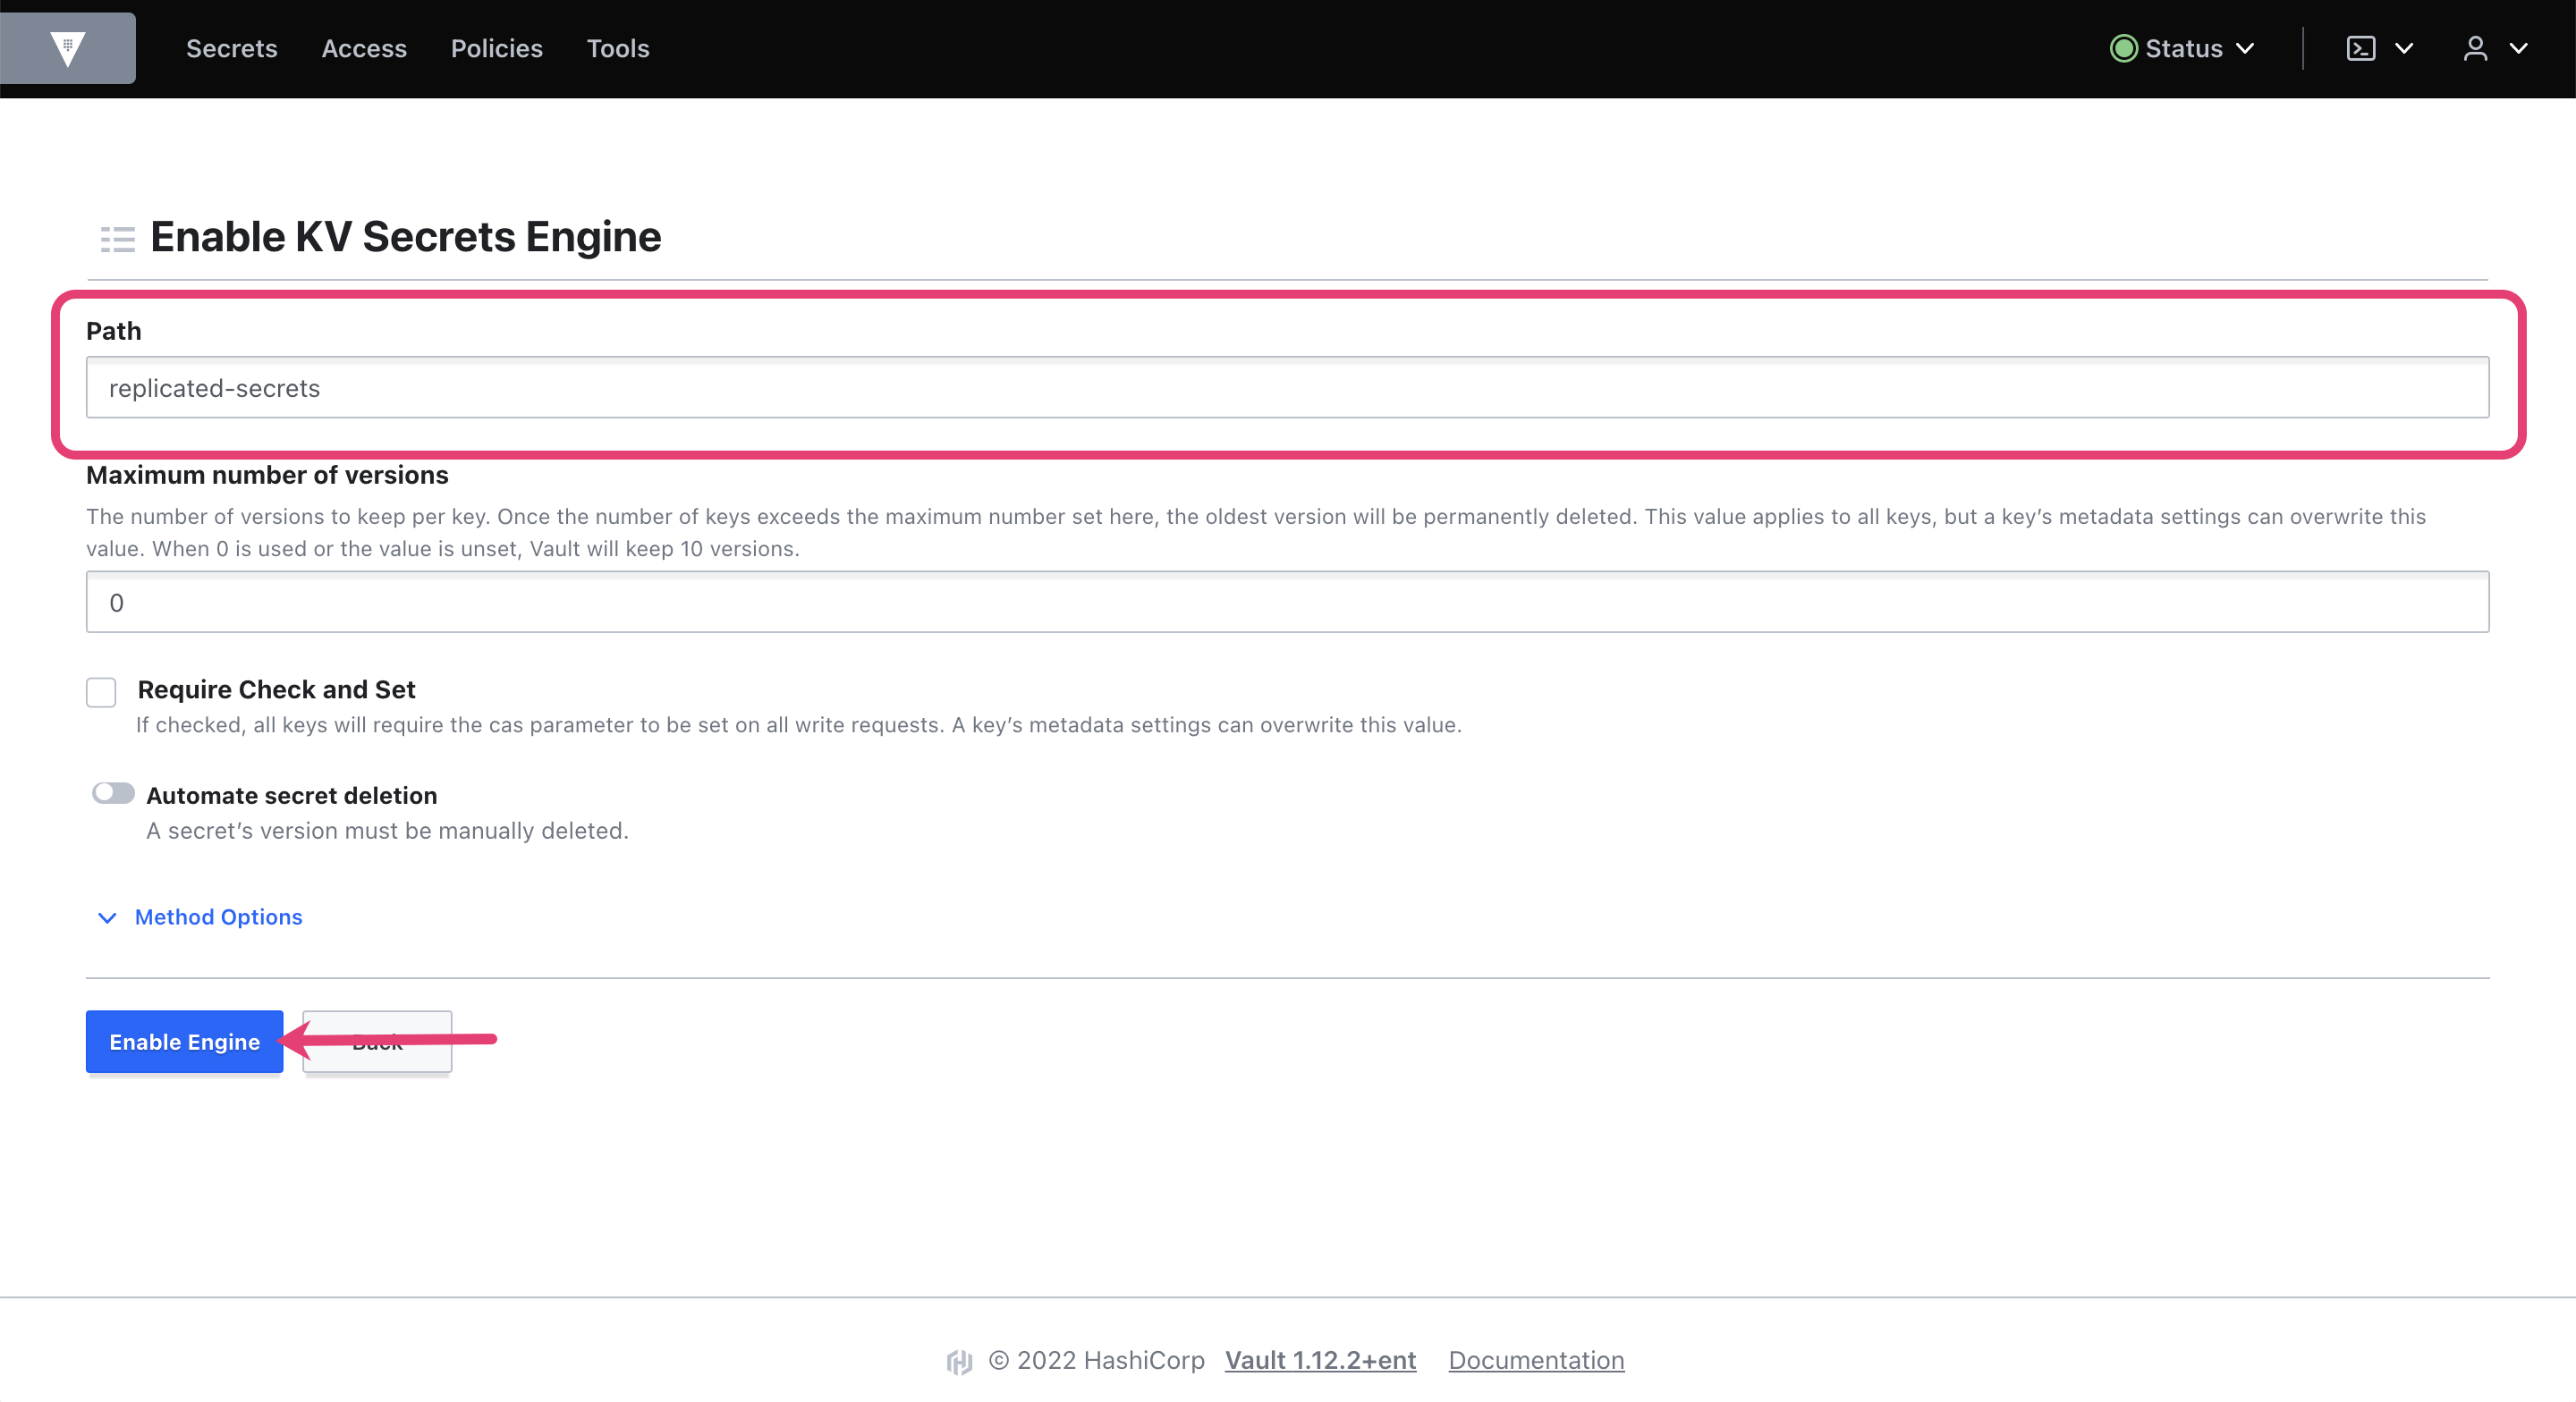
replicated-secrets.$ vault secrets enable -path=replicated-secrets -version=2 kvPut a test secret into the newly enabled secrets engine.
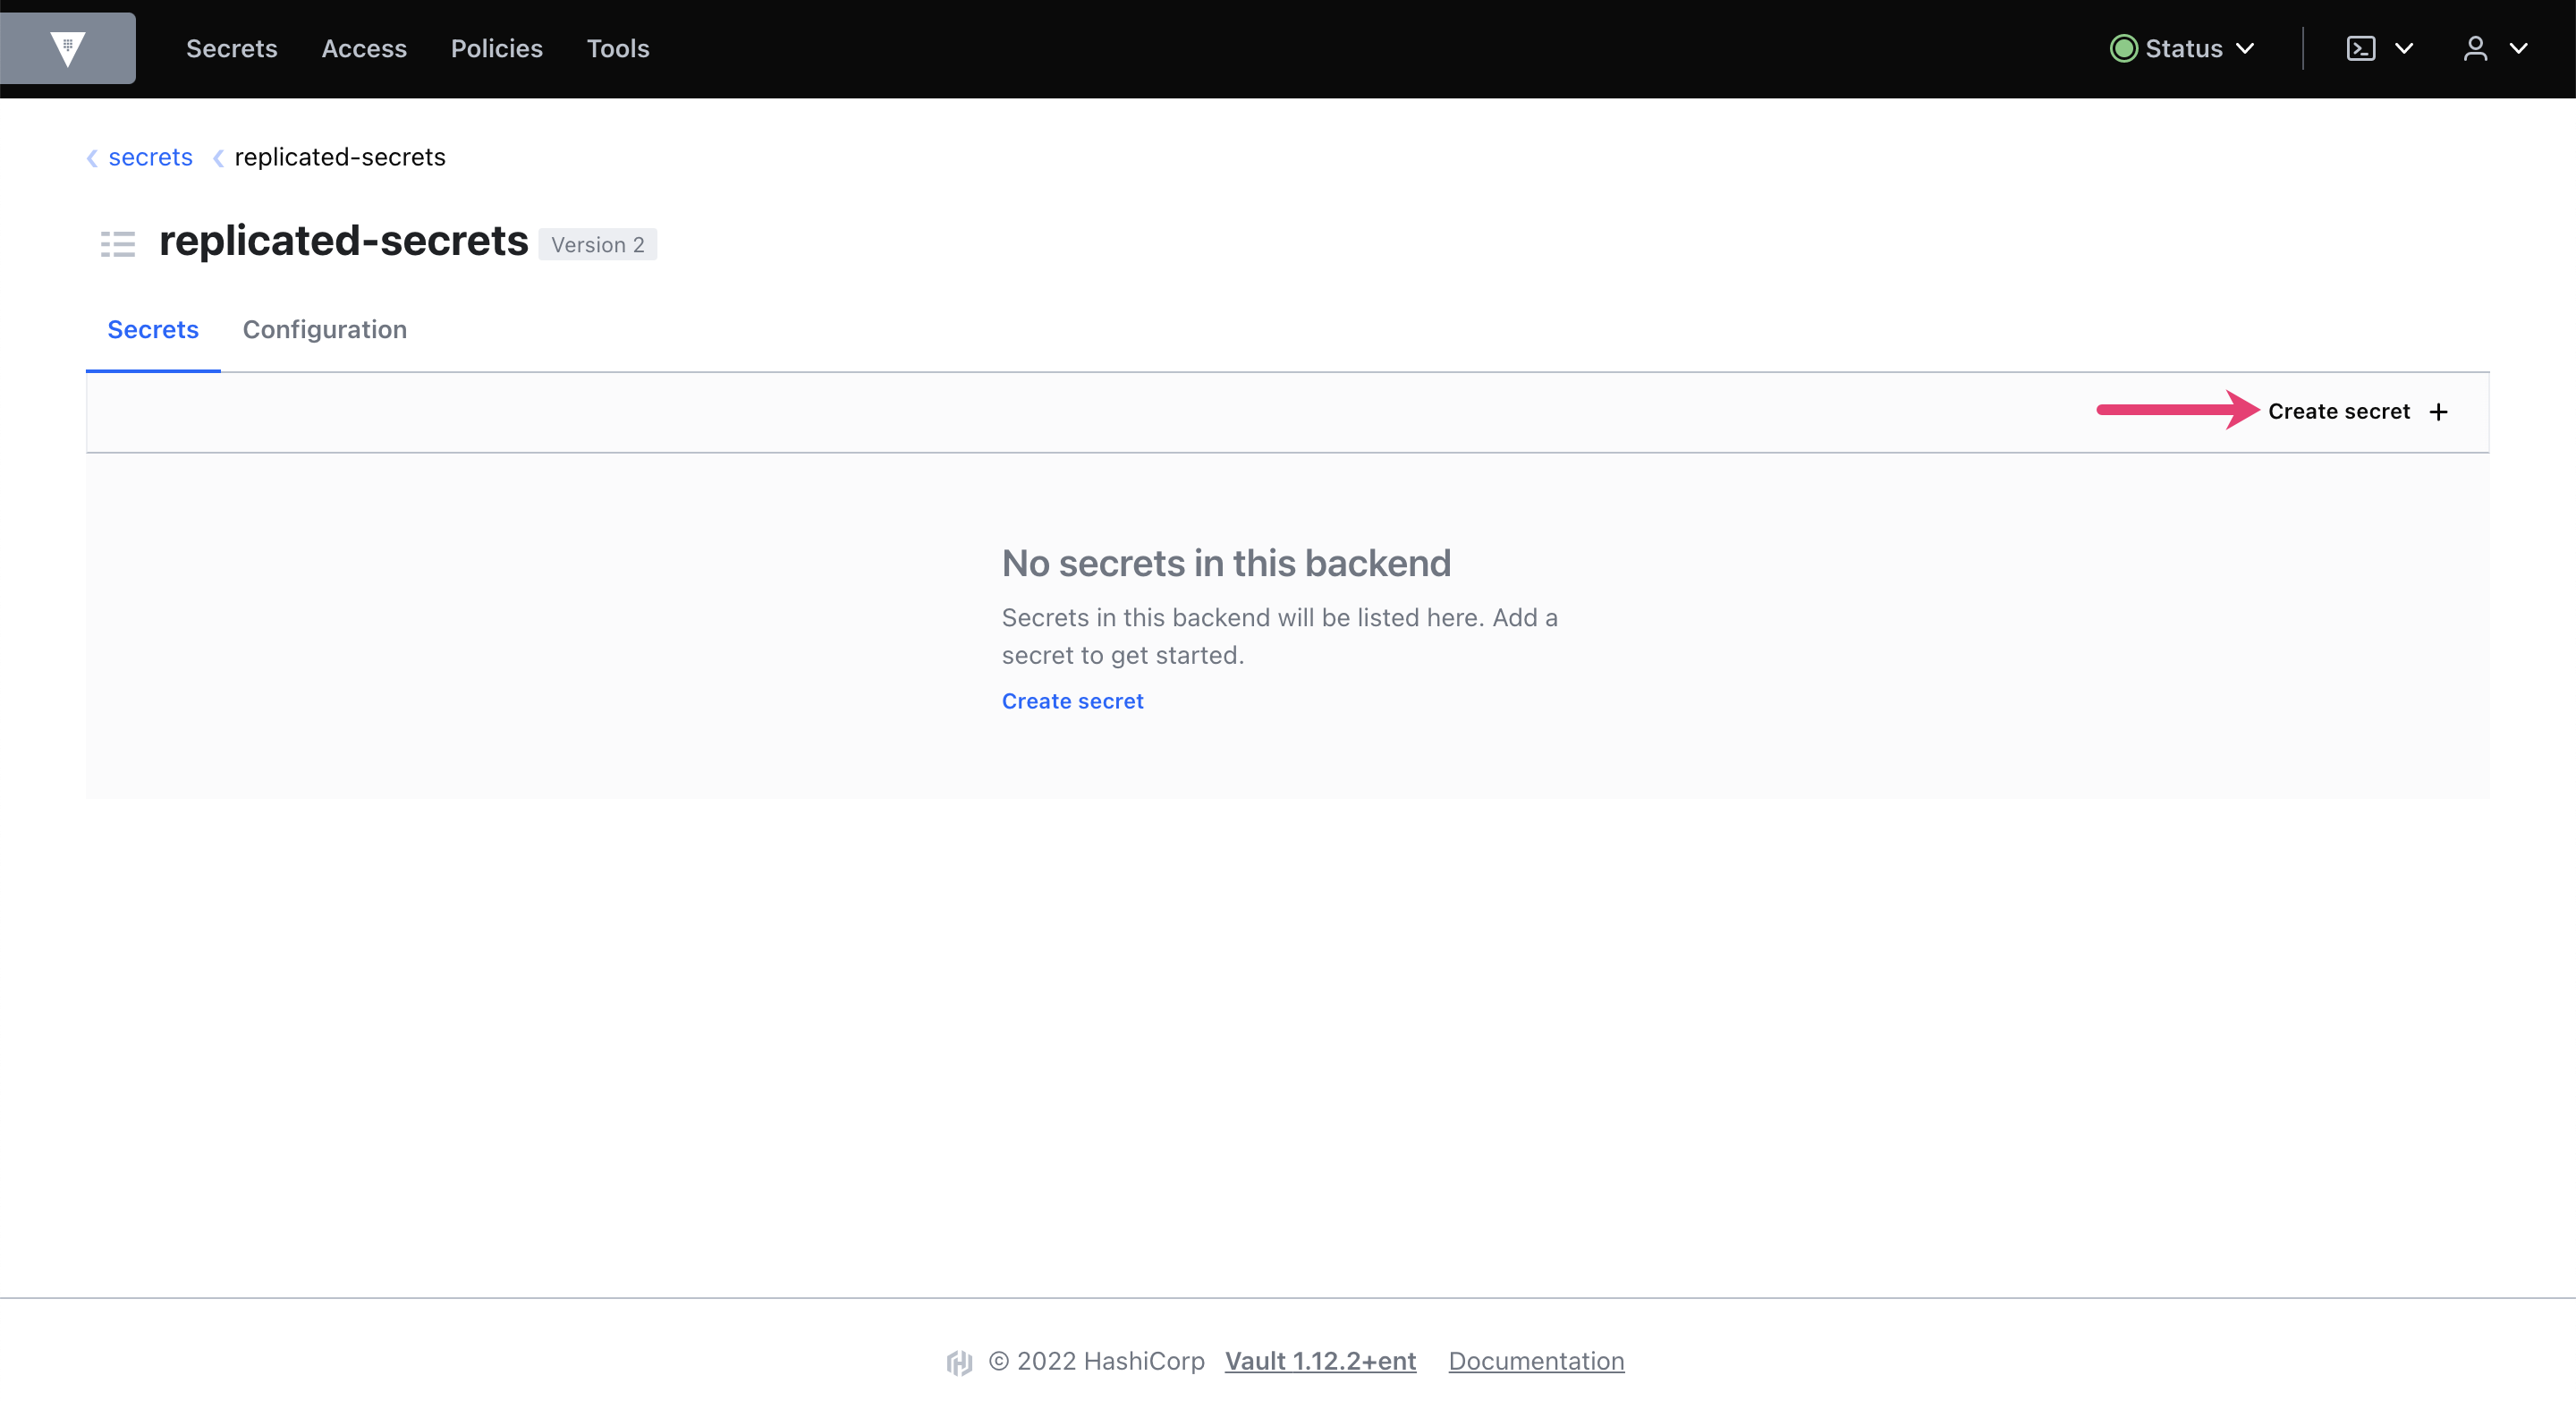
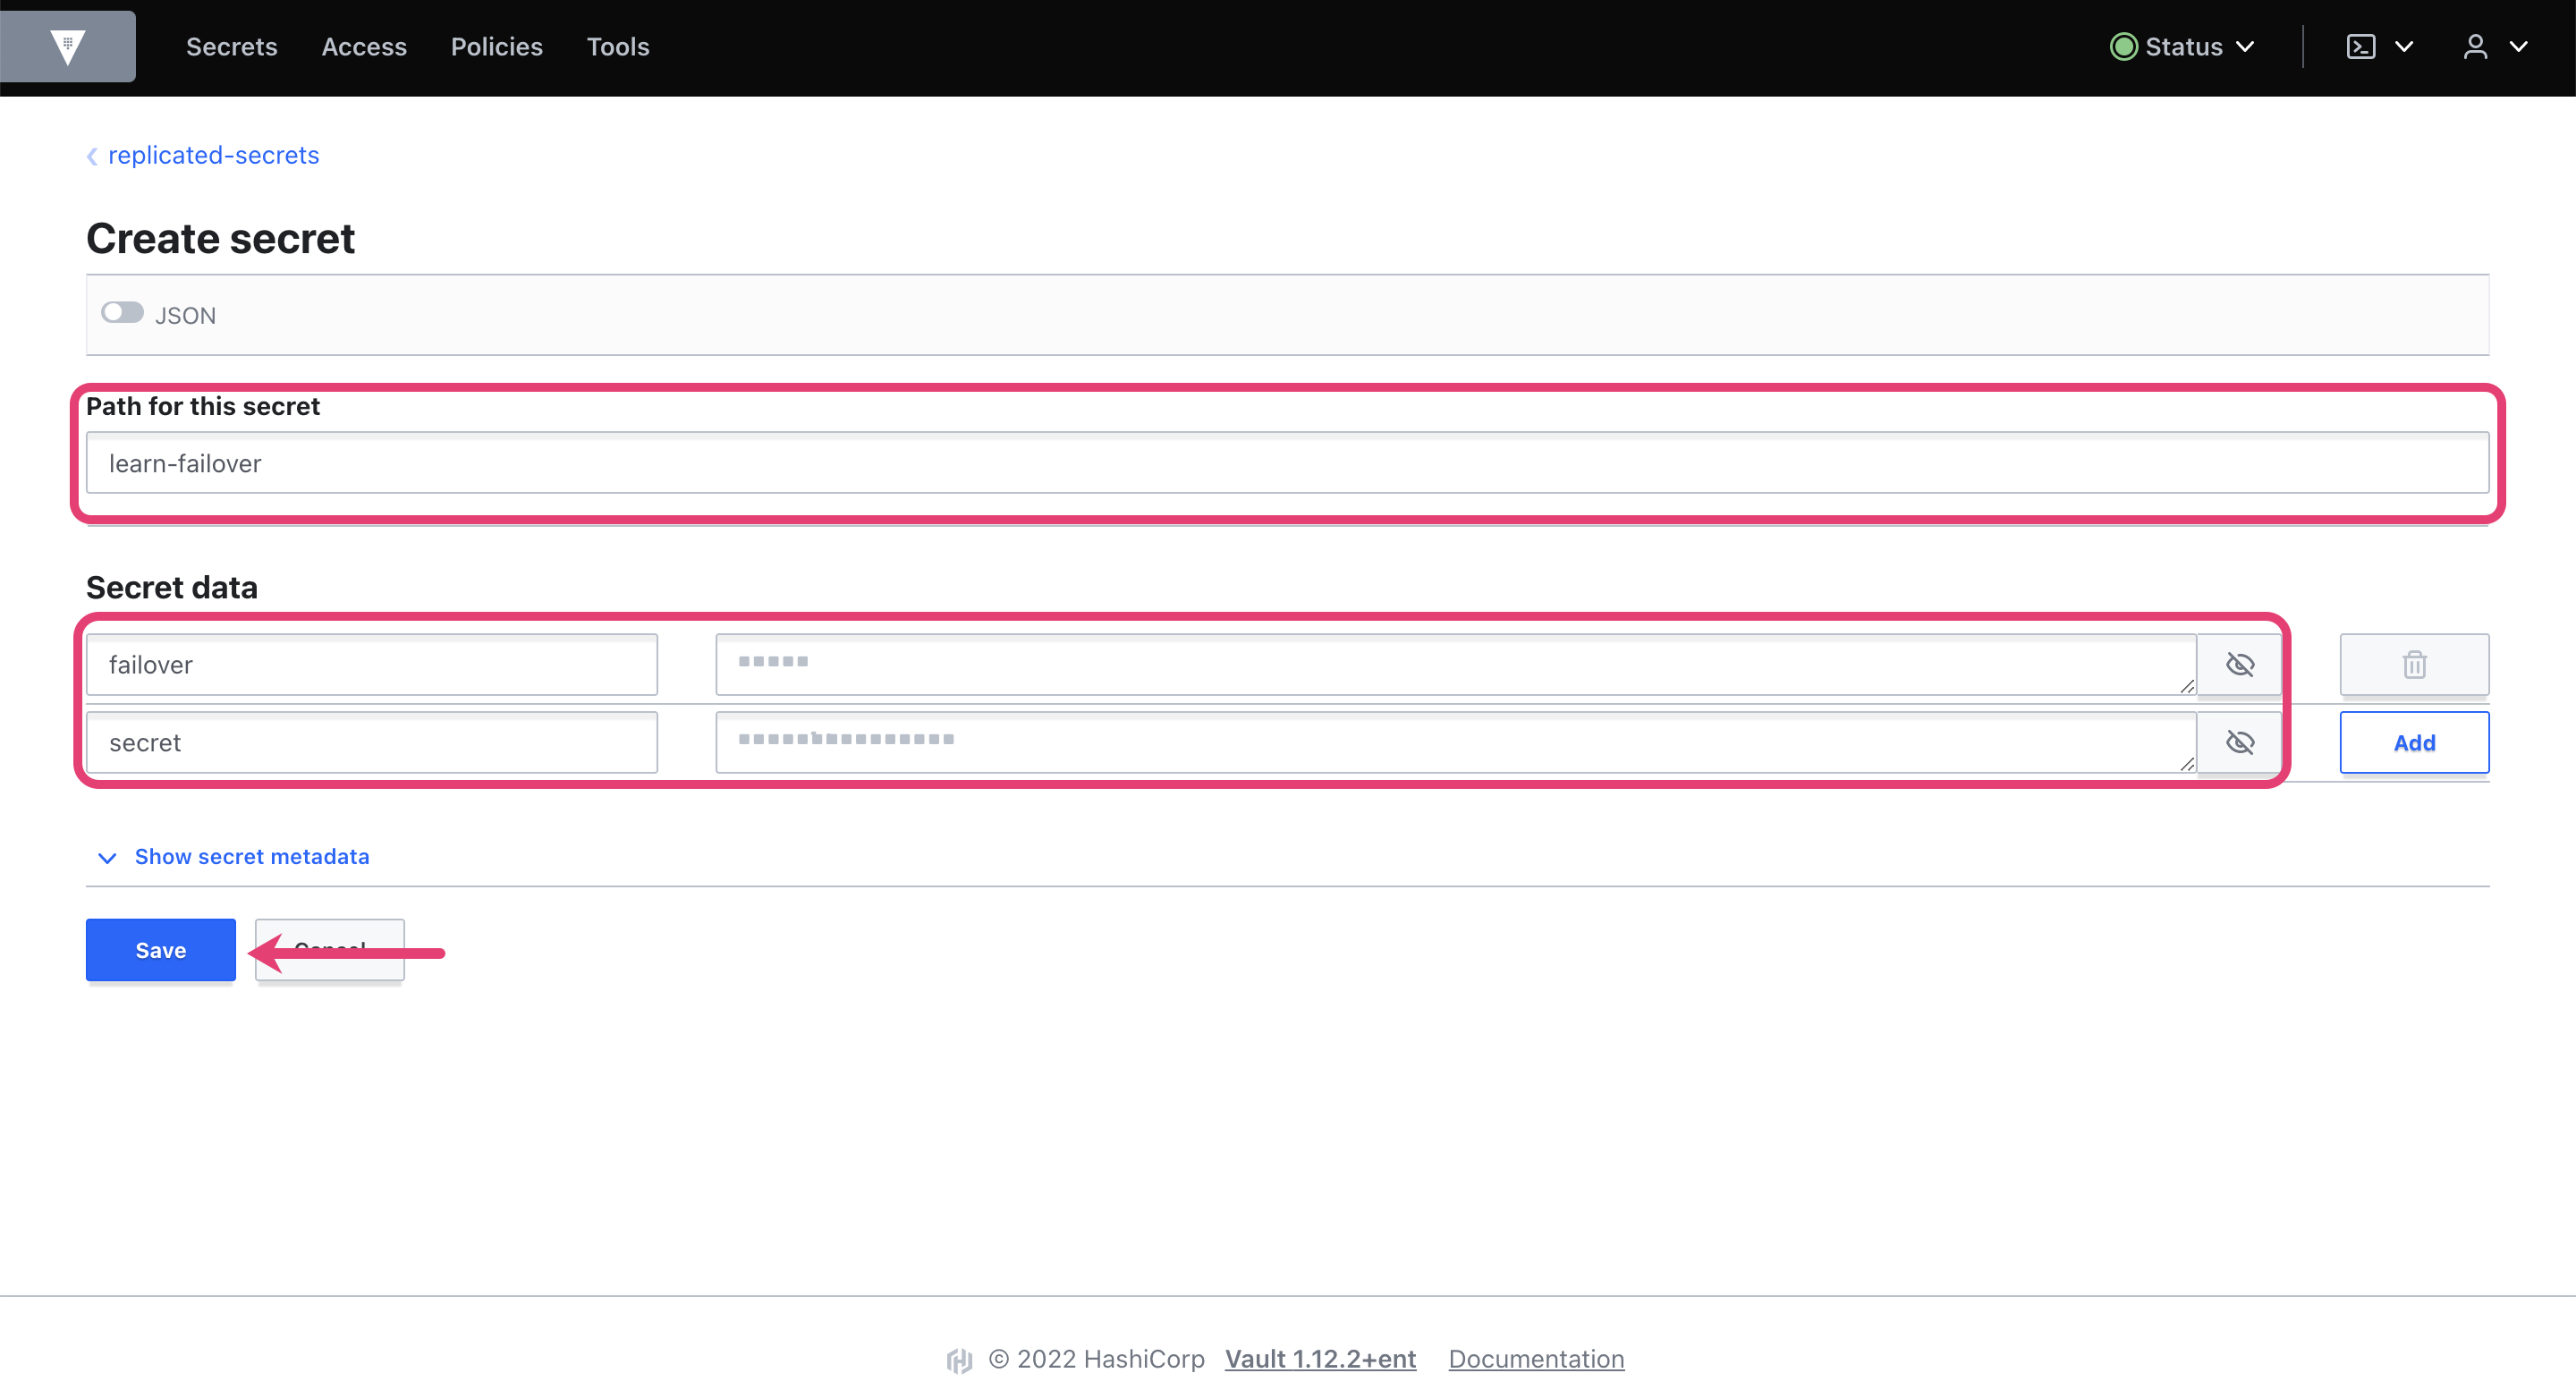
$ vault kv put replicated-secrets/learn-failover failover=false secret=984UIFBH4HK3M84Successful example output:
============= Secret Path =============
replicated-secrets/data/learn-failover

======= Metadata =======
Key                Value
---                -----
created_time       2022-09-13T18:44:09.734060046Z
custom_metadata    <nil>
deletion_time      n/a
destroyed          false
version            1
Check the replication status on primary cluster.
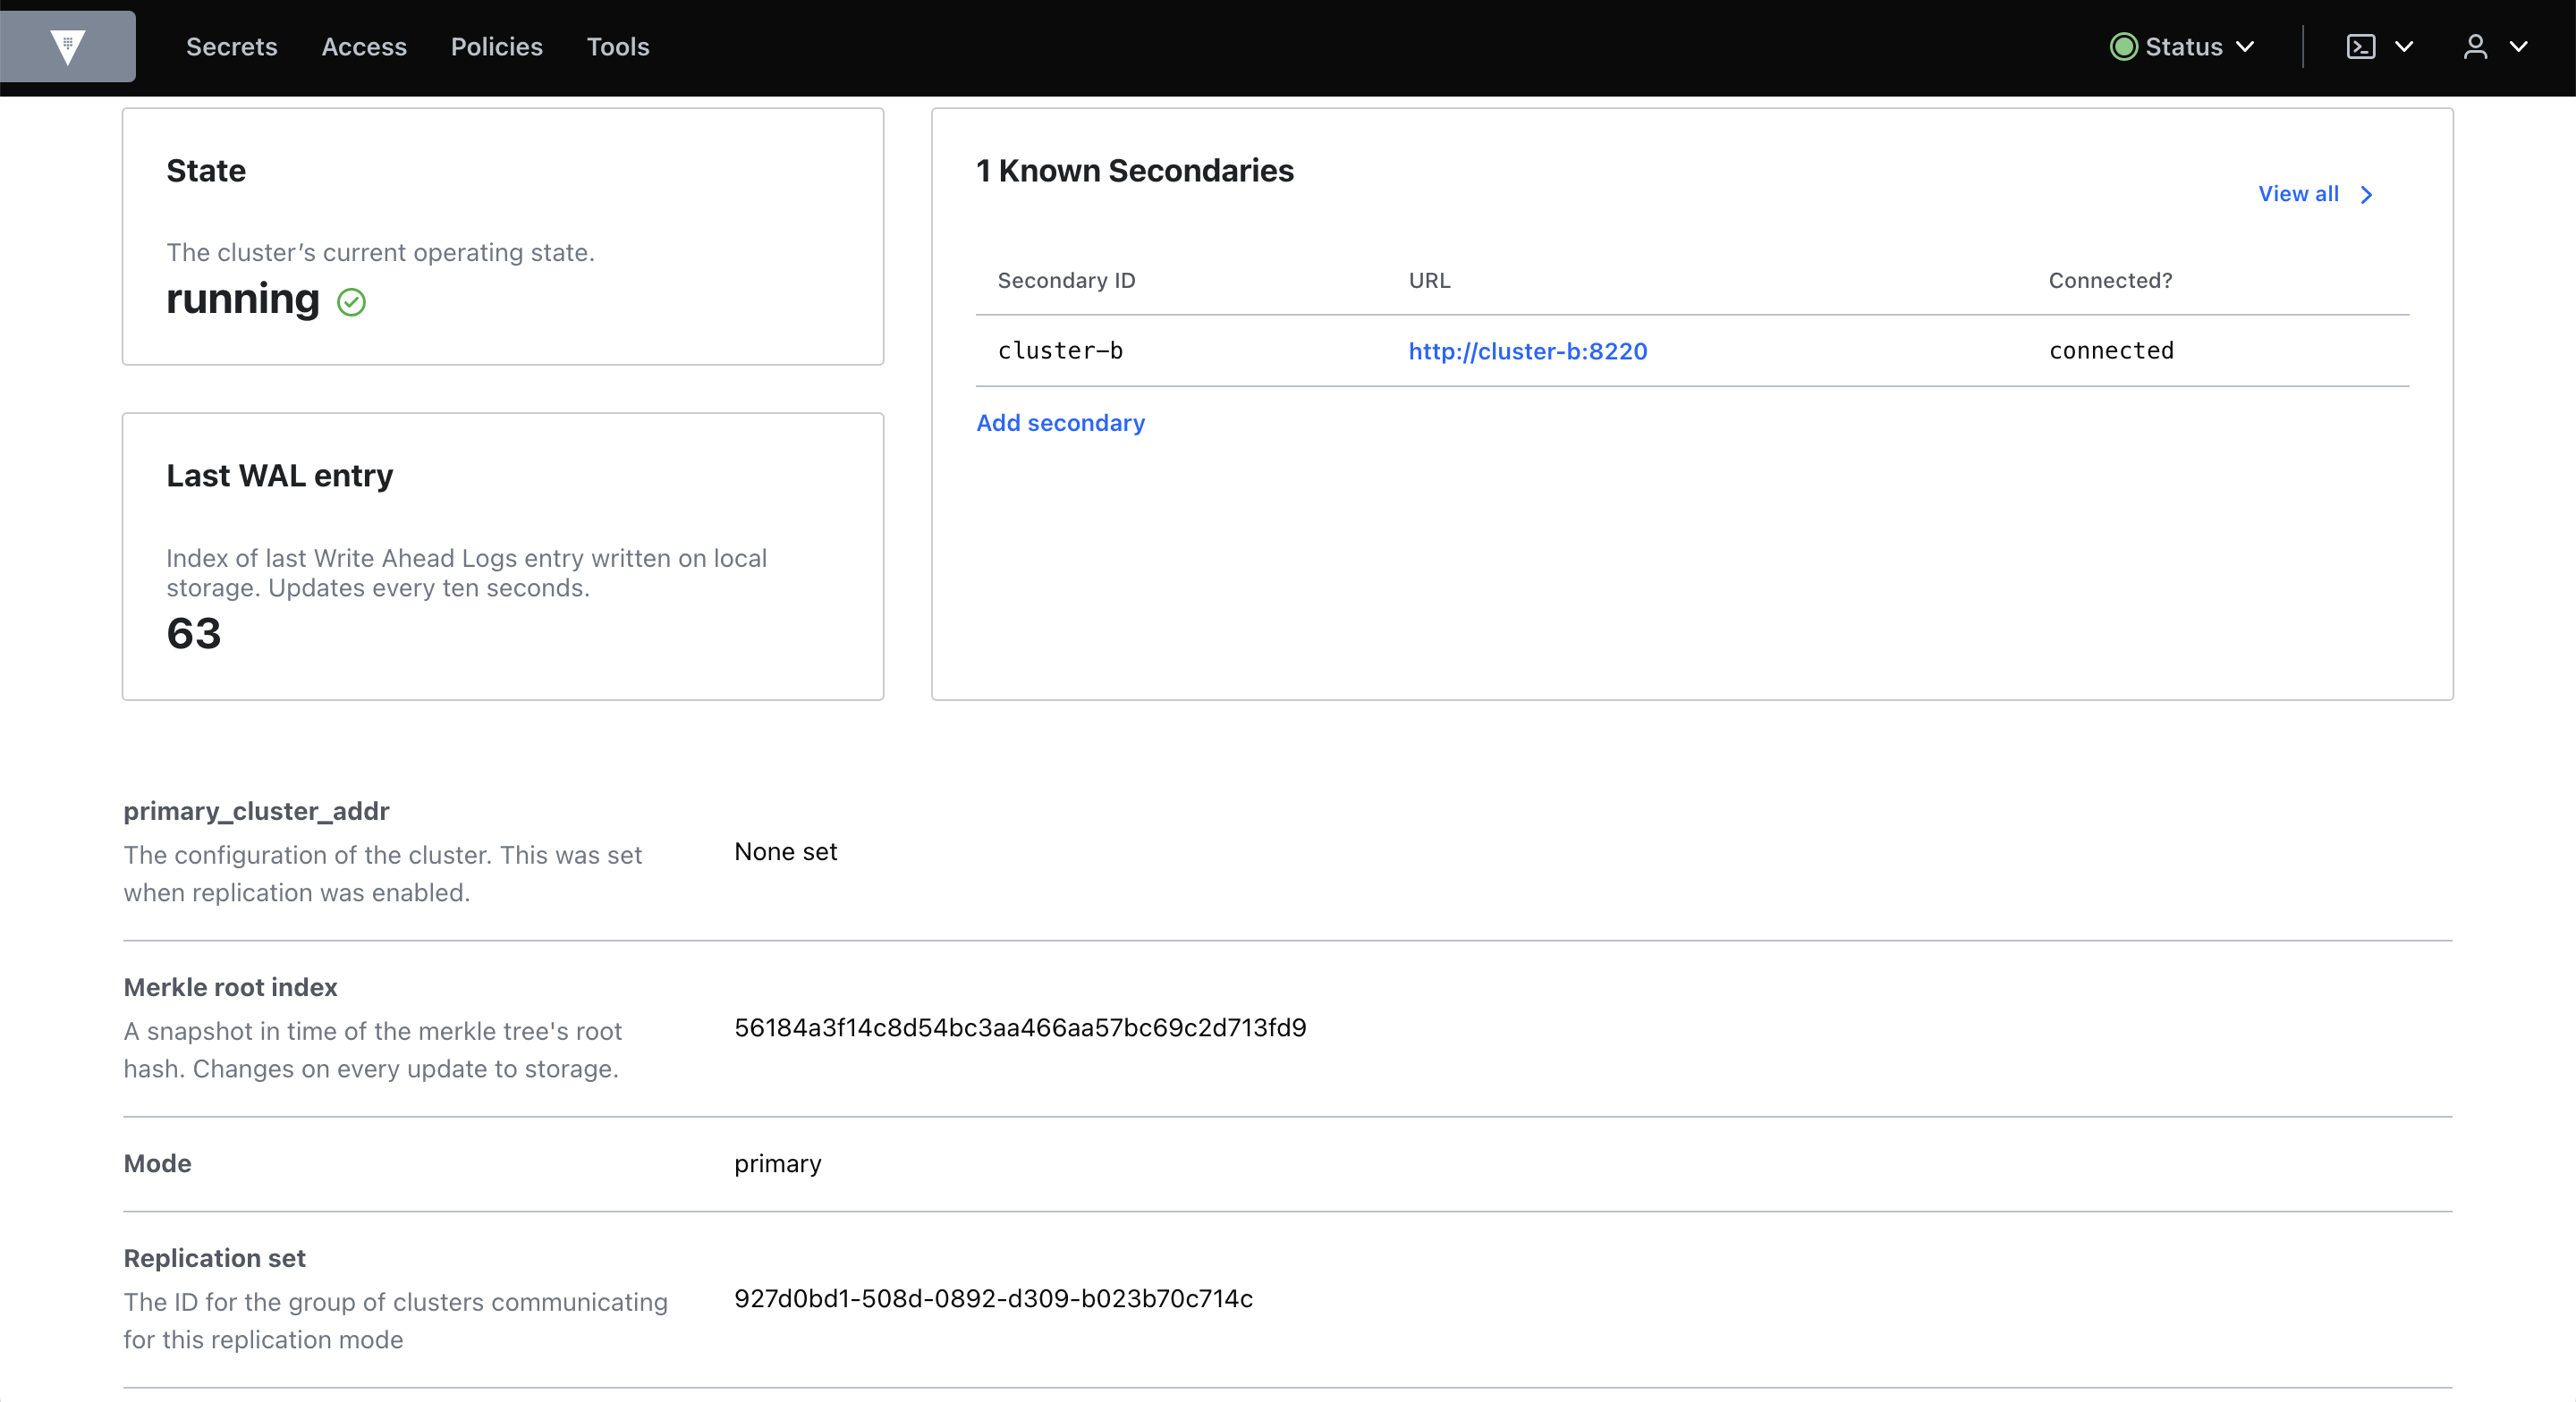
$ vault read sys/replication/dr/status
Key                     Value
---                     -----
cluster_id              d8f8a096-c55e-d13f-0274-faadb011b0b0
known_secondaries       [cluster-b]
last_dr_wal             51
last_reindex_epoch      0
last_wal                51
merkle_root             842e9a56744da59fef266464a805432ca9fc4cd1
mode                    primary
primary_cluster_addr    n/a
secondaries             [map[api_address:http://cluster-b:8220 cluster_address:https://cluster-b:8221 connection_status:connected last_heartbeat:2022-12-05T18:08:38Z node_id:cluster-b]]
state                   running
Check the replication status on cluster B.
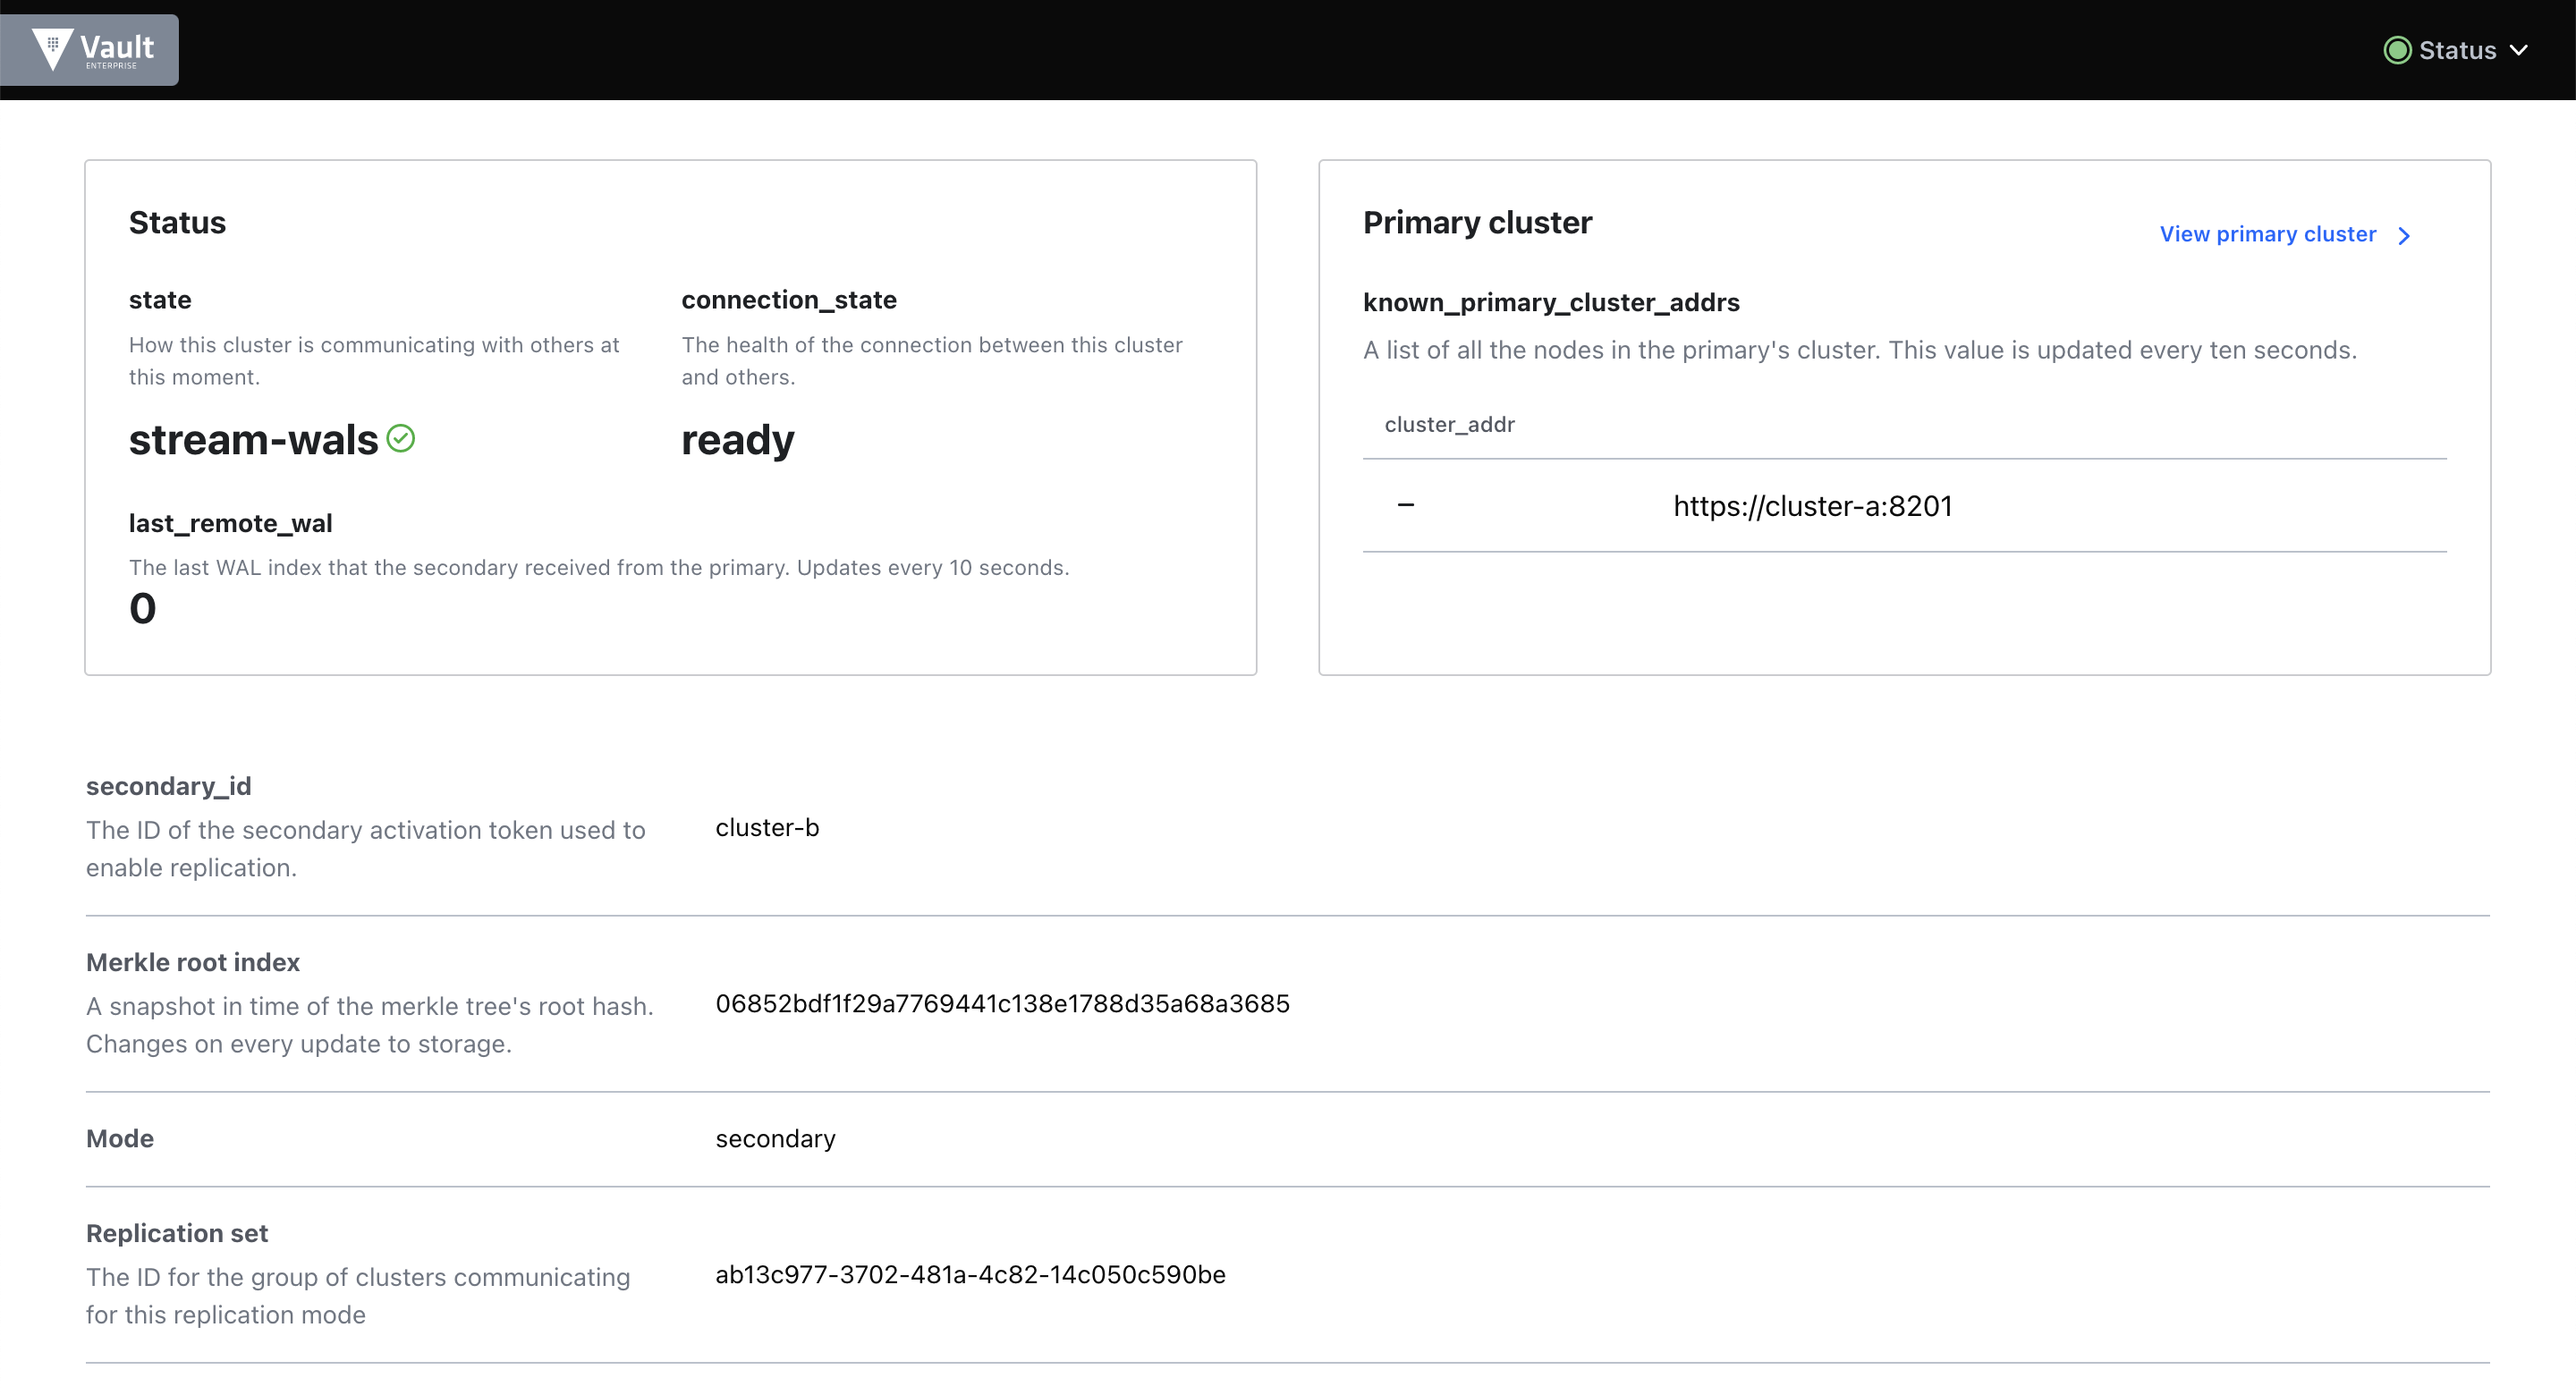
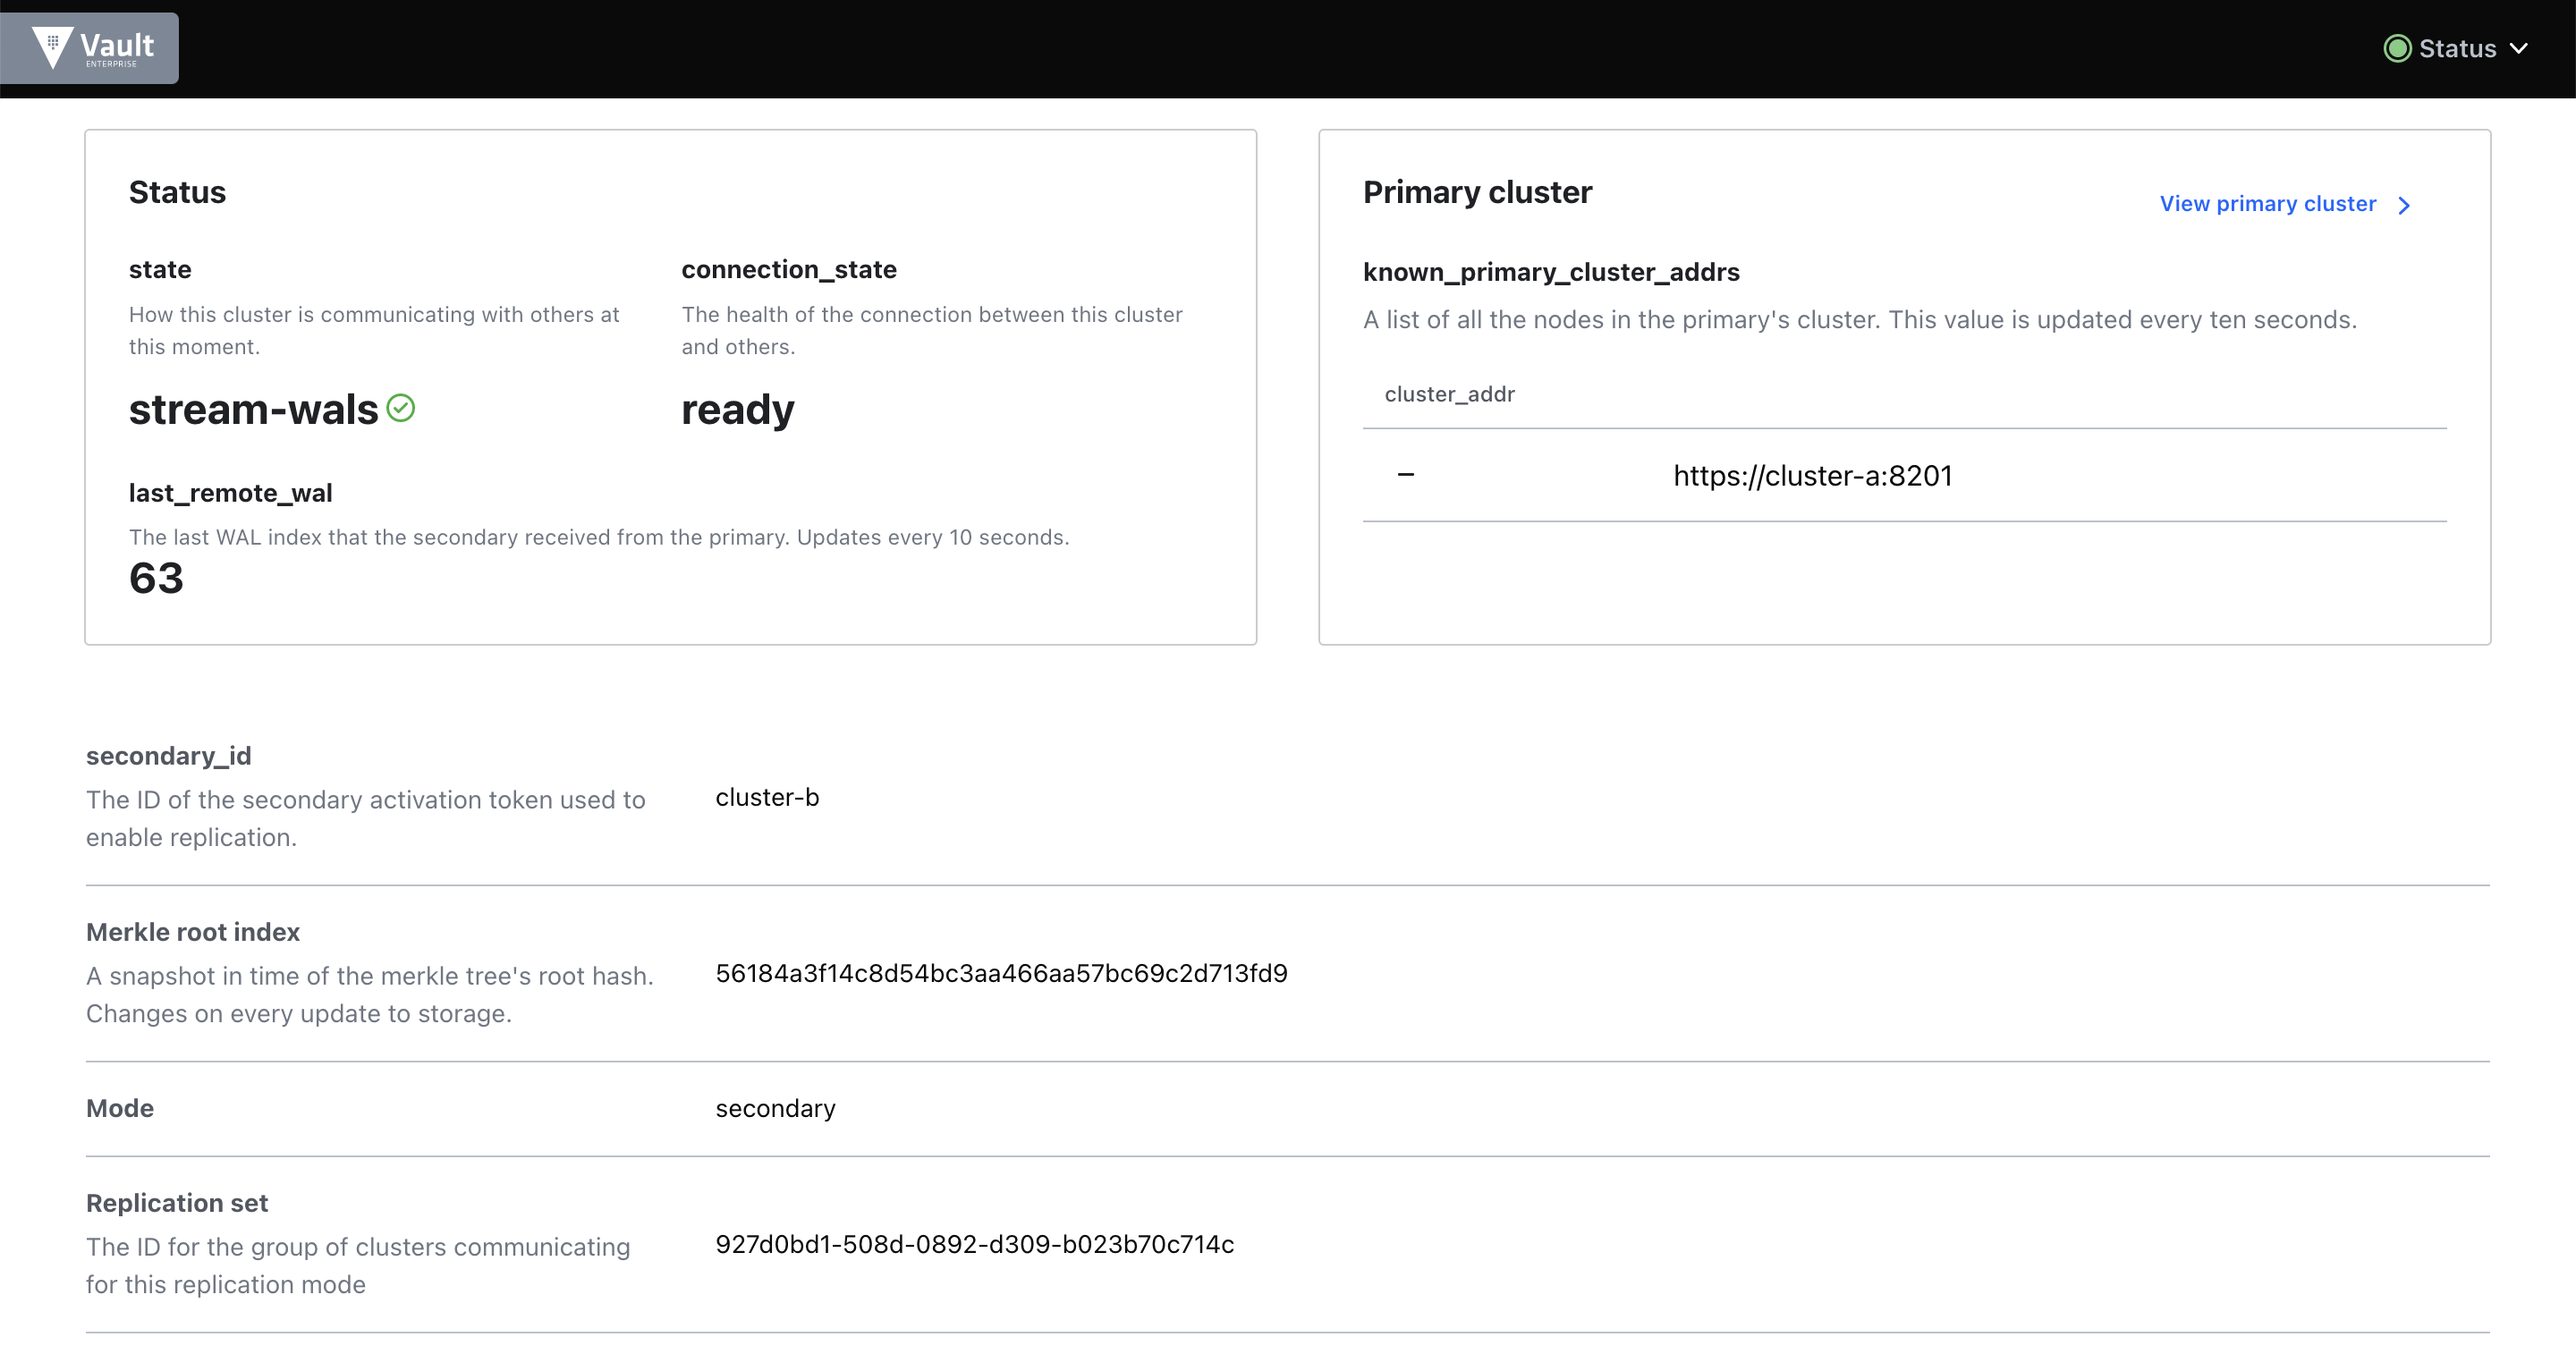
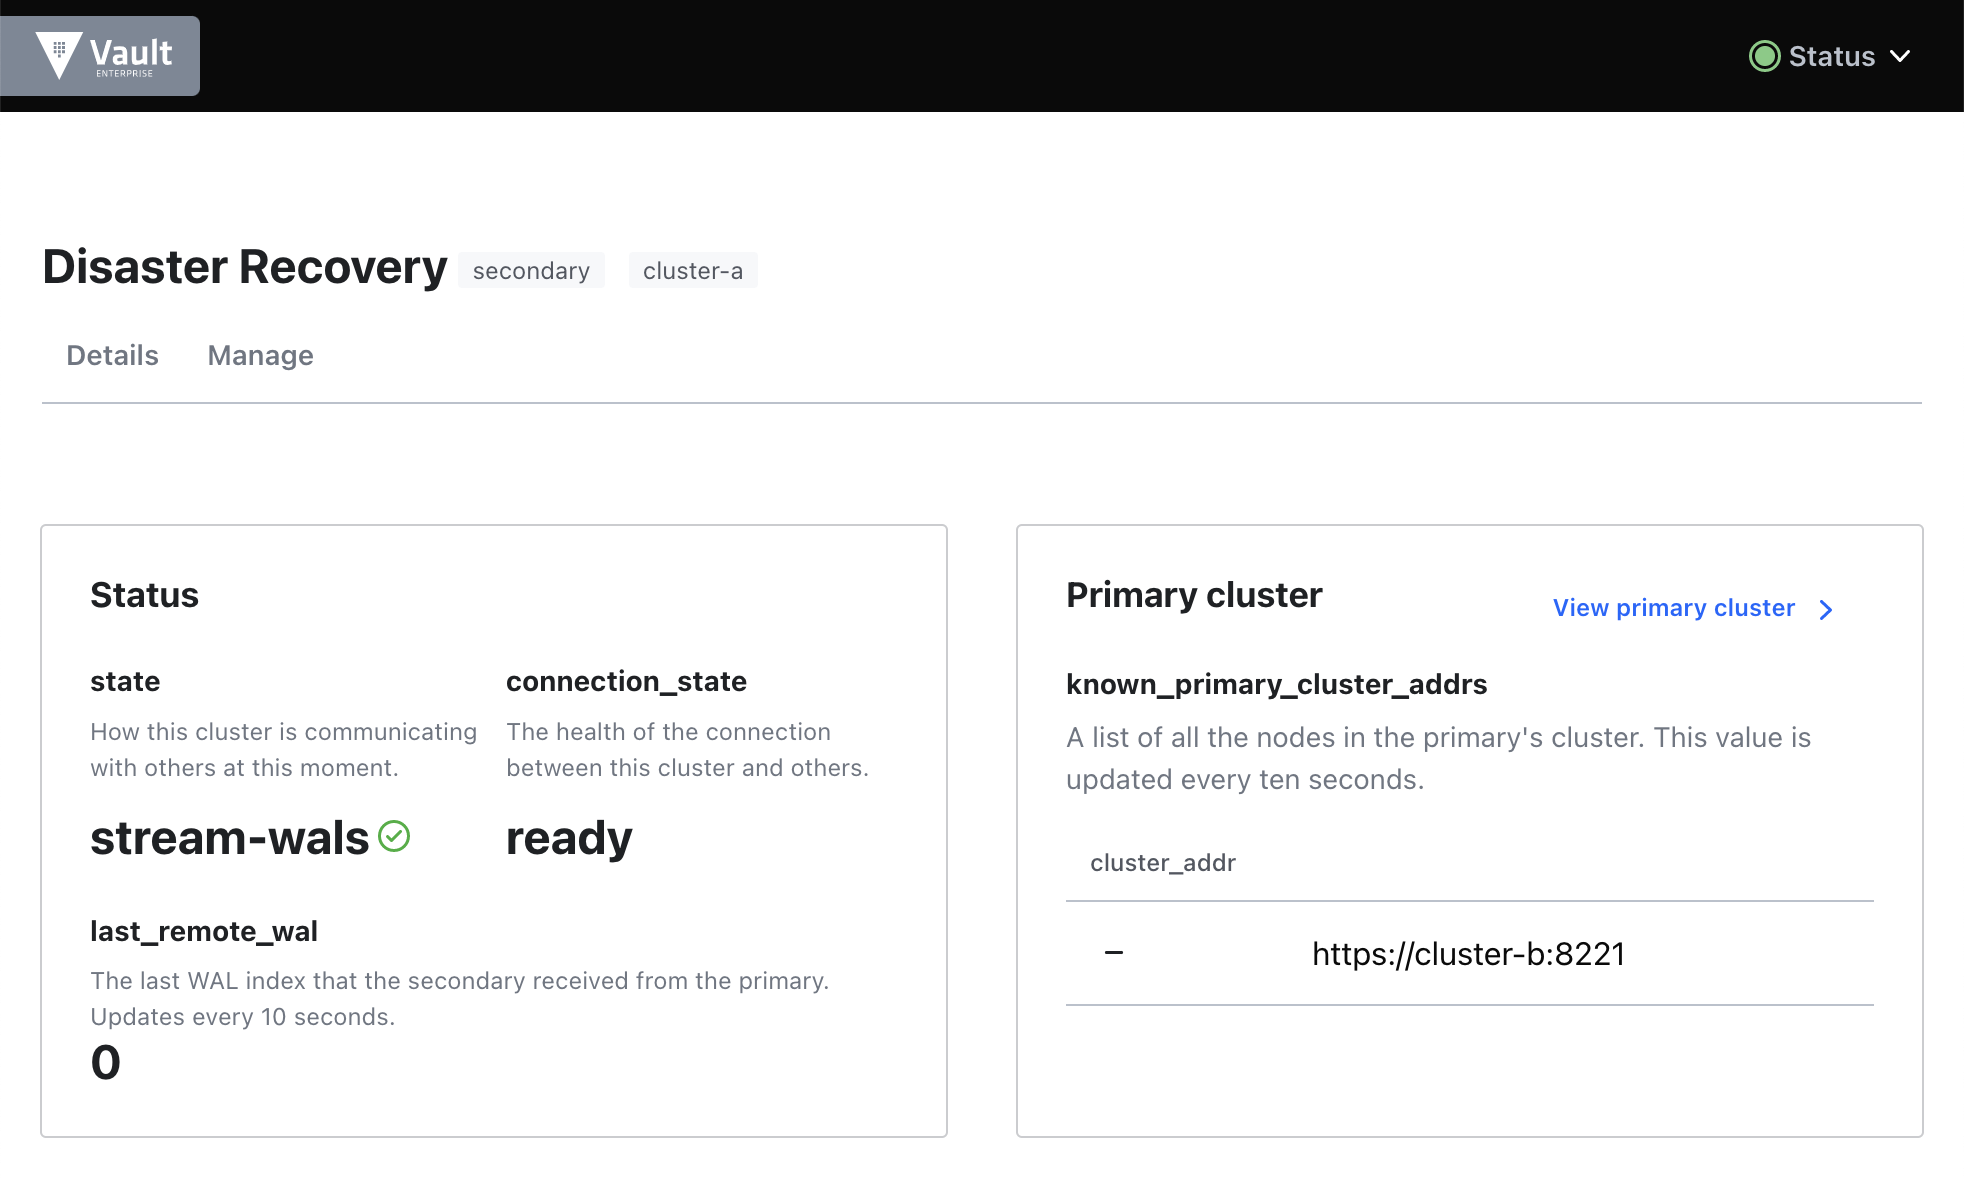
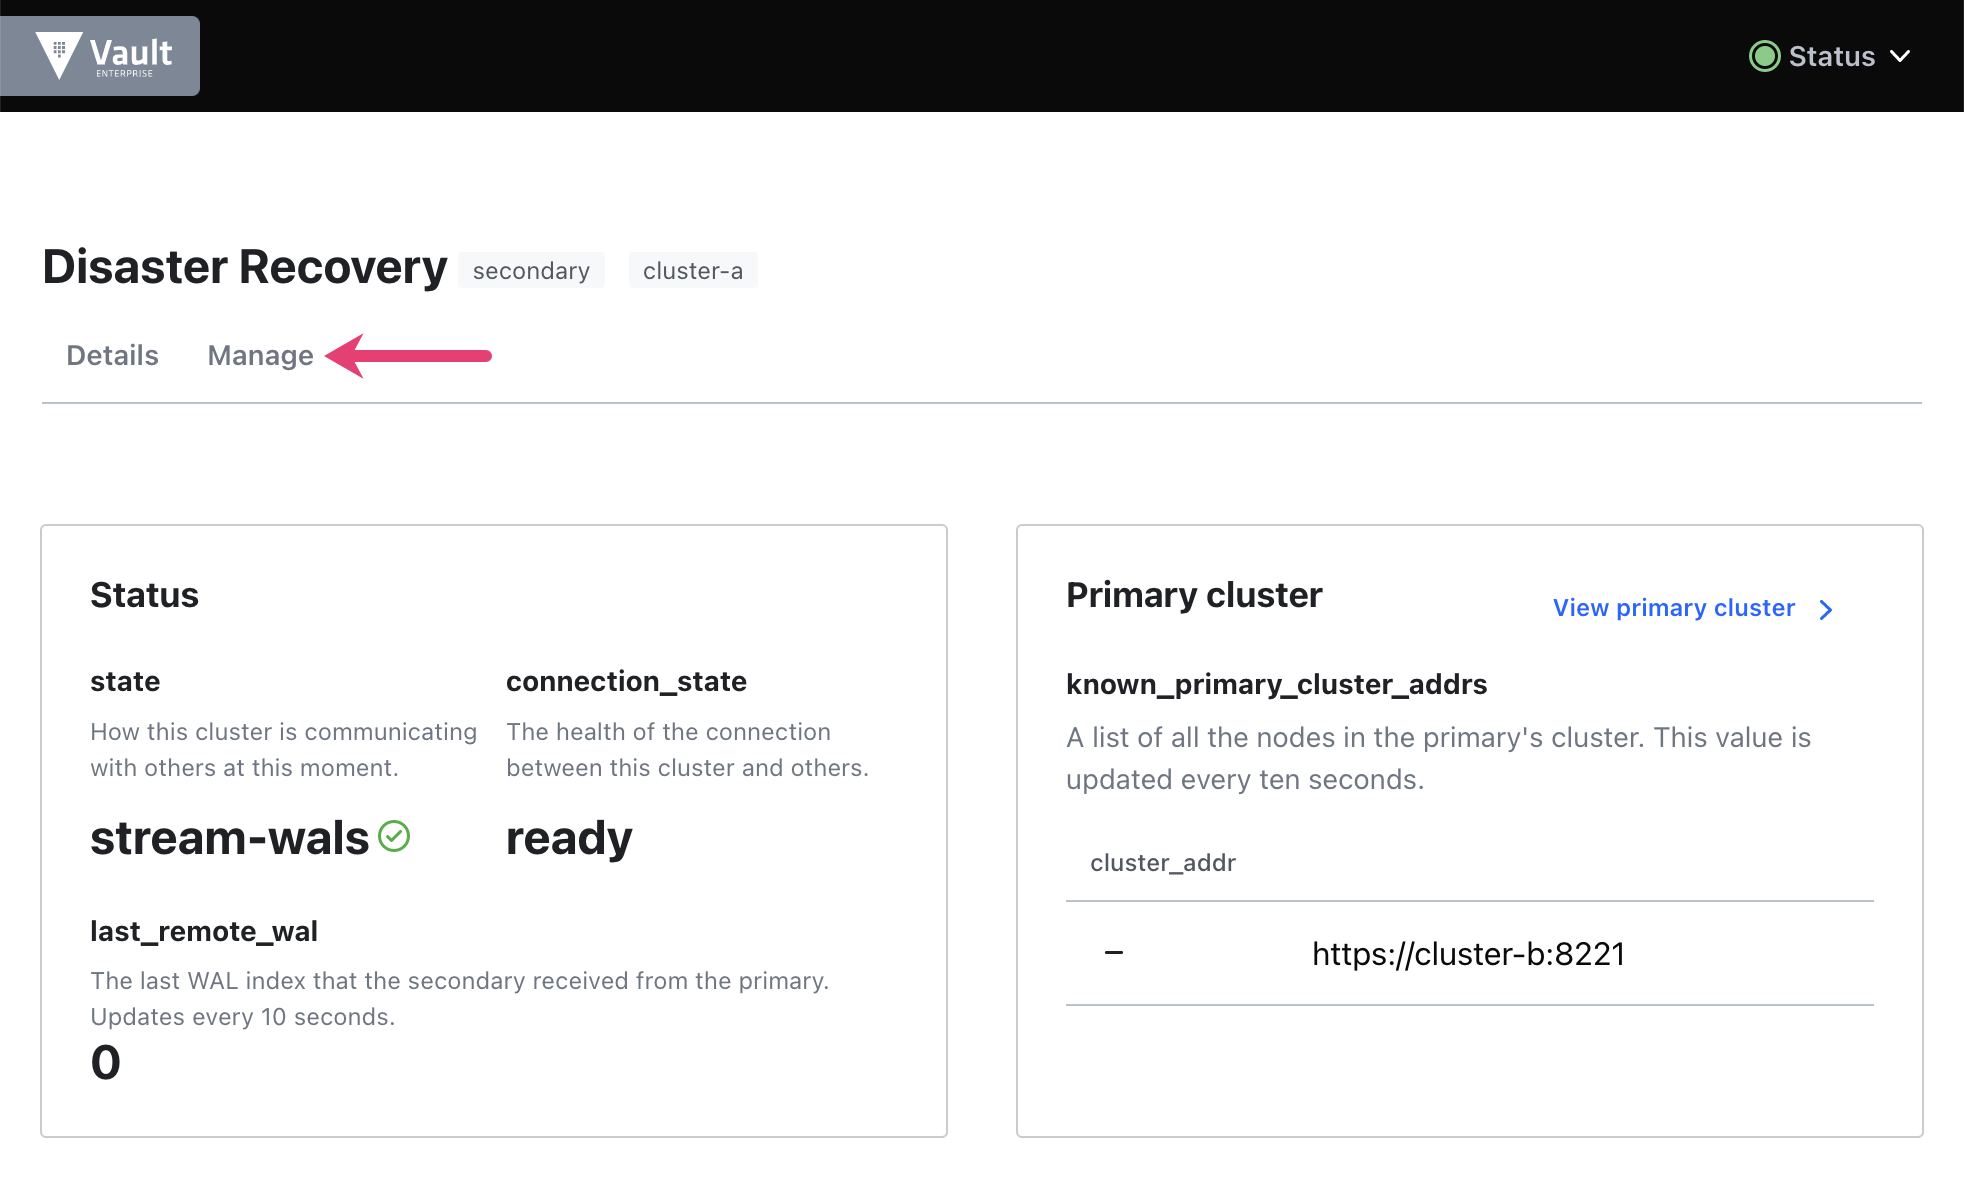
$ vault read -address=http://127.0.0.1:8220 sys/replication/dr/status
Key                            Value
---                            -----
cluster_id                     d8f8a096-c55e-d13f-0274-faadb011b0b0
connection_state               ready
known_primary_cluster_addrs    [https://cluster-a:8201]
last_reindex_epoch             1670263708
last_remote_wal                51
merkle_root                    842e9a56744da59fef266464a805432ca9fc4cd1
mode                           secondary
primaries                      [map[api_address:http://cluster-a:8200 cluster_address:https://cluster-a:8201 connection_status:connected last_heartbeat:2022-12-05T18:10:13Z]]
primary_cluster_addr           https://cluster-a:8201
secondary_id                   cluster-b
state
The replication state on cluster A is running and its mode is primary. On cluster B, the state is stream-wals and the mode is secondary. This detail in combination with matching last_wal and last_remote_wal values confirms that the secret you created replicated to the secondary, and that the clusters synced.
You are now ready to continue with the failover and failback scenario.
Failover scenario
The goal of this section is to failover the current primary cluster A, and then promote the current secondary cluster B to become the new primary cluster.
You will also validate access to your secret data from the newly promoted primary, and update cluster A, setting cluster B as its new primary.
Take a snapshot
Before proceeding with any failover or failback, it's critical that you have a recent backup of the Vault data. Since the scenario environment uses Vault servers with Integrated Storage, you can take a snapshot of the cluster A Vault data, and write it to cluster-a/vault-cluster-a-snapshot.snap as a backup.
Export a VAULT_ADDR environment variable to communicate with the cluster A Vault.
$ export VAULT_ADDR=http://127.0.0.1:8200Take a snapshot of the cluster A data, and write it to
cluster-a/vault-cluster-a-snapshot.snap.$ vault operator raft snapshot save cluster-a/vault-cluster-a-snapshot.snapThis command produces no output.
Confirm that the snapshot file is present in the
cluster-adirectory:$ ls -lh cluster-a/vault-cluster-a-snapshot.snap Permissions Size User Date Modified Name .rw-r--r-- 97k you 15 Nov 09:58 cluster-a/vault-cluster-a-snapshot.snap
After confirming replication status and taking a snapshot of Vault data, you are ready to begin the failover workflow.
Batch disaster recovery operation token strategy
To promote a DR secondary cluster to be the new primary, a DR operation token is typically needed. However, the process of generating a DR operation token requires a threshold of unseal keys or recovery keys if Vault uses auto unseal. This can be troublesome since a cluster failure is usually caused by unexpected incident. You find difficulty in coordinating amongst the key holders to generate the DR operation token in a timely fashion.
As of Vault 1.4, you can create a batch DR operation token that you can use to promote and demote clusters as needed. This is a strategic operation that the Vault administrator can use to prepare for loss of the DR primary ahead of time. The batch DR operation token also has the advantage of being usable from the primary or secondary more than once.
Export a VAULT_ADDR environment variable to communicate with the cluster A Vault.
$ export VAULT_ADDR=http://127.0.0.1:8200Create a policy named "dr-secondary-promotion" on cluster A allowing the
updatecapability for thesys/replication/dr/secondary/promotepath. In addition, you can add a policy for thesys/replication/dr/secondary/update-primarypath so that you can use the same DR operation token to update the primary cluster that the secondary cluster points to.$ VAULT_TOKEN=$CLUSTER_A_ROOT_TOKEN vault policy write \ dr-secondary-promotion - <<EOF path "sys/replication/dr/secondary/promote" { capabilities = [ "update" ] } # To update the primary to connect path "sys/replication/dr/secondary/update-primary" { capabilities = [ "update" ] } # Only if using integrated storage (raft) as the storage backend # To read the current autopilot status path "sys/storage/raft/autopilot/state" { capabilities = [ "update" , "read" ] } EOFSuccessful example output:
Success! Uploaded policy: dr-secondary-promotionVerify that you enabled the "dr-secondary-promotion" policy.
$ VAULT_TOKEN=$CLUSTER_A_ROOT_TOKEN vault policy list

 default
 dr-secondary-promotion
 root
Create a token role named "failover-handler" with the
dr-secondary-promotionpolicy attached, and specify its type asbatch. You cannot renew a batch token, so set therenewableparameter value tofalse. Also, set theorphanparameter totrue.$ VAULT_TOKEN=$CLUSTER_A_ROOT_TOKEN vault write auth/token/roles/failover-handler \ allowed_policies=dr-secondary-promotion \ orphan=true \ renewable=false \ token_type=batchCreate a token for role, "failover-handler" with time-to-live (TTL) set to 8 hours.
$ VAULT_TOKEN=$CLUSTER_A_ROOT_TOKEN vault token create \
   -role=failover-handler -ttl=8h
Successful example output:
Key                  Value
---                  -----
token                hvb.AAAAAQJElHcwQOSpT6KSHtgZQWvBeU_Kki7py77MZT5Sv-LKpISO47Sgrd7kUBnggKJwM66GwjaT0fWx2oaEfyLz7Sg2X_xRpZ52Jn6tBhz6Al5C-MBIFY-p2jbH6xhIdgdszRzGHaMuKuVOb5ACswZ6enNqoDLB81CuEKalACCN-fwlT4fOohHWIFxg4fgIGcFGc0ff33
token_accessor       n/a
token_duration       8h
token_renewable      false
token_policies       ["default" "dr-secondary-promotion"]
identity_policies    []
policies             ["default" "dr-secondary-promotion"]
Export a token as the value of the CLUSTER_B_DR_OP_TOKEN environment variable.
$ export CLUSTER_B_DR_OP_TOKEN=$(VAULT_TOKEN=$CLUSTER_A_ROOT_TOKEN vault token create \
    -field=token -role=failover-handler -ttl=8h)
Securely store this batch token. If you need to promote the DR secondary cluster, you can use the batch DR operation token to perform the promotion. The batch token works on both primary and secondary clusters.
This eliminates the need for the unseal keys (or recovery keys if using auto unseal).
Generate a disaster recovery operation token
If you are on a version of Vault before 1.4.0, you need to create a DR operation token to perform this task.
The following process is similar to Generating a Root Token (via CLI). You must share a number of unseal keys (or recovery keys for auto unseal) equal to the threshold value. Vault generated the unseal and recovery keys when you initialized cluster A.
Perform this operation on the DR secondary cluster (Cluster B).
Start the DR operation token generation process.
$ vault operator generate-root -dr-token -initExample expected output:
A One-Time-Password has been generated for you and is shown in the OTP field. You will need this value to decode the resulting root token, so keep it safe. Nonce b4738404-0a11-63aa-2cb6-e77dfd96946f Started true Progress 0/3 Complete false OTP EYHAkPQYvvz93e8iI3pg1maQ OTP Length 24Each unseal key holder must execute the following operation with their key share to generate a DR operation token.
Example:
$ vault operator generate-root -dr-token \
    -nonce=b4738404-0a11-63aa-2cb6-e77dfd96946f \
    UNSEAL_KEY_OF_ORIGINAL_DR_PRIMARY_1

Nonce            b4738404-0a11-63aa-2cb6-e77dfd96946f
Started          true
Progress         1/3
Complete         false
Once you reach the threshold, the output displays an encoded DR operation token.
Example:
$ vault operator generate-root -dr-token \
    -nonce=b4738404-0a11-63aa-2cb6-e77dfd96946f \
    UNSEAL_KEY_OF_ORIGINAL_DR_PRIMARY_3

Nonce            b4738404-0a11-63aa-2cb6-e77dfd96946f
Started          true
Progress         3/3
Complete         true
Encoded Token    djw4BR1iaDUFIBxaAwpiCC1YGhQHHDMf
Decode the generated DR operation token (
Encoded Token).Example:
$ vault operator generate-root -dr-token \
     -decode="djw4BR1iaDUFIBxaAwpiCC1YGhQHHDMf" \
     -otp="EYHAkPQYvvz93e8iI3pg1maQ"

hvs.5xsAyncmt1OPEHhMFPMKcYAG
Export the token as the value of the CLUSTER_B_DR_OP_TOKEN environment variable.
$ export CLUSTER_B_DR_OP_TOKEN=hvs.5xsAyncmt1OPEHhMFPMKcYAG


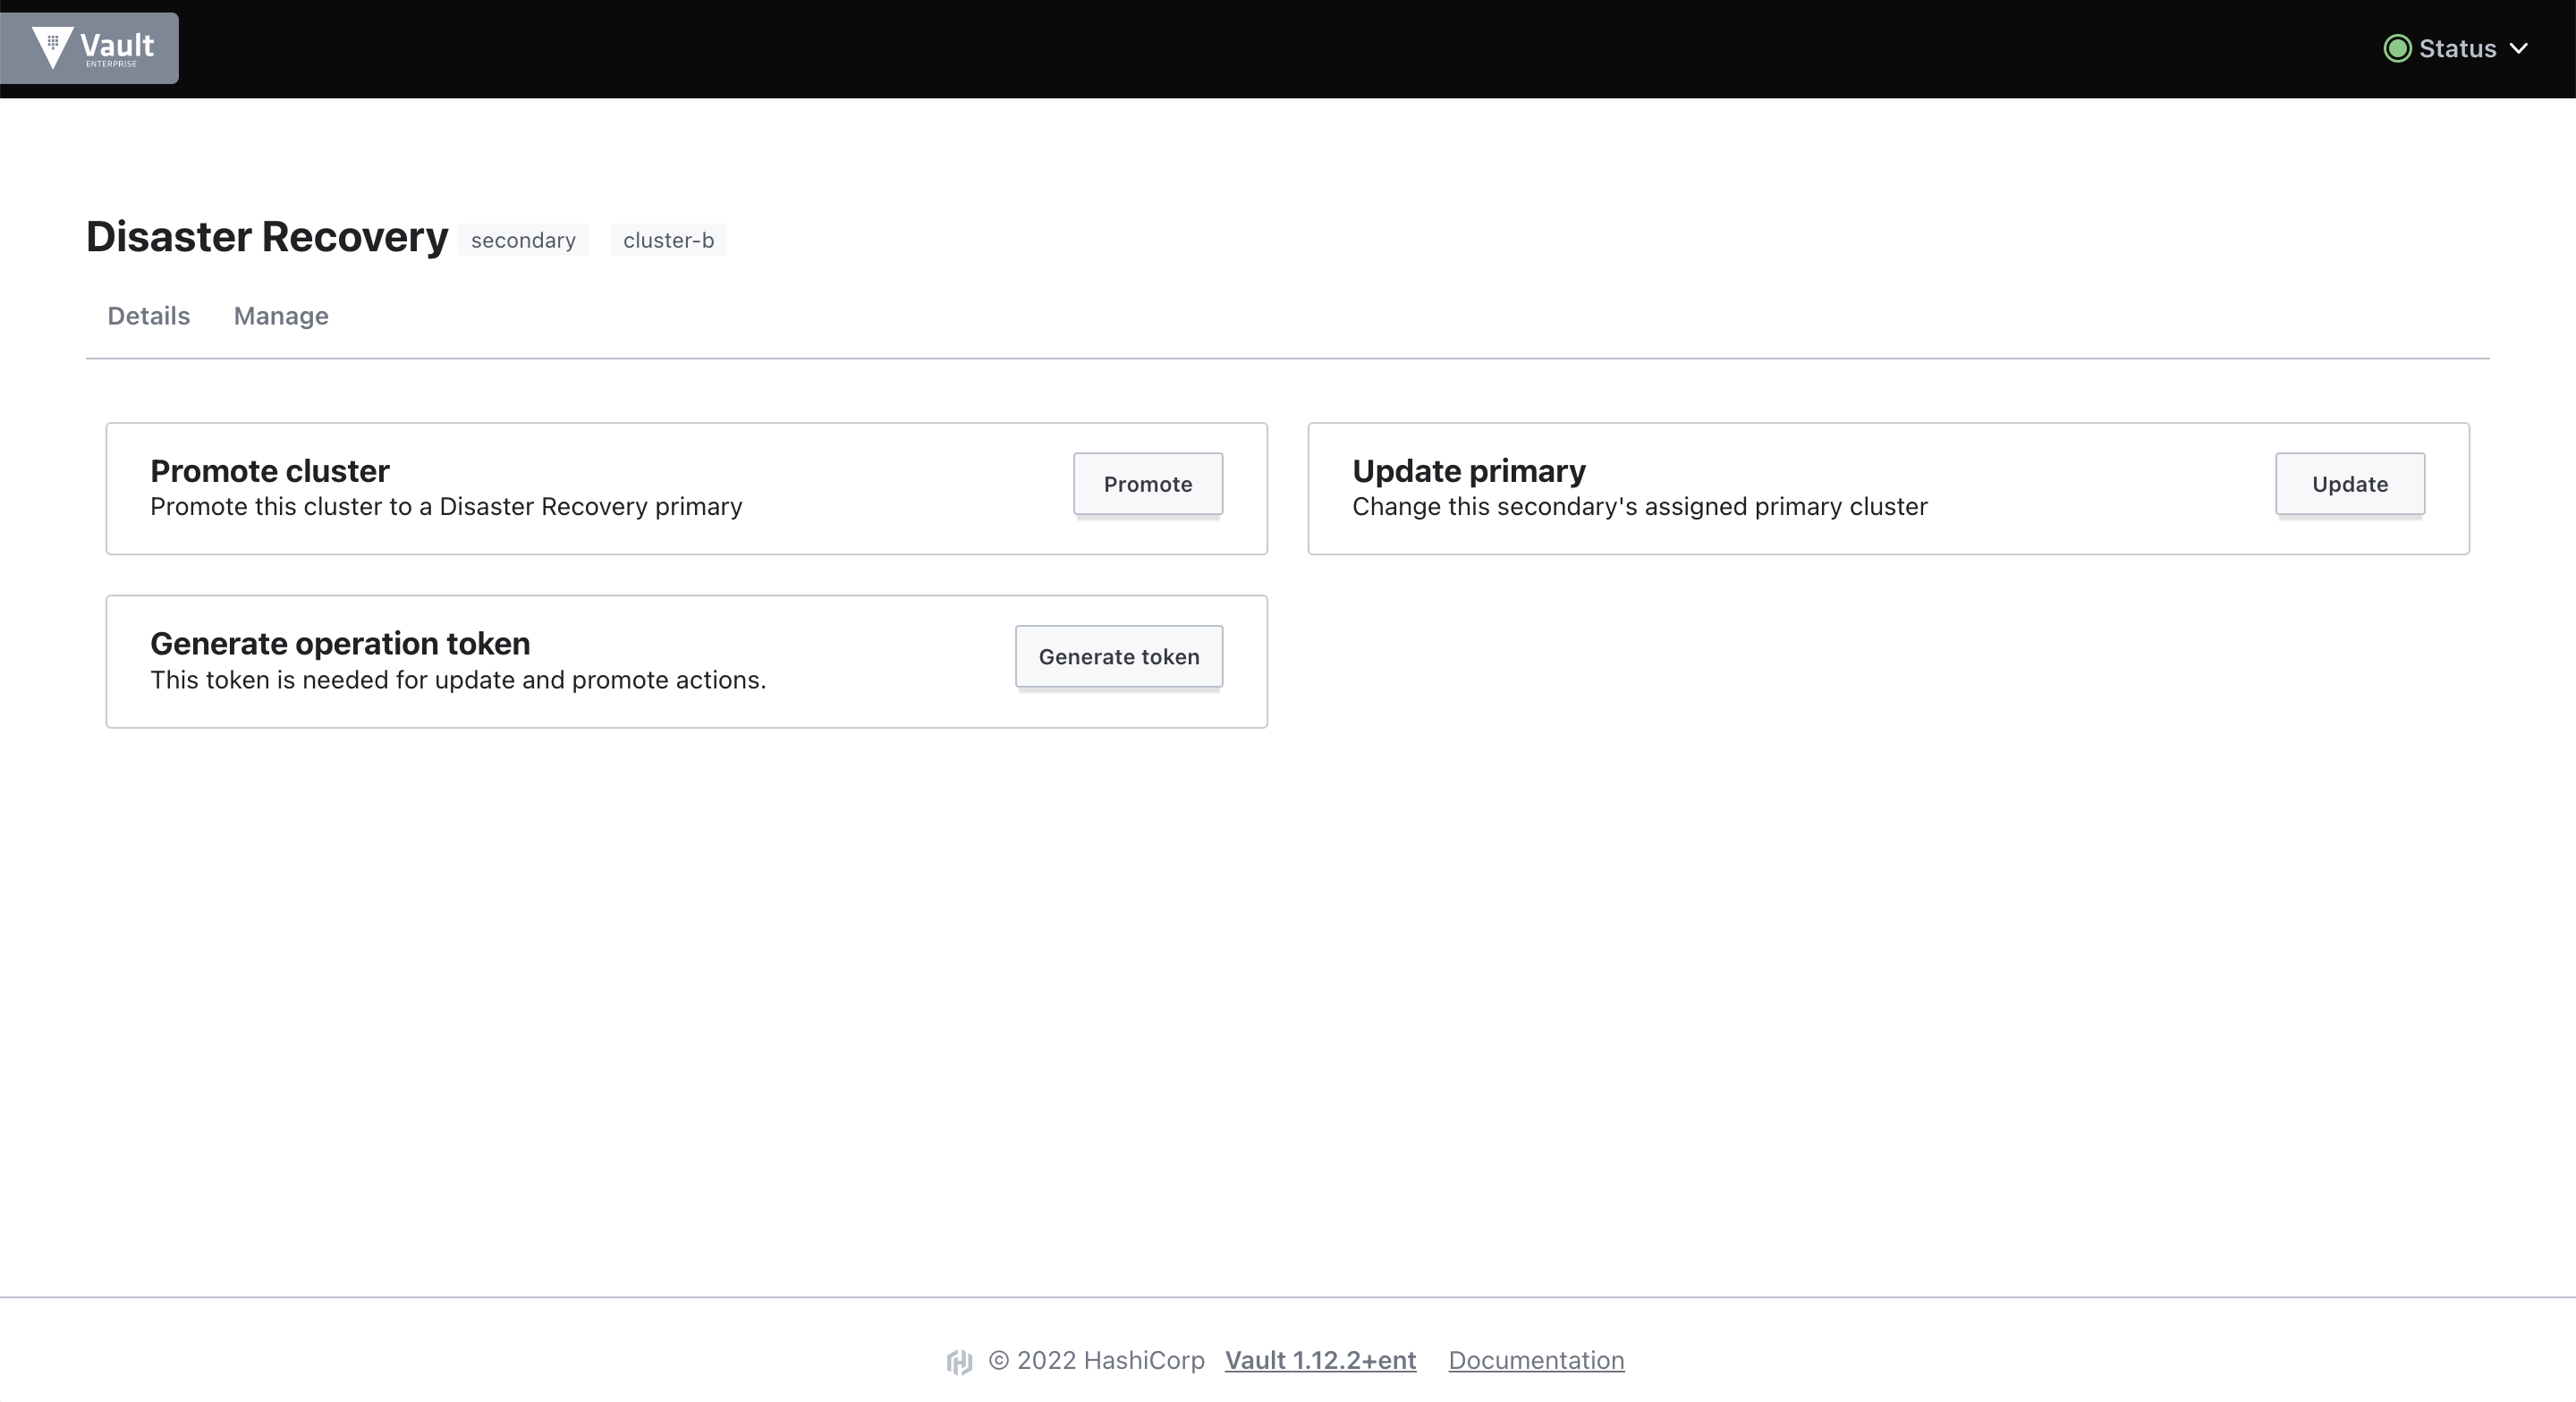
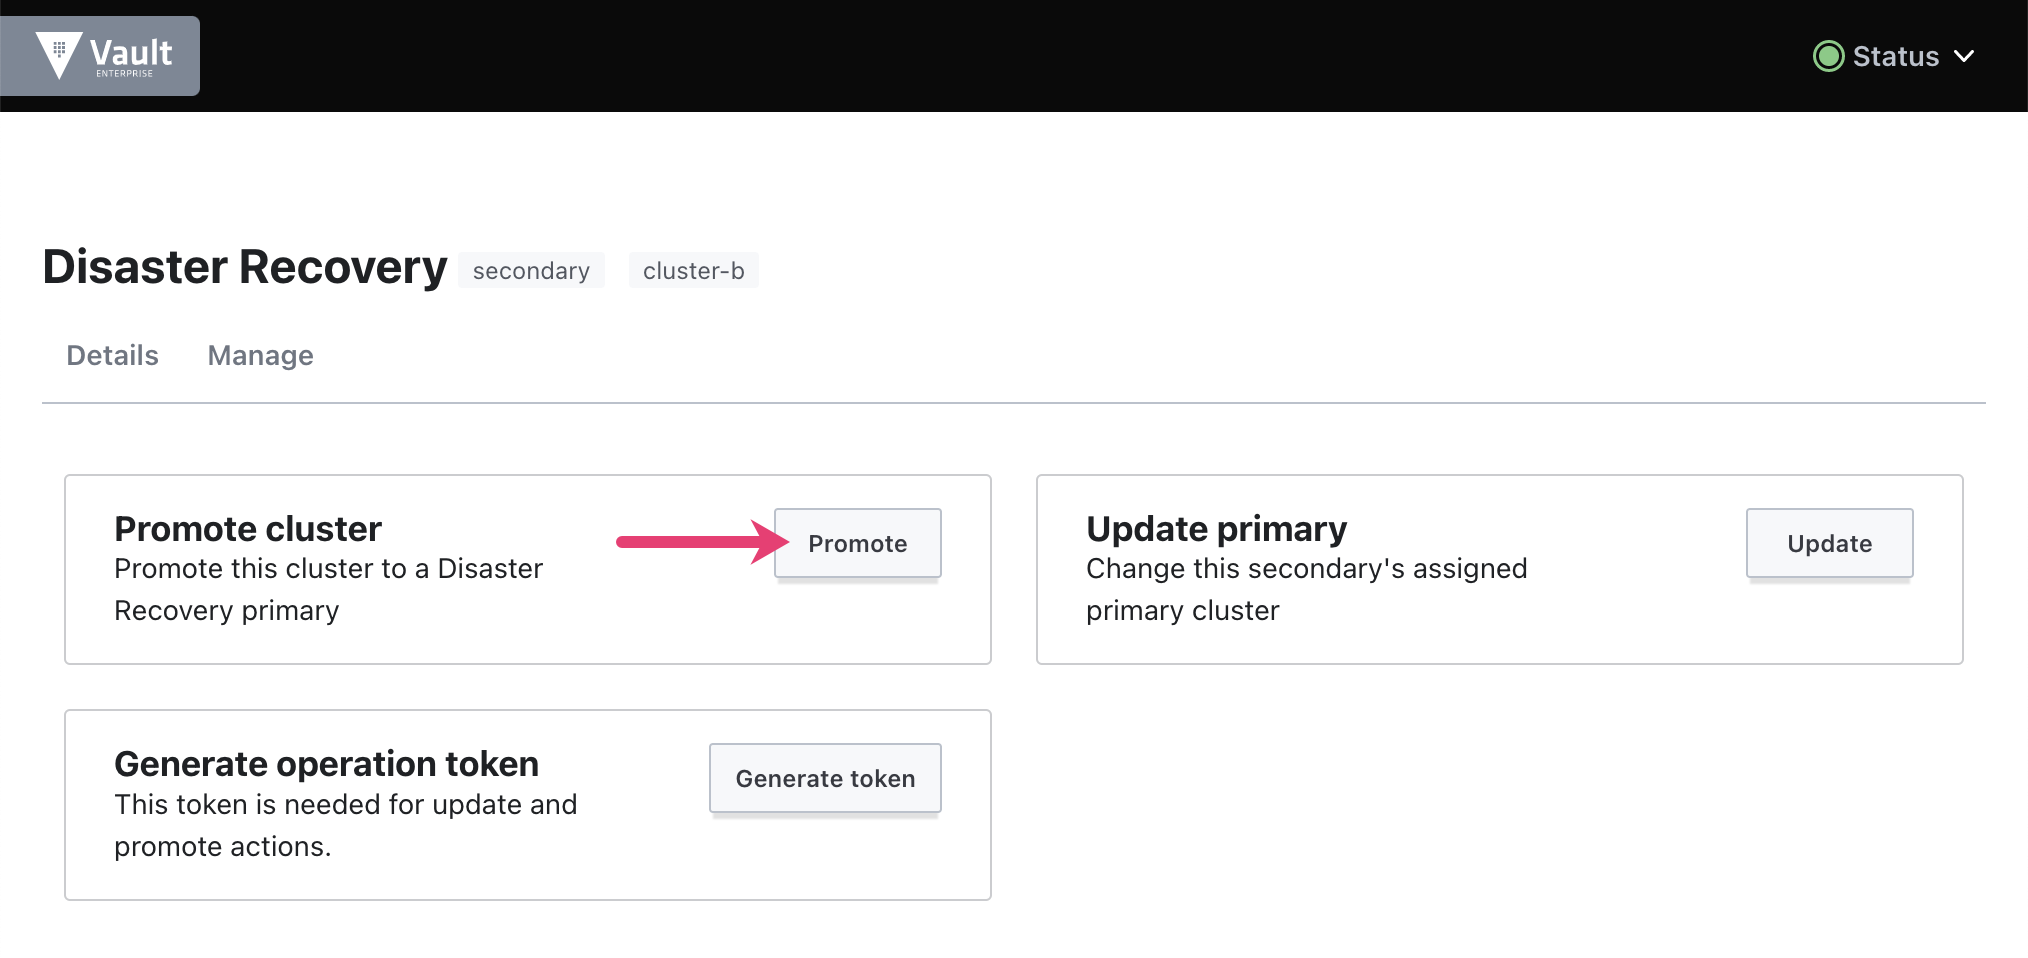
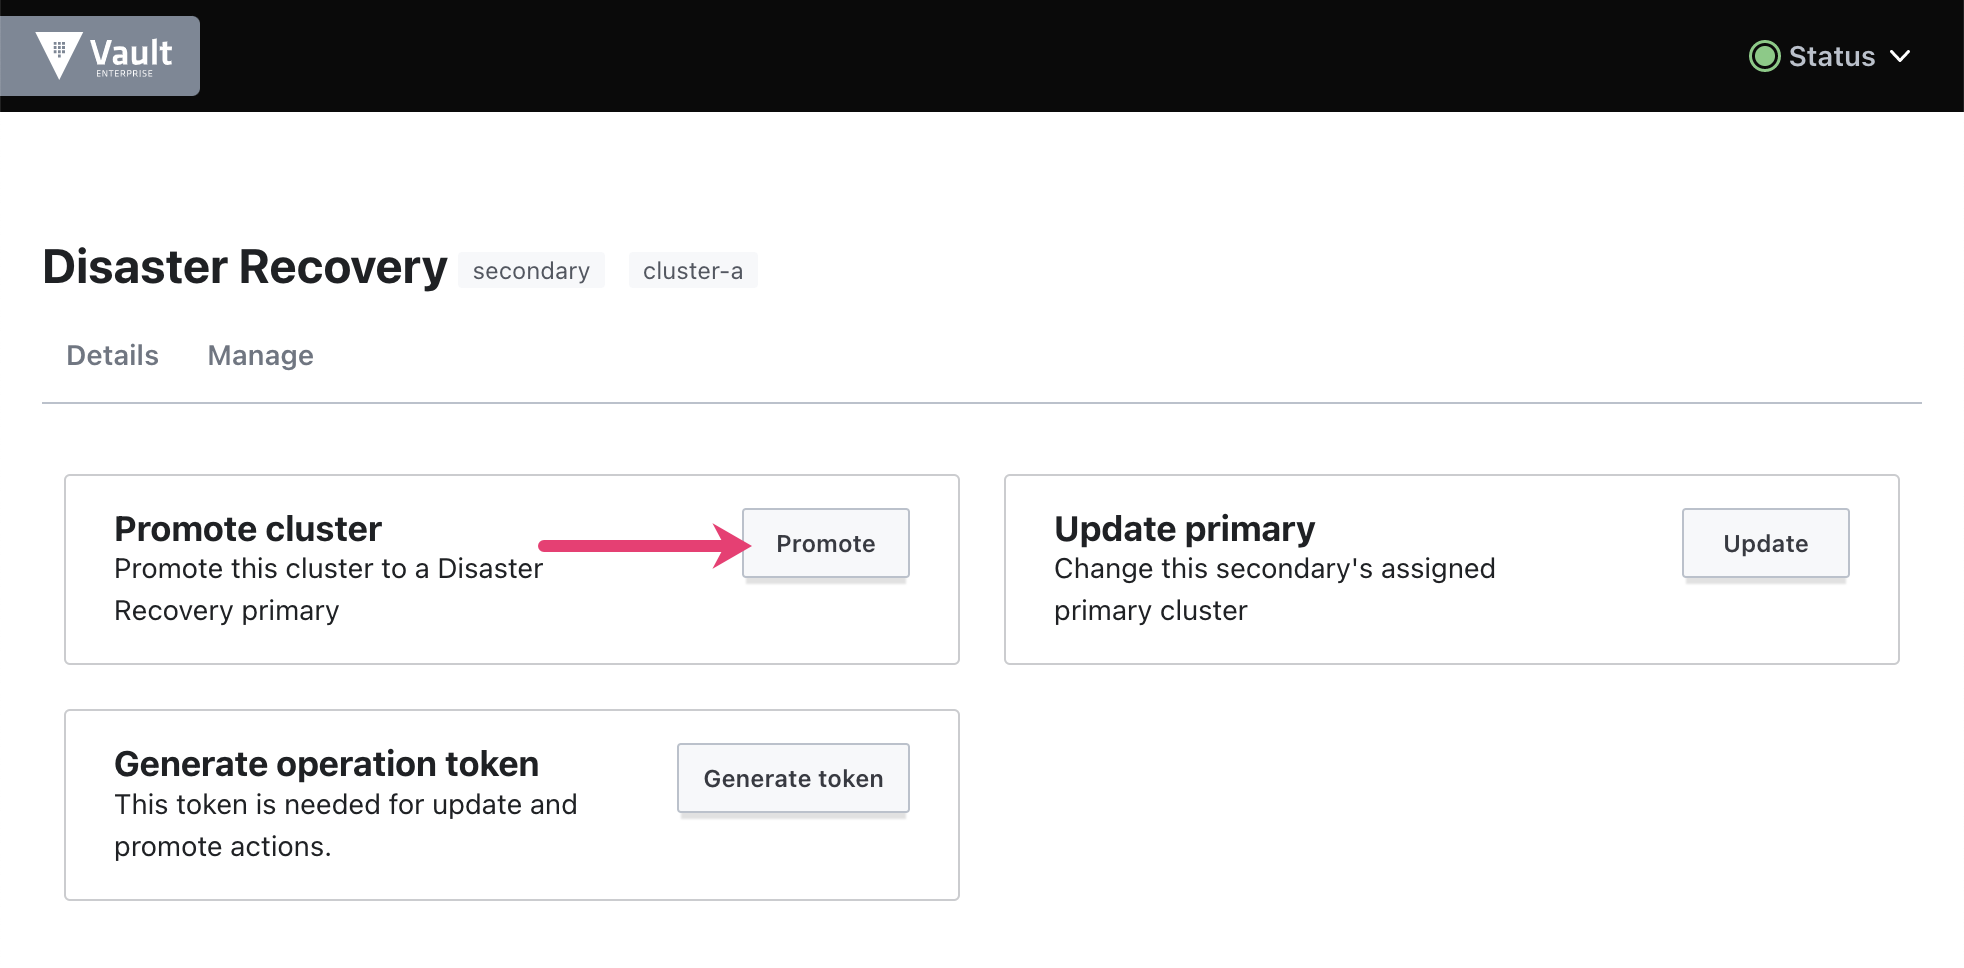
Promote cluster B to primary status
The first step in this failover workflow is to promote cluster B as a primary.
While you can demote cluster A before promoting cluster B, in production DR scenarios you might instead promote cluster B before demoting cluster A due to unavailability of cluster A.
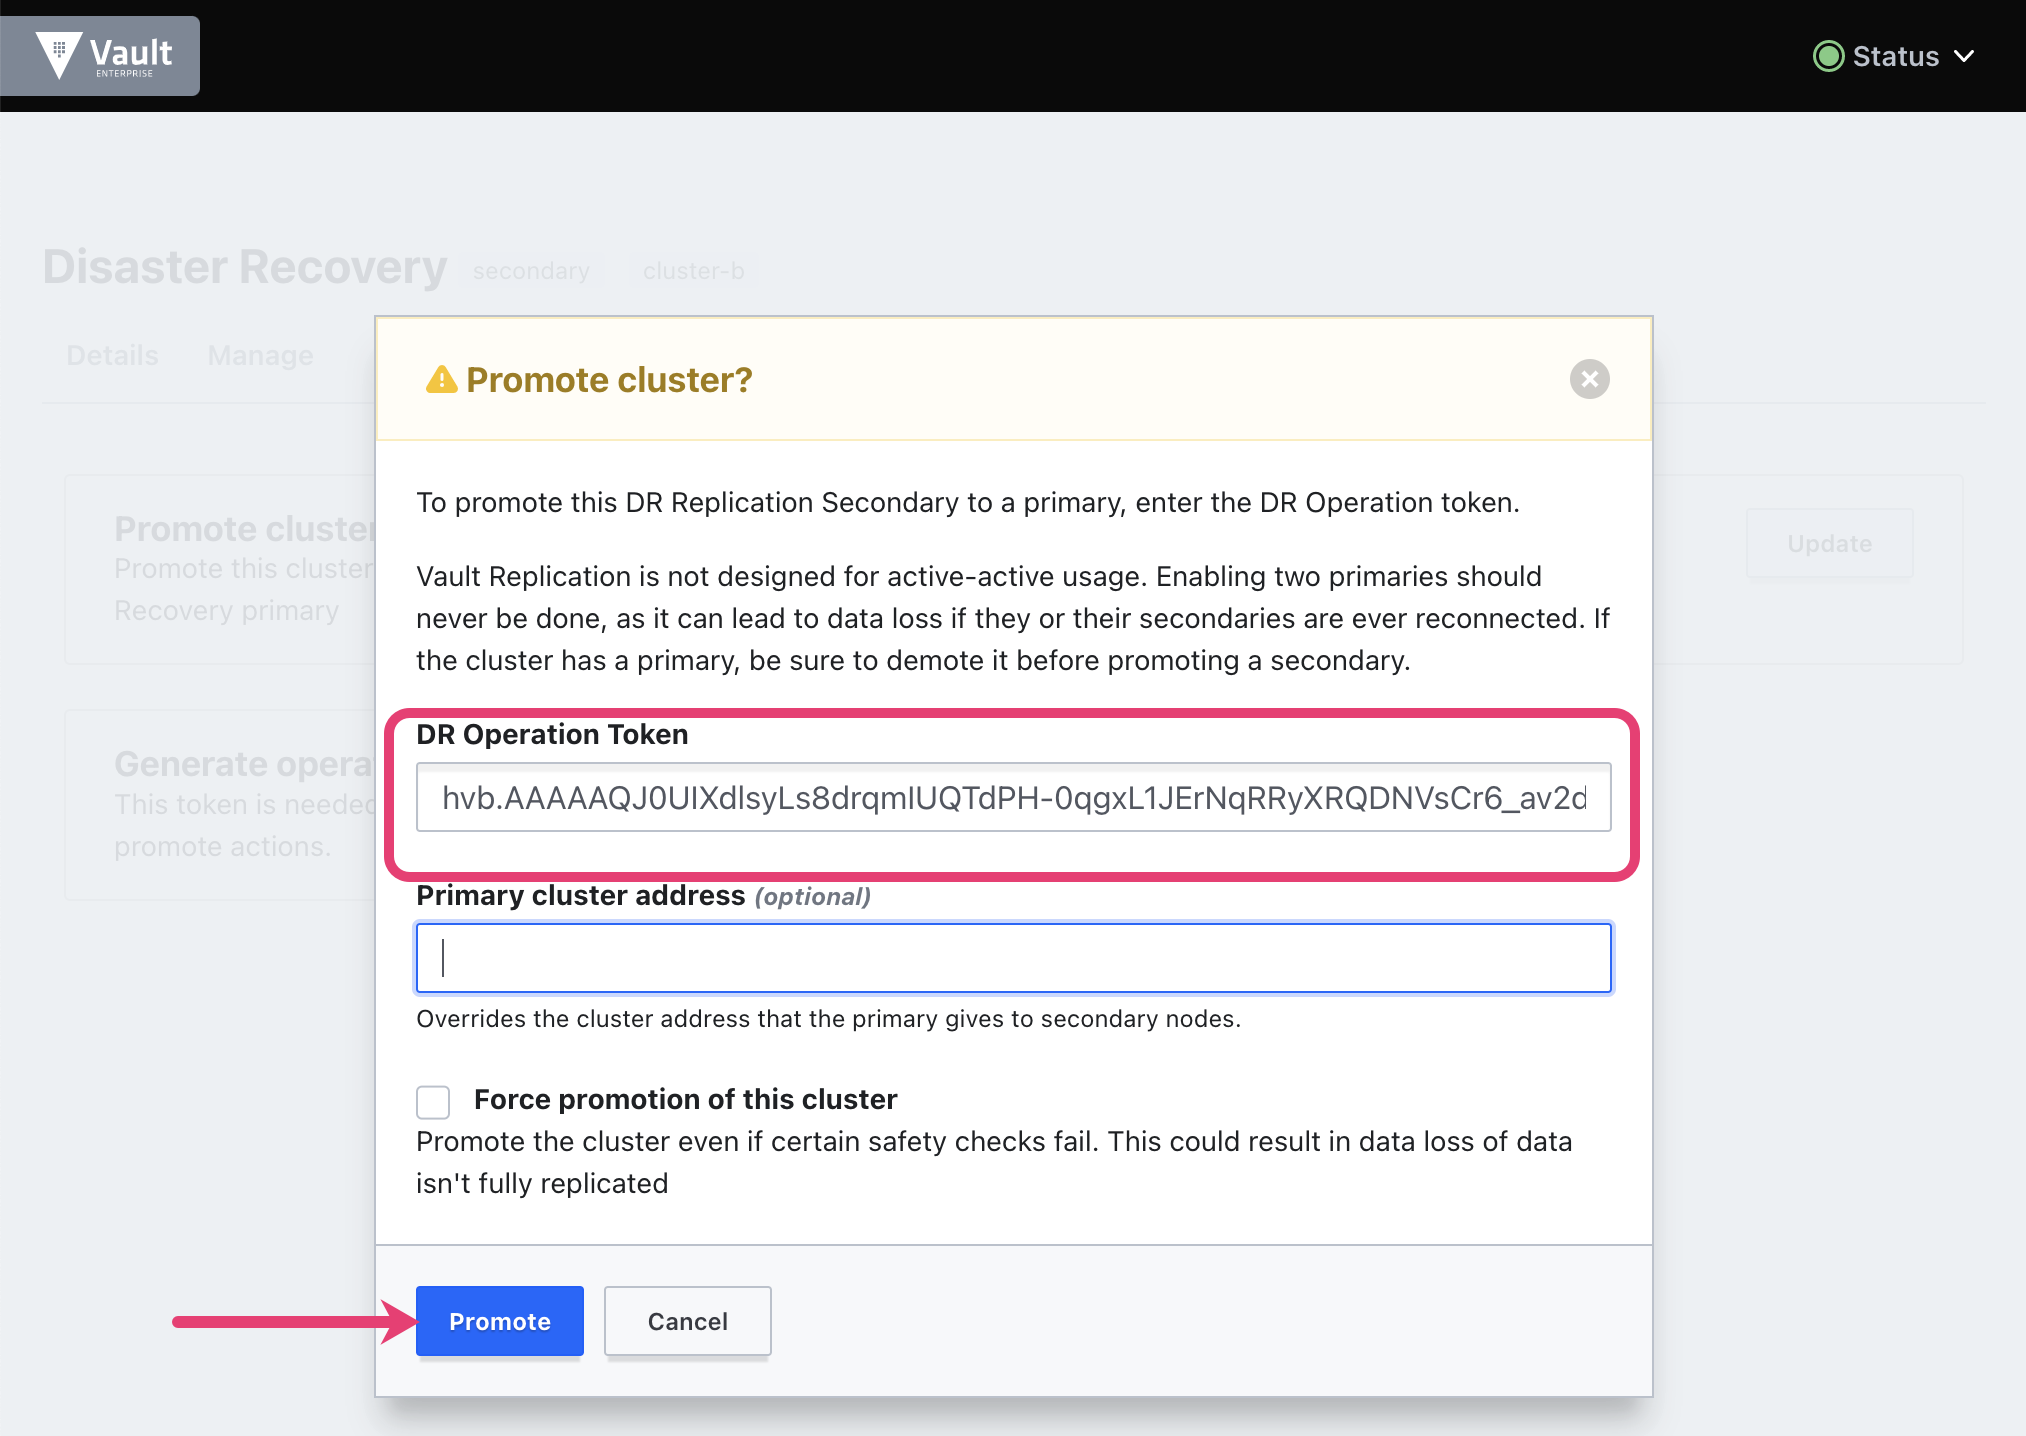
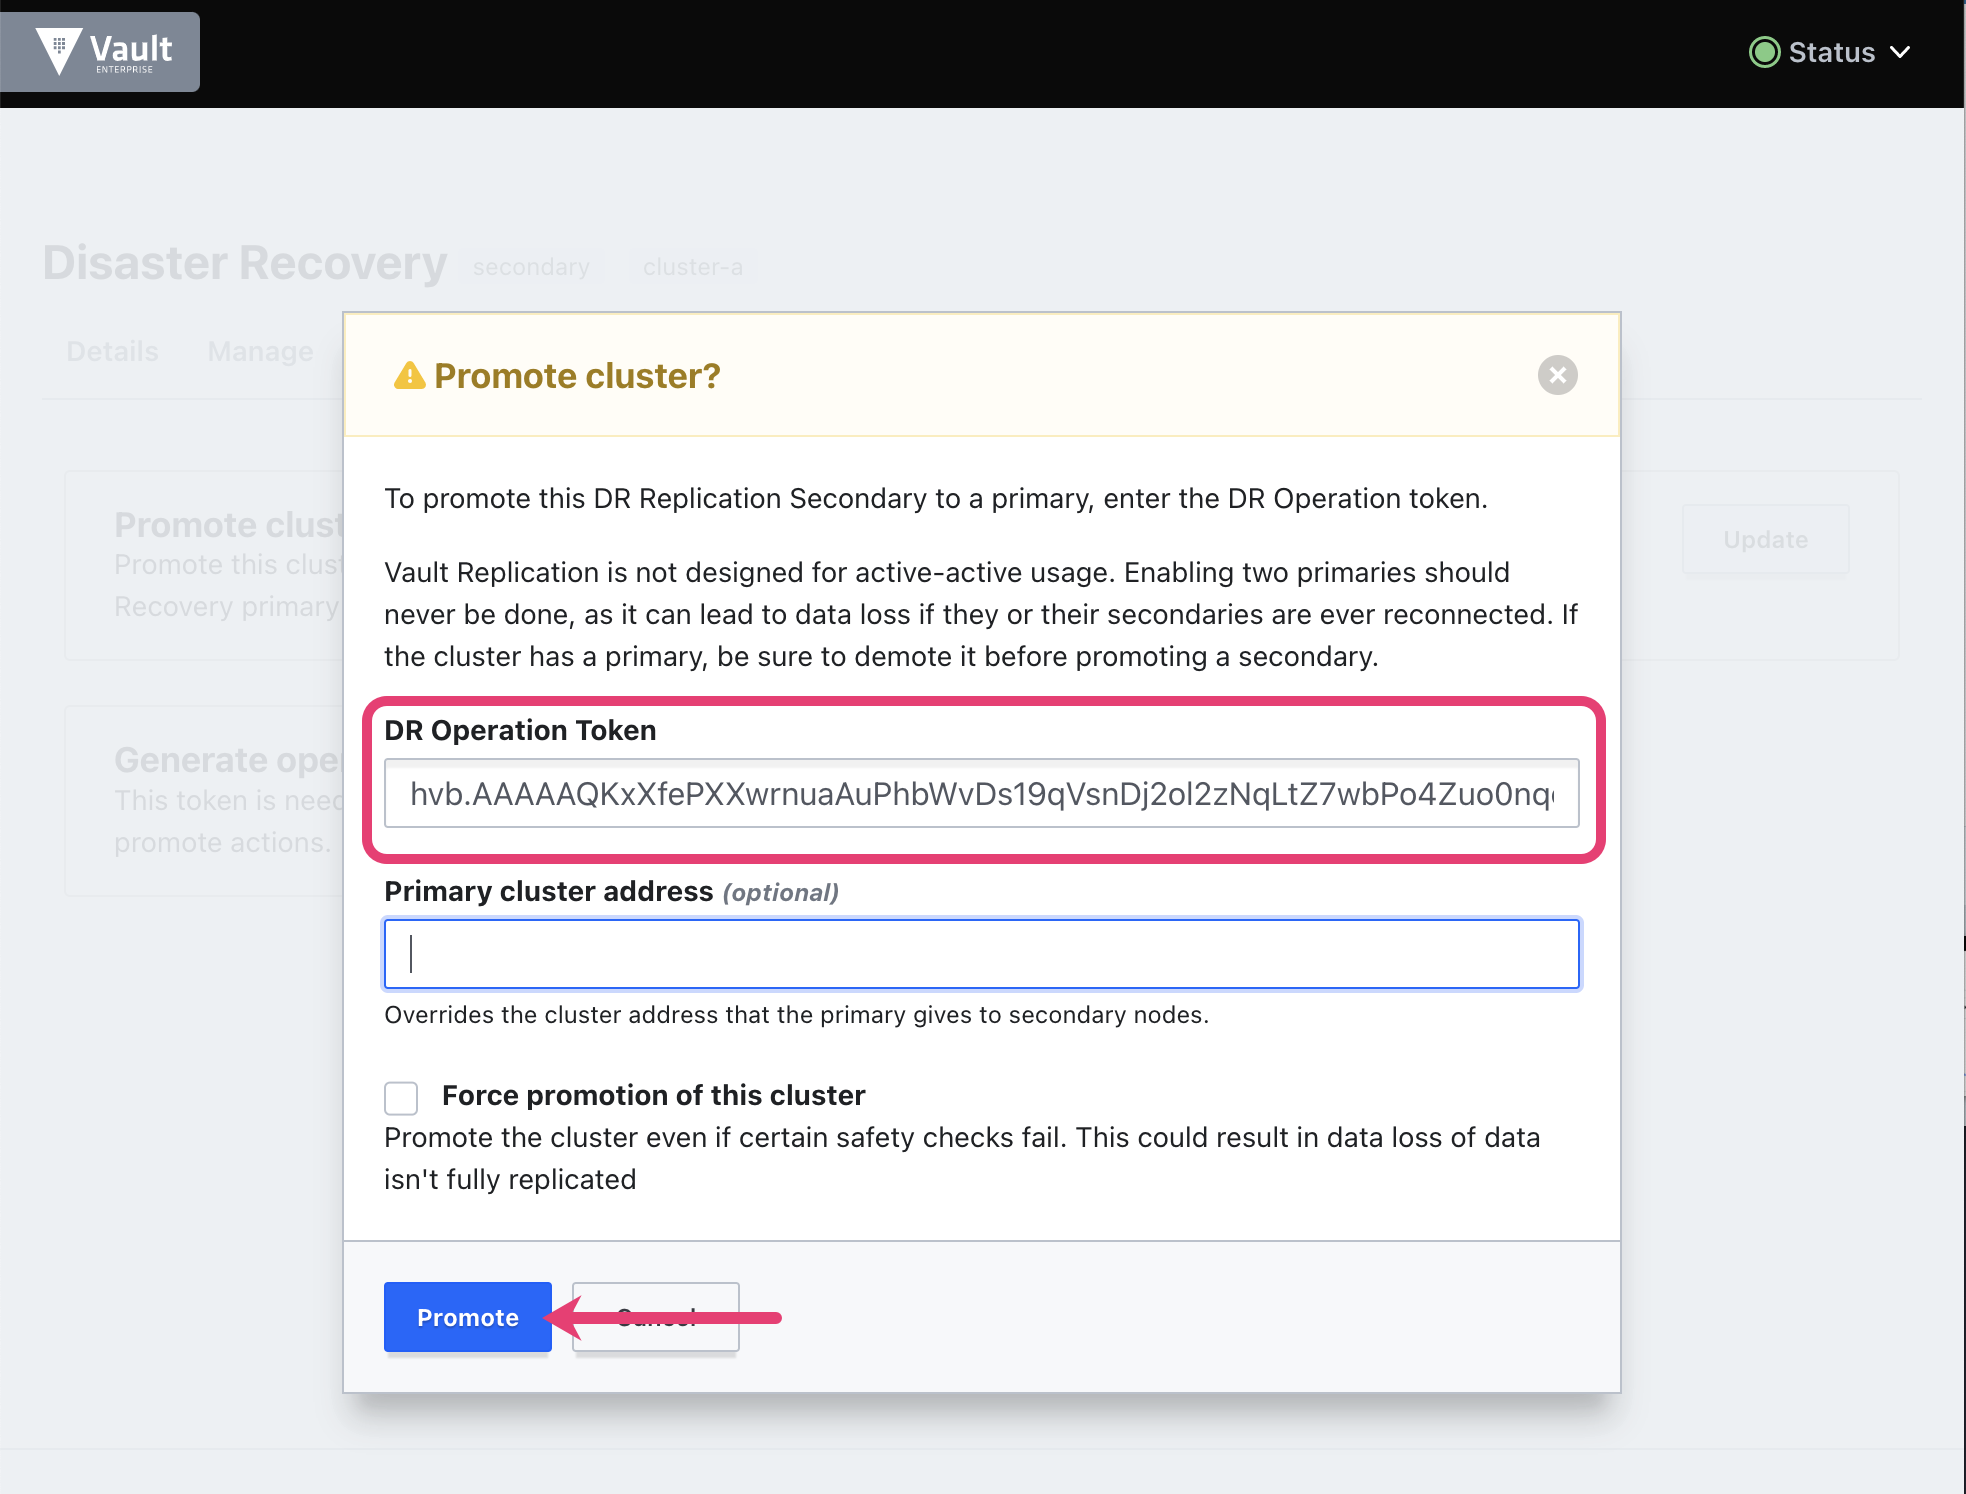
Promote cluster B to primary using the batch DR operation token.
$ VAULT_ADDR=http://127.0.0.1:8220 \
    vault write -f sys/replication/dr/secondary/promote \
    dr_operation_token=$CLUSTER_B_DR_OP_TOKEN
Successful example output:
WARNING! The following warnings were returned from Vault:

  * This cluster is being promoted to a replication primary. Vault will be
  unavailable for a brief period and will resume service shortly.
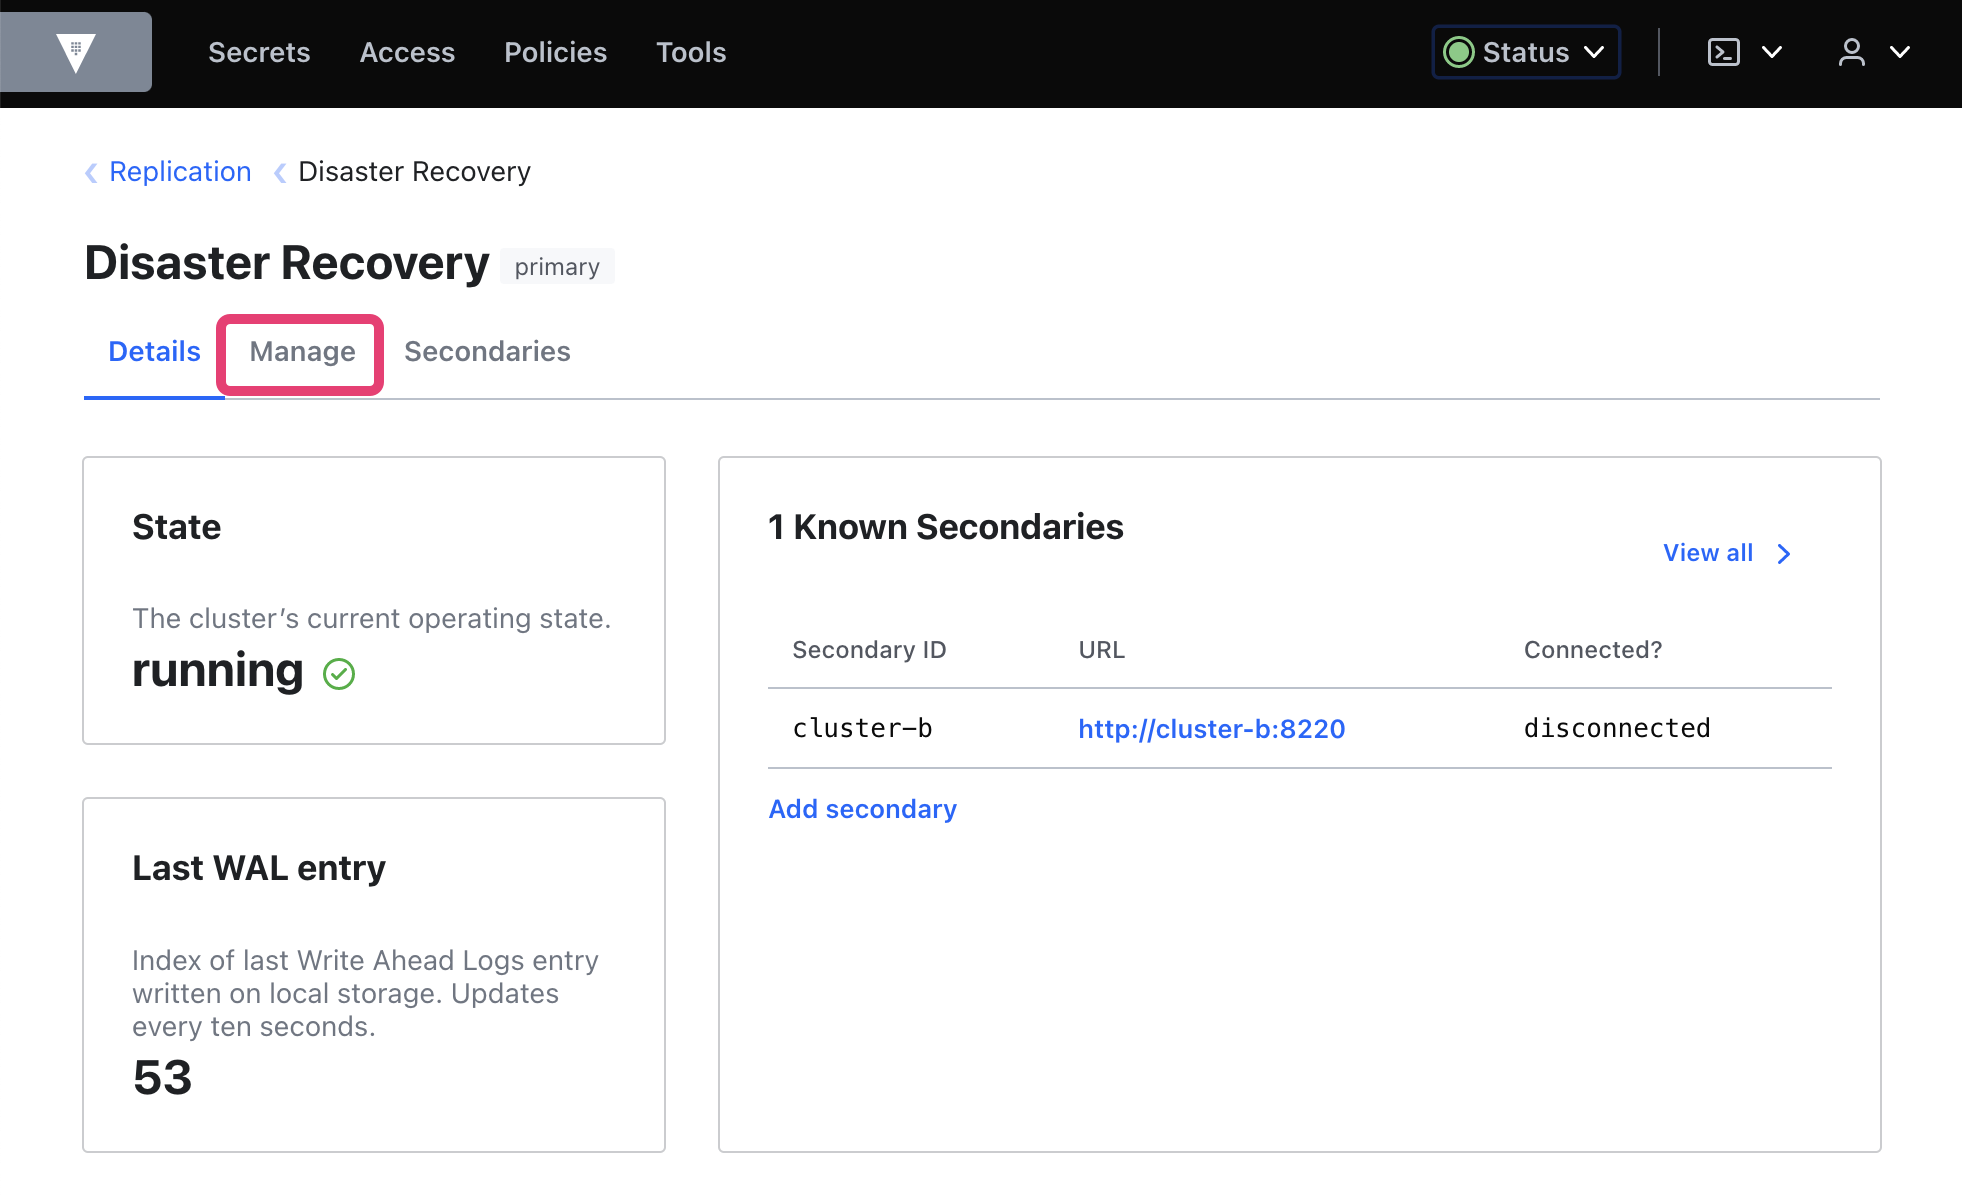
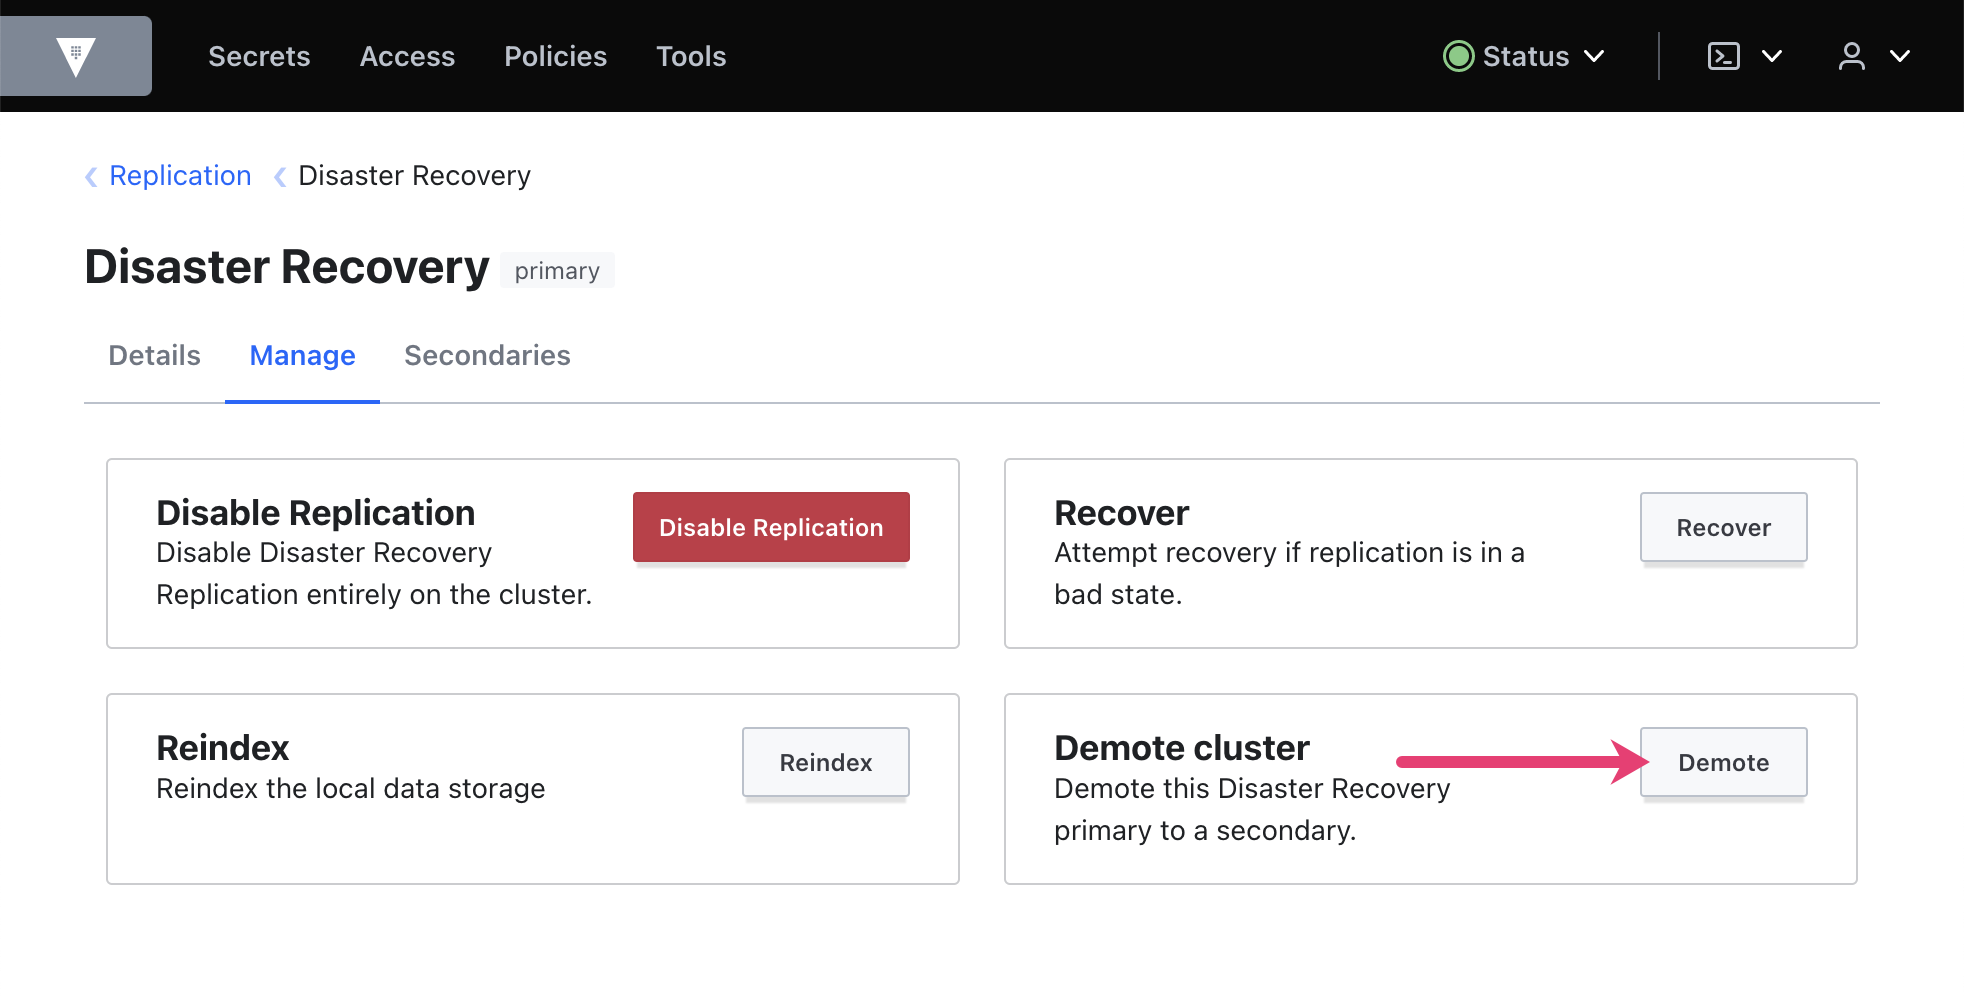
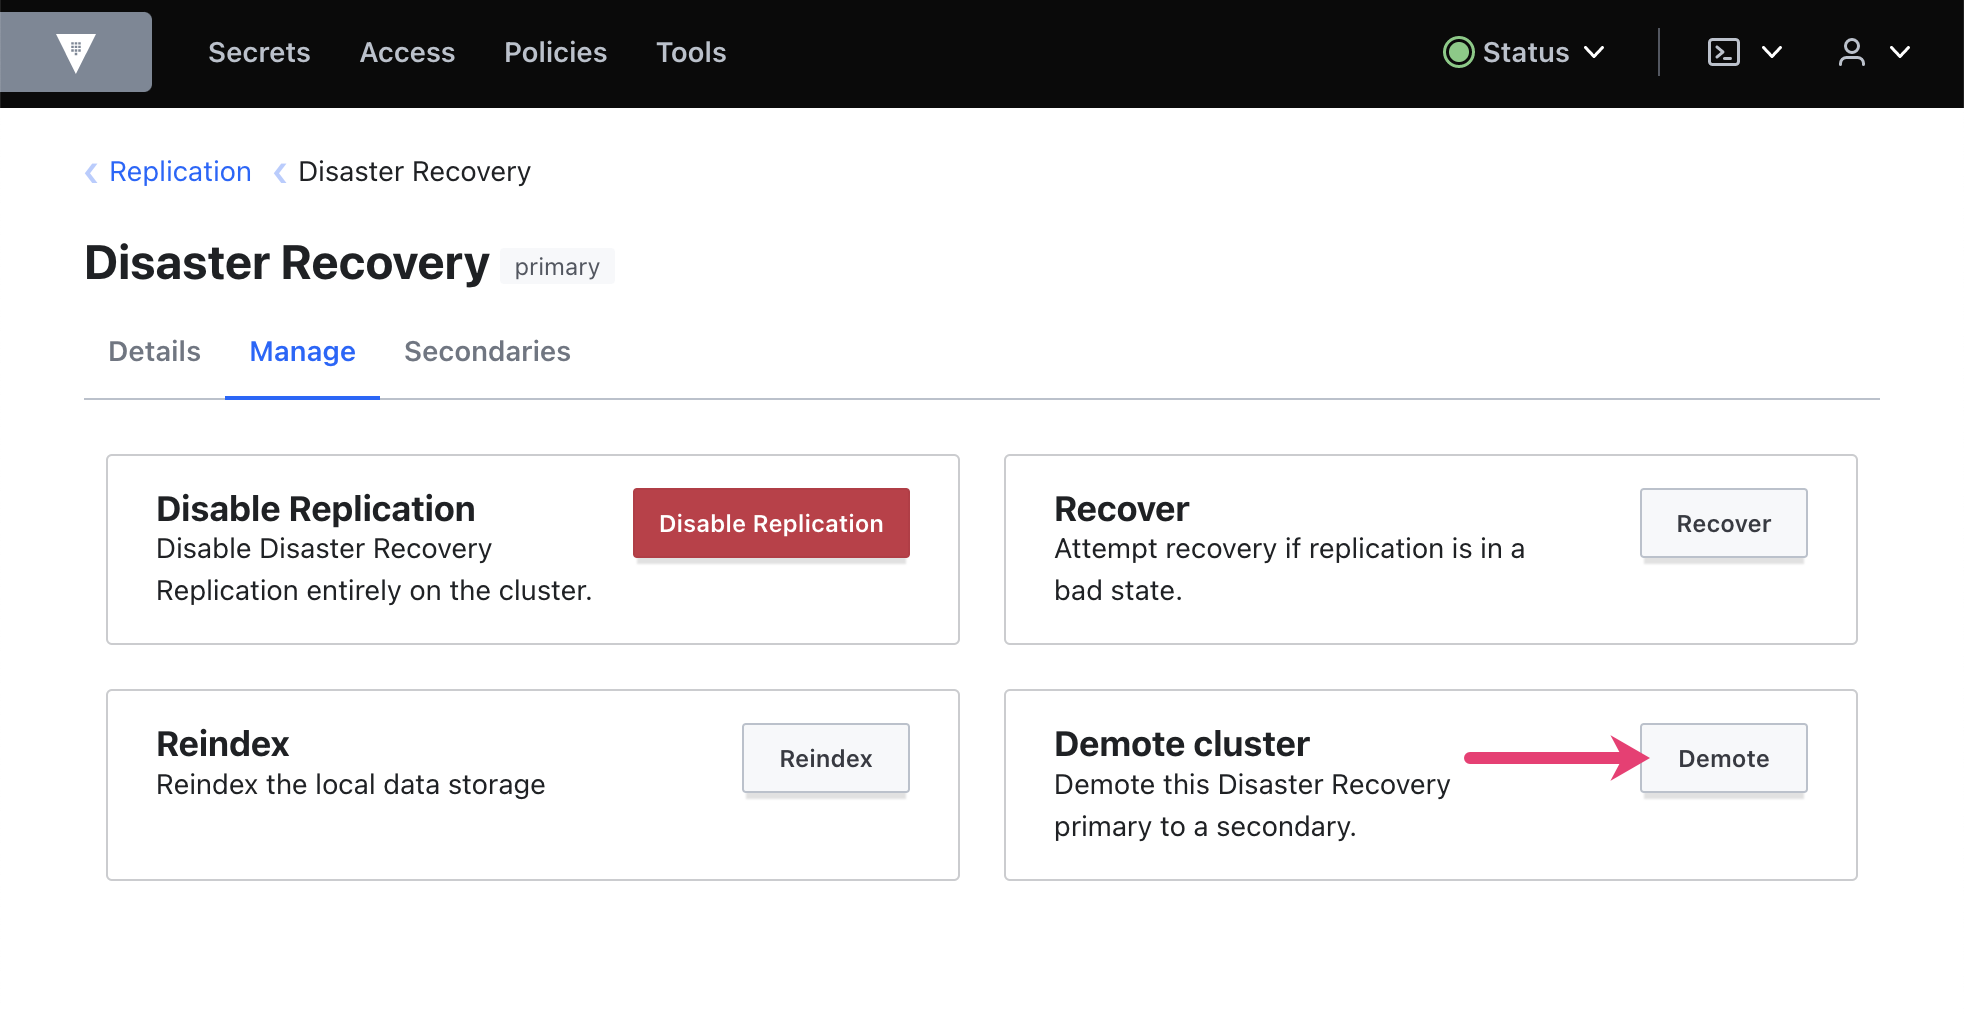
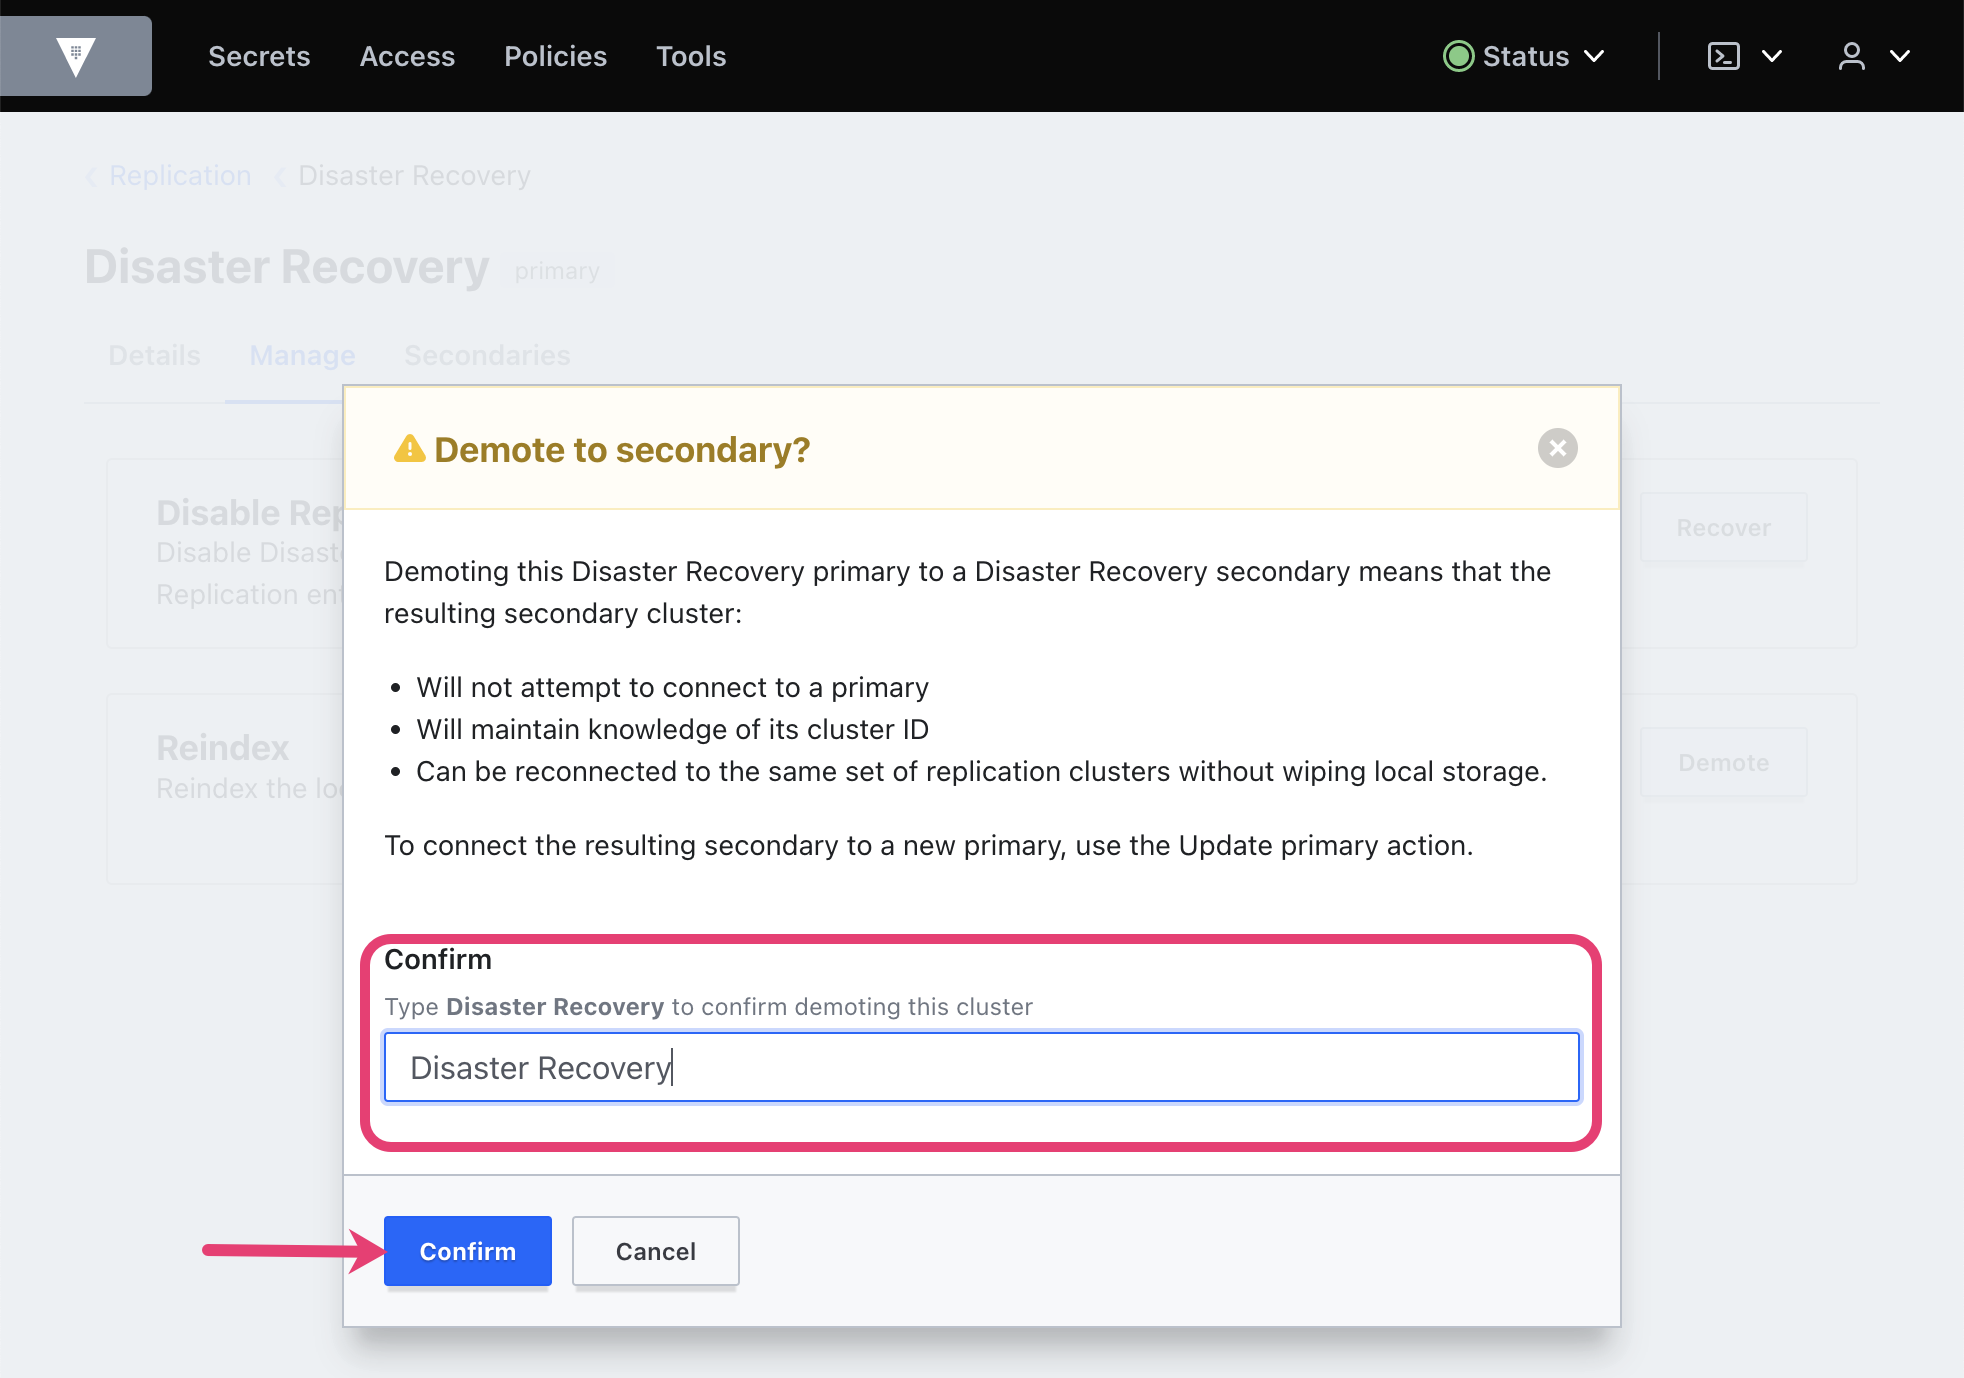
Demote cluster A to secondary status
Demote cluster A so that it's no longer the primary cluster.
Export a VAULT_ADDR environment variable to address cluster A.
$ export VAULT_ADDR=http://127.0.0.1:8200
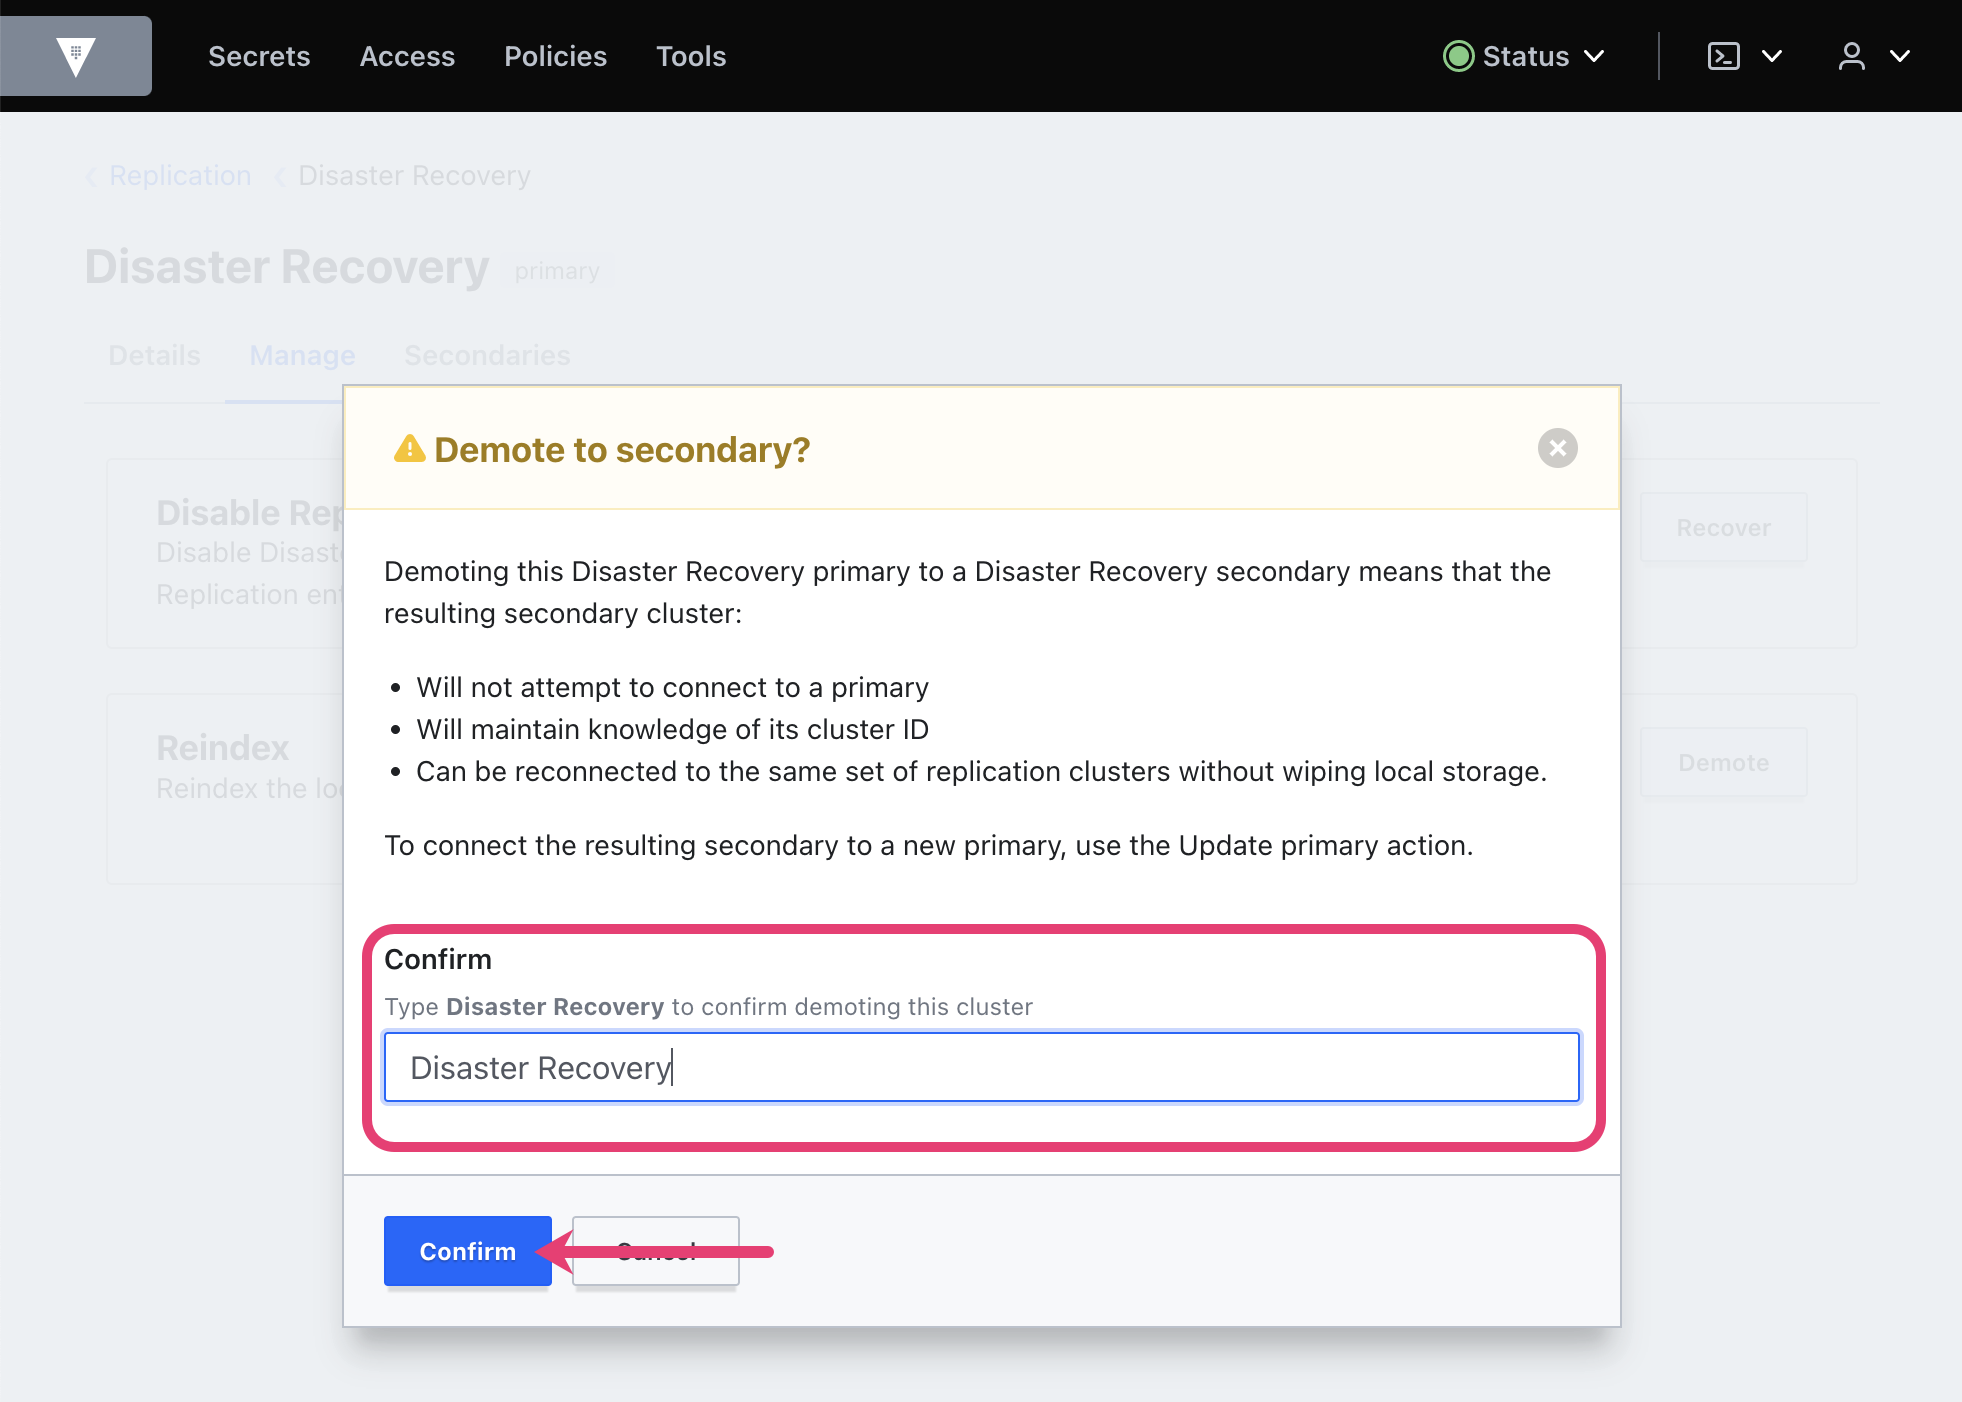
Demote cluster A.
$ vault write -f sys/replication/dr/primary/demote
Successful example output:
WARNING! The following warnings were returned from Vault:

  * This cluster is being demoted to a replication secondary. Vault will be
  unavailable for a brief period and will resume service shortly.
Test access to Vault data
Now that cluster B is the primary, you can use the initial root token from cluster A to check that the Vault data is available the new primary cluster.
Export a VAULT_ADDR environment variable to address cluster B.
$ export VAULT_ADDR=http://127.0.0.1:8220Check for the
failoversecret inreplicated-secretsusing the cluster A initial root token.$ VAULT_TOKEN=$CLUSTER_A_ROOT_TOKEN vault kv get replicated-secrets/learn-failoverSuccessful example output:
============= Secret Path =============
replicated-secrets/data/learn-failover

======= Metadata =======
Key                Value
---                -----
created_time       2022-09-20T19:15:39.772945069Z
custom_metadata    <nil>
deletion_time      n/a
destroyed          false
version            1

====== Data ======
Key         Value
---         -----
failover    false
The secret is present in your newly promoted primary cluster.
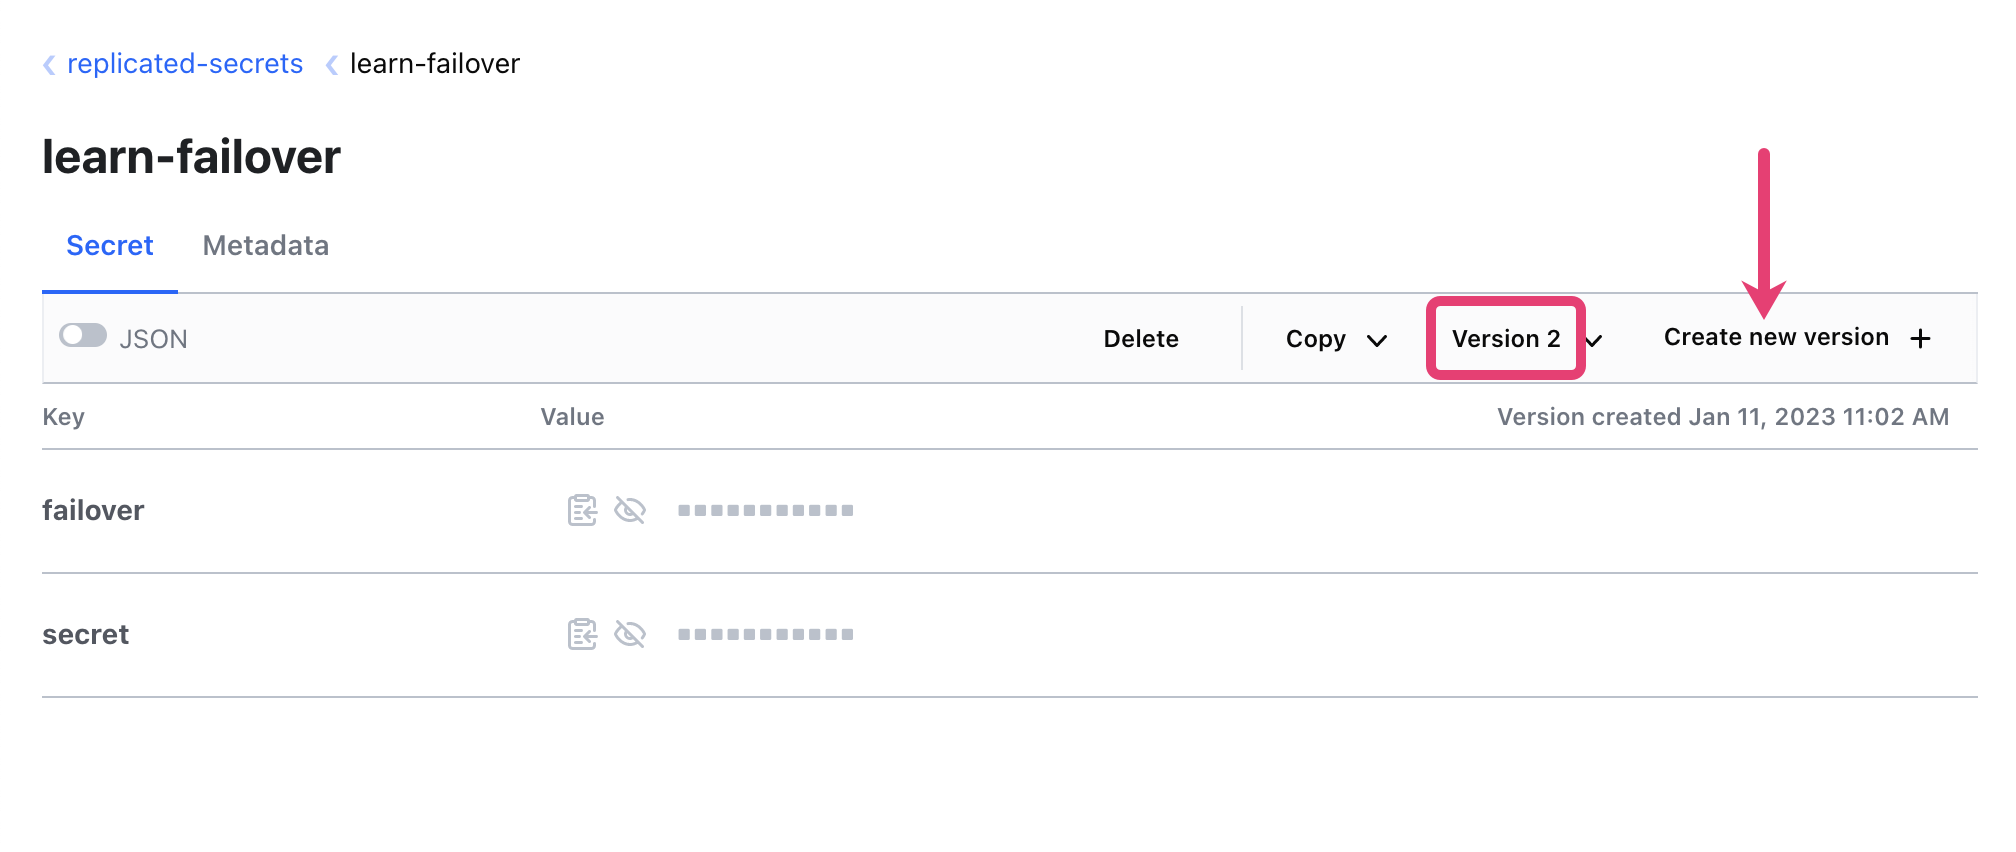
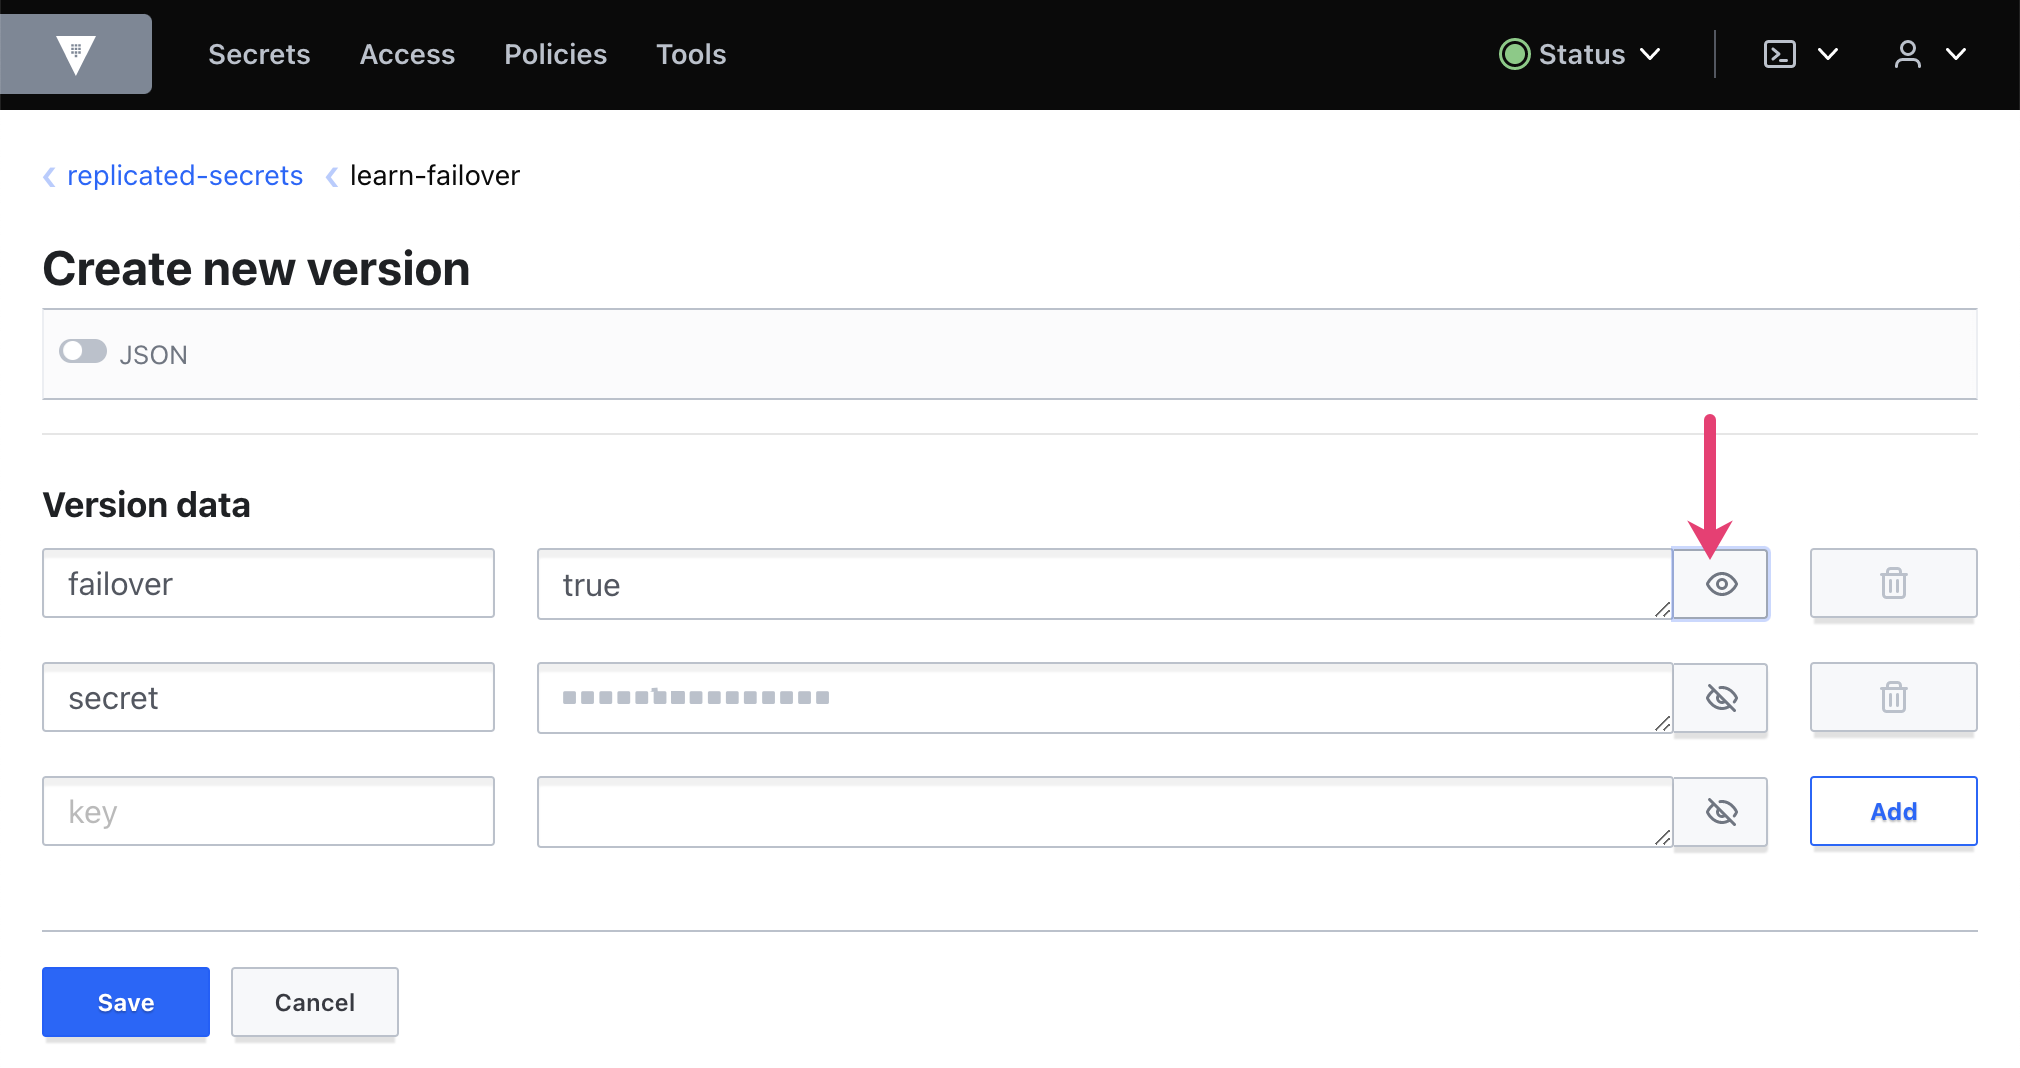
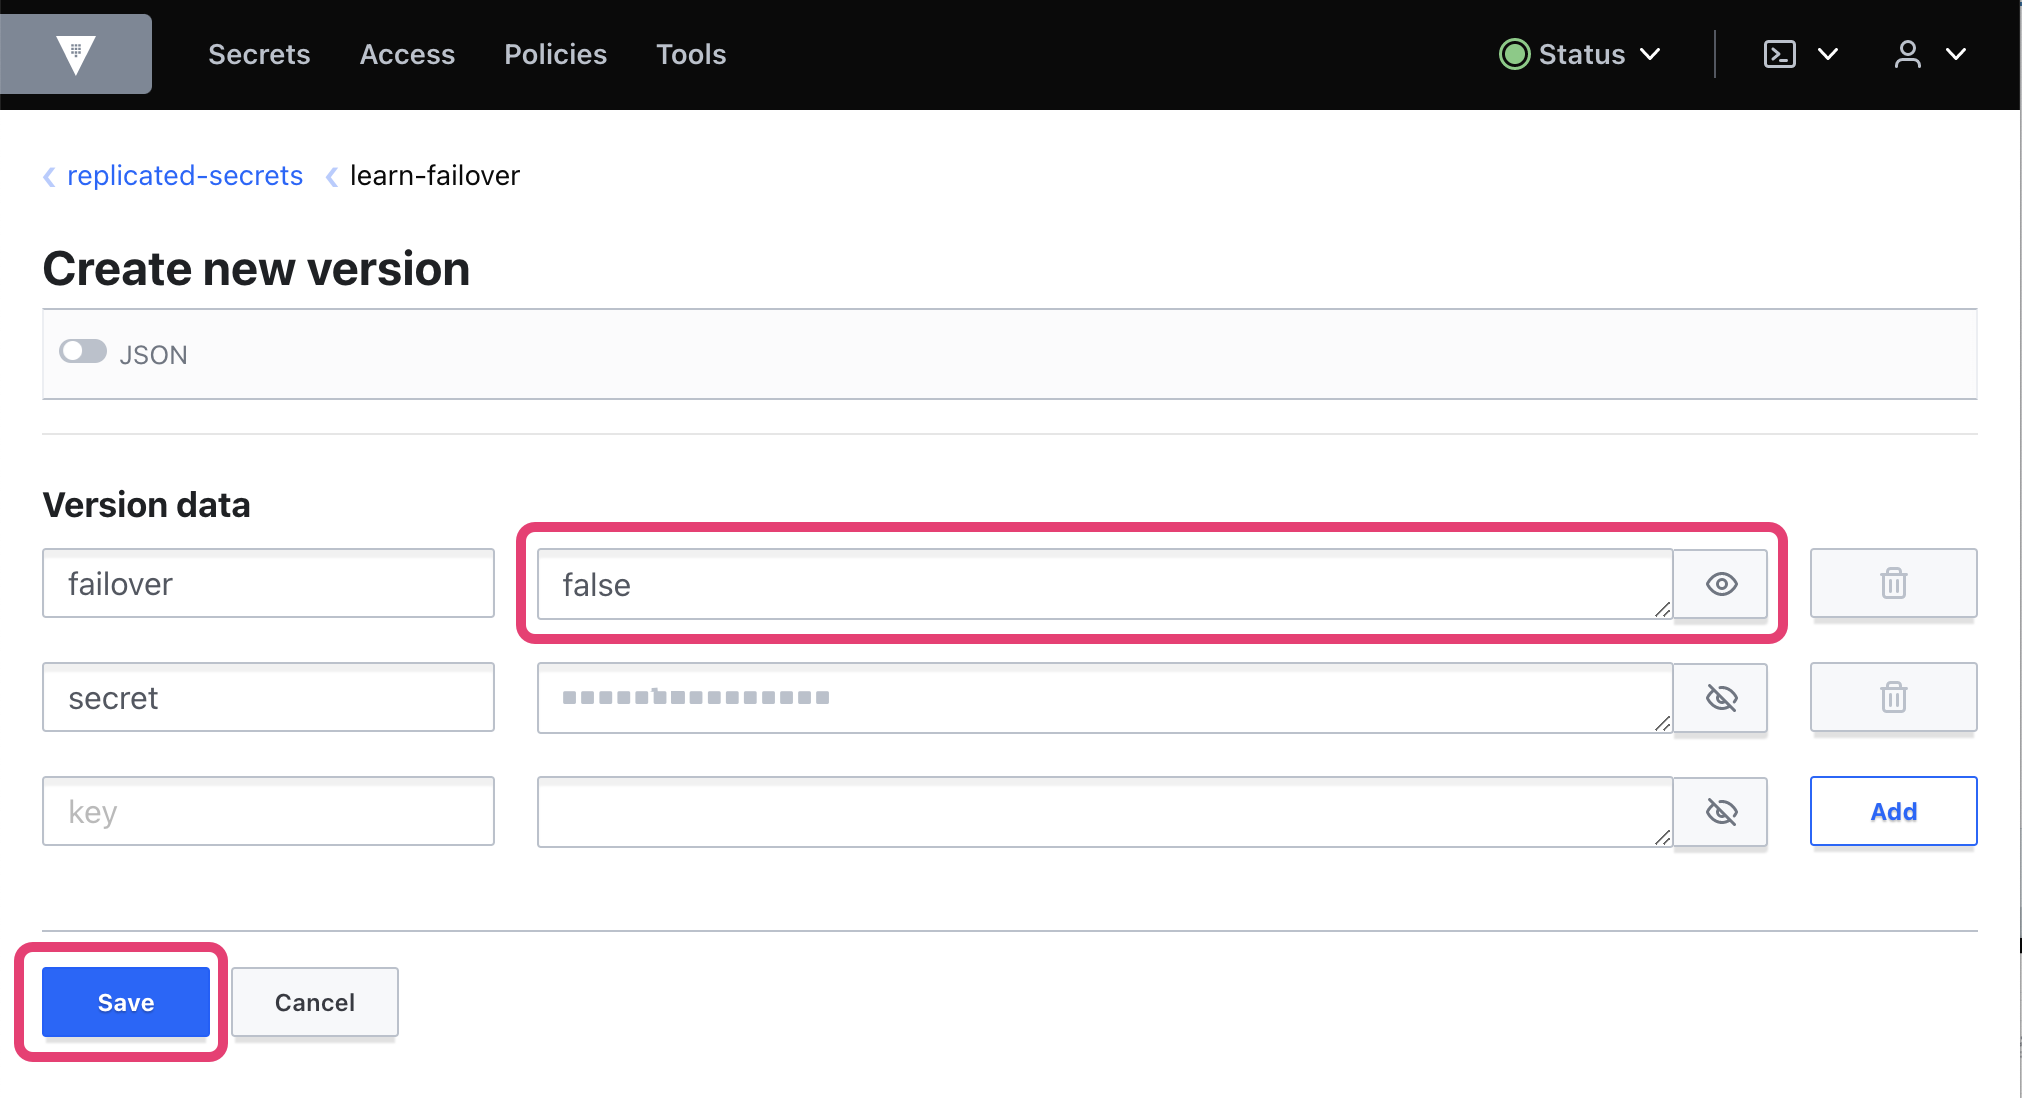
Create an updated version of the secret, and set the value of key failover to
true.$ VAULT_TOKEN=$CLUSTER_A_ROOT_TOKEN \ vault kv put replicated-secrets/learn-failover \ failover=trueSuccessful example output:
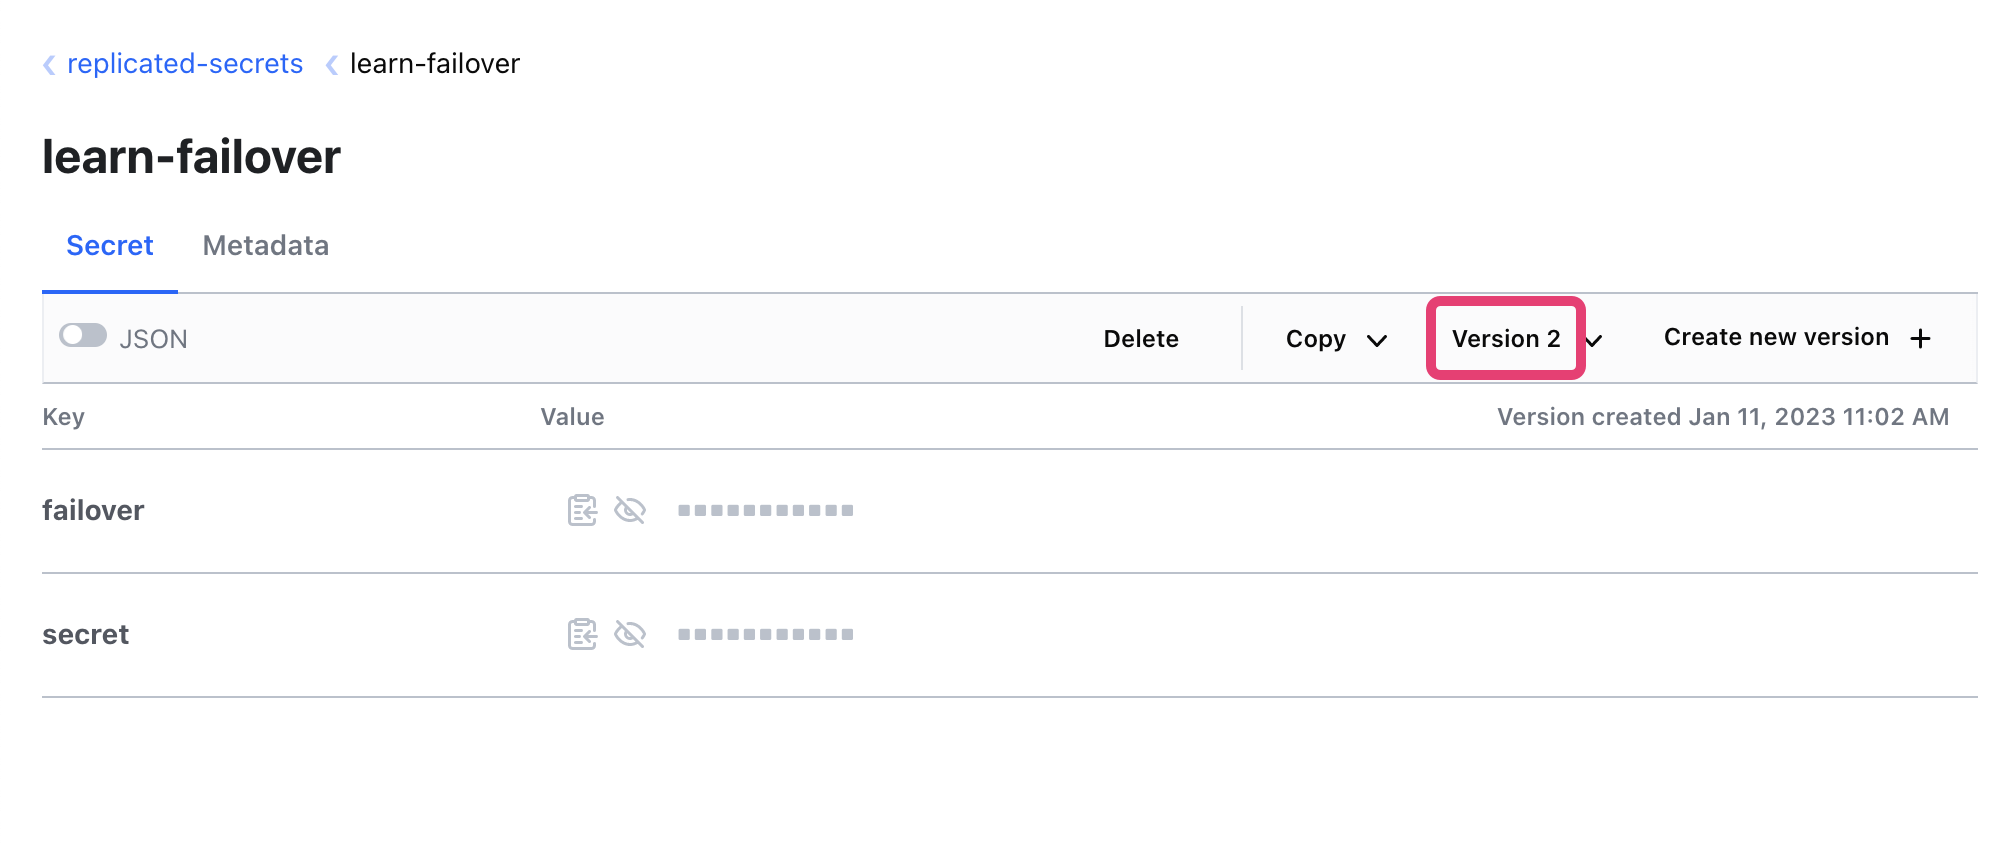
============= Secret Path =============
replicated-secrets/data/learn-failover

======= Metadata =======
Key                Value
---                -----
created_time       2022-09-20T19:28:26.971643793Z
custom_metadata    <nil>
deletion_time      n/a
destroyed          false
version            2

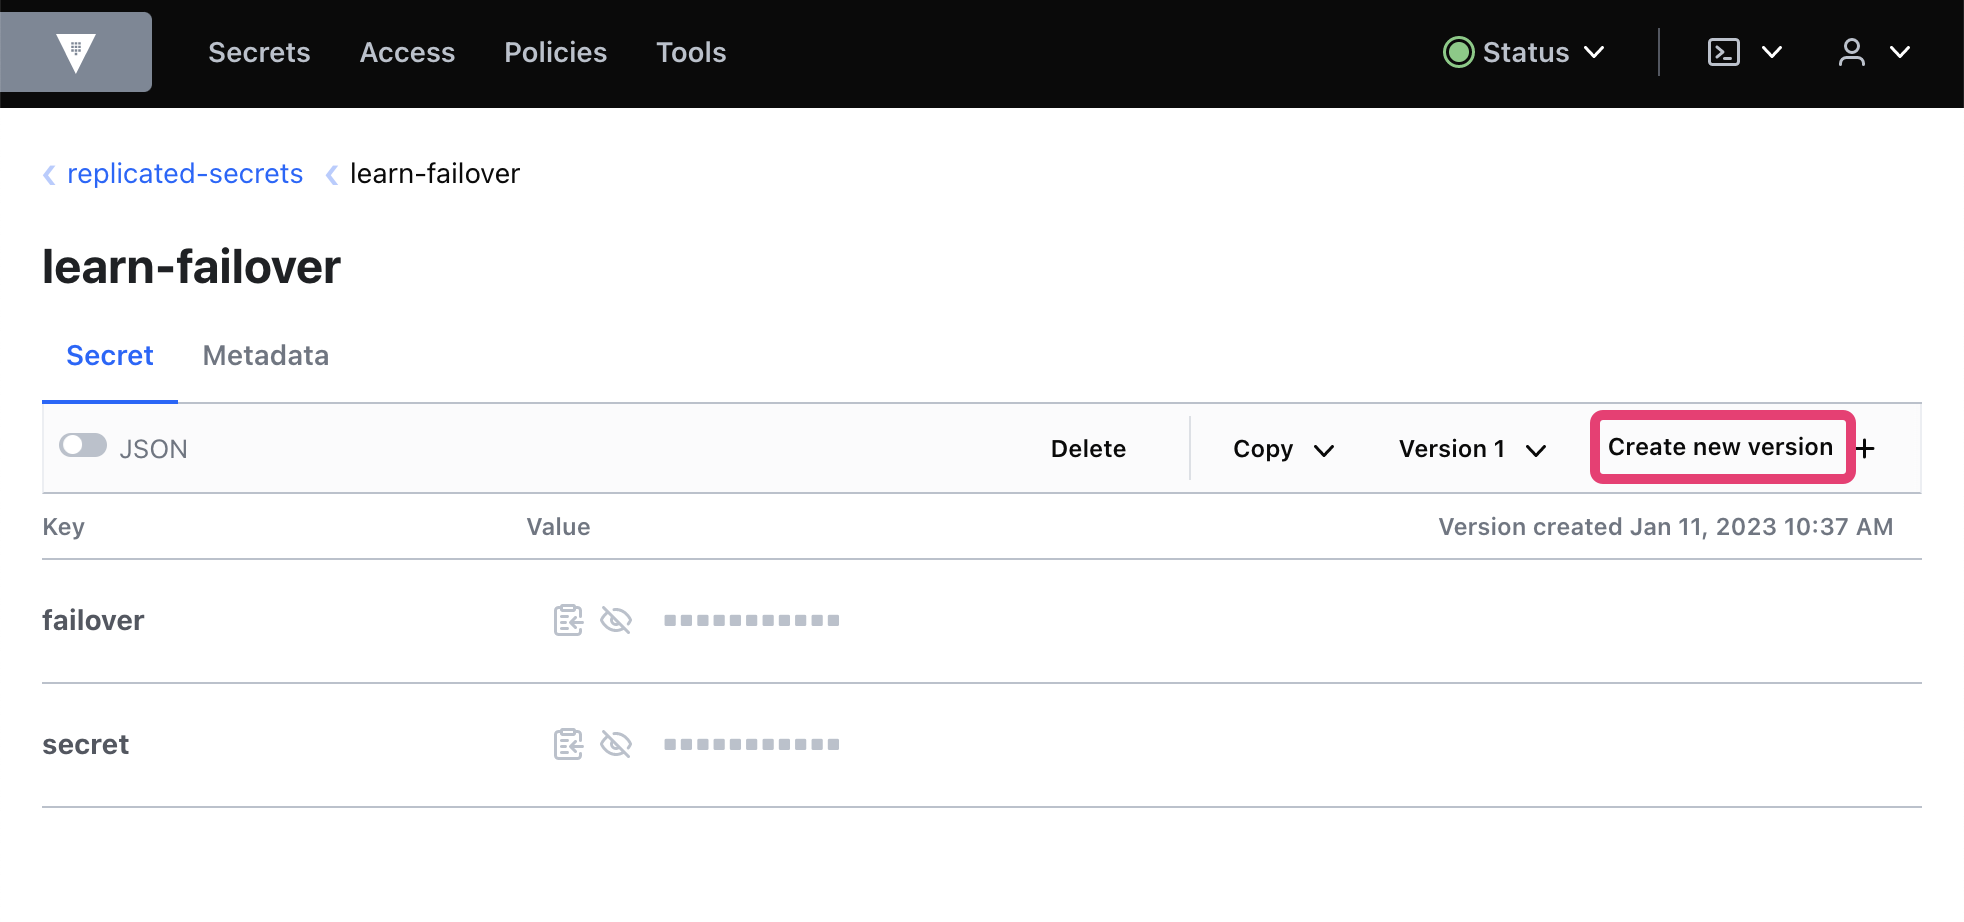
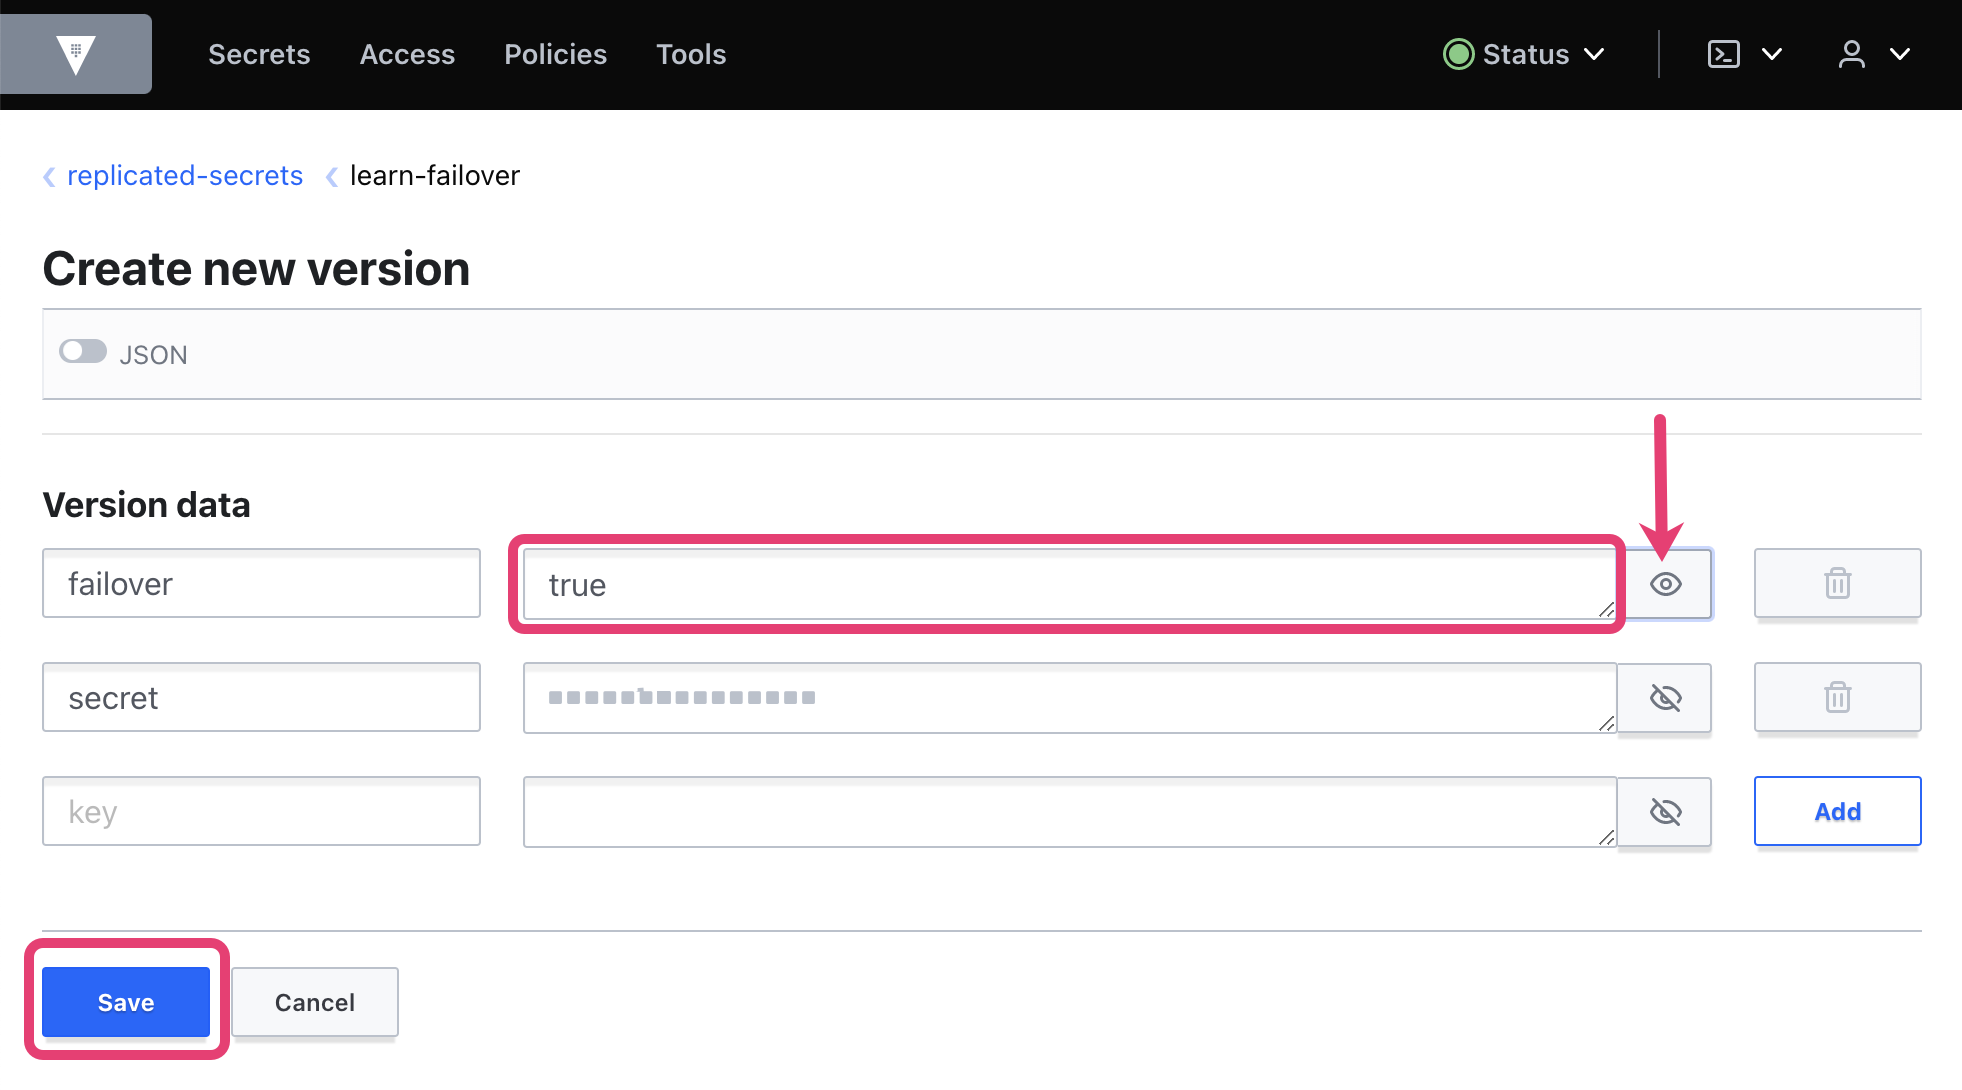
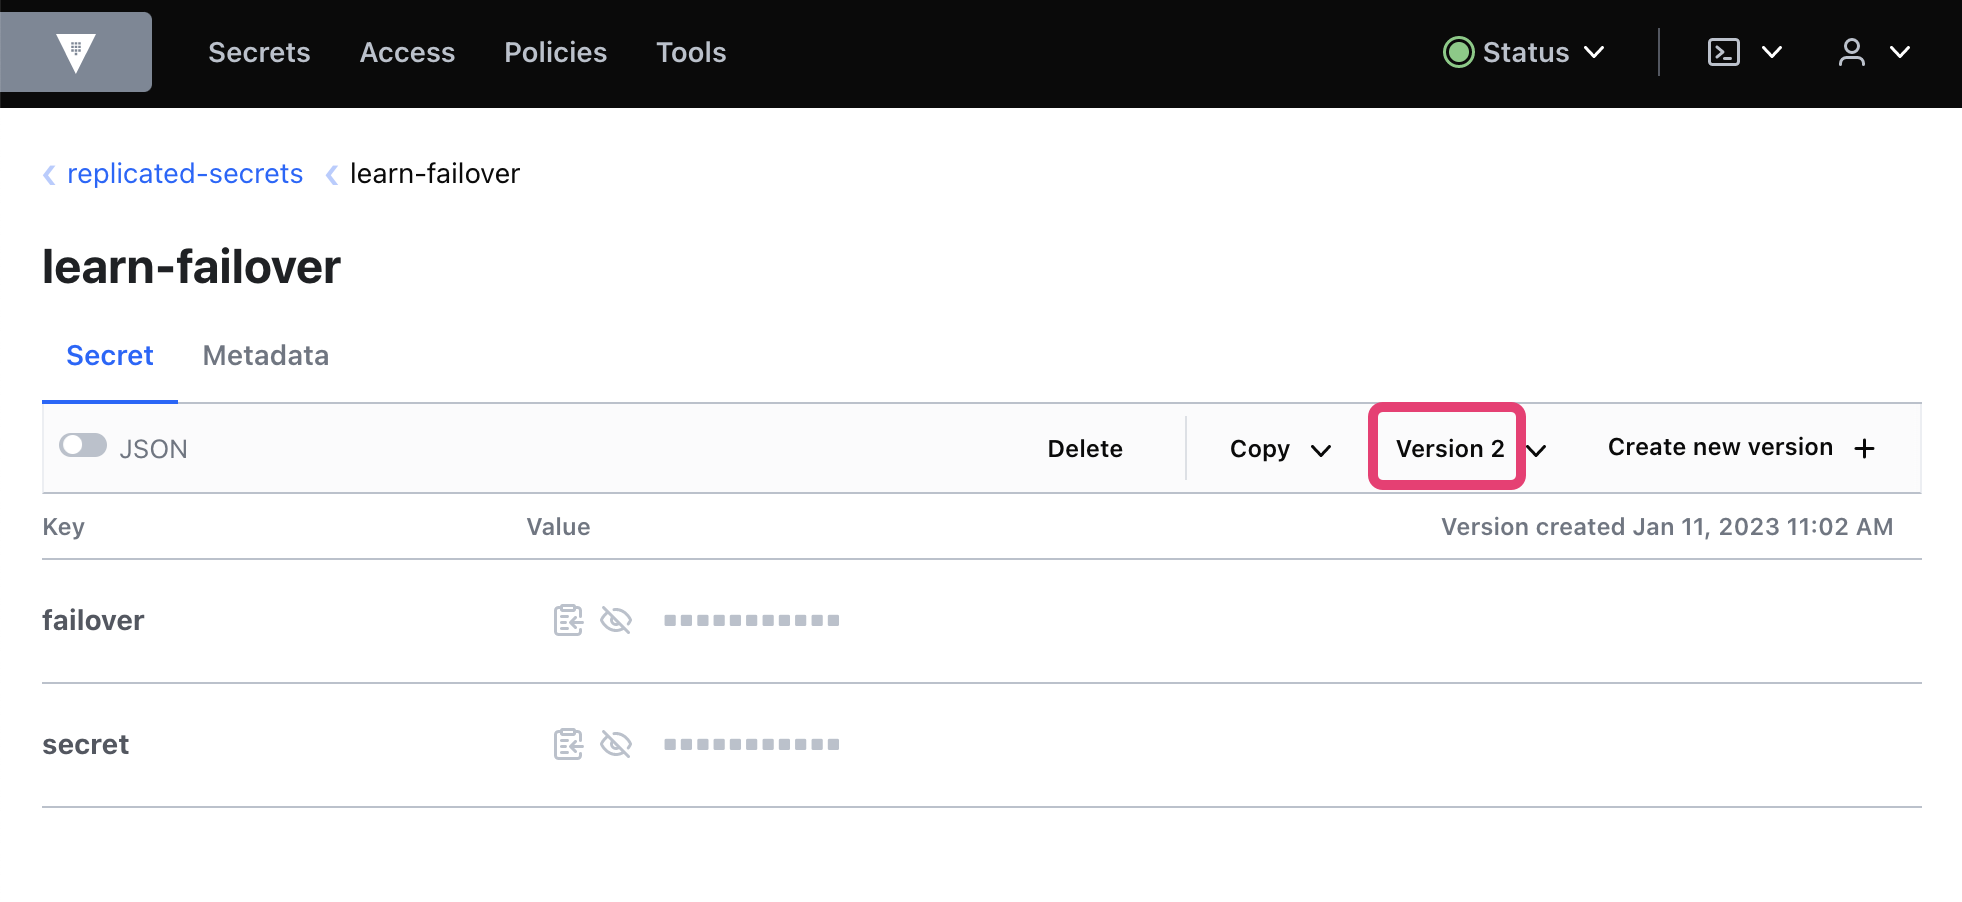
You have created version 2 of the secret while cluster B is acting as the primary cluster.
Point demoted cluster A to new primary cluster B
Now that you have verified access to cluster A, update it to be a secondary in DR replication to cluster B.
You can use the secondary_public_key parameter to demonstrate updating the secondary in a network environment where the primary's API port is not available and thus an unwrap API call cannot be made. This instructs the primary to encrypt the connection details with the secondary's public key instead of using a wrapping token, which is the default behavior.
Export VAULT_ADDR environment variable to address cluster A.
$ export VAULT_ADDR=http://127.0.0.1:8200On cluster A, generate the public key and export its value as the
DR_SECONDARY_PUB_KEYenvironment variable.$ export DR_SECONDARY_PUB_KEY=$(vault write -field secondary_public_key -f sys/replication/dr/secondary/generate-public-key)Export a VAULT_ADDR environment variable to address cluster B.
$ export VAULT_ADDR=http://127.0.0.1:8220Generate a new secondary token and assign its value to the exported environment variable
CLUSTER_A_DR_SECONDARY_TOKEN. Notice that the secondary public key is also specified with thesecondary_public_keyparameter.$ export CLUSTER_A_DR_SECONDARY_TOKEN="$(VAULT_TOKEN=$CLUSTER_A_ROOT_TOKEN \ vault write -field token \ sys/replication/dr/primary/secondary-token id=clusterA secondary_public_key=$DR_SECONDARY_PUB_KEY)"Confirm the environment variable value.
$ echo $CLUSTER_A_DR_SECONDARY_TOKENSuccessful output example:
eyJjbHVzdGVyX2lkIjoiZTc0ff33ZWUtMDY4Zi0yZTE3LTFhMWMtMjI1NTQ4MDlkNzc3IiwicHJpbWFyeV9jbHVzdGVyX2FkZHIiOiJodHRwczovL2NsdXN0ZXItYjo4MjIxIiwiY2FfY2VydCI6Ik1JSUNmVENDQWQrZ0F3SUJBZ0lJV2F3VjlzMXQ3V1l3Q2dZSUtvWkl6ajBFQXdRd016RXhNQzhHQTFVRUF4TW9jbVZ3TFRaaU5tUTVPRGM0TFdJMU5HRXRPV1ZtTXkwM1pqUmxMVEk0T0dKa09HWmhOMk13TmpBZ0Z3MHlNekExTWpNeU1UVTFNakZhR0E4eU1EVXpNRFV5TXpBNU5UVTFNVm93TXpFeE1DOEdBMVVFQXhNb2NtVndMVFppTm1RNU9EYzRMV0kxTkdFdE9XVm1NeTAzWmpSbExUSTRPR0prT0daaE4yTXdOakNCbXpBUUJnY3Foa2pPUFFJQkJnVXJnUVFBSXdPQmhnQUVBQkNZaS81QUVoOVZtN010UWJiejcybU5KRVpSU01WR1p4cWN0c291Z3ZtM25Bc1NaaFZDdzluRHpIa3prMjljNkdpQnBEWmJyL1pyUnJYdnVJVStaTVBiQVpQKzVOVFdhZy8yMS9GNHJNN3Y2UHZSS2w2Tk1SL1IyRWZIL3dlR2ZxUzQ2V0UyUkl0Zmg4cHRjQnRWRWZab0wvUDBoSm9kN3Vnb0FJSmN5d1hza3dBZ280R1hNSUdVTUE0R0ExVWREd0VCL3dRRUF3SUNyREFkQmdOVkhTVUVGakFVQmdnckJnRUZCUWNEQVFZSUt3WUJCUVVIQXdJd0R3WURWUjBUQVFIL0JBVXdBd0VCL3pBZEJnTlZIUTRFRmdRVXNGQjk1TG4vQjhQT1VDSGZ0RW9CQXV1REE2b3dNd1lEVlIwUkJDd3dLb0lvY21Wd0xUWmlObVE1T0RjNExXSTFOR0V0T1dWbU15MDNaalJsTFRJNE9HSmtPR1poTjJNd05qQUtCZ2dxaGtqT1BRUURCQU9CaXdBd2dZY0NRZ0ZPL3lrQlZUOHNxdjBnalRWSjRUWVJJZ0JTS1R3MkdyTzZteTA2WTVDWVl1L0xYUWoyVVM4VlhuOEZ1L1BSeUE0UVRxLy9SU21XM01hTms0eVpHK09NbWdKQlBEeEtOVStBWkUybDQzY0RmaXdqMnJYMnl2WXQ0U1R6ZVFOdkdXNDFlTFBCRUFzdjFNcW9WaWlScXJOTlh2SUdTNjVDM3V3aGJTYWNYL2l1ZGlLZ0NCST0iLCJjbGllbnRfY2VydCI6Ik1JSUNaekNDQWNpZ0F3SUJBZ0lJU1k0SWk5WXBFUlF3Q2dZSUtvWkl6ajBFQXdRd016RXhNQzhHQTFVRUF4TW9jbVZ3TFRaaU5tUTVPRGM0TFdJMU5HRXRPV1ZtTXkwM1pqUmxMVEk0T0dKa09HWmhOMk13TmpBZ0Z3MHlNekExTWpNeU1UVTJNekJhR0E4eU1EVXpNRFV5TXpBNU5UY3dNRm93THpFdE1Dc0dBMVVFQXhNa05qZzJNelprT1dRdE5tUTNaQzA1TkRRMUxXRTJNamN0TjJRd01EYzFORGxoTjJSaU1JR2JNQkFHQnlxR1NNNDlBZ0VHQlN1QkJBQWpBNEdHQUFRQjR2akNGUnliMHRray9kV25adkJrYTlyVTFSdW41OE84NGJNZUpxMnBRT2t2dHFpZmJUd2d0RlFJSEFBWitjVjlVTm1PV3o3YVVOV3NISUp6Y08wbnREOEE1MUdnd1FVTXhCajhxZzRycWY0Wk5CekFYWXJVSklaRFNYclF5QXBFdXF4VVBlTkxMaklXZHp5SzlVdlRDMkpLaE8yWEZ1MEJ5bWpFSlNjR1ZZKzMvQktqZ1lRd2dZRXdEZ1lEVlIwUEFRSC9CQVFEQWdPb01CMEdBMVVkSlFRV01CUUdDQ3NHQVFVRkJ3TUNCZ2dyQmdFRkJRY0RBVEFmQmdOVkhTTUVHREFXZ0JTd1VIM2t1ZjhIdzg1UUlkKzBTZ0VDNjRNRHFqQXZCZ05WSFJFRUtEQW1naVEyT0RZek5tUTVaQzAyWkRka0xUazBORFV0WVRZeU55MDNaREF3TnpVME9XRTNaR0l3Q2dZSUtvWkl6ajBFQXdRRGdZd0FNSUdJQWtJQTcxTzdVajZzd2ZtZmNtVUlEcXZoZXYwOExHUVFvNVdIZ0JEbW9rSjMvd1JJTjlGRXczOWlQUEM2V0hFVnNPNEczOG1HZTMzQnZ4Qk55NlVOVFNka1E0b0NRZ0RuaFJCeVQrQnE3aTIxdlhPWW1xcWdsYzhDMGY2Z3R6YVJIRzAvQ0c0RGZkV0Vnc1NQTTR0WHJYYWppNG9MWXkwWUlSZ0tXT0JGUVQxdmMyd252eVIwSUE9PSIsImNsaWVudF9rZXkiOm51bGwsImlkIjoiY2x1c3RlckEiLCJtb2RlIjo1MTIsInByaW1hcnlfcHVibGljX2tleSI6Ii9BWHc3aVpObFlockFrMEs5d0hnMEVxMDhXcmg1b0dETy85cGpPdUp4R0U9IiwiZW5jcnlwdGVkX2NsaWVudF9rZXkiOiJ1M001VlBIU2Y2ZEF2YllLLzc1NWRkVE9kYm5ob2dYUWhtQmhkQTZsODNIdWVDTldoaTRzb2JzUnM3RWhRRnF2U2RuUnJKRDVOdGwrNmZCOFZJbEwvb3R3RTRWZ0ZuaWZGRHNQZk81VEx4Z1JYbnFhaVZhcktQd013Zk1yUWg3bm1YQzVmUDJ0SWY5ZGx3N01RTC9ZaXB2eVRZczFtVDYwczhOSURTeWUrczloSFVpTUJsZTZMeFJlVzZ5SkVvTVorZlh3Vk9jdm1WNEVHcVEyZmU5Y0h2c0pGVDNacTB0TFlBaUJlOVhDbEVqVzRUQ2EzR0grSTNuSzRyNGpXTjFsYjhZNUkwSi9NWVl0MzZ4aHRKaDF1VmNpTThaTStqOEpyREd3OFZBSXZnTkZVYmZVVzFrWDY3ekFiVXZBRDFPNFAvVzc0ff33dERjV2p0ZmNFSzhmVTZlcHBGb0R0WHlRcWFpOUNoTzdnQ3kva0taZXI2ejJtZGJCVUt6ek4wK2czclp1QUs2cThQQ24rS3RWU3lZTGJ0TkdsazJIdk5xdlpQQjNBeE90eTBXeDVKOGhxeFJwcjgvQzdUNTNNSHV5OENQUzAxYnMxWTZMd2kwNEpQbDJ6anR1VFl6TU5lV3ZEcExyMXAwbEY4RUJCNmNEdnlpWXl3QWg1MzJpQmhPd0h3NmdocnpWK1gxUEc1T3NrcU16Uzg1V3hRYmhNdnFpemRub3pNcnp3SnZqZWlYWU5rbWRQdXRjY2xTdmY5VHFpWm0wT1lYeEhiWmJGQmhaL1VuYmgvUmQxS1FQRDluS0pBeW45R0E5NFRXaXo5NU16YzBocmZNWVlibWgzVTlhN3pMRGRRWndNakV1eEFKT0tyemUzWE1Yd3MzZ3ZnNnhObm43bkpMOEdIa251L0YyIiwibm9uY2UiOiJ1UXVRbExGSTZuZ0NVU21VIn0Export VAULT_ADDR environment variable to address cluster A.
$ export VAULT_ADDR=http://127.0.0.1:8200Point cluster B to cluster A, so that cluster A becomes a secondary cluster of (the new primary) cluster B. Use the batch operation token value or DR operation token value with the secondary token value to do so.
$ vault write sys/replication/dr/secondary/update-primary \
    dr_operation_token=$CLUSTER_B_DR_OP_TOKEN token=$CLUSTER_A_DR_SECONDARY_TOKEN
WARNING! The following warnings were returned from Vault: * Vault has successfully found secondary information; it may take a while to perform setup tasks. Vault is unavailable until these tasks and initial sync complete.Check replication status on cluster B using JSON output for a bit more readability.
$ VAULT_TOKEN=$CLUSTER_A_ROOT_TOKEN \
    vault read --format=json sys/replication/status
Successful output example:
{
"request_id": "8db7d9d2-c624-27f3-ed68-650c772b1adf",
"lease_id": "",
"lease_duration": 0,
"renewable": false,
"data": {
   "dr": {
      "cluster_id": "d8f8a096-c55e-d13f-0274-faadb011b0b0",
      "connection_state": "ready",
      "known_primary_cluster_addrs": [
      "https://cluster-b:8221"
      ],
      "last_reindex_epoch": "0",
      "last_remote_wal": 0,
      "merkle_root": "6c73ab55554f73868b504d7cae470b5dd82f3833",
      "mode": "secondary",
      "primaries": [
      {
         "api_address": "http://cluster-b:8220",
         "cluster_address": "https://cluster-b:8221",
         "connection_status": "connected",
         "last_heartbeat": "2022-12-05T18:22:29Z"
      }
      ],
      "primary_cluster_addr": "https://cluster-b:8221",
      "secondary_id": "clusterA",
      "state": "stream-wals"
   },
   "performance": {
      "mode": "disabled"
   }
},
"warnings": null
}
Cluster A is now in mode
secondary, and shows that it has a primary at the value ofprimary_cluster_addrofhttps://secondary(cluster B) as expected.Read the
replicated-secrets/learn-failoversecret with the cluster A initial root token.$ VAULT_ADDR=http://127.0.0.1:8220 \ VAULT_TOKEN=$CLUSTER_A_ROOT_TOKEN \ vault kv get replicated-secrets/learn-failoverSuccessful example output:
============= Secret Path =============
replicated-secrets/data/learn-failover

======= Metadata =======
Key                Value
---                -----
created_time       2022-12-05T18:22:10.447701139Z
custom_metadata    <nil>
deletion_time      n/a
destroyed          false
version            2

====== Data ======
Key         Value
---         -----
failover    true
Vault returns the expected secret value, and cluster A is now a secondary cluster to cluster B.
Failback scenario
Now it's time to failback, and restore the clusters to their initial replication state.
At this point cluster B is the new primary with cluster A as the secondary. You will now promote Cluster A (the original primary) back to primary.
Verify replication status on cluster A.
$ VAULT_ADDR=http://127.0.0.1:8200 VAULT_TOKEN=$CLUSTER_A_ROOT_TOKEN \
    vault read sys/replication/dr/status
Successful output example:
Key                            Value
---                            -----
cluster_id                     d8f8a096-c55e-d13f-0274-faadb011b0b0
connection_state               ready
known_primary_cluster_addrs    [https://cluster-b:8221]
last_reindex_epoch             0
last_remote_wal                0
merkle_root                    6c73ab55554f73868b504d7cae470b5dd82f3833
mode                           secondary
primaries                      [map[api_address:http://cluster-b:8220 cluster_address:https://cluster-b:8221 connection_status:connected last_heartbeat:2022-12-05T18:26:39Z]]
primary_cluster_addr           https://cluster-b:8221
secondary_id                   clusterA
state                          stream-wals
Verify replication status on cluster B.
$ VAULT_ADDR=http://127.0.0.1:8220 VAULT_TOKEN=$CLUSTER_A_ROOT_TOKEN \
    vault read sys/replication/dr/status
Successful output example:
Key                     Value
---                     -----
cluster_id              d14a98dc-3651-ca72-1e8a-b18cff2240ef
known_secondaries       [clusterA]
last_dr_wal             41
last_reindex_epoch      0
last_wal                41
merkle_root             5c1d0af68825331681f846a8ee6282f23f18f31e
mode                    primary
primary_cluster_addr    n/a
secondaries             [map[api_address:http://primary:8200 cluster_address:https://cluster-a:8201 connection_status:connected last_heartbeat:2022-10-31T16:29:30Z node_id:clusterA]]
state                   running
From the replication status output, you can learn that cluster B is the primary, cluster A is the secondary, and replication is running and in stream-wals state.
You can now start the failback workflow.
Demote cluster B to secondary status
Demote cluster B back to secondary status.
$ VAULT_ADDR=http://127.0.0.1:8220 VAULT_TOKEN=$CLUSTER_A_ROOT_TOKEN \
    vault write -f sys/replication/dr/primary/demote
Successful output example:
WARNING! The following warnings were returned from Vault:

  * This cluster is being demoted to a replication secondary. Vault will be
  unavailable for a brief period and will resume service shortly.
Promote cluster A to primary status
Begin failback by promoting cluster A to primary status.
Use the batch DR operation token value from the CLUSTER_B_DR_OP_TOKEN environment variable to promote cluster A back to primary status.
$ VAULT_ADDR=http://127.0.0.1:8200 VAULT_TOKEN=$CLUSTER_A_ROOT_TOKEN \
    vault write -f sys/replication/dr/secondary/promote \
    dr_operation_token=$CLUSTER_B_DR_OP_TOKEN
Successful output example:
WARNING! The following warnings were returned from Vault:

  * This cluster is being promoted to a replication primary. Vault will be
  unavailable for a brief period and will resume service shortly.
Confirm replication status and access to data
The goal of this section is to check the replication status of cluster A and B, and read the secret data to confirm the failback.
Verify replication status on cluster A.
$ VAULT_ADDR=http://127.0.0.1:8200 VAULT_TOKEN=$CLUSTER_A_ROOT_TOKEN \
   vault read sys/replication/dr/status
Successful output example:
Key                     Value
---                     -----
cluster_id              d14a98dc-3651-ca72-1e8a-b18cff2240ef
known_secondaries       []
last_dr_wal             71
last_reindex_epoch      0
last_wal                71
merkle_root             af89e30c16ea03009df256991bf3c6ec4e8b390a
mode                    primary
primary_cluster_addr    n/a
secondaries             []
state                   running
Verify replication state on cluster B.
$ VAULT_ADDR=http://127.0.0.1:8220 VAULT_TOKEN=$CLUSTER_A_ROOT_TOKEN \
   vault read sys/replication/dr/status
Successful output example:
Key                            Value
---                            -----
cluster_id                     d14a98dc-3651-ca72-1e8a-b18cff2240ef
known_primary_cluster_addrs    [https://cluster-a:8201]
last_reindex_epoch             0
merkle_root                    5c1d0af68825331681f846a8ee6282f23f18f31e
mode                           secondary
primaries                      []
primary_cluster_addr           n/a
secondary_id                   n/a
state                          idle
The status indicates that the clusters are replicating again in their original state with cluster A being the primary and cluster B the secondary.
Try to update the secret data in cluster A.
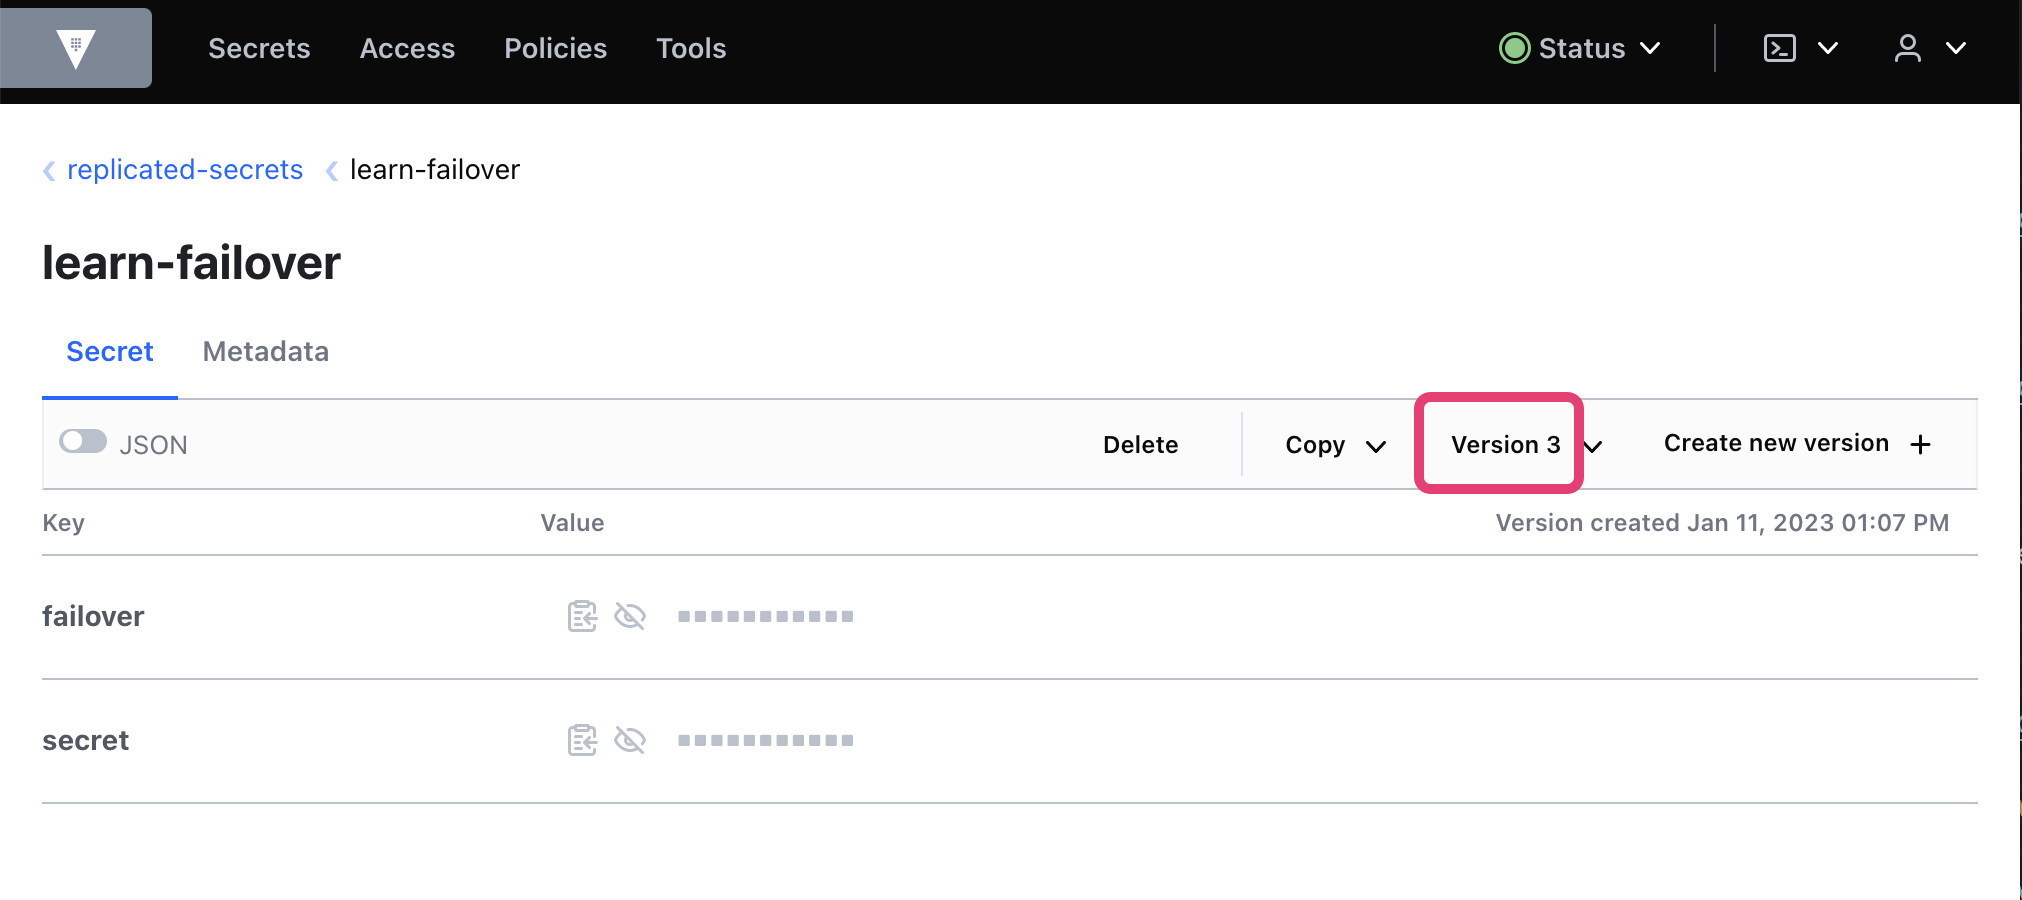
$ VAULT_ADDR=http://127.0.0.1:8200 VAULT_TOKEN=$CLUSTER_A_ROOT_TOKEN \
   vault kv put replicated-secrets/learn-failover failover=false
Successful example output:
============= Secret Path =============
replicated-secrets/data/learn-failover

======= Metadata =======
Key                Value
---                -----
created_time       2022-09-26T17:03:48.661780123Z
custom_metadata    <nil>
deletion_time      n/a
destroyed          false
version            3
You have created a second version of the secret while cluster A is once again acting as the primary cluster.
Update replication primary on cluster B
The goal of this section is to update cluster B and point it to cluster A as the new primary cluster.
This time, you can use the default secondary token generation behavior, which is to encrypt the connection details in a wrapping token.
Generate a secondary token on cluster A and assign its value to the exported environment variable
CLUSTER_A_DR_SECONDARY_TOKEN.$ export CLUSTER_A_DR_SECONDARY_TOKEN="$(VAULT_ADDR=http://127.0.0.1:8200 \ VAULT_TOKEN=$CLUSTER_A_ROOT_TOKEN \ vault write -field wrapping_token \ sys/replication/dr/primary/secondary-token id=ClusterB)"This command produces no output.
DR Operation Tokens are one-time use, so you need to generate a new one for this step. Use environment variables to override the vault host and root token values, and generate the DR Operation Token by initializing.
$ VAULT_ADDR=http://127.0.0.1:8220 \
   VAULT_TOKEN=$CLUSTER_B_ROOT_TOKEN \
   vault operator generate-root -dr-token -init
Successful output example:
 A One-Time-Password has been generated for you and is shown in the OTP field.
 You will need this value to decode the resulting root token, so keep it safe.
 Nonce         7854eb3e-7338-b4ad-2408-6e598a5684e9
 Started       true
 Progress      0/1
 Complete      false
 OTP           3BYcM71jcwIYDm8auxIFvHhATbRM
 OTP Length    28
Export the OTP value from the earlier output as the environment variable
CLUSTER_B_DR_OTP.$ export CLUSTER_B_DR_OTP=3BYcM71jcwIYDm8auxIFvHhATbRMDisplay the cluster A unseal key value to use in the next step:
$ echo $CLUSTER_A_UNSEAL_KEY
Sx4AOb7X5ShyQ97sL5g7nhUn2l+IYv64GYucApVdm44=
Generate the encoded token value.
$ VAULT_ADDR=http://127.0.0.1:8220 \
   VAULT_TOKEN=$CLUSTER_B_ROOT_TOKEN \
   vault operator generate-root -dr-token
When prompted, enter the unseal key from cluster A.
Successful output example:
 Nonce            7854eb3e-7338-b4ad-2408-6e598a5684e9
 Started          true
 Progress         1/1
 Complete         true
 Encoded Token    WzQqTQdRfzohHT4hAyxMNjcSfxAuIVgVPgQ7KQ
Export the "Encoded Token" value from the earlier output as the environment variable
CLUSTER_B_DR_ENCODED_TOKEN.$ export CLUSTER_B_DR_ENCODED_TOKEN=WzQqTQdRfzohHT4hAyxMNjcSfxAuIVgVPgQ7KQComplete the DR operation token generation, and export the resulting token value as the environment variable
CLUSTER_B_DR_OP_TOKENfor later use.$ export CLUSTER_B_DR_OP_TOKEN=$(VAULT_ADDR=http://127.0.0.1:8220 \ VAULT_TOKEN=$CLUSTER_B_ROOT_TOKEN \ vault operator generate-root \ -dr-token \ -otp=$CLUSTER_B_DR_OTP \ -decode=$CLUSTER_B_DR_ENCODED_TOKEN)
Echo the
CLUSTER_B_DR_OP_TOKENenvironment variable to confirm that it's set.$ echo $CLUSTER_B_DR_OP_TOKENSuccessful output example:
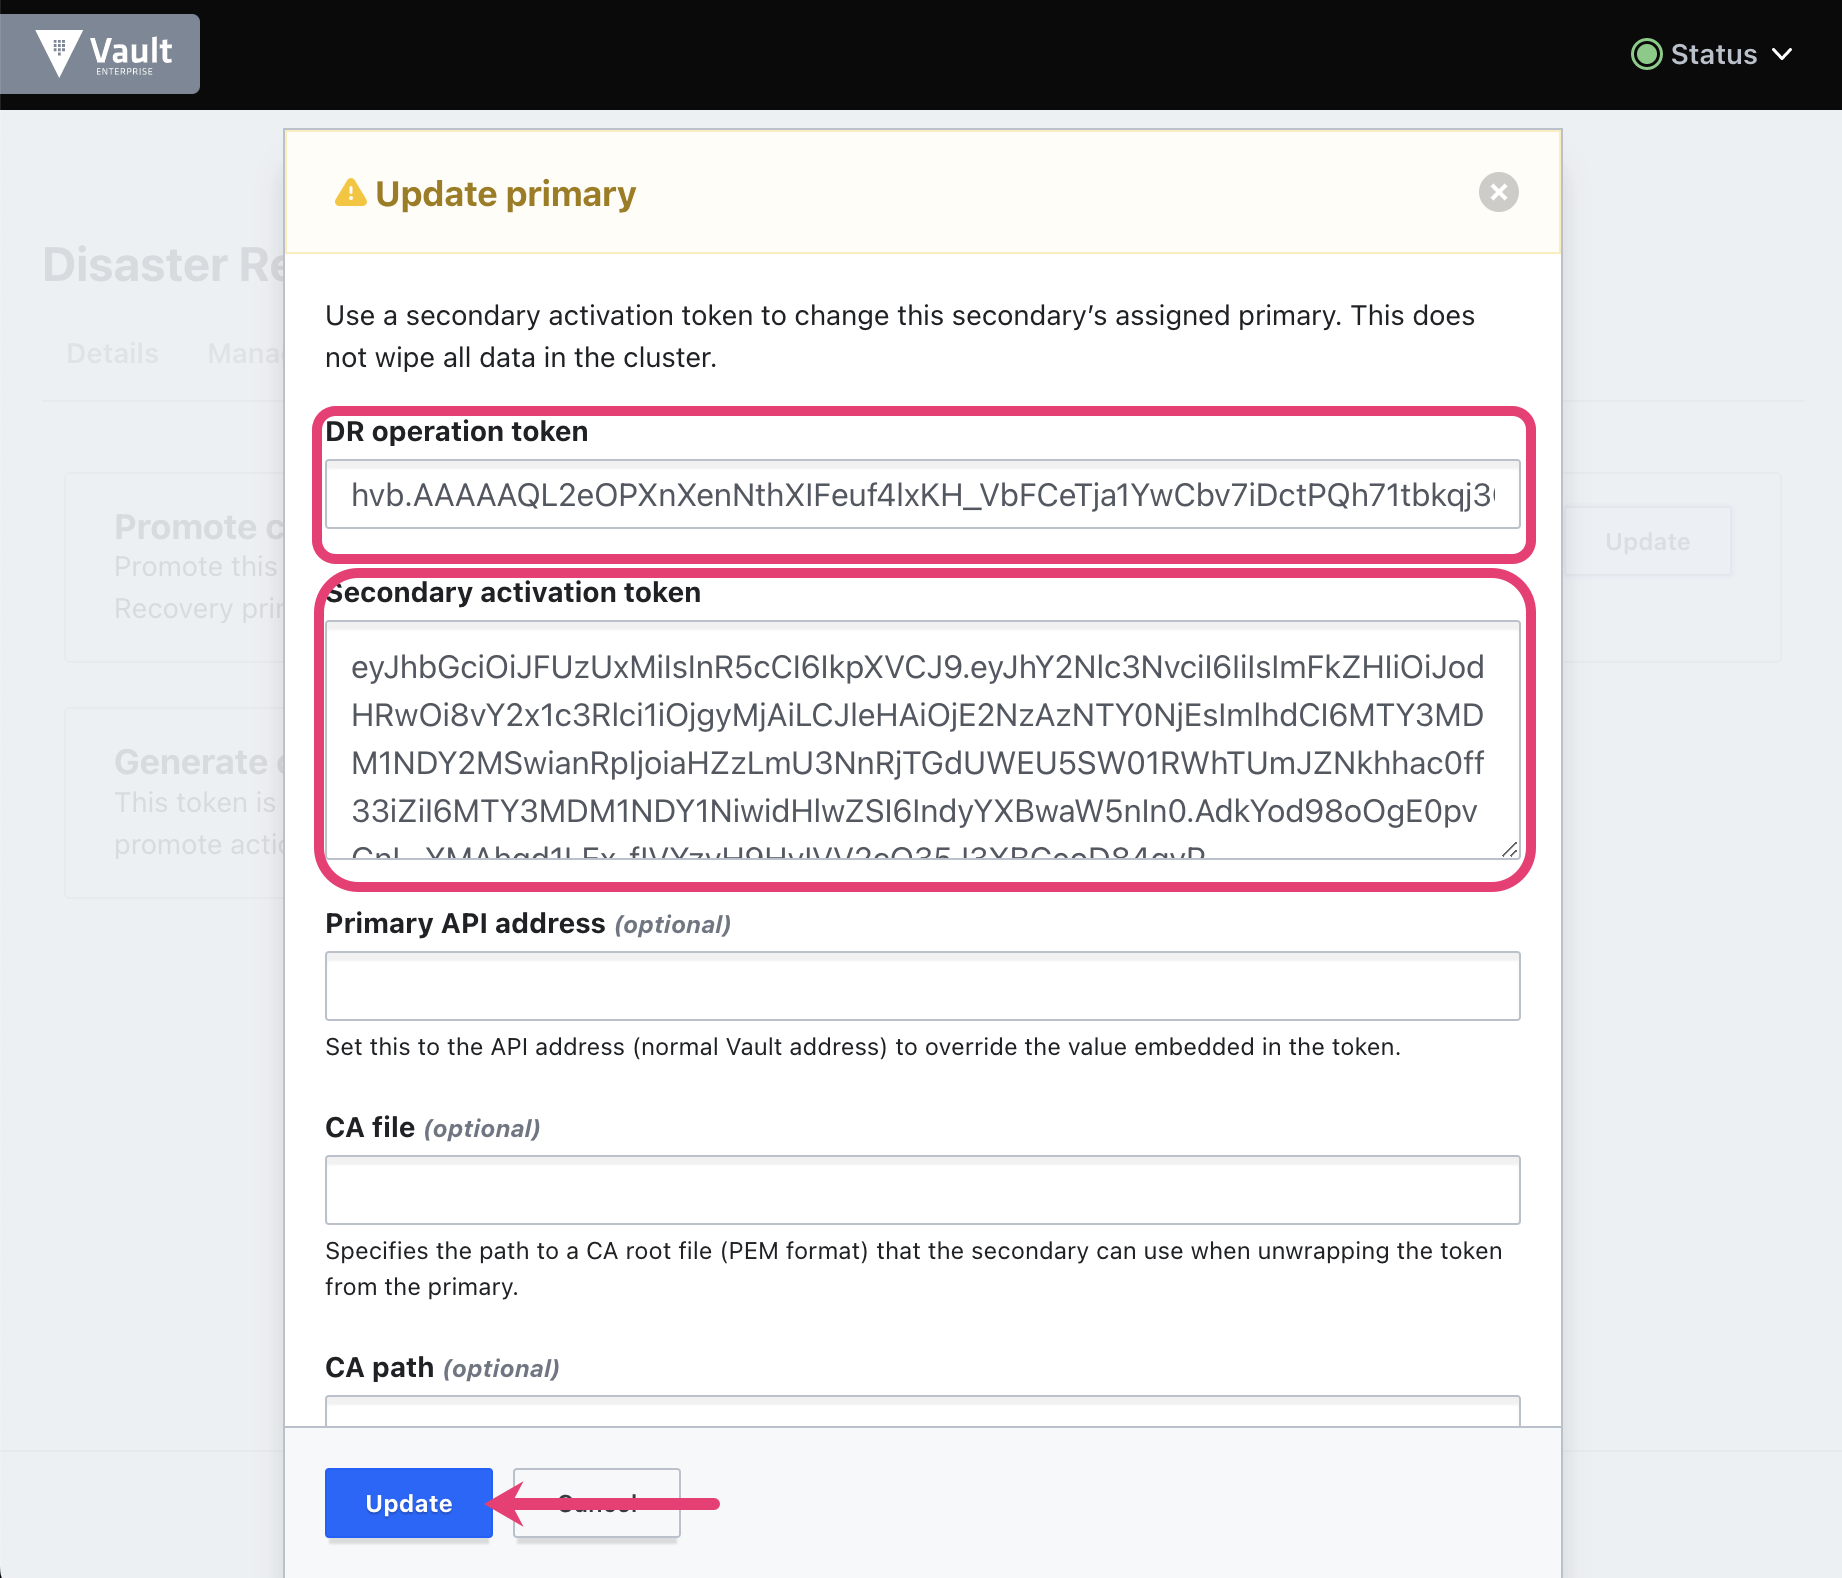
hvb.AAAAAQLE0eZ9DZREm3xrKWoc-KpbejFcyr8YEyiiORdxSMt_PKwDT-b_9AUavF3w4NcVQJQyO4-BRfahEb0h9GEE9vI-EidU2RjGd7UFdrXph6iSchNtMjC7sVFqH_Y558yx_D_LN1bSPA8vsq-ADzKnnvw5rACn4BREv7QdrPBytX2JkStDrevVzLlWsHS1UF0xFACxSQUpdate cluster so that it uses cluster A as the new primary cluster.
$ VAULT_ADDR=http://127.0.0.1:8220 \
      vault write sys/replication/dr/secondary/update-primary \
      dr_operation_token=$CLUSTER_B_DR_OP_TOKEN token=$CLUSTER_A_DR_SECONDARY_TOKEN
WARNING! The following warnings were returned from Vault: * Vault has successfully found secondary information; it may take a while to perform setup tasks. Vault will be unavailable until these tasks and initial sync complete.Now check replication status on cluster B.
$ VAULT_ADDR=http://127.0.0.1:8220 VAULT_TOKEN=$CLUSTER_A_ROOT_TOKEN \
   vault read sys/replication/dr/status
Successful example output:
Key                            Value
---                            -----
cluster_id                     e3619c22-8958-8d24-c374-c5630988b300
known_primary_cluster_addrs    [https://cluster-a:8201]
last_reindex_epoch             0
merkle_root                    7a82bc8a3bc5be71342661424fae40cee94786a5
mode                           secondary
primaries                      []
primary_cluster_addr           n/a
secondary_id                   n/a
state                          idle
The output shows that cluster B is now a secondary with a known primary cluster address that matches cluster A.
You have completed the failover and failback scenario with the Vault DR Replication feature.
Clean up
Stop the Docker containers (this also automatically removes them).
$ docker stop vault-enterprise-cluster-a vault-enterprise-cluster-b
vault-enterprise-cluster-a
vault-enterprise-cluster-b
Remove the Docker network.
$ docker network rm learn-vault
learn-vault
Change into your home directory
$ cd ..Remove the
learn-vault-labproject directory.$ rm -rf "${HC_LEARN_LAB}"Unset the environment variables
$ unset \
CLUSTER_A_UNSEAL_KEY \
CLUSTER_A_ROOT_TOKEN \
CLUSTER_A_DR_OTP \
CLUSTER_A_DR_ENCODED_TOKEN \
CLUSTER_A_DR_SECONDARY_TOKEN \
CLUSTER_A_DR_OP_TOKEN \
CLUSTER_B_UNSEAL_KEY \
CLUSTER_B_ROOT_TOKEN \
CLUSTER_B_DR_OP_TOKEN \
MY_VAULT_LICENSE \
VAULT_ADDR \
VAULT_TOKEN
Summary
You have learned how to establish a DR replication configuration between a primary and secondary cluster. You have also learned the essential workflow for failover from an existing primary cluster and failback to the original cluster state after operating in a failed over state.
Next steps
You can learn more about replication, including popular topics such as monitoring replication, setting up Performance Replication, and Performance Replication with HashiCorp Cloud Platform (HCP) Vault.