Scale out HCP Vault Dedicated across multiple regions
Workloads can exist in multiple geographic regions. In some cases it may be sufficient for those workloads to access your HCP Vault Dedicated cluster across great distances.
However, many workloads are sensitive to latency, which can introduce errors in your application. You can scale out your HCP Vault Dedicated cluster across multiple regions within your selected cloud provider using the Vault Enterprise performance replication feature. This allows you centrally manage Vault Dedicated from a primary cluster, and push the configuration to secondary clusters closer to remote workloads, reducing latency when connecting to Vault.
What is HCP Vault Dedicated Performance Replication
Vault provides the critical services of identity management, secrets storage, and policy management. This functionality is expected to be highly available and to scale as the number of clients and their functional needs increase. At the same time, operators would like to ensure that a common set of policies are enforced globally, and a consistent set of secrets and keys are exposed to applications that need to interoperate. Vault Enterprise Performance Replication provides scalability across regions.
Replication operates on a primary/secondary model, wherein a primary cluster is linked to its secondary clusters. The primary cluster acts as the system of record and asynchronously replicates most Vault data to the secondary cluster. The secondary cluster mirrors the configuration of its primary cluster; however, it keeps track of its own tokens and leases.
If a user action modifies the underlying shared state, the secondary cluster forwards the request to the primary cluster to handle; this is transparent to the client. In practice, most high-volume workloads (reads in the kv backend, encryption/decryption operations in transit, etc.) can be satisfied by the local secondary, allowing Vault to scale relatively horizontally.
You can create up to five performance secondary clusters, but all clusters and their associated networks must be created in the same cloud provider.
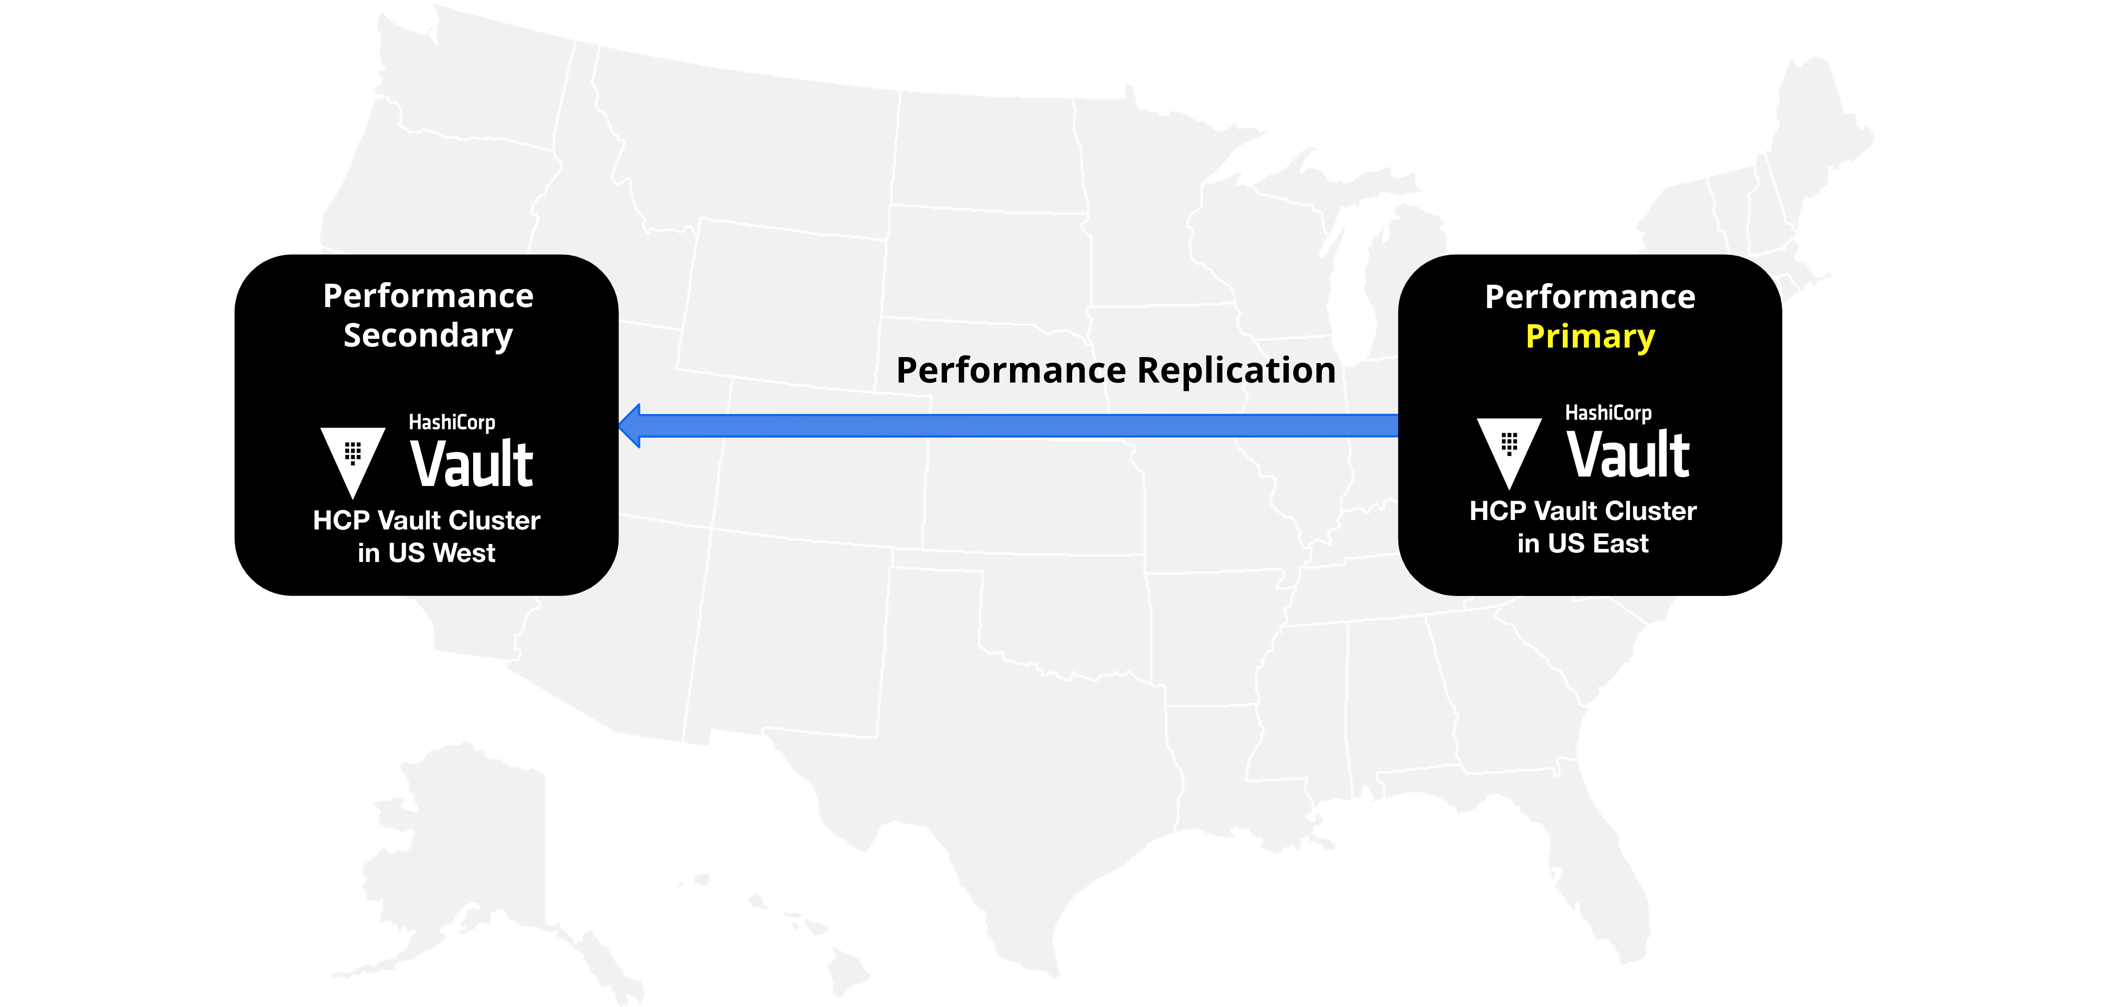
Scenario introduction
In this tutorial, you are going to create an HCP Vault Dedicated primary cluster in the US East region, and the secondary cluster in the US West region.
Prerequisites
- An HCP account with appropriate permissions to initiate this change.
- If you are new to Vault Dedicated, go through the Getting Started with HCP Vault Dedicated tutorials.
- Install Vault on your local machine.
Create HashiCorp Virtual Networks
Create HashiCorp Virtual Networks (HVNs) in the US East region and the US West region before creating Vault Dedicated clusters.
Launch the HCP Portal and login.
Click HashiCorp Virtual Network, and click Create network.
At the Create a HashiCorp Virtual Network page, enter
hvn-us-east-1in the Network name field.Select Amazon Web Services as the provider.
Select N. Virginia (us-east-1) from the Region selection drop-down list.
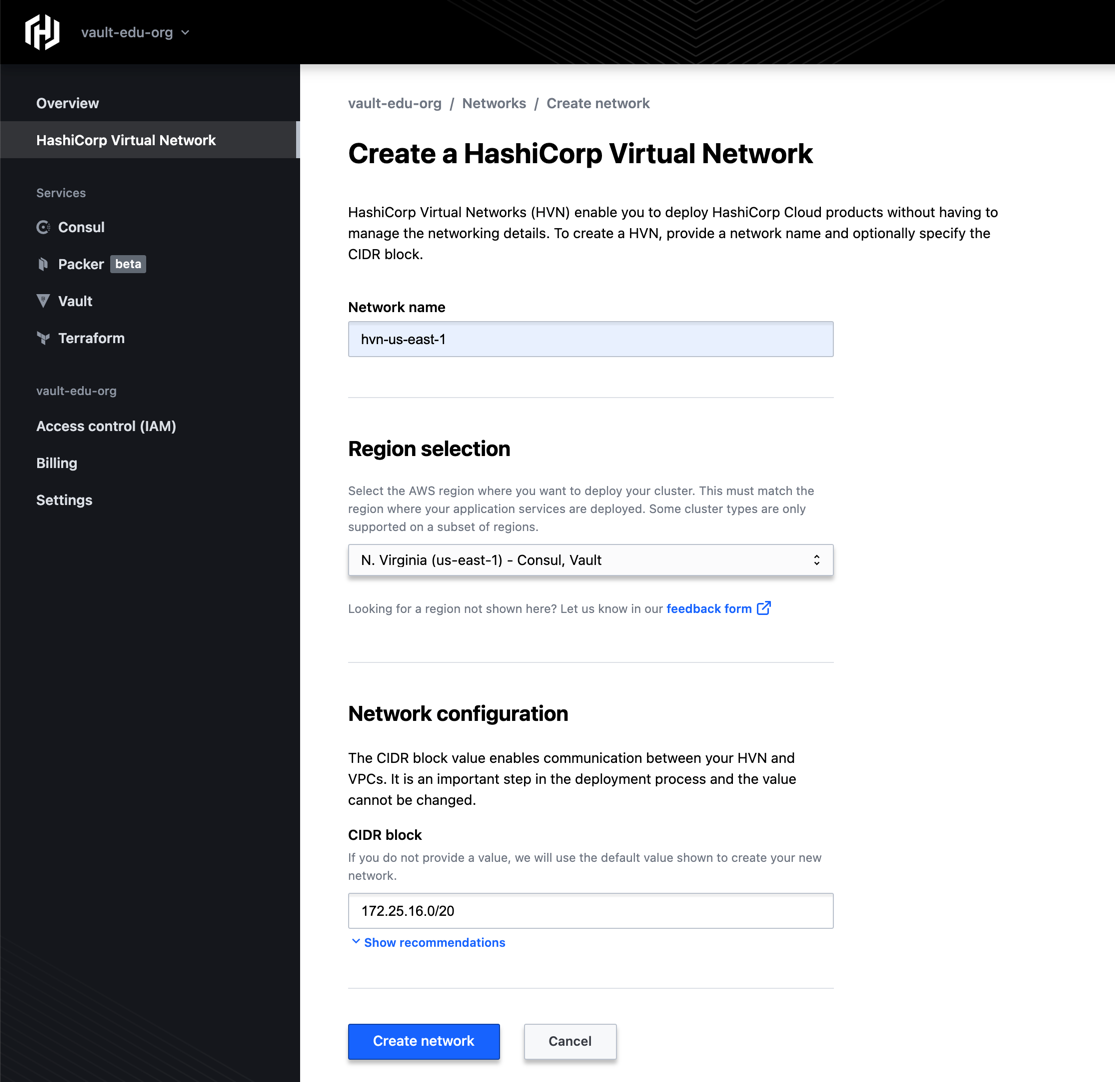
Accept the default CIDR block of
172.25.16.0/20.Click Create network. This takes a few minutes.
Click Back to Networks.
From the HashiCorp Virtual Network page, click Create network again.
Enter
hvn-us-west-2in the Network name field.Select Amazon Web Services as the provider.
Select Oregon (us-west-2) from the Region selection drop-down list.
Enter
172.24.16.0/20in the CIDR block field.Click Create network. Wait until the HVN creation completes.
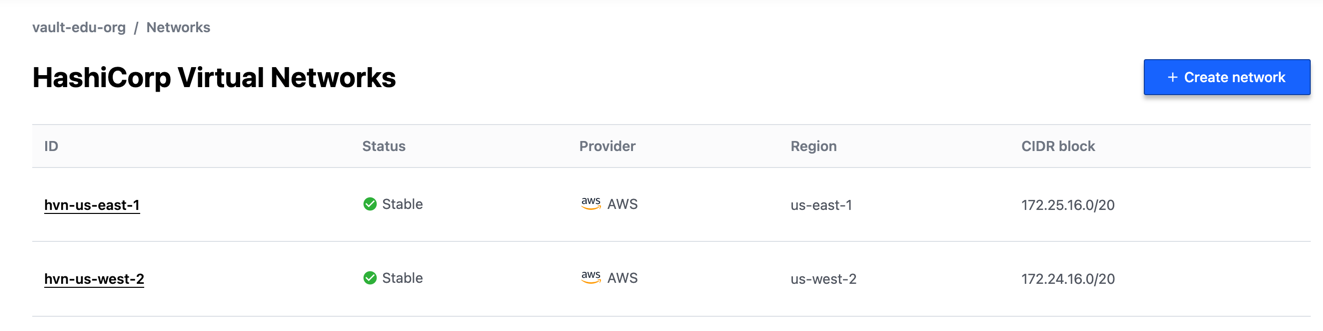
Click Back to Networks in the left navigation menu to view the HVNs.
Create a primary cluster
Click Vault in the left navigation menu, and click the Create cluster button.
Select the cloud Provider that you used when creating the HVN.
Under the Vault tier section, click the pull down menu and select Standard.
Under the Network section select hvn-us-east-1.
Under the Cluster accessibility section, select Public.
Enter
vault-cluster-primaryin the Cluster ID field.Keep all other settings as the default and click the Create cluster button.
Create sample data
To demonstrate the replication capabilities you will create two namespaces and enable the key/value v2 secrets engine.
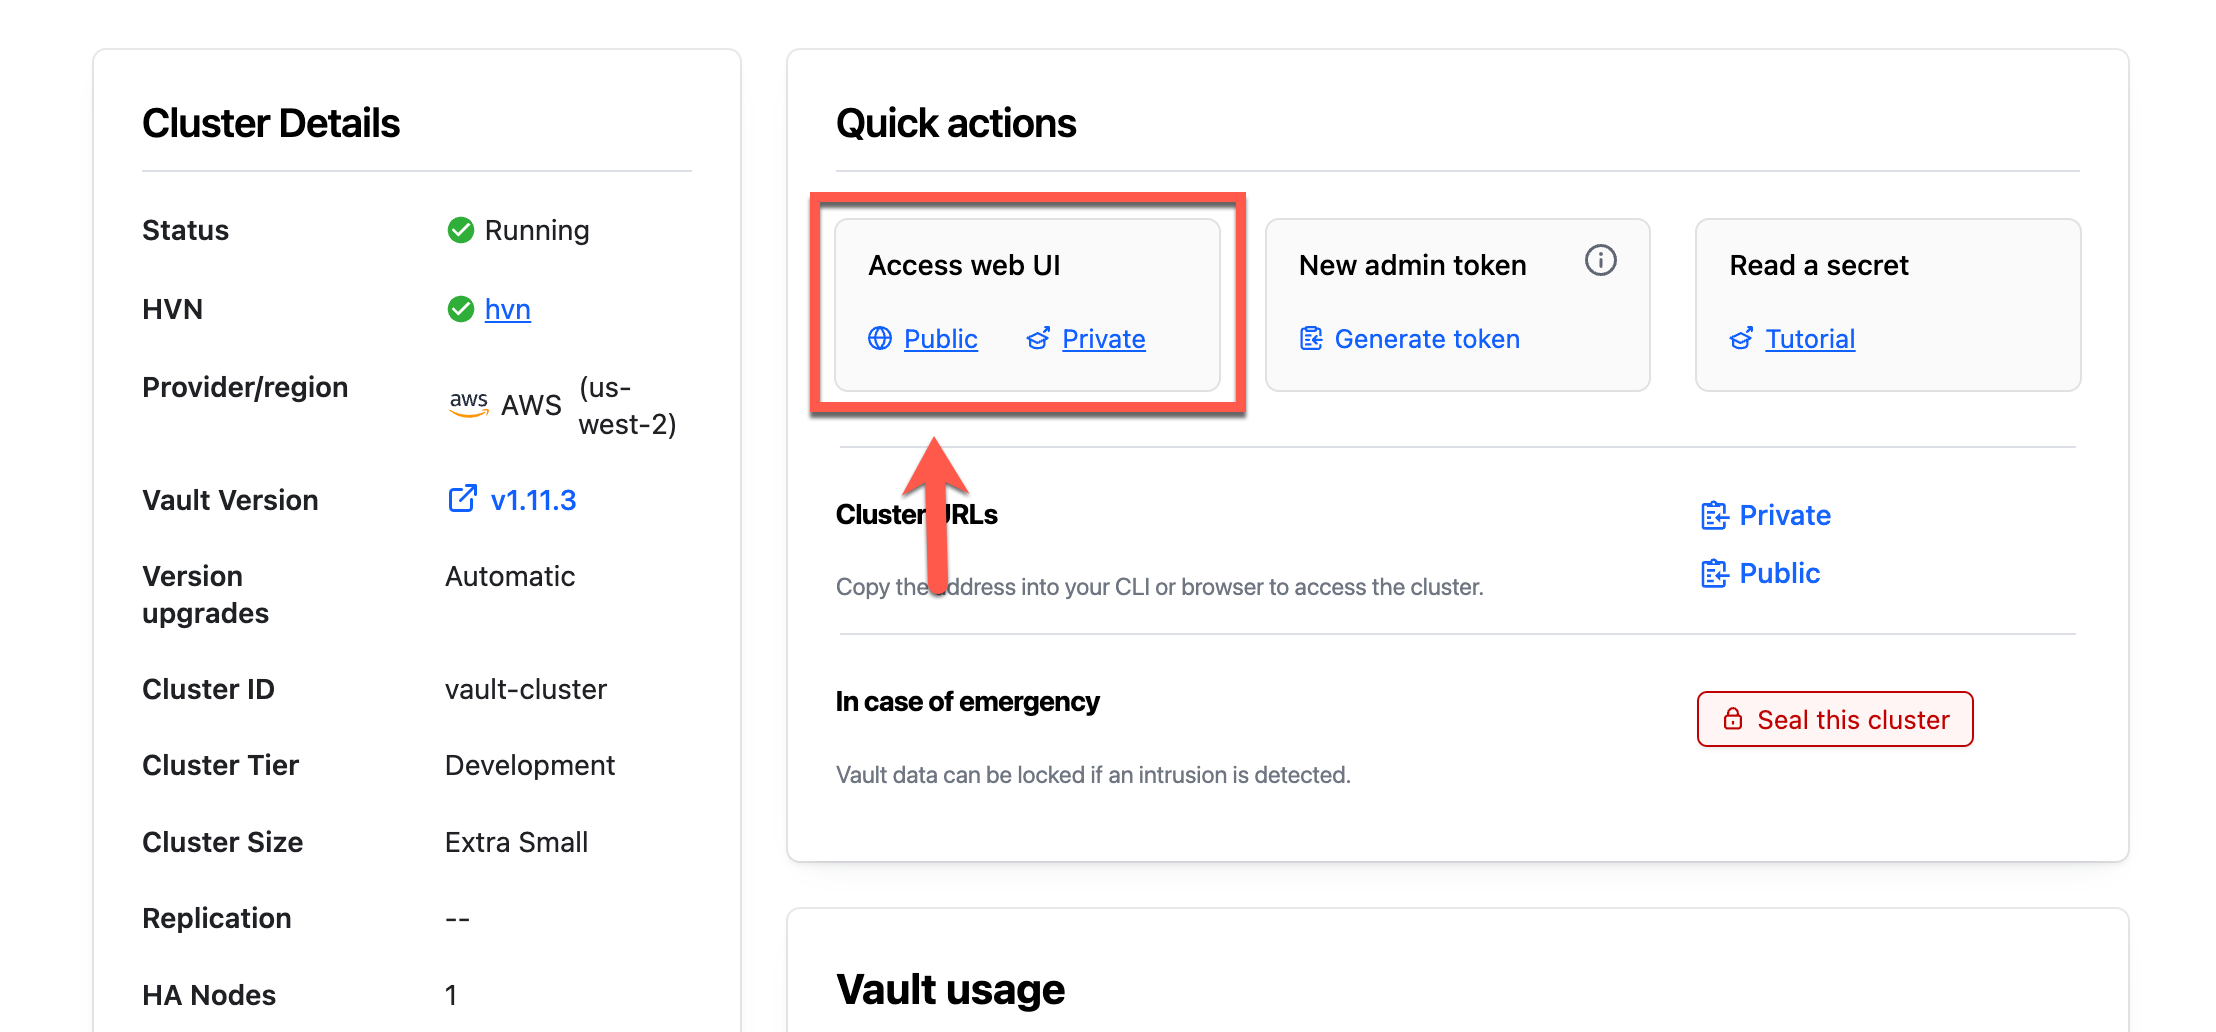
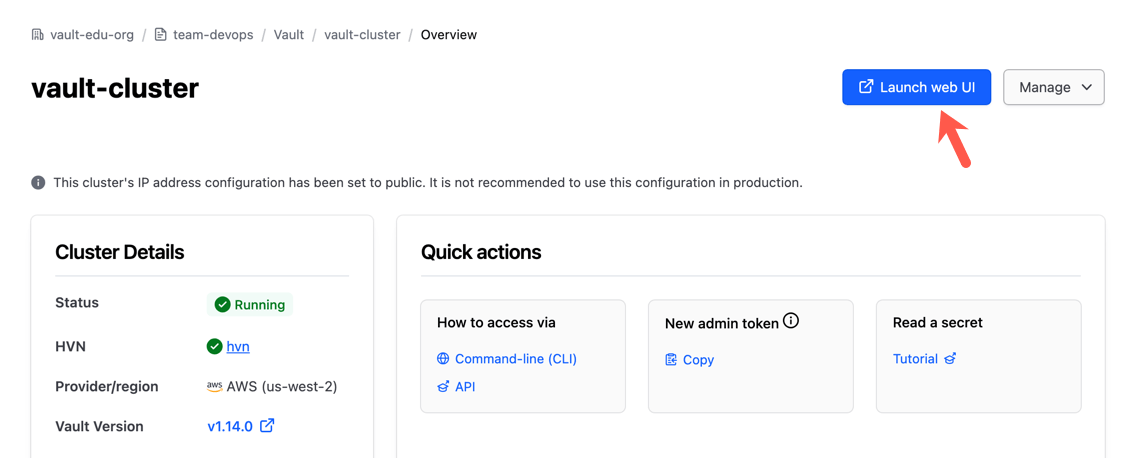
Under Cluster URLs, click Public Cluster URL.
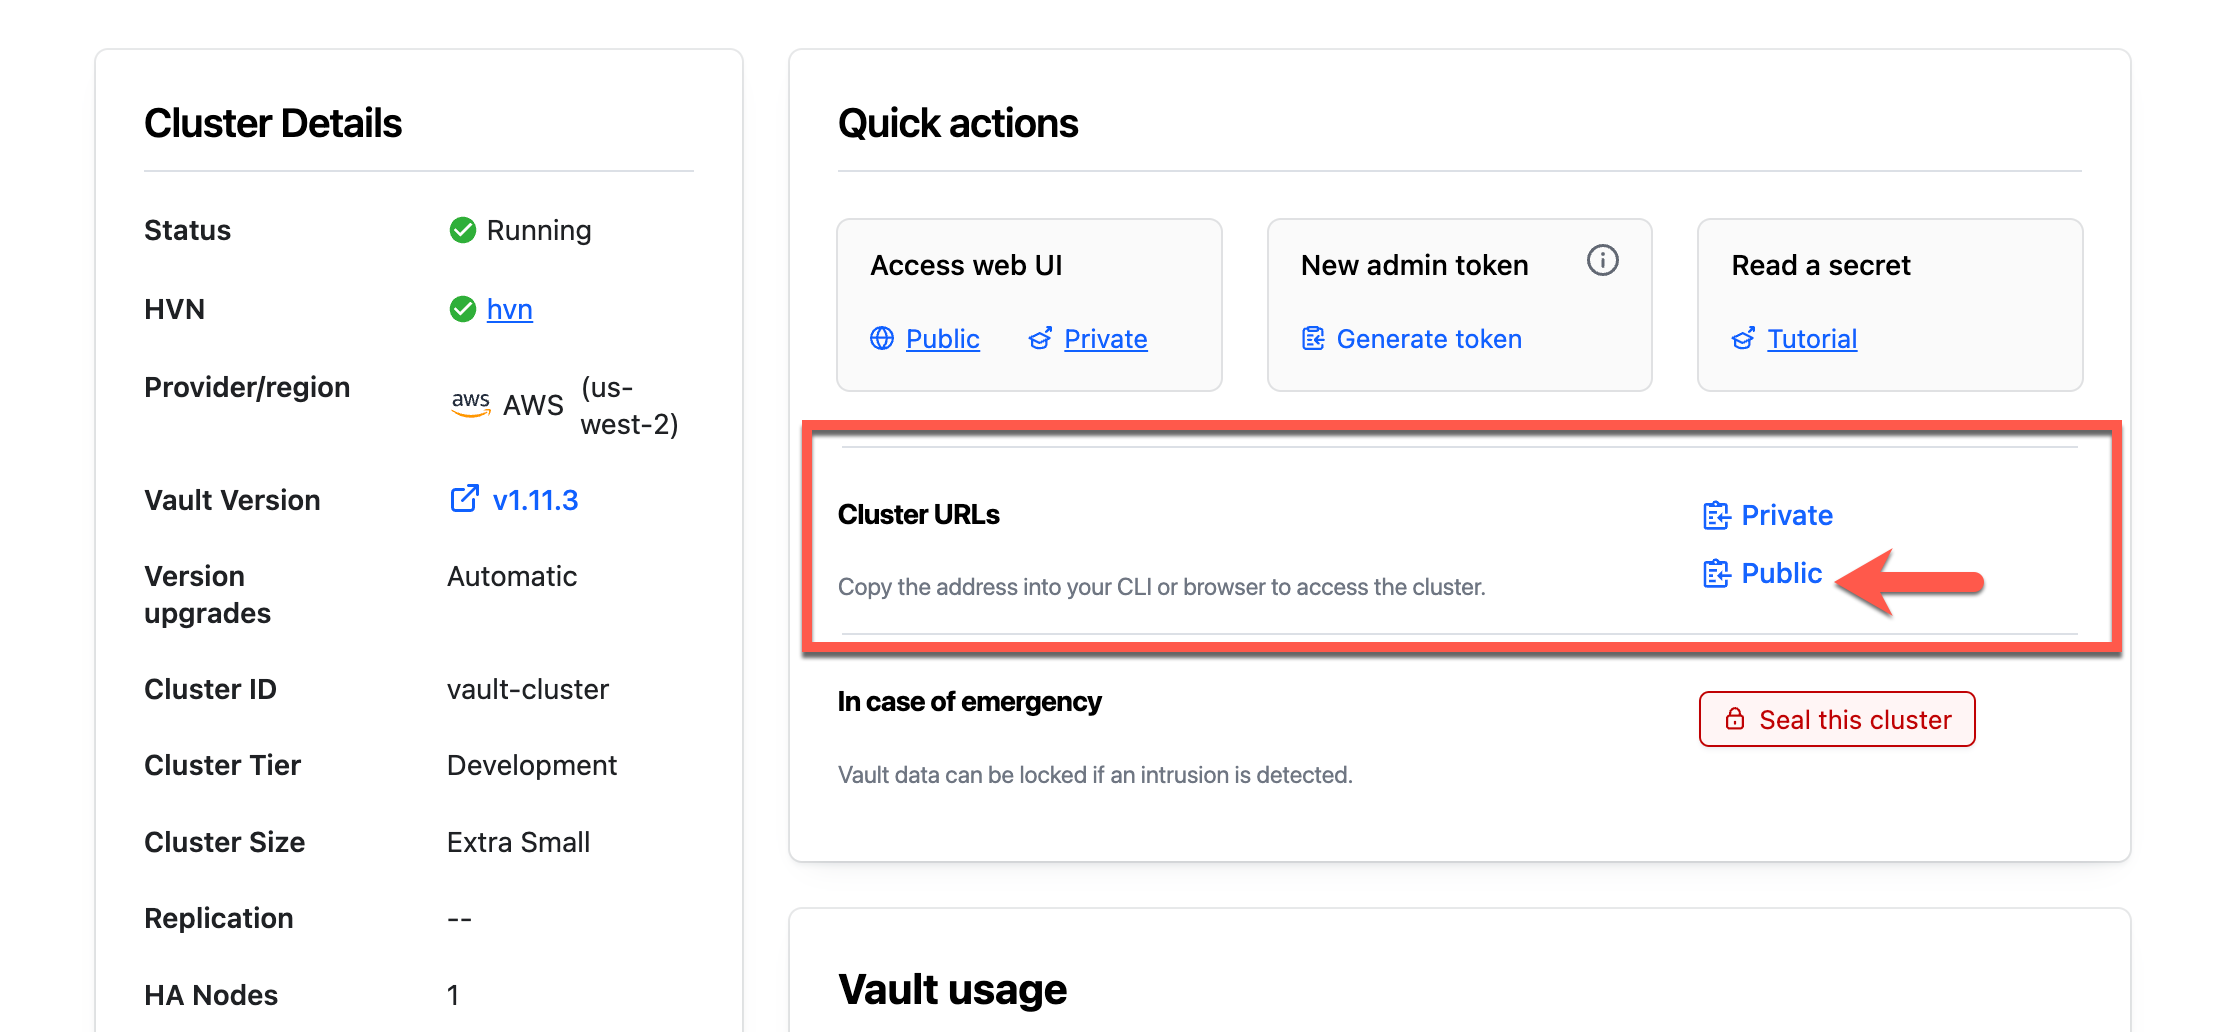
In a terminal, set the
VAULT_ADDRenvironment variable to the copied address.$ export VAULT_ADDR=<Public_Cluster_URL>Return to the Overview page and click Generate token.
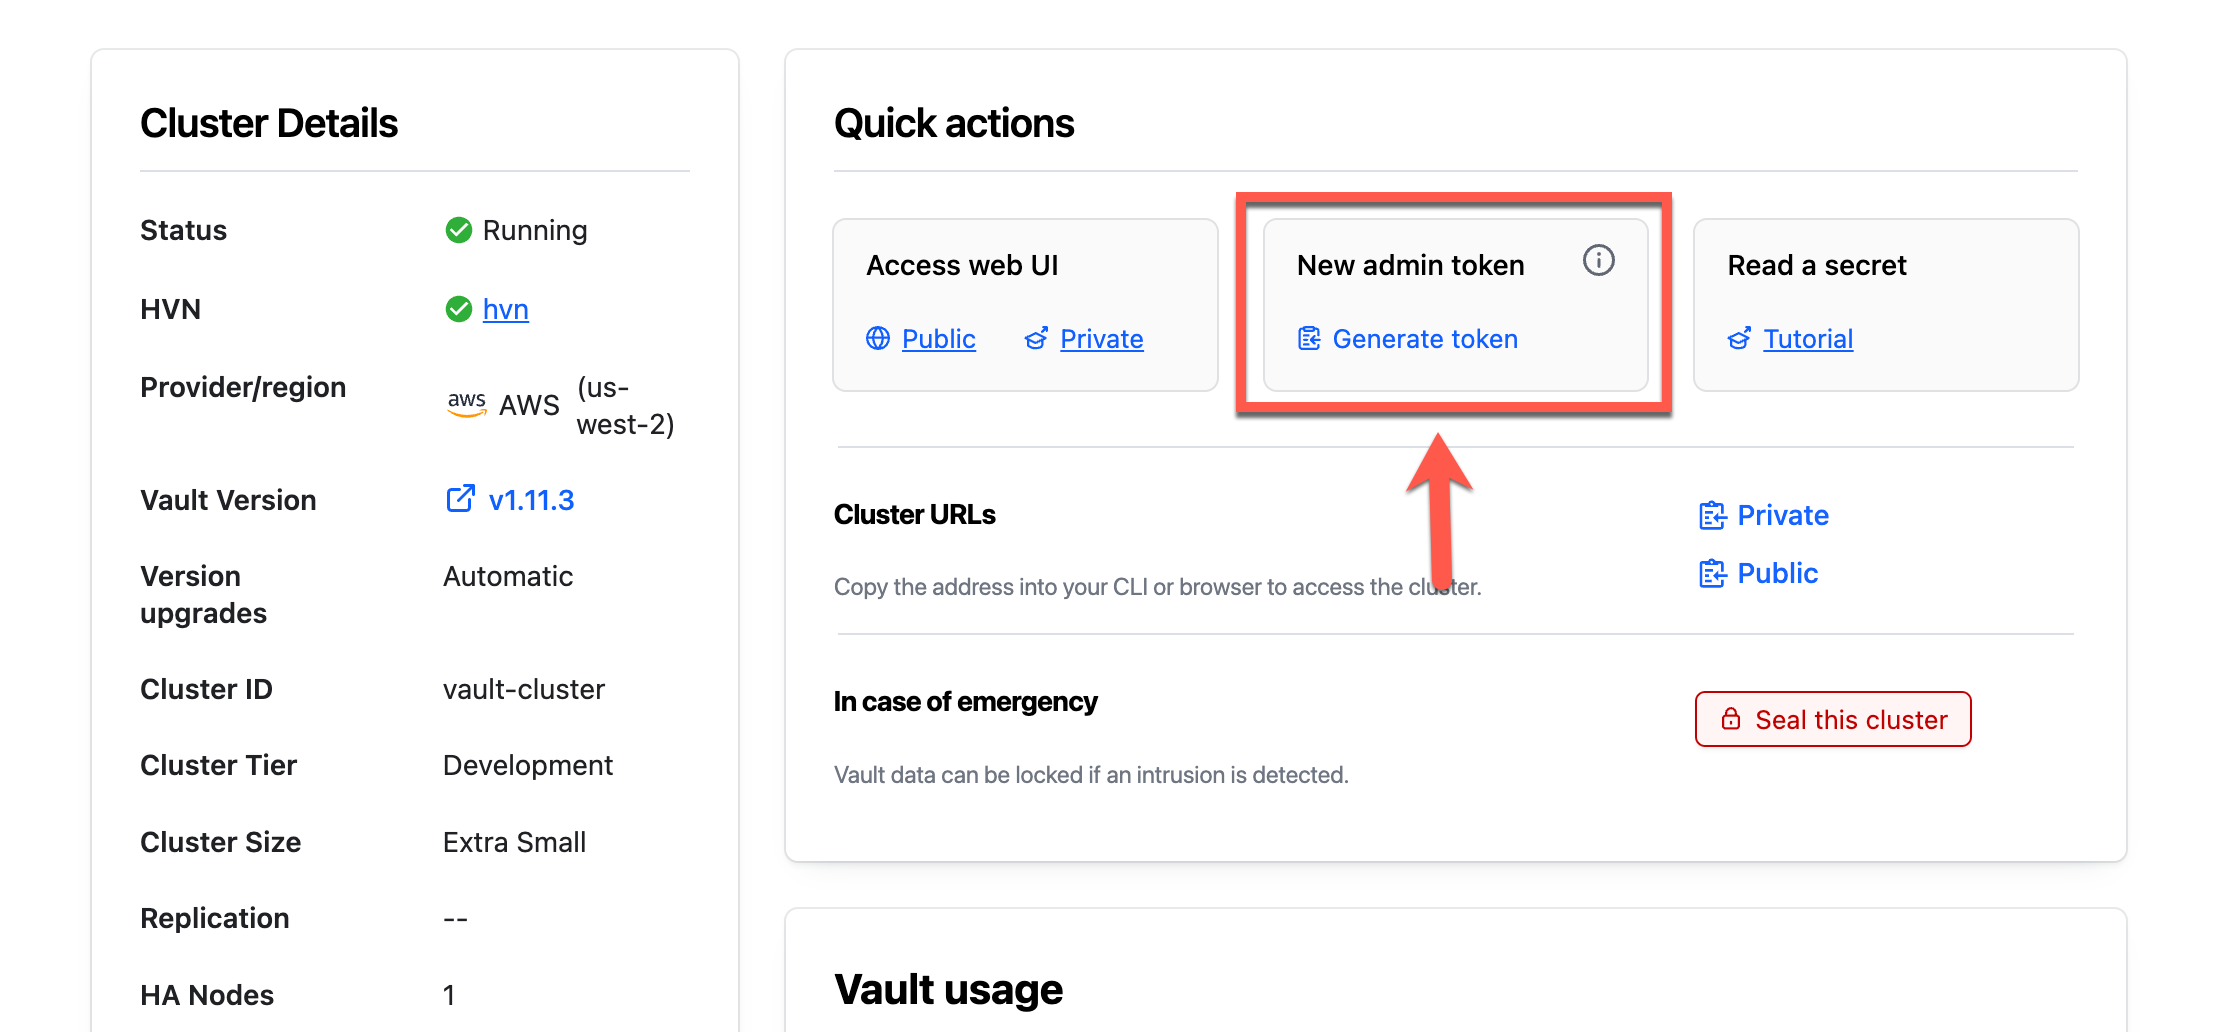
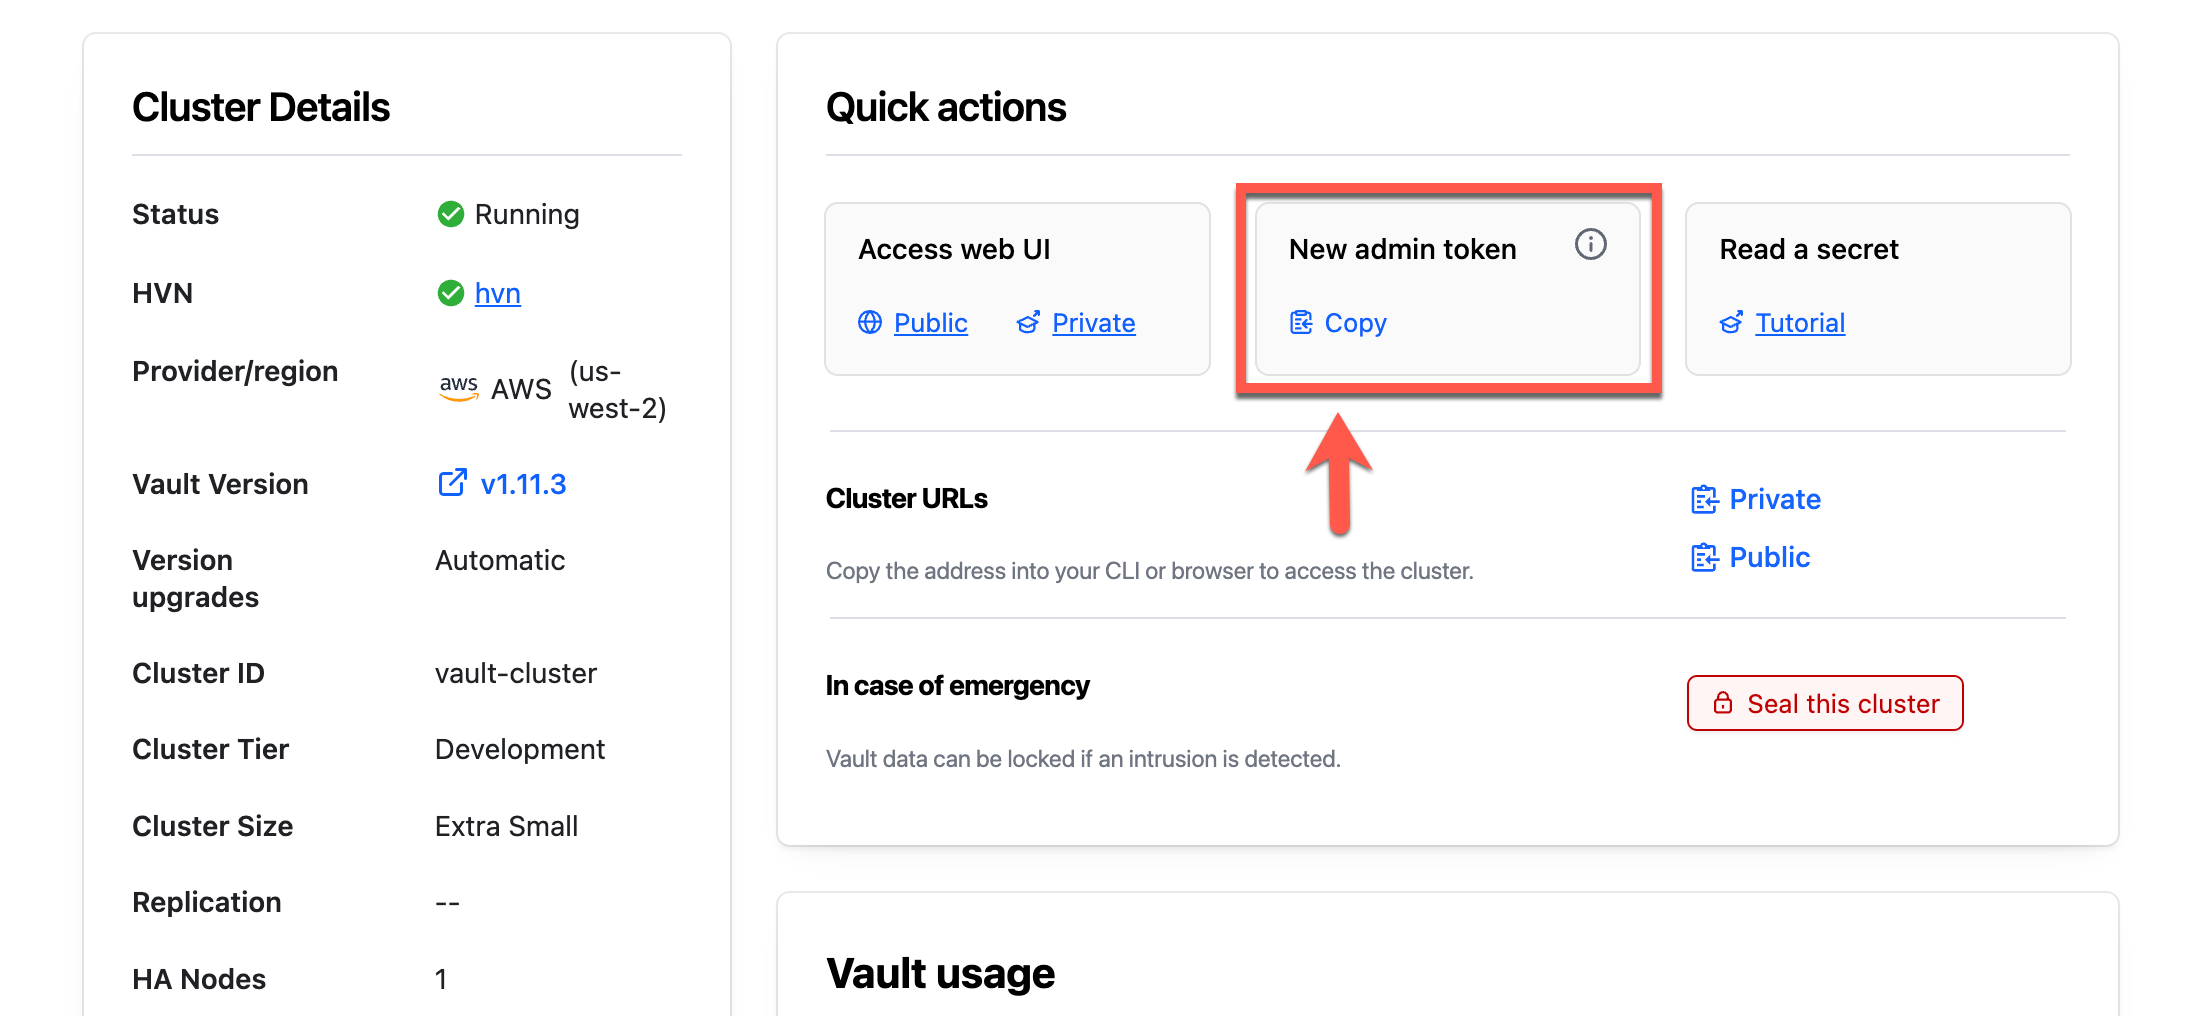
Within a few moments, a new token will be generated.
Copy the Admin Token.
Return to the terminal and set the
VAULT_TOKENenvironment variable.$ export VAULT_TOKEN=<token>Set the
VAULT_NAMESPACEenvironment variable toadmin.$ export VAULT_NAMESPACE=adminCreate a namespace named
replicate-namespace.$ vault namespace create replicate-namespace Key Value --- ----- custom_metadata map[] id zB09r path admin/replicate-namespace/Enable the K/V v2 secrets engine in the
replicate-namespacenamespace with the pathreplicate-secrets.$ vault secrets enable -namespace=admin/replicate-namespace -path=replicate-secrets kv-v2 Success! Enabled the kv-v2 secrets engine at: replicate-secrets/Enable the K/V v2 secrets engine in the
replicate-namespacenamespace with the pathdo-not-replicate-secrets.$ vault secrets enable -namespace=admin/replicate-namespace -path=do-not-replicate-secrets kv-v2 Success! Enabled the kv-v2 secrets engine at: do-not-replicate-secrets/List the enabled secrets engines in the
replicate-namespacenamespace.$ vault secrets list -namespace=admin/replicate-namespace Path Type Accessor Description ---- ---- -------- ----------- cubbyhole/ ns_cubbyhole ns_cubbyhole_8bd101b3 per-token private secret storage do-not-replicate-secrets/ kv kv_3b7c4595 n/a identity/ ns_identity ns_identity_03413f20 identity store replicate/ kv kv_35088ce2 n/a sys/ ns_system ns_system_d52af70f system endpoints used for control, policy and debuggingCreate a second namespace named
do-not-replicate-namespace.$ vault namespace create do-not-replicate-namespace Key Value --- ----- custom_metadata map[] id blByN path admin/do-not-replicate-namespace/

Create a performance secondary cluster
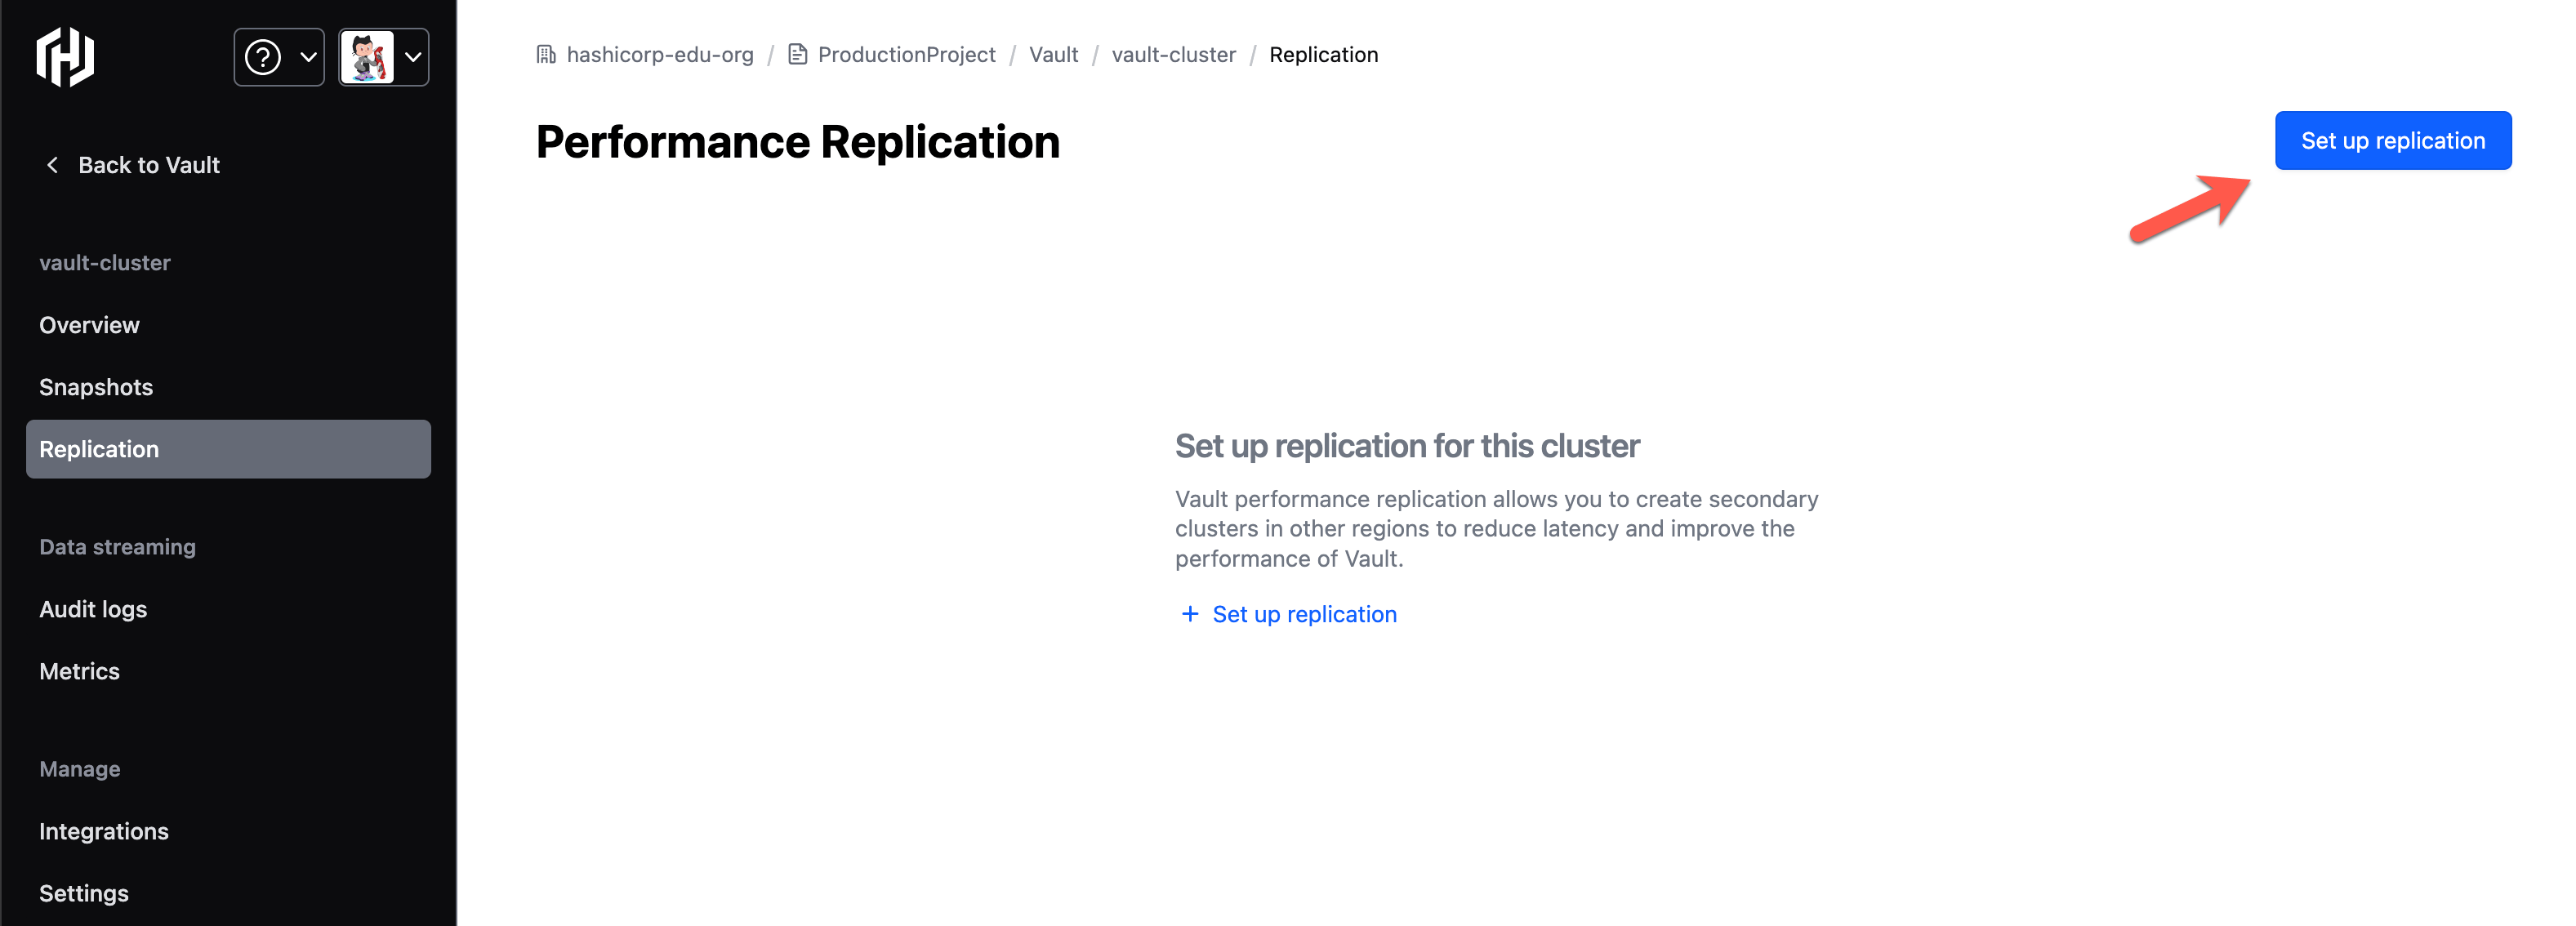
From the Vault overview page, click Replication in the left navigation menu. If the navigation menu does not appear, refresh the page.
Click Set up replication.
In the Create a Vault replication secondary page, enter
vault-cluster-secondaryin the Cluster ID field.Select
hvn-us-west-2under HashiCorp Virtual Network.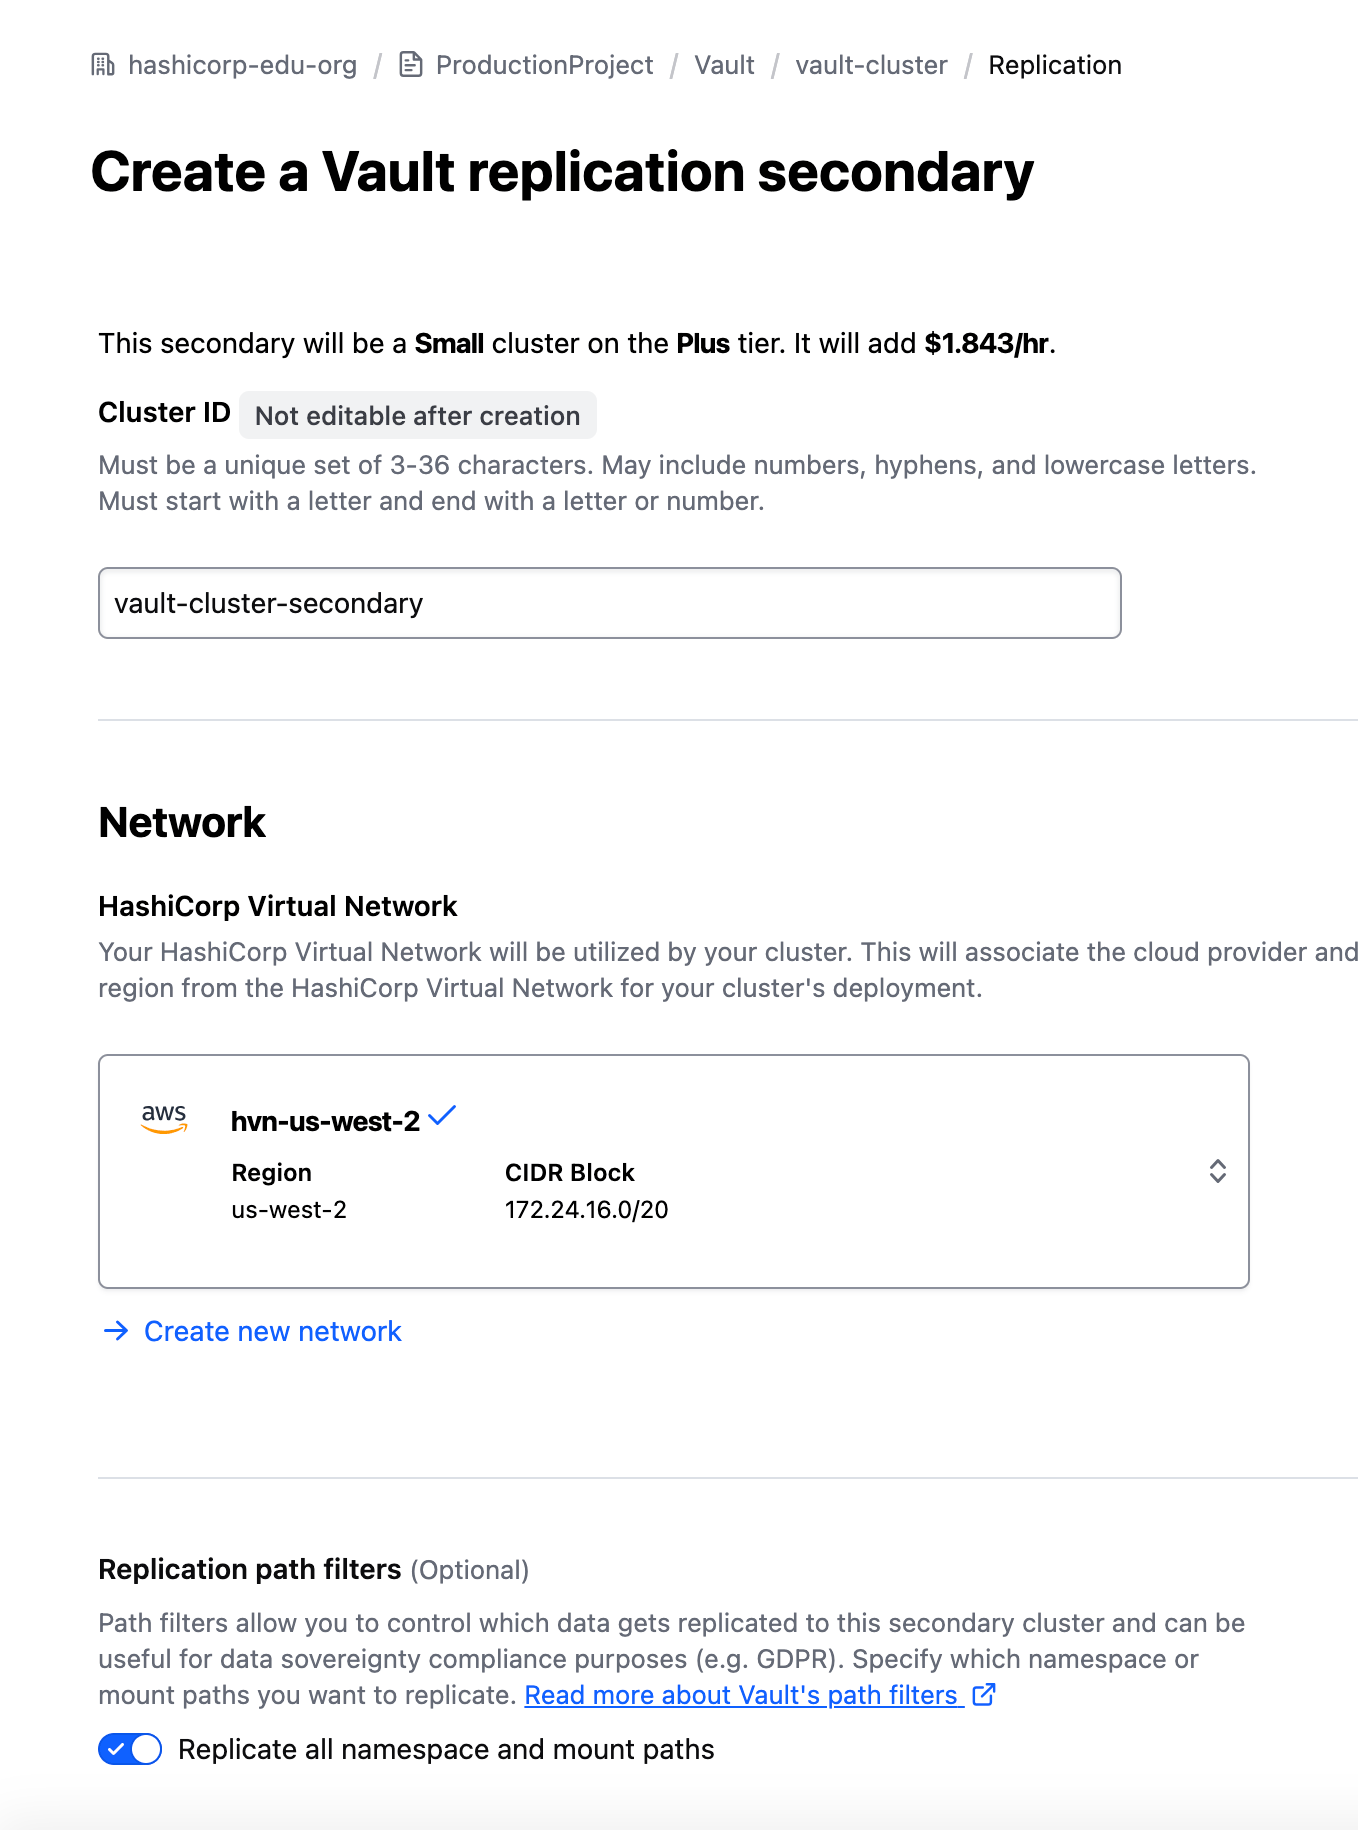
Observe the Replication paths filter switch.
By default, all namespaces and mount paths will be replicated to the secondary cluster.
Click the Replicate all namespace and mount paths switch. The Deny access to the following namespaces and mount paths text box will appear.
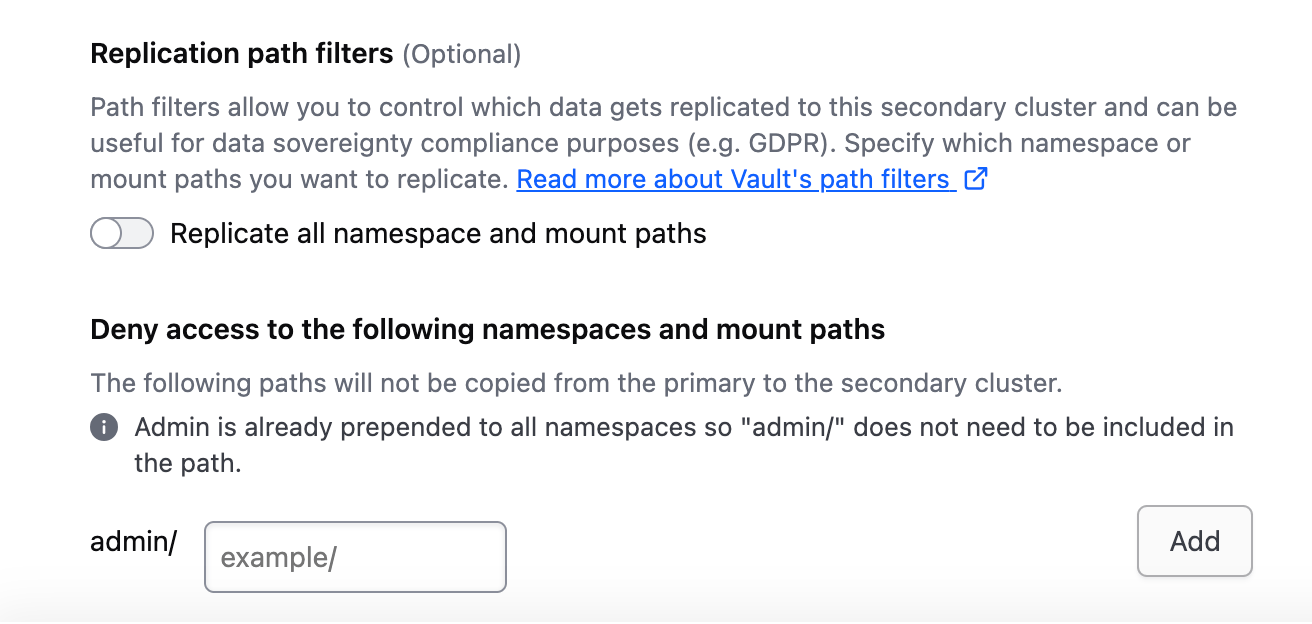
In the text box enter
do-not-replicate-namespaceand click the Add button.This will prevent the
do-not-replicate-namespacenamespace you created earlier from being replicated to the secondary cluster, including any mount paths in the namespace.A second text box will appear. Enter
replicate-namespace/do-not-replicate-secretsand click the Add button.This will prevent the K/V v2 secret engine you enabled earlier from being replicated to the secondary cluster, even though its parent namespace is being replicated.
Click Create cluster. Wait for the cluster creation to complete.
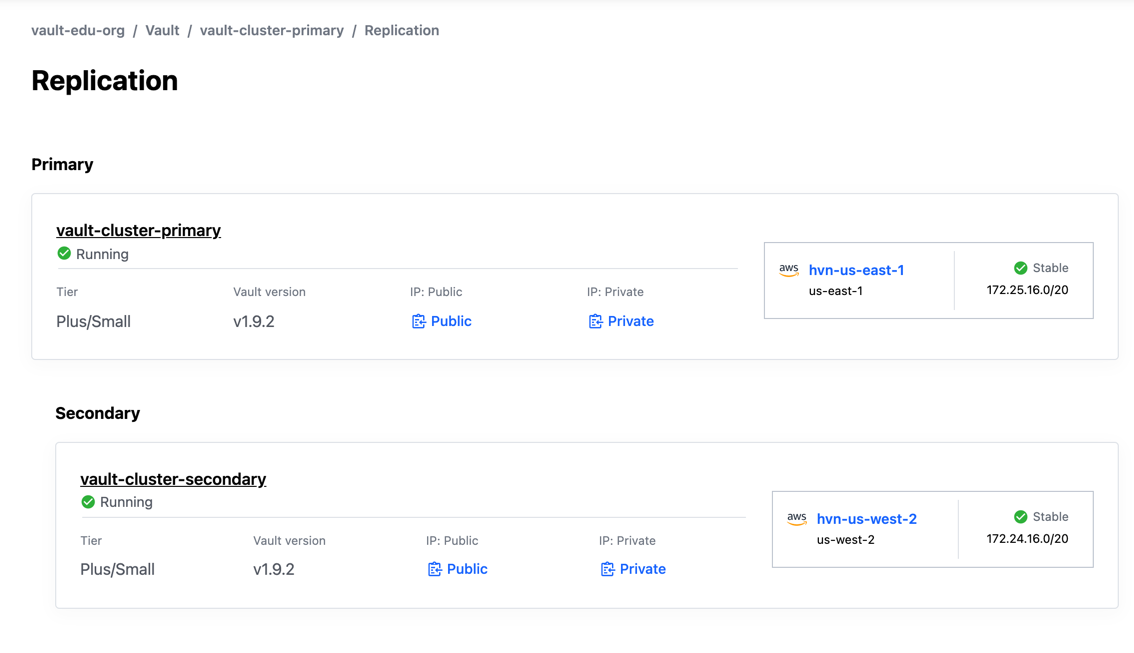
Validate cluster replication
Once the vault-cluster-secondary cluster deployment completes, verify the sample data
you created was replicated as expected.
When the cluster status changes to Running, click the vault-cluster-secondary link.
In the Configuration pane, click the Public Cluster URL.
In the terminal you previously set the
VAULT_ADDRenvironment variable, update theVAULT_ADDRto the copied address for the secondary cluster.$ export VAULT_ADDR=<Public_Cluster_URL>Return to the Overview page and click Generate token.
Within a few moments, a new token will be generated.
Copy the Admin Token.
Update the
VAULT_TOKENenvironment variable to store the token value for the secondary cluster.$ export VAULT_TOKEN=<Admin_Token>View the list of namespaces available in the secondary cluster.
$ vault namespace list

Keys
----
replicate-namespace/
The
do-not-replicate-namespacenamespace was not replicated to the secondary cluster because you added the namespace path to the deny filter.View the list of secrets engines available in the
replicate-namespace.$ vault secrets list -namespace=admin/replicate-namespace Path Type Accessor Description ---- ---- -------- ----------- cubbyhole/ ns_cubbyhole ns_cubbyhole_8bd101b3 per-token private secret storage identity/ ns_identity ns_identity_03413f20 identity store replicate-secrets kv kv_35088ce2 n/a sys/ ns_system ns_system_d52af70f system endpoints used for control, policy and debuggingThe
do-not-replicate-secretsK/V secret engine was not replicated, even though the namespace was replicated because you added the secret engine path to the deny filter.
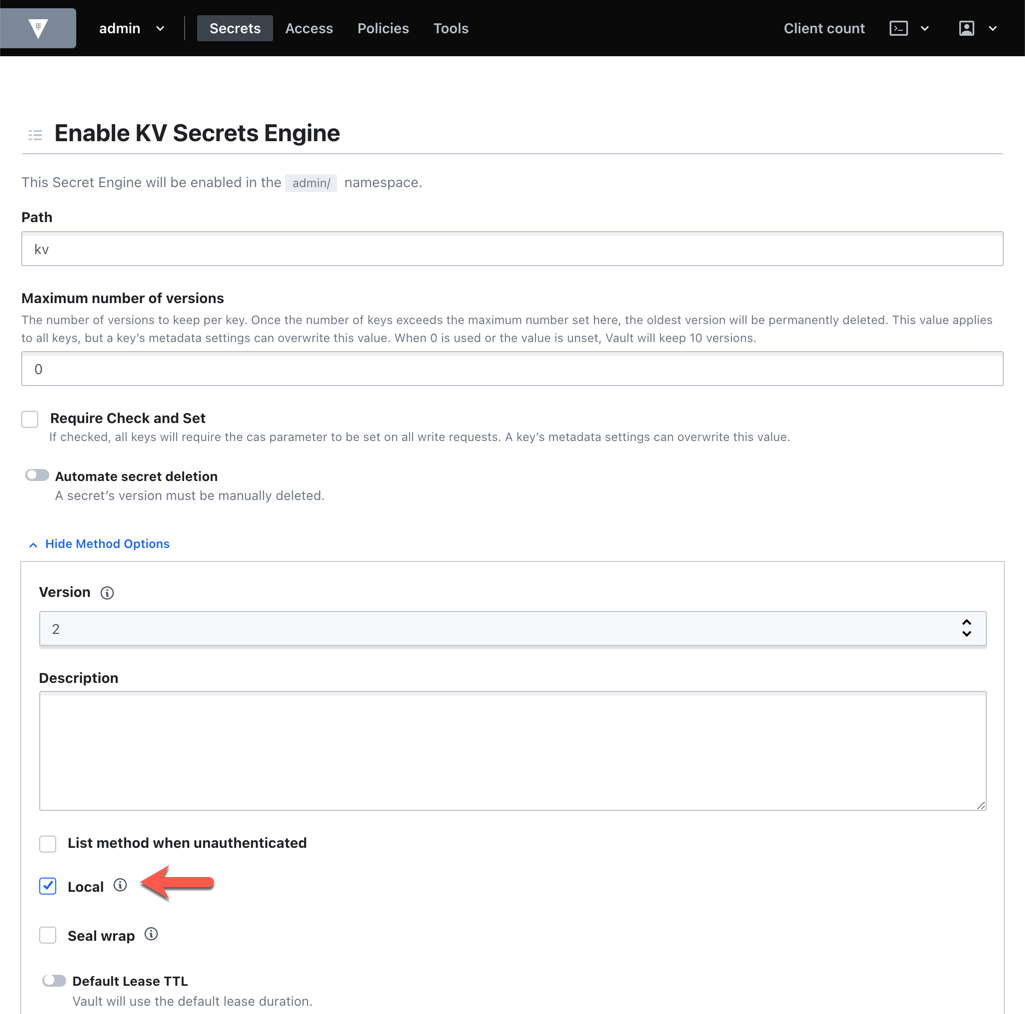
Local secrets engines and auth methods
You can also enable secrets engines and/or auth methods locally if you want to disallow them from being replicated across the clusters.
Enable an auth method via CLI
To enable a local secrets engine or auth method via Vault
CLI, use the -local flag.
Example: The following command enables the AppRole auth method locally at
us_east_approle path. This auth method configuration will not be replicated
to other clusters within the replication group.
$ vault auth enable -local -path=us_east_approle approle
Delete clusters
A primary cluster can not be deleted while it has an active secondary cluster. The secondary cluster needs to be deleted before deleting the primary cluster.
From the Vault page, click vault-cluster-secondary.
In the Overview page, click Manage > Delete cluster.
When prompted to confirm, enter
DELETEin the text field and click Delete. Wait until the cluster deletion completes.Repeat the steps to delete the primary cluster (
vault-cluster-primary).
After clusters are deleted, you can delete the HVNs as well.
Revoke irrevocable leases on secondary clusters
Performance replication will break if you disable dynamic secret engines without manually revoking irrevocable leases on the secondary clusters. For example, to safely disable a database secrets plugin on the primary cluster, you must revoke any local leases on the secondary clusters first.