Manage HCP Vault Dedicated clusters
HashiCorp Cloud Platform (HCP) Vault provides access to critical operational tasks, such as locking the cluster, accessing audit logs, and managing data snapshots.
Enable cross-region disaster recovery
HCP Vault Dedicated supports cross-region disaster recover (DR) on essentials or standard tier clusters in both AWS and Azure. Cross-region DR replicas must be in the same provider as the primary Vault cluster.
Cross-region DR allows you to enable high-availability for your HCP Vault Dedicated cluster, even when your selected cloud provider has a regional outage.
You must create the cross-region DR HVN in a different region than the primary cluster HVN.
Create primary HVN
Create an HVN in the preferred region for your primary cluster.
Launch the HCP Portal and login.
Select the organization and project where you want to create a HCP Vault Dedicated cluster with cross-region disaster recovery.
Click HashiCorp Virtual Networks.
Click Create network.
Enter
hvn-primaryin the Network name field.Select your preferred cloud provider.
Select an east region for your provider from the Region selection dropdown menu.
Enter
172.25.16.0/24in the CIDR block field.Click Create network.
Create cross-region disaster recovery HVN
Enable cross-region DR by creating an HVN in a different region than your primary cluster.
Repeat the steps above to create a second HVN with the following details:
- Network name:
hvn-dr - Provider: Select the same cloud provider as the primary HVN.
- Region selection: Select a west region for your provider.
- CIDR block:
172.25.17.0/24
- Network name:
Click Back to Networks.
Create cluster with cross-region DR
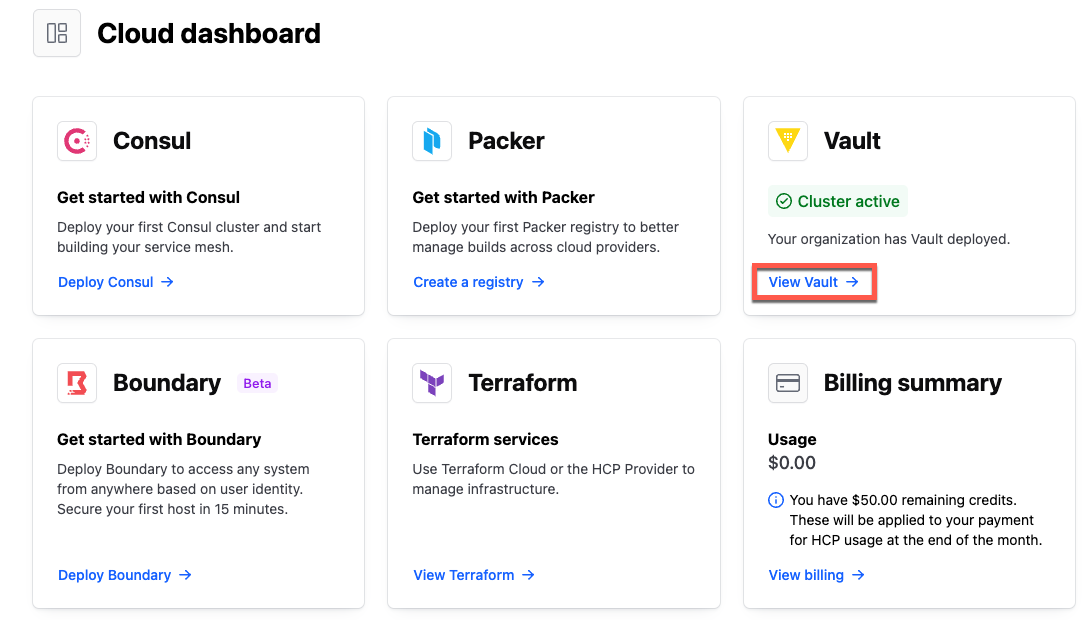
Click Vault Dedicated.
Under Start from scratch click Create cluster.
Select the cloud provider you selected for the two HVNs as the Provider.
Select Standard for the Vault tier.
Select hvn-primary for the Network.
Click the toggle switch to enable the Backup network.
Click the pulldown menu and select hvn-dr.

Click Create cluster. The new cluster deployment and initialization process beings.
When the cluster initialization completes, the Cluster networking pane displays the active HVN and the Backup network.

HashiCorp manages the disaster response. If a disaster is declared, HashiCorp will failover to the cross-region DR replica. Failover to the DR replica is transparent for any workloads accessing Vault once the failover is complete. When the disaster has been resolved, HashiCorp will fail back to the primary cluster.
Refer to the HCP Vault Dedicated documentation for additional cross-region DR considerations.
Lock and unlock the Vault cluster
Intrusion detection or data breaches may require you to lock your HCP Vault Dedicated cluster. API lock functions similarly to Vault sealing by preventing normal Vault operations but still allowing the HCP platform access to perform upgrades and snapshots.
Lock the cluster
Under Quick actions, click API Lock.

A Lock API? pop-up dialog displays a warning and explanation of the locking operation.
Enter
LOCKinto the Confirm lock field.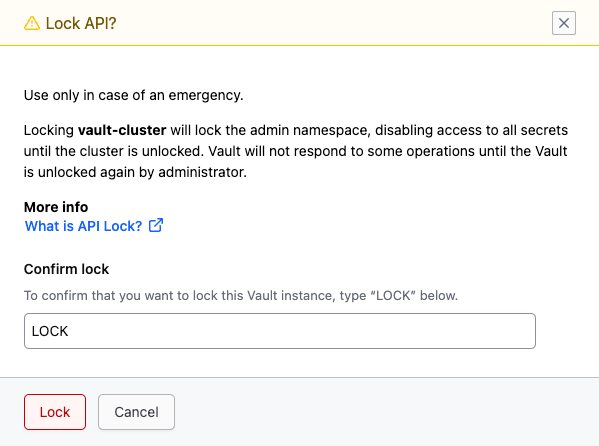
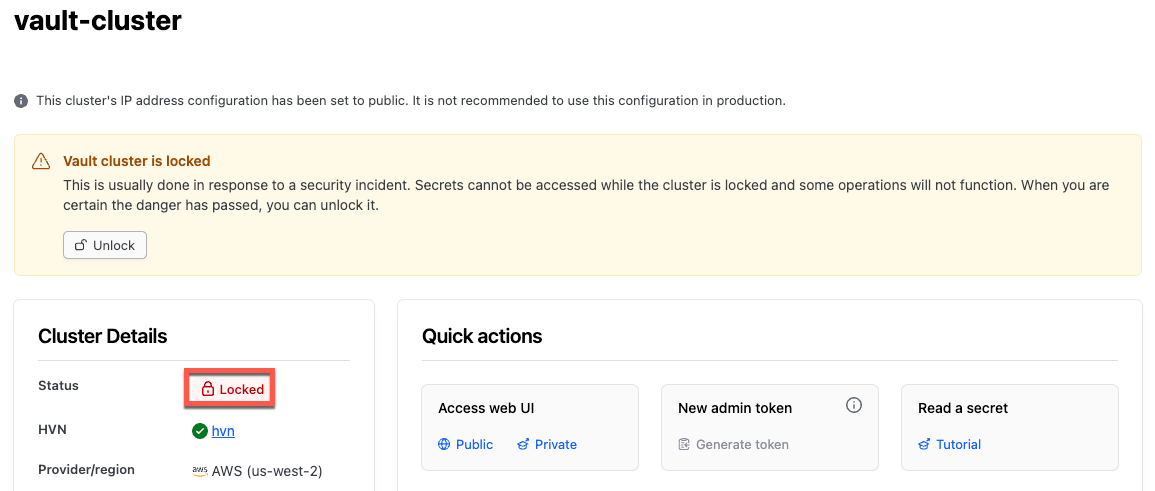
Click Lock to proceed. When it completes, the cluster state changes to Locked.
Unlock the cluster
In the Vault cluster is locked notification, click Unlock.
A pop-up dialog displays a warning and explanation of the unseal operation.
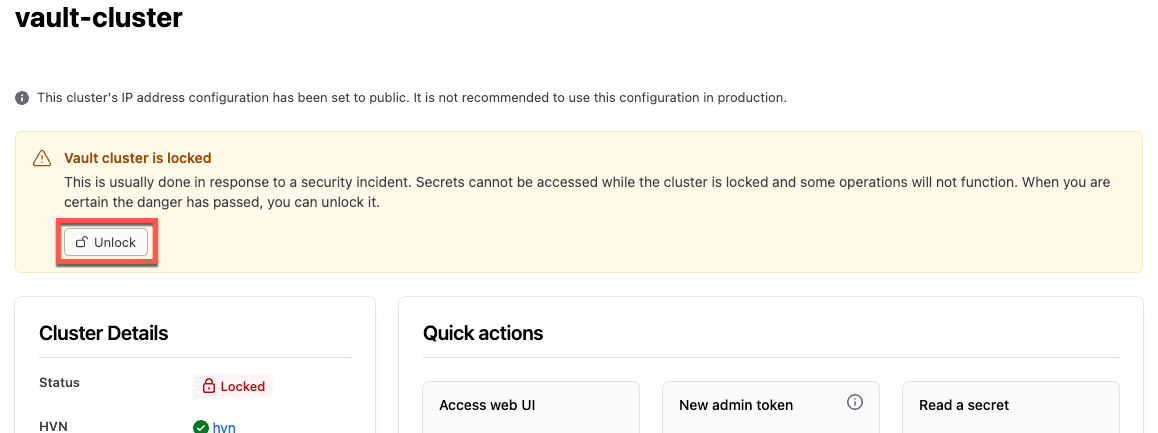
Enter
UNLOCKinto the Confirm unlock field.Click Unlock.
The Vault cluster unlocks. The Vault Overview page displays the Vault configuration and available operations.
Scale an HCP Vault Dedicated cluster up or down
Vault Dedicated cluster scaling allows you to scale your cluster up or down to meet organizational needs. You can scale between both cluster tiers (e.g. dev to standard) and cluster sizes (e.g standard small to standard medium).
Cluster scaling is fully managed by the HashiCorp Cloud Platform and performed with no downtime, meaning you can continue to utilize Vault Dedicated while the cluster is being scaled up or down. Cluster scaling is available from the HCP Portal and Terraform when using version 0.21.1 or higher of the HCP Terraform provider.
Follow these steps in the HCP Portal to scale your cluster up from the dev tier cluster created in the Create a Vault Cluster on HCP tutorial.
Navigate to the Overview page for your Vault Dedicated cluster.
Click Manage and then select Edit configuration.
Scroll down to view the Cluster Tier pulldown menu.
Click the pulldown menu and select the Standard tier. In the Cluster Size pulldown menu you will see multiple supported sizes. You can scale the Vault Dedicated cluster up and down between the available sizes within a tier, or scale between different tiers. You can scale up from the development tier to another tier but you cannot scale back down to the development tier.
Click Next.
The Review changes screen provides an overview of the requested changes and the pricing differences between the two tiers.
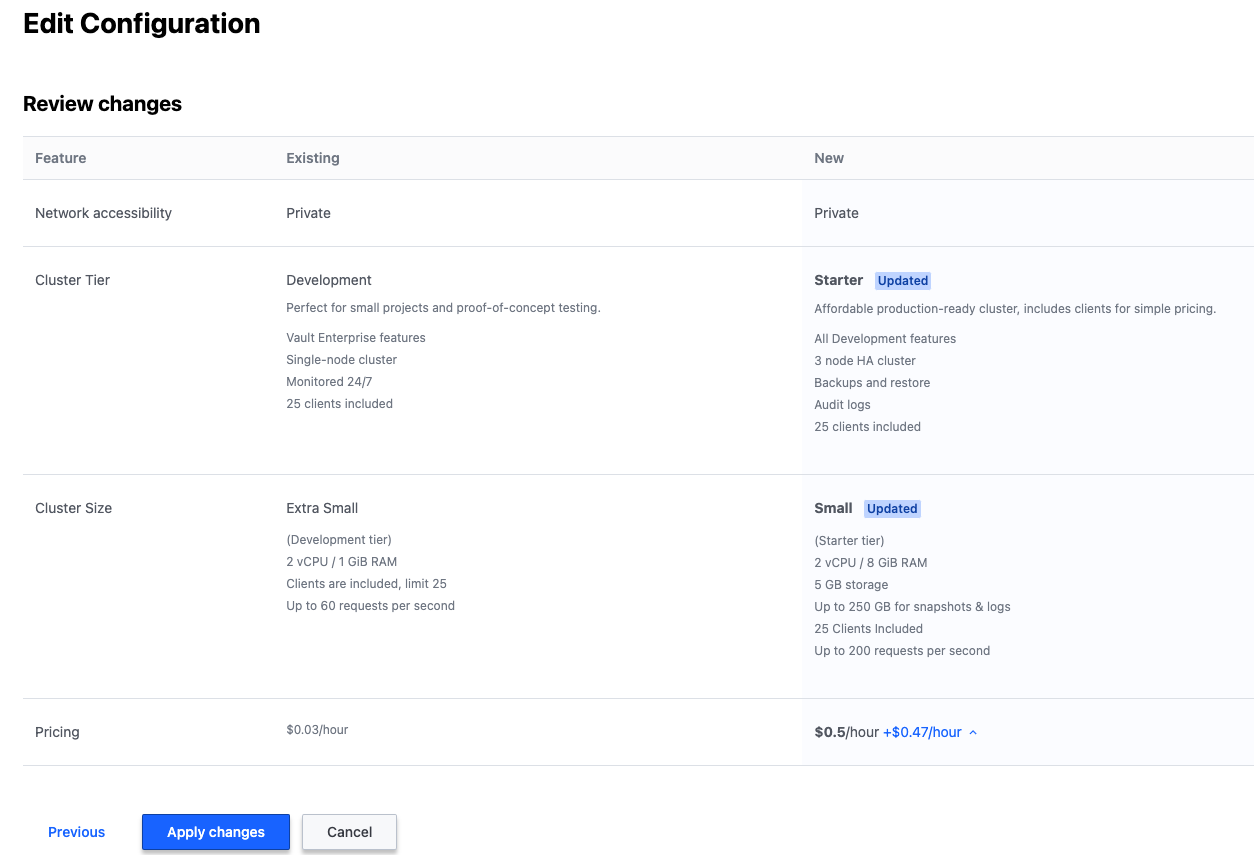
Click Apply changes. You will be returned to the Overview screen.
The cluster will begin updating. This process will take several minutes.
Wait for the cluster to complete the scale up process and then move on to the next section.
Create data snapshots
Preserving Vault data is critical to production operations and particularly for disaster or sabotage recovery purposes. Vault Dedicated offers snapshot functionality for the underlying storage to preserve data based on your requirements.
Create snapshot
After completing the Scale an Vault Dedicated cluster up or down tutorial you can follow these steps to manually snapshot your Vault data as needed.
Click Snapshots in the left navigation pane.
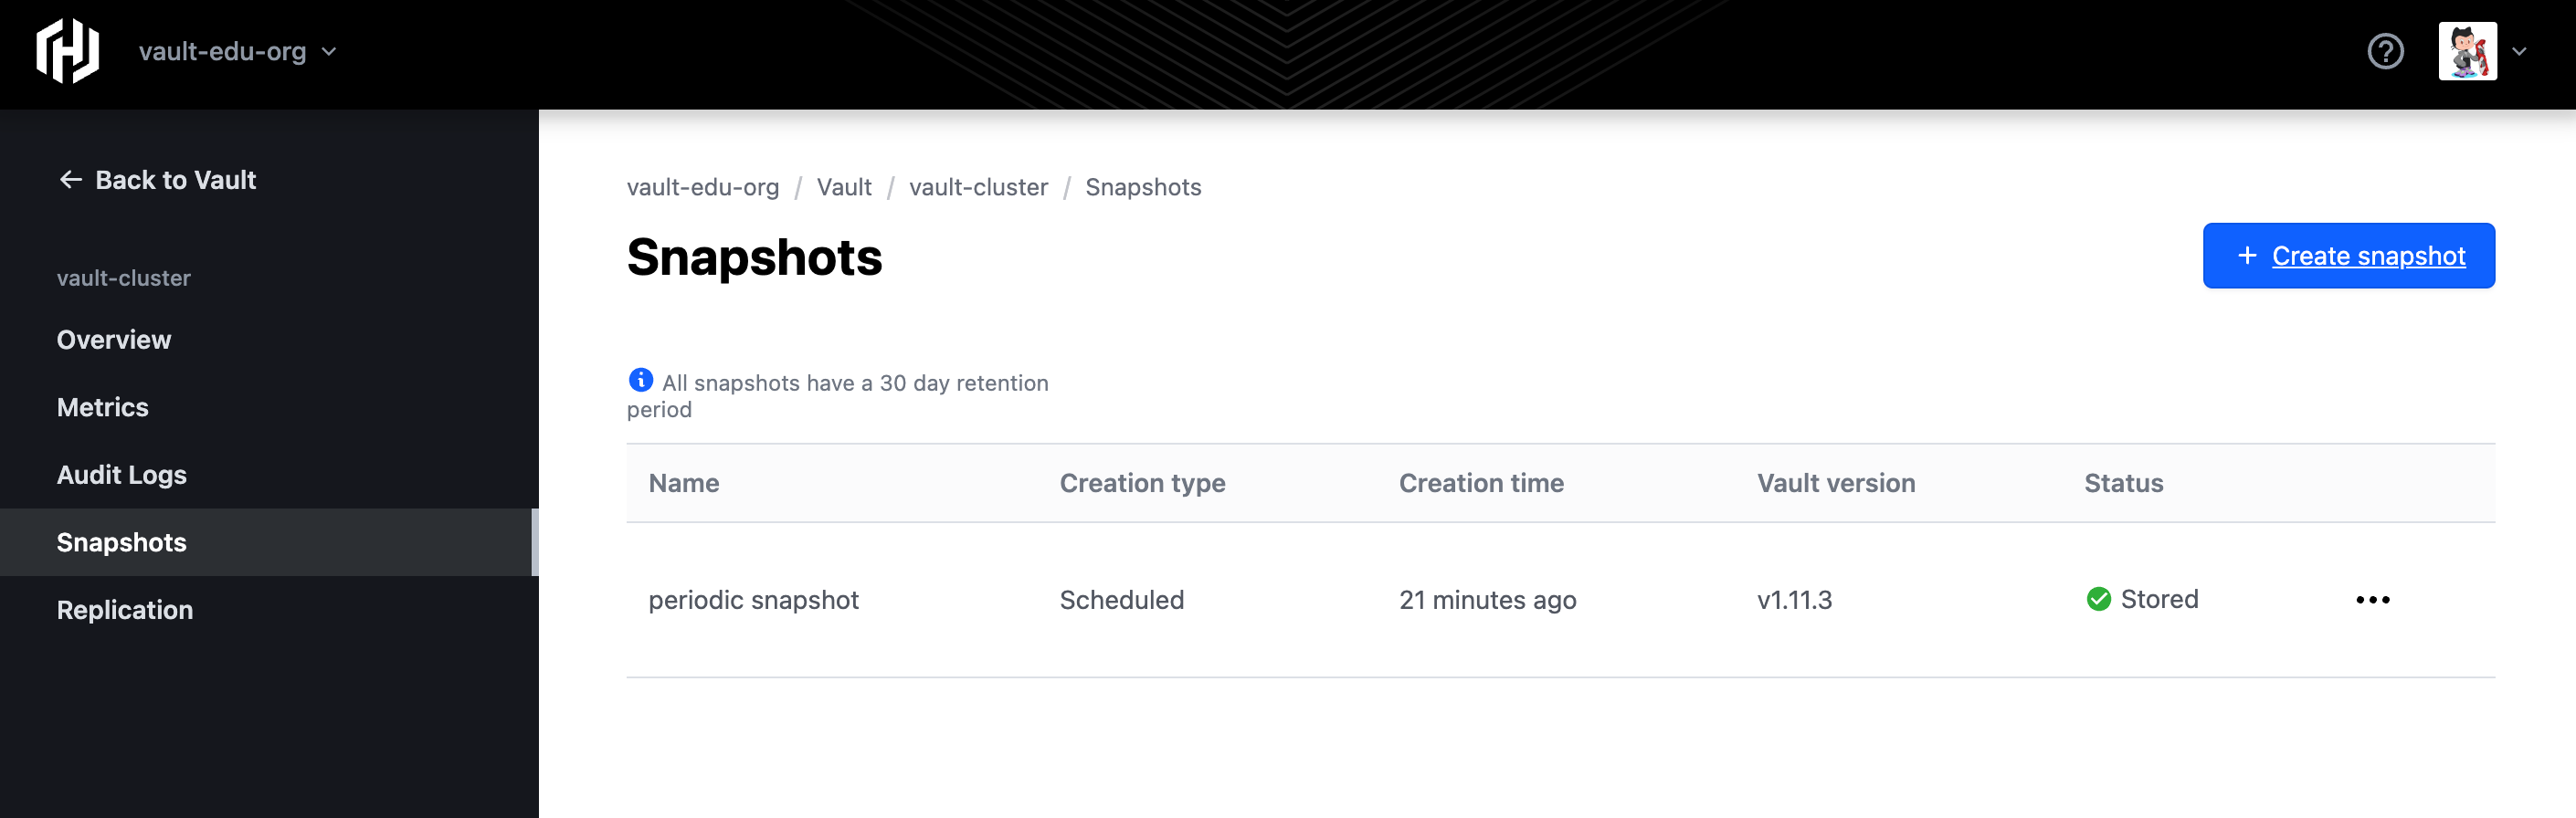
The view displays a history of the snapshots created.
Click Create snapshot.
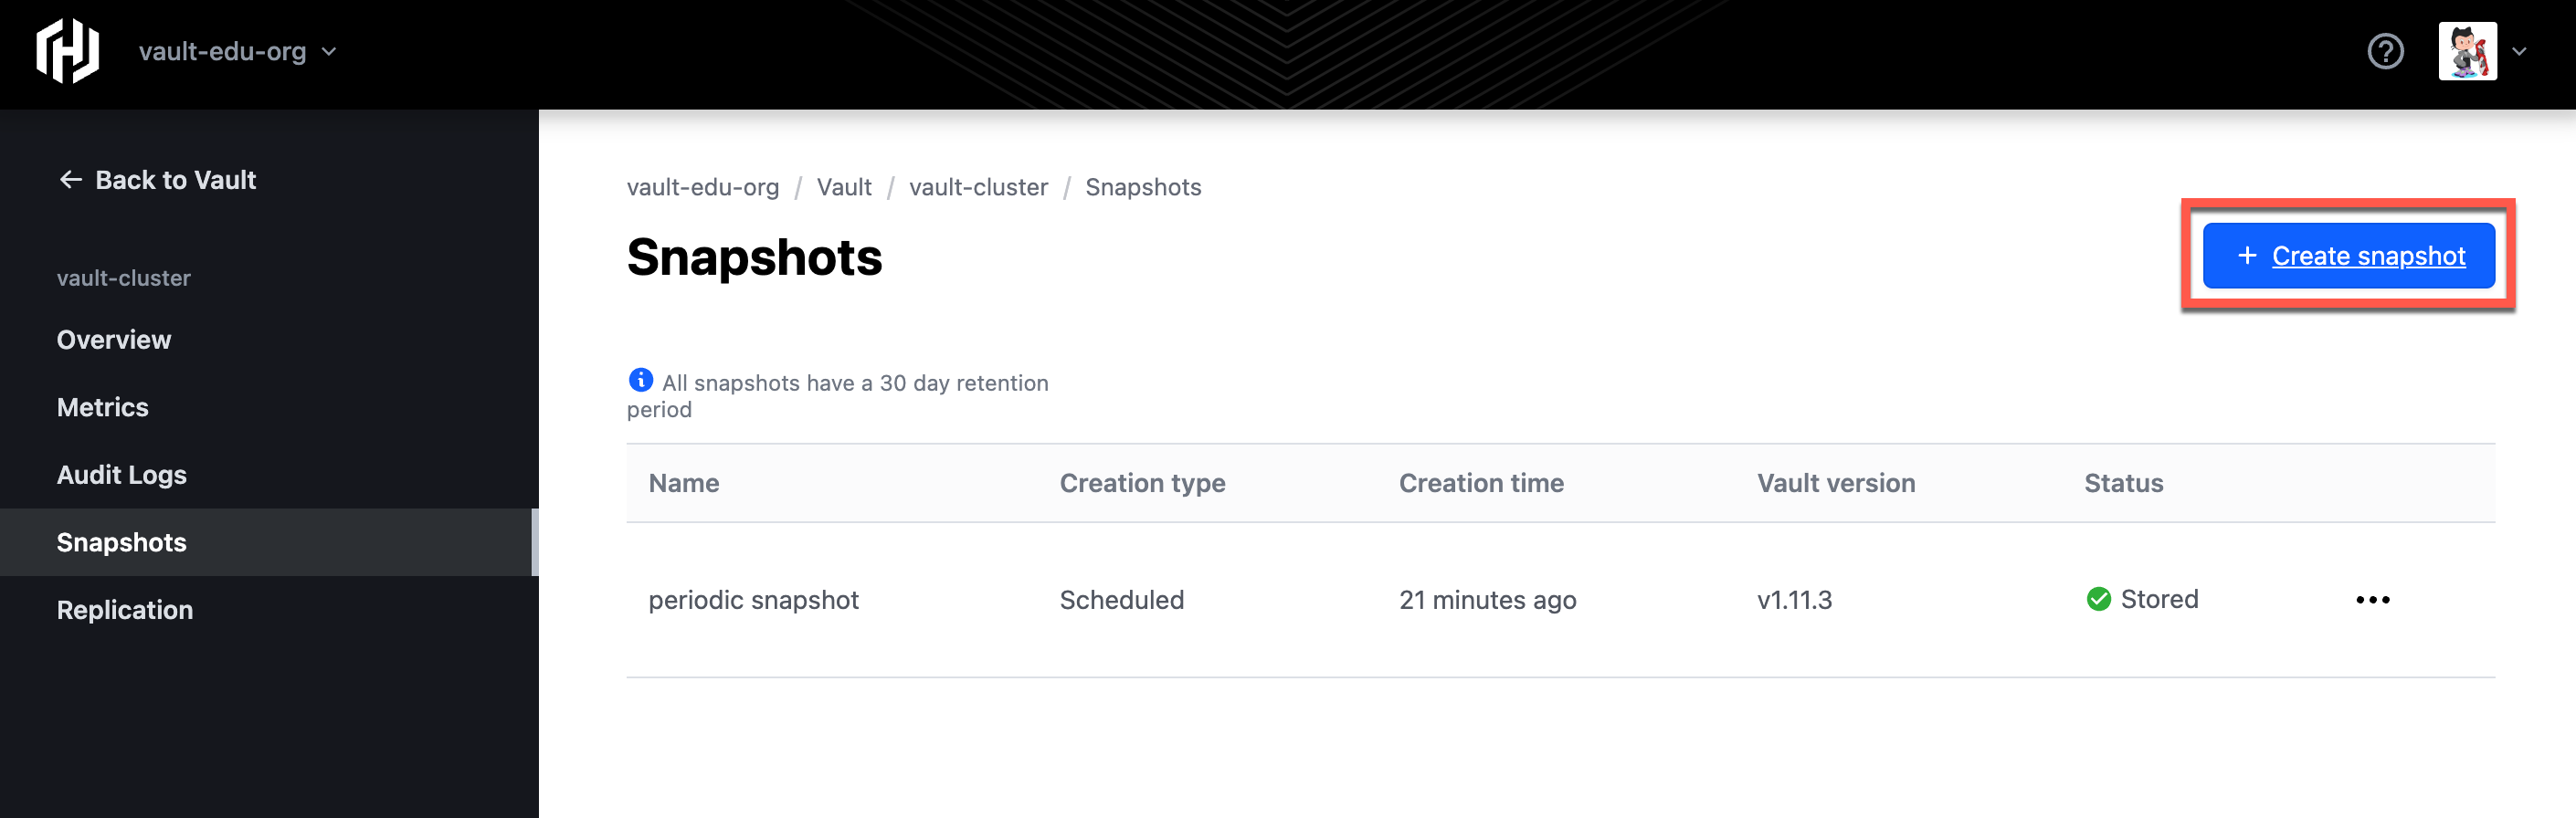
A Create snapshot pop-up dialog displays.
Enter tutorial in the Snapshot name field and click Create snapshot.
The view displays the snapshot history. The latest snapshot is appended to the snapshot list. While the snapshot is in progress it will display a Pending animation in the Status column.
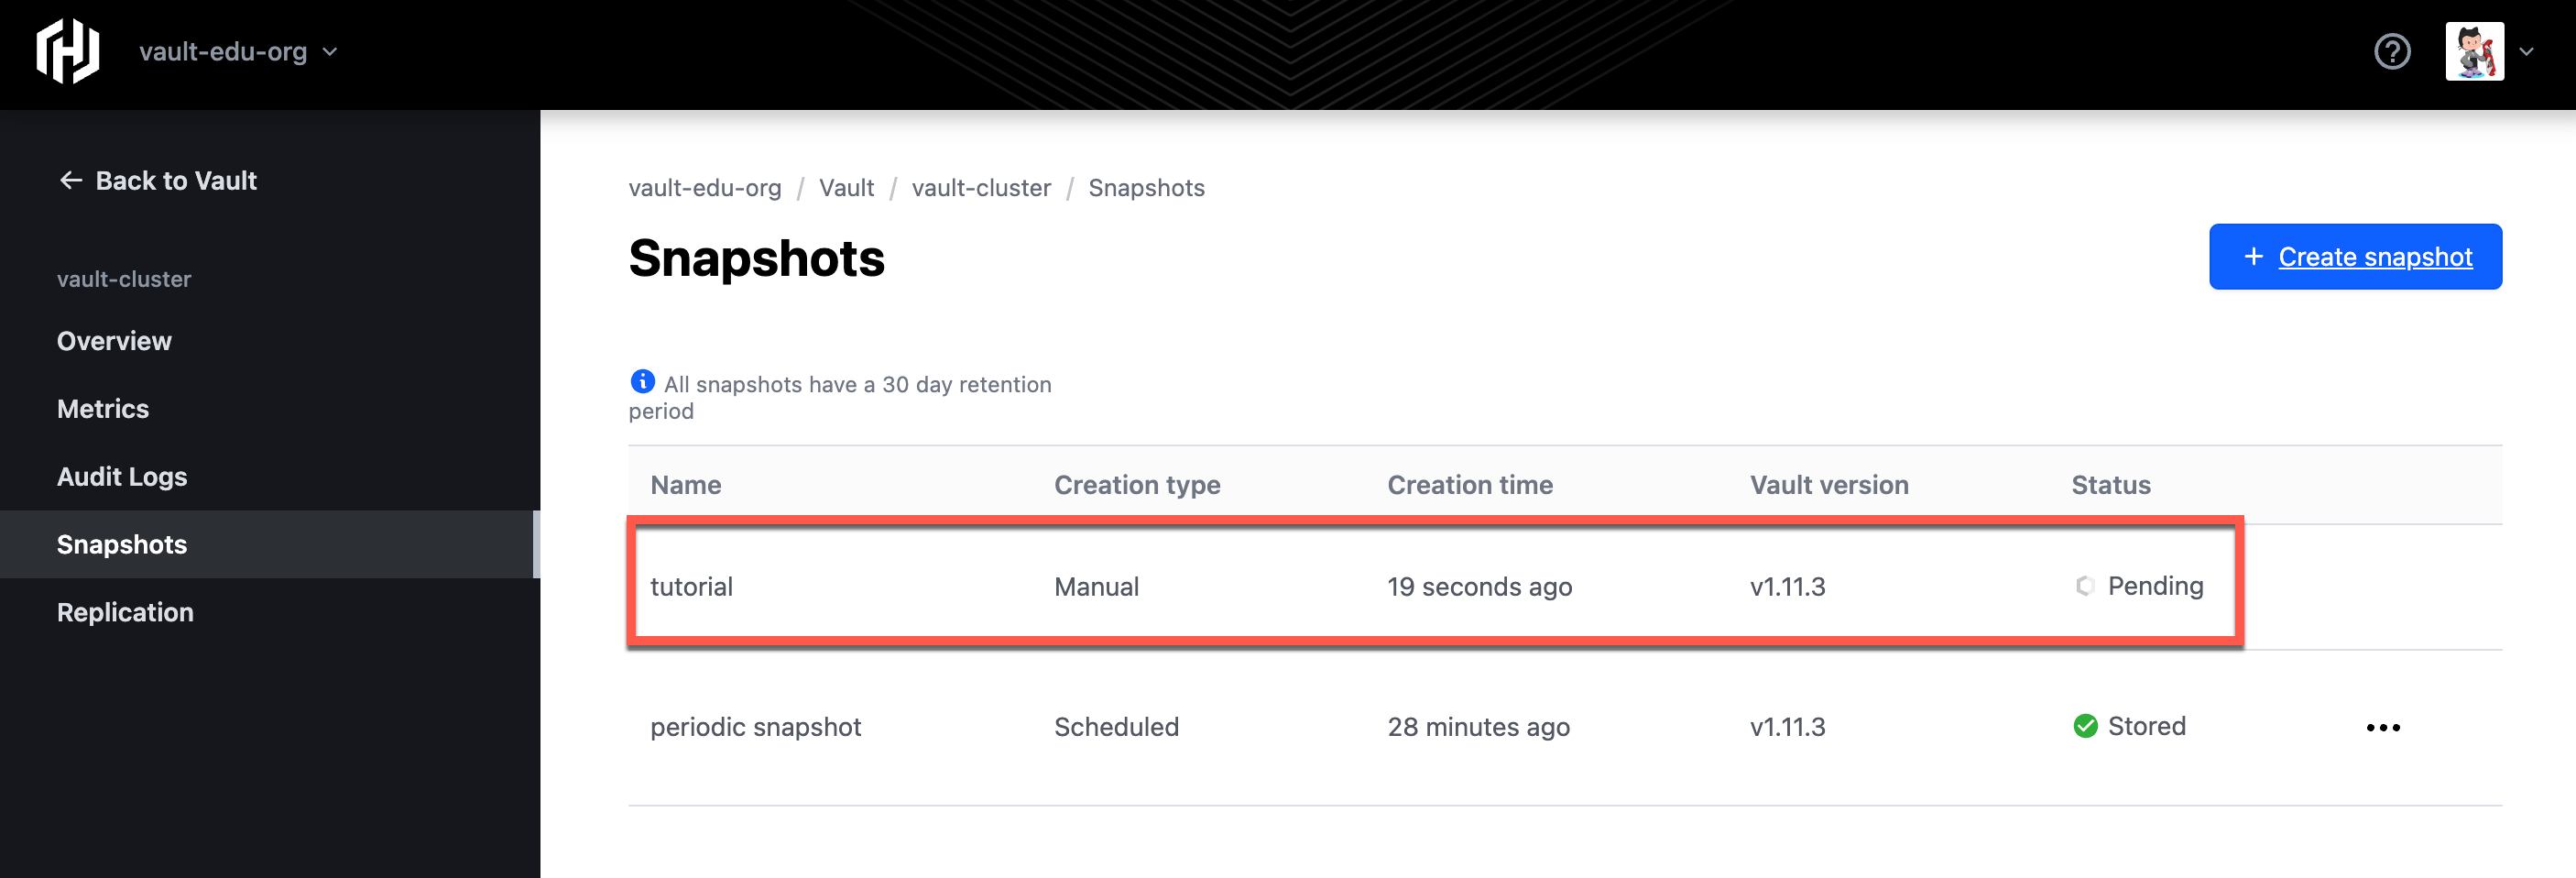
When the snapshot operation completes the Status changes to Stored.
Restore snapshot
You can use the snapshots to restore data if it ever becomes necessary.
Click the Snapshots link in the left navigation pane.
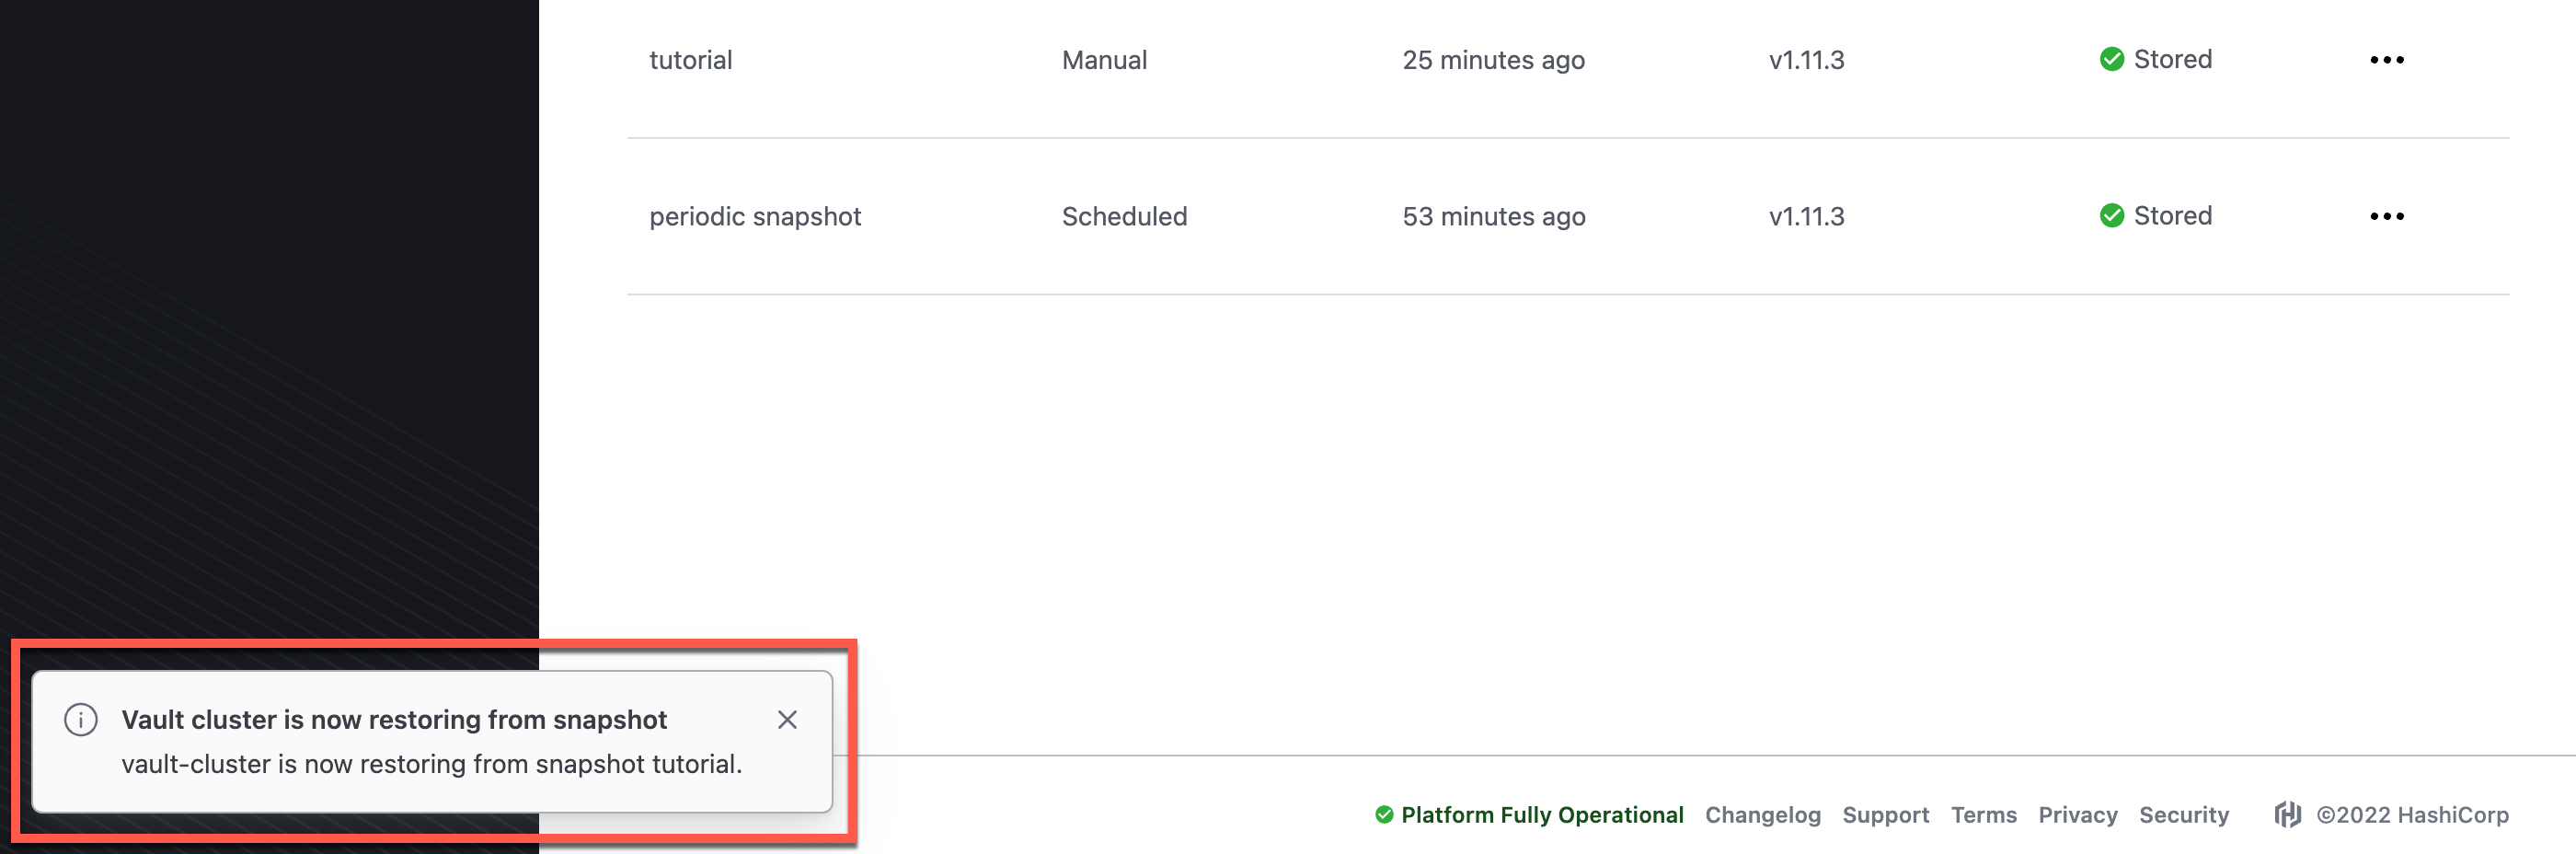
Click the ellipsis (...) menu next to the tutorial snapshot entry, and choose Restore.
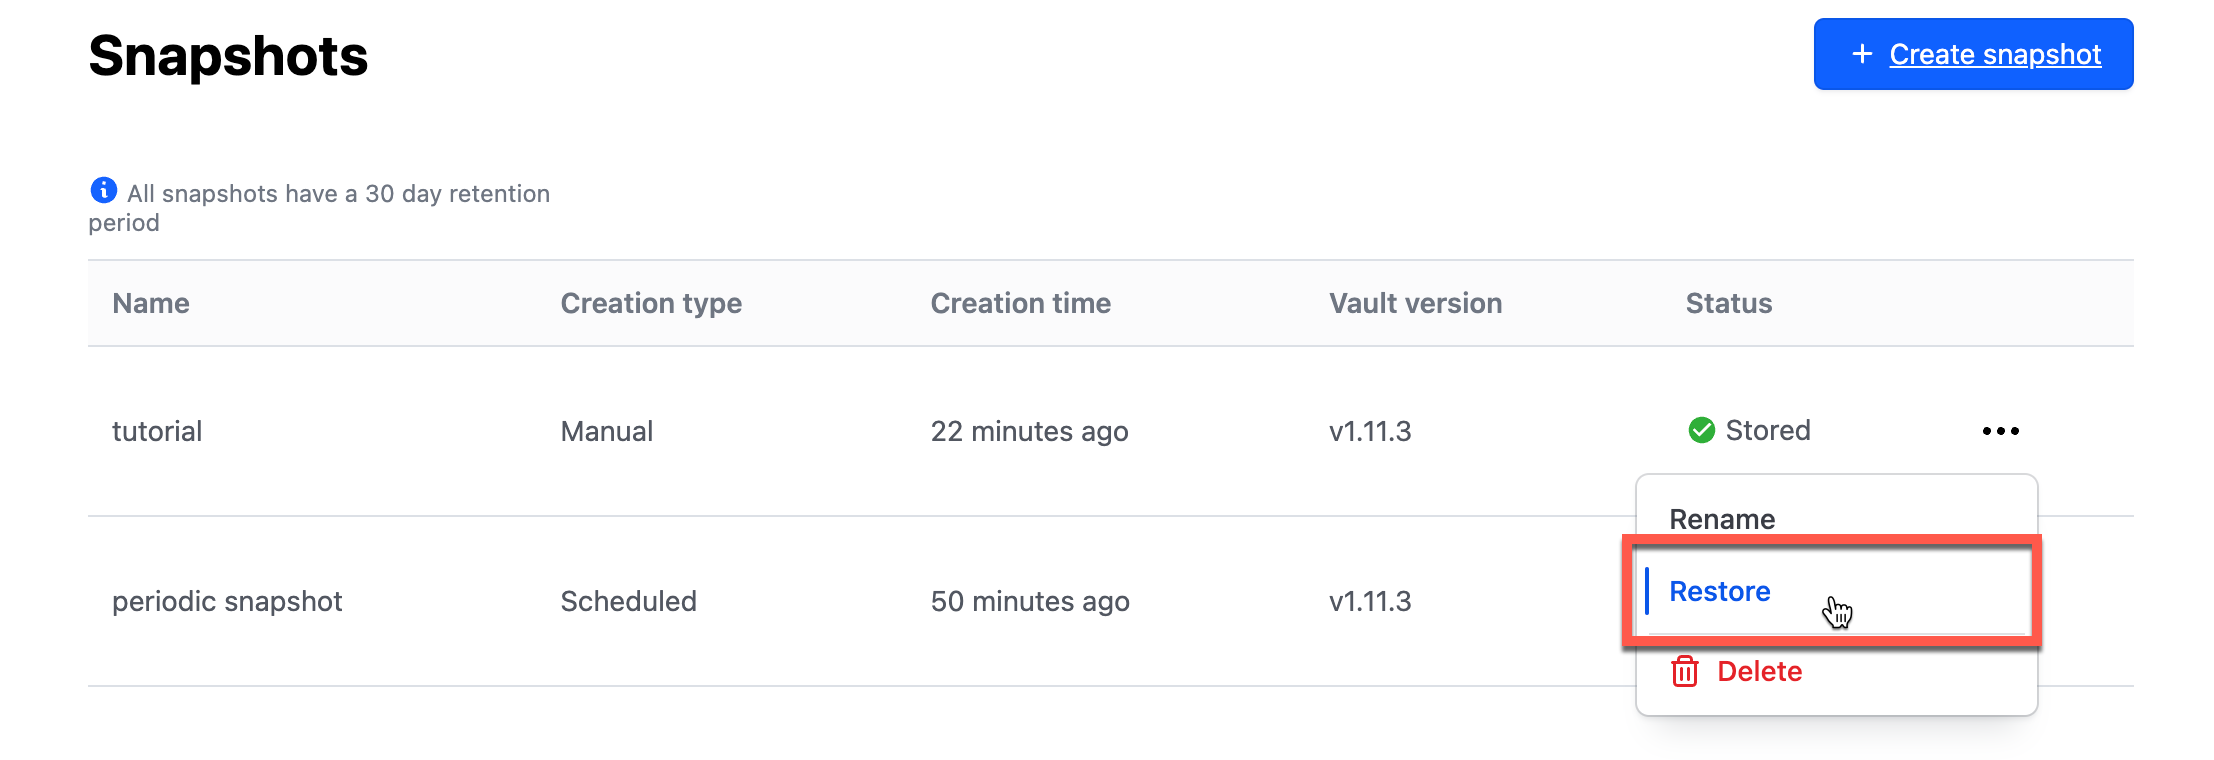
A confirmation dialog appears; enter
RESTOREand click Restore snapshot to confirm restoration.A message will appear informing you the restore process has started.
Delete snapshot
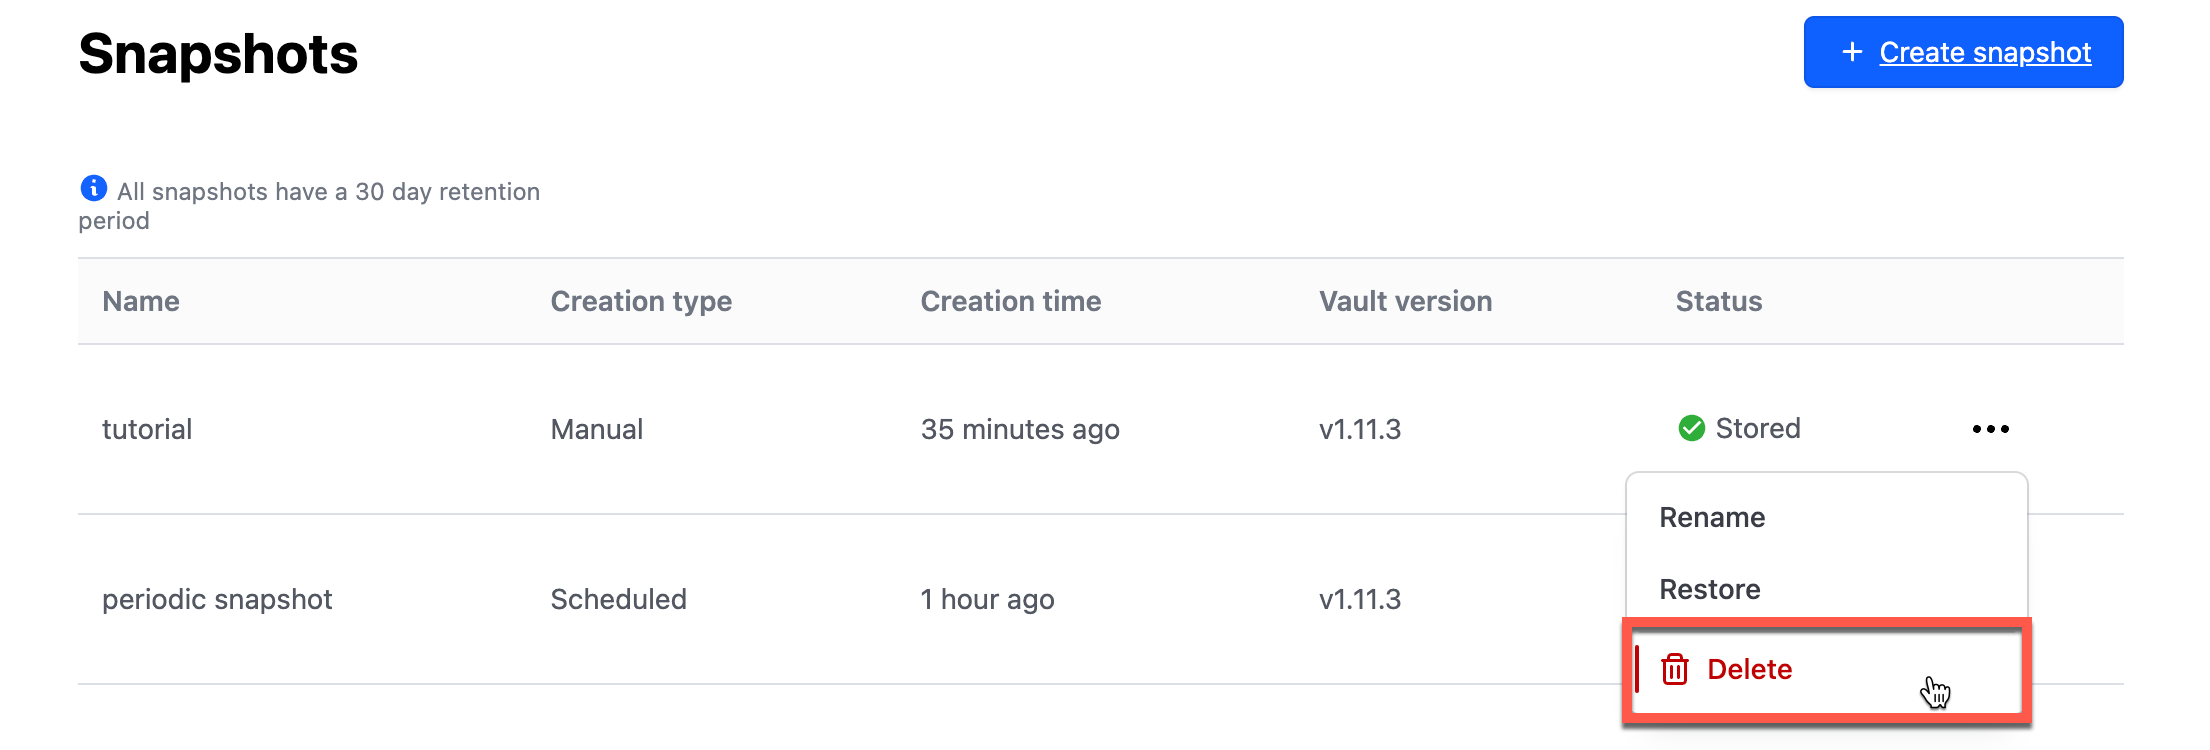
Click the Snapshots link in the left navigation pane.
Click the ellipsis (...) menu next to the tutorial snapshot, and choose Delete.
A confirmation dialog appears; enter
DELETEand click Delete snapshot to confirm snapshot deletion.A Snapshot deleting dialog appears. Once the snapshot is deleted, it no longer appears in the snapshot list.
Access the audit log for troubleshooting
Effective troubleshooting of requests and responses to Vault requires access to the audit device logs.
Vault Dedicated enables a File Audit Device by default. This device provides the last hour of Vault requests in a downloadable archive. These logs may be imported into your preferred tooling for auditing and troubleshooting.
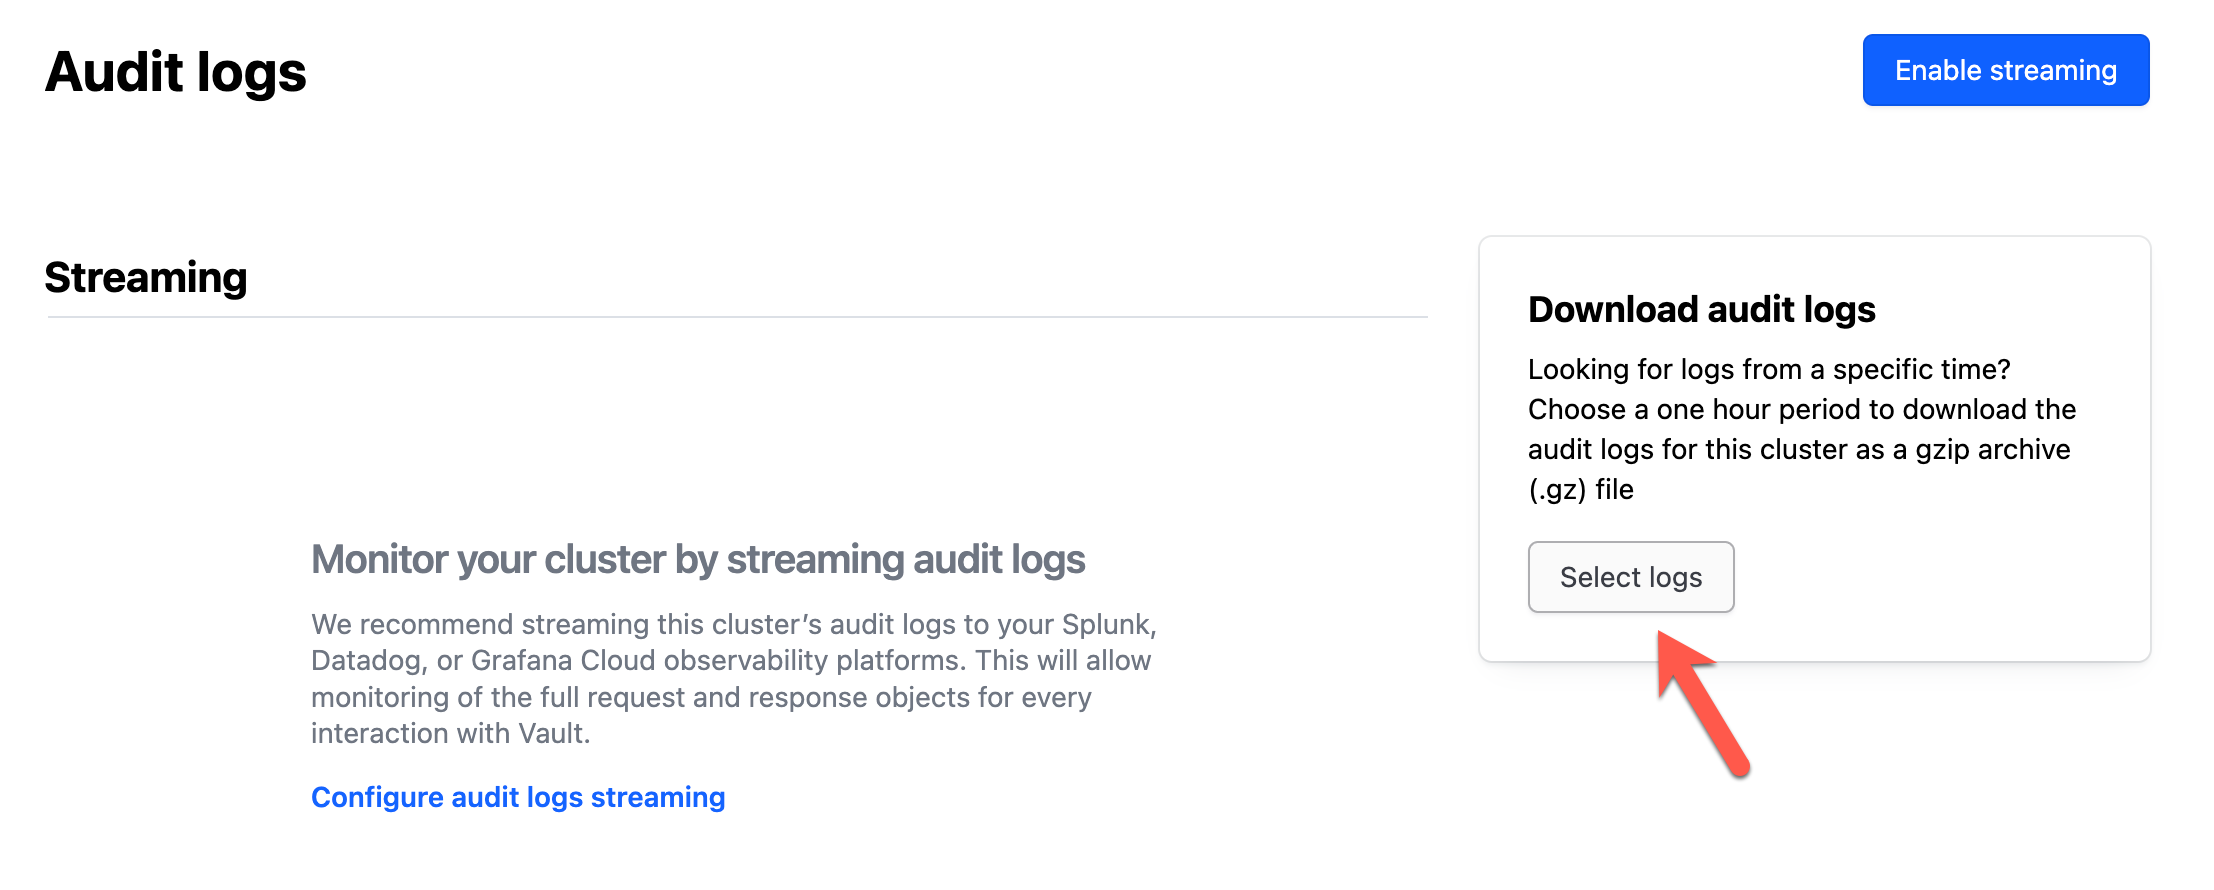
From the Vault cluster overview page, click Audit Logs.
From the Audit logs page, click Select logs in the Download audit logs box.
A Download audit logs pop-up dialog displays.
Use the Start date and Start time components to specify the audit log starting position. The log file will cover a 1 hour period after the date and time that you select.
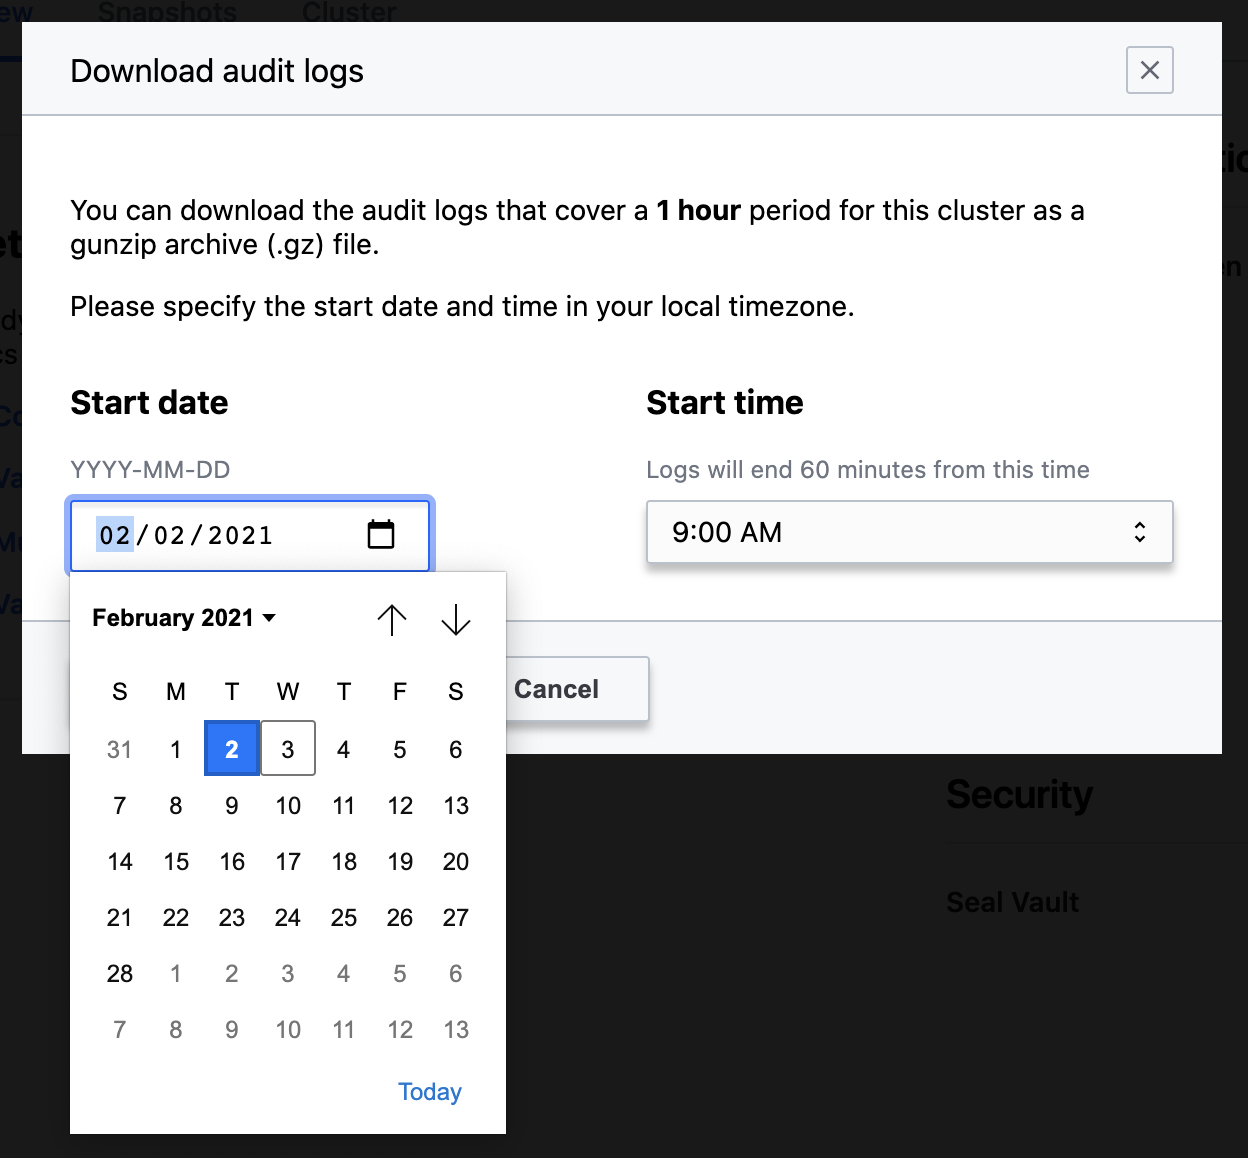
Once you have selected the desired Start date and Start time, click Generate logs.
When the archive is created, a new Download audit logs pop-up dialog displays. The archive is presented with the specific time-frame covered by the log file.
Click the download icon.
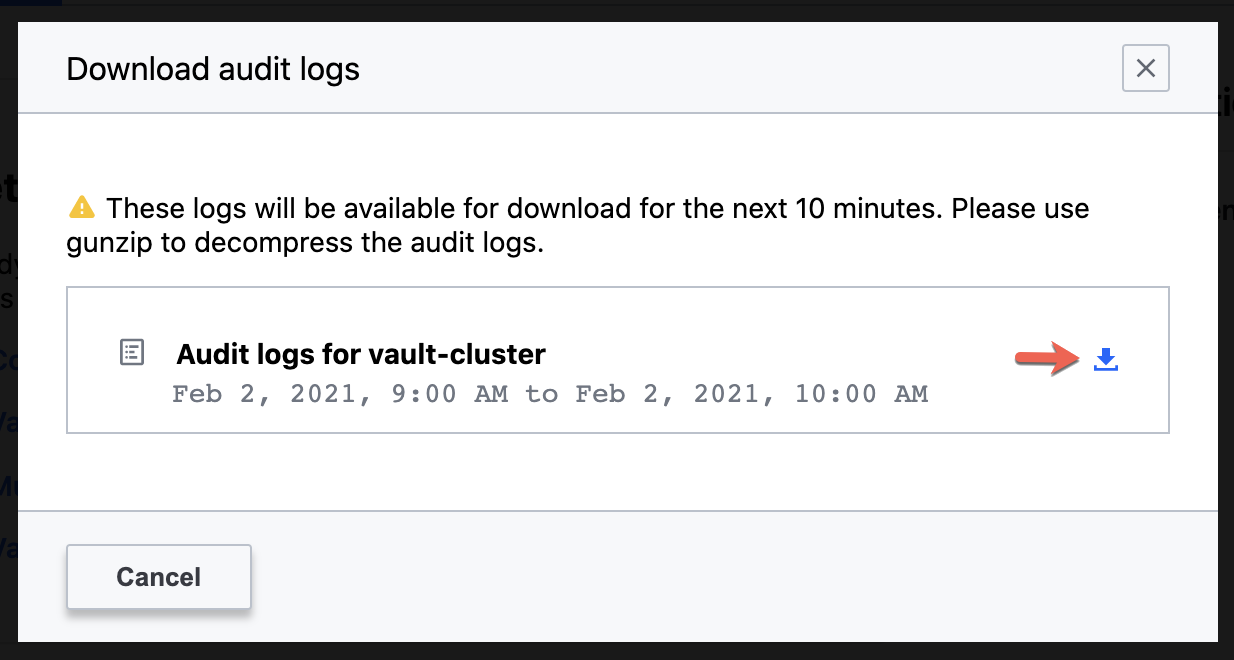
The downloaded file is a gzip compressed file. The filename contains the start and end timestamps as part of its filename (e.g.
auditlogs-vault-cluster-202102021400-202102021500.gz).
Manage major version upgrades
There are scenarios where major version upgrades of the Vault cluster can potentially affect the behavior of Vault clients. For example, the returned JSON output may contain a new field. These changes may require additional testing or operational updates to leverage the enhanced behaviors.
When running Vault Dedicated essentials or standard tier clusters, you can manage when to upgrade the Vault cluster. If you would like to follow this tutorial, upgrade your Vault cluster to the essentials or standard tier.
Log into the HCP Portal and navigate to the Vault Overview page.
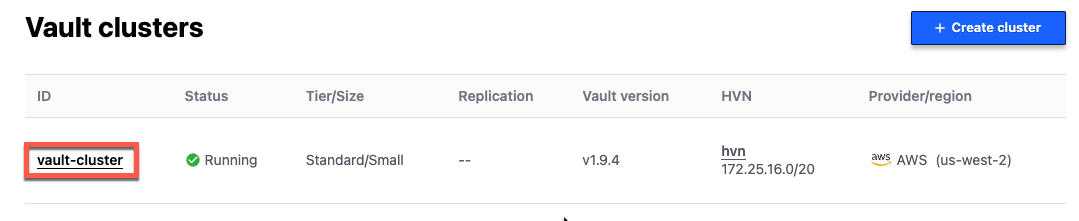
Click the cluster ID link for a Vault Dedicated cluster that is on the essentials or standard tier.
From the Vault cluster Overview page, click Upgrade settings.

Click Edit settings.
You can choose between three options to control when your cluster will be upgrade.
Automatic will upgrade the cluster as new versions of Vault are validated for HCP.
Manual allows you to initiate the upgrade on any day or time of your choosing, but will be automatically upgraded after 60 days.
Scheduled allows you select a day and time window in which the upgrade will be performed.
Select Manual and click Apply changes.
Click Overview.
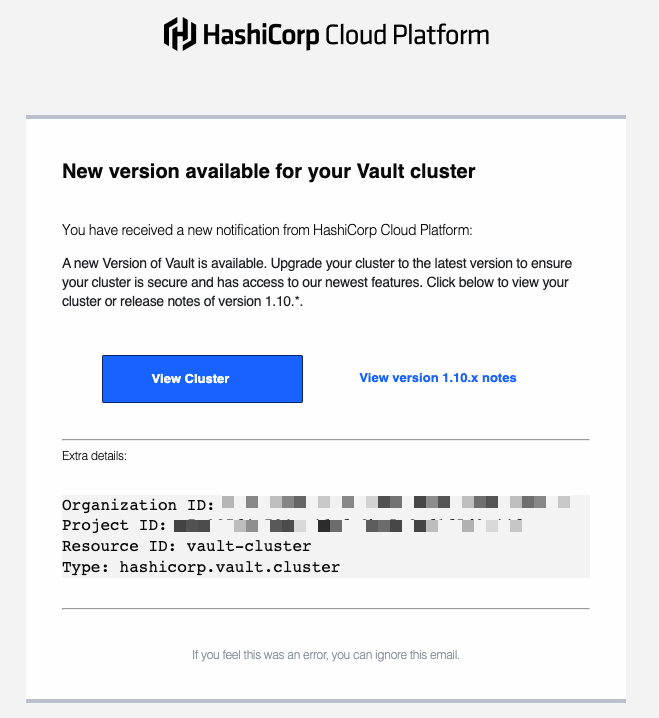
When a cluster is set to manual, and a new upgrade is detected, you will receive a notification that an upgrade is available with a Upgrade now button.
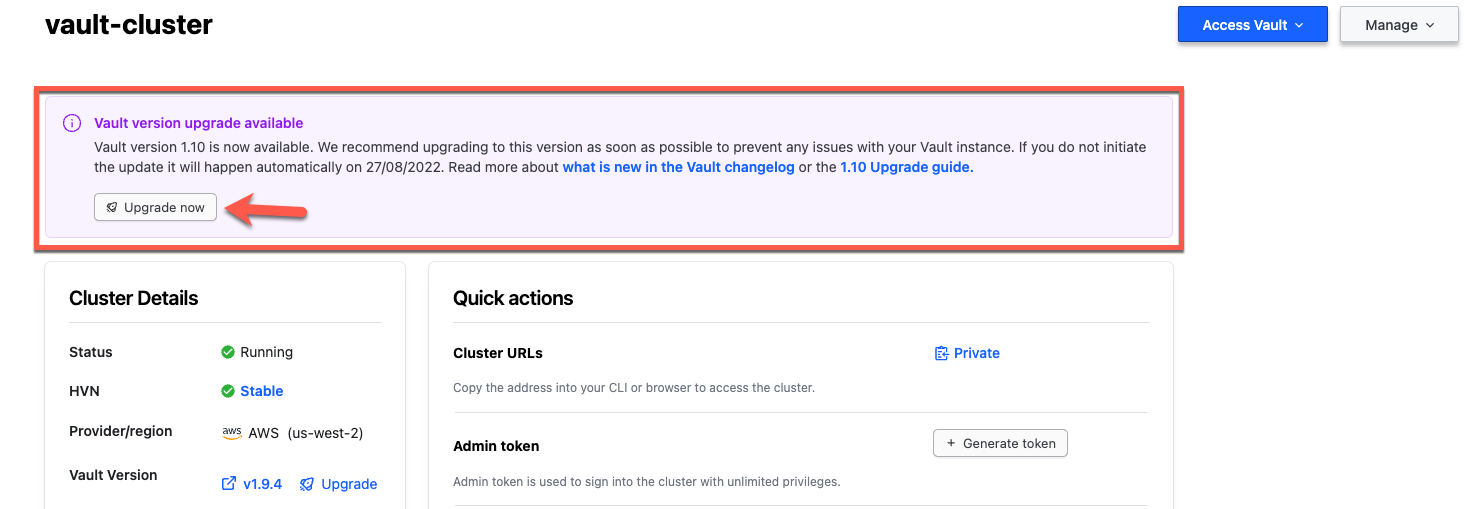
HCP Portal users will also receive an email notification that the upgrade is available.
Click Upgrade now. A dialog will appear with a link to the changelog and upgrade guide so you can review any changes that may impact your usage of Vault Dedicated.
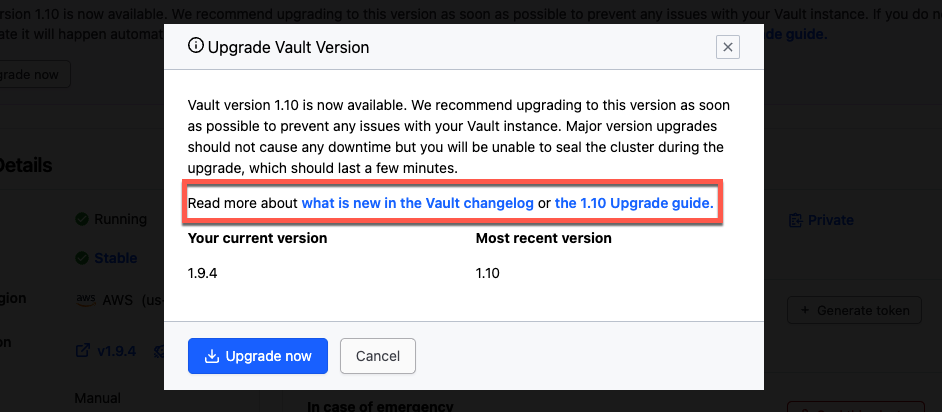
Click Upgrade now to begin the automated upgrade process.
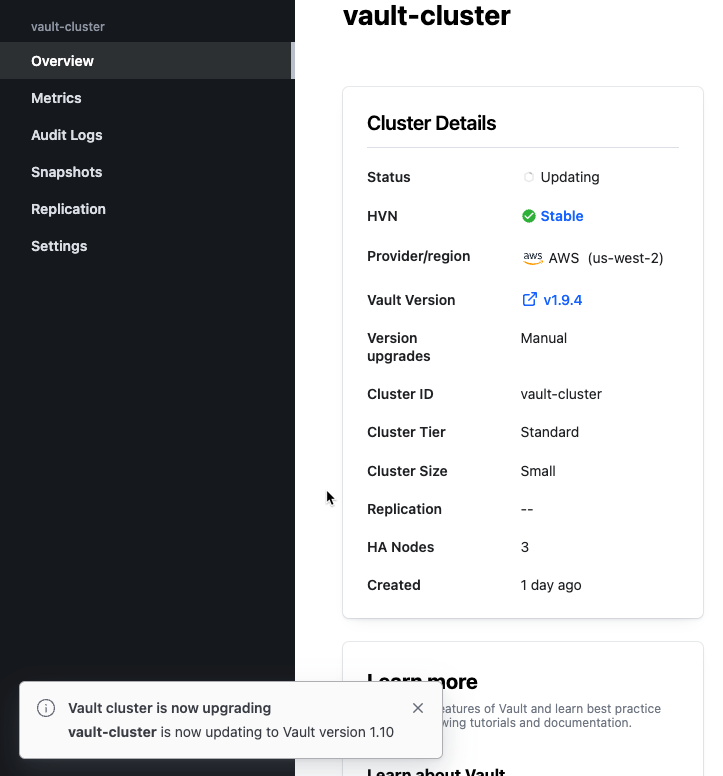
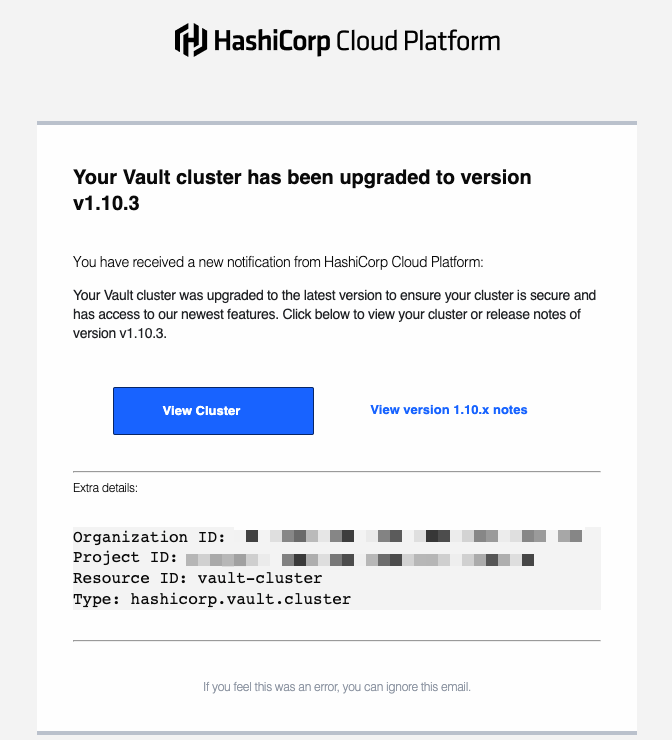
When the upgrade process completes, a new notification will appear with a link to the release notes.

HCP Portal users will also receive an email notification that the upgrade is complete.
Knowledge checks
A quiz to test your knowledge.
What is a key restriction when scaling an HCP Vault Dedicated cluster between different tiers?
🔘 You must take the cluster offline before initiating a scaling operation.
🔘 You cannot scale a cluster down to the development tier.
🔘 You can only scale between tiers if public access is disabled.
🔘 You must manually delete all snapshots before scaling the cluster.
❌ You must take the cluster offline before initiating a scaling operation.
✅ You cannot scale a cluster down to the development tier.
❌ You can only scale between tiers if public access is disabled.
❌ You must manually delete all snapshots before scaling the cluster.
How does locking your HCP Vault Dedicated cluster affect its operation?
🔘 It completely powers down the cluster to prevent any network access.
🔘 It restricts all access, including HashiCorp's ability to perform upgrades and snapshots.
🔘 It prevents normal Vault operations but still allows the HCP platform to perform upgrades and snapshots.
🔘 It only locks the
adminnamespace, leaving child namespaces fully operational.❌ It completely powers down the cluster to prevent any network access.
❌ It restricts all access, including HashiCorp's ability to perform upgrades and snapshots.
✅ It prevents normal Vault operations but still allows the HCP platform to perform upgrades and snapshots.
❌ It only locks the
adminnamespace, leaving child namespaces fully operational.What are the network requirements for the HashiCorp Virtual Network (HVN) when setting up cross-region disaster recovery?
You must create the cross-region DR HVN in a different region than the primary cluster's HVN, select the same cloud provider, and use non-overlapping CIDR ranges for the primary and DR HVNs.
Summary
In this series of tutorials you learned how to perform the basic operational tasks for Vault Dedicated.
Visit the Manage HCP Vault Dedicated collection to learn advanced configuration options for Vault Dedicated clusters.
Help and reference
Set up a private connection with your HVN to Amazon Web Services, Azure, and Google Cloud Platform.
Monitor your HCP Vault Dedicated cluster.
Create access control policies to manage access to Vault resources.
Enable secrets engines and learn how to enable, configure, store, and generate secrets.
Integrate your applications to read secrets from Vault using different methods.