Generate one-time SSH passwords with Vault
In a distributed cloud environment, tenant, and system is increasingly important part of online security. If an attacker gains access to your virtual machines, they can get control of most running applications, local data as well as its connected machines and systems.
The Vault SSH secrets engine provides secure authentication and authorization for access to machines via the SSH protocol. It supports signed SSH certificate and one-time SSH password modes. This tutorial demonstrates the one-time SSH password mode.
Personas
The end-to-end scenario described in this tutorial involves two personas:
operationswith privileged permissions to setup SSH secrets engineclienttrusted entity to request SSH OTP from Vault
Challenge
SSH servers provide a range of authentication methods, but most use password based authentication by default. If any user on the system has a fairly weak password, an attacker can more readily determine the password and create an unauthorized SSH connection.
Solution
Vault can create a one-time password (OTP) for SSH authentication on a network every time a client wants to SSH into a remote host using a helper command on the remote host to perform verification.
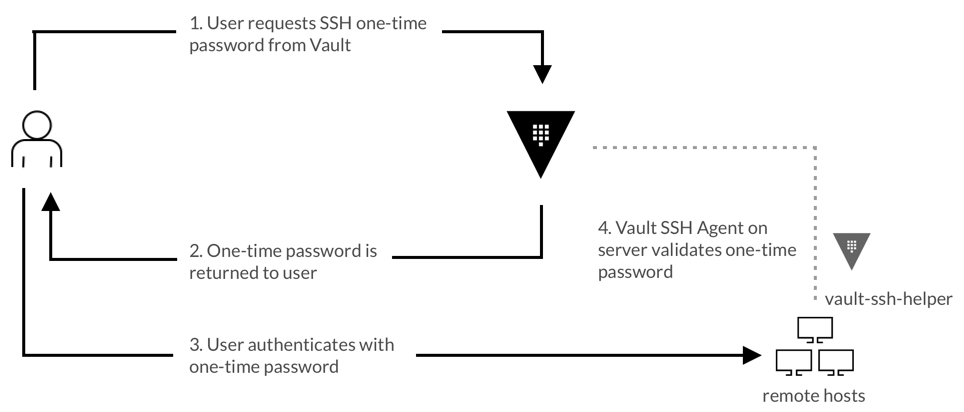
An authenticated client requests an OTP from the Vault server. If the client is authorized, Vault issues and returns an OTP. The client uses this OTP during the SSH authentication to connect to the desired target host.
When the client establishes an SSH connection, the Vault helper receives the OTP, and validates the OTP with the Vault server. The Vault server then deletes this OTP, ensuring that it is used just once.
Establishment of an SSH connection contacts the Vault server for every login attempt, and Vault can log the attempt and its correlating lease information to an audit device.
Launch Terminal
This tutorial includes a free interactive command-line lab that lets you follow along on actual cloud infrastructure.

Prerequisites
This lab was tested on macOS using an x86_64 based processor. If you are running macOS on an Apple silicon-based processor, use a x86_64 based Linux virtual machine in your preferred cloud provider.
To perform the tasks described in this tutorial, you need to have:
- HCP or Vault Community Edition environment
- Vagrant installed with a configured provider such as VirtualBox
- jq installed
Policy requirements
To perform all tasks demonstrated in this tutorial, your policy must include the following paths and capabilities:
# To enable secrets engines
path "sys/mounts/*" {
  capabilities = [ "create", "read", "update", "delete" ]
}

# To configure the SSH secrets engine
path "ssh/*" {
  capabilities = [ "create", "read", "update", "delete", "list" ]
}

# To enable the userpass auth method
path "sys/auth/userpass" {
  capabilities = [ "update" ]
}

# To create the policy for the test user
path "sys/policies/acl/test" {
  capabilities = [ "read", "update" ]
}

# To create the test user
path "auth/userpass/users/ubuntu" {
  capabilities = [ "create", "update" ]
}
If you are not familiar with policies, complete the policies tutorial.
Lab setup
Start Vault
Open a terminal session and get your local workstation IP address.
$ ifconfig | grep inetDepending on your operating system and workstations configuration, you may have multiple addresses. Copy the address that matches your network. For example, if your network uses a subnet of
192.168.100.0/24copy the192.168.100.101address.Example output:
     inet 127.0.0.1 netmask 0xff000000
     inet6 ::1 prefixlen 128
     inet6 fe80::1%lo0 prefixlen 64 scopeid 0x1
     inet6 fe80::aede:48ff:fe00:1122%en5 prefixlen 64 scopeid 0x4
     inet6 fe80::1c44:73de:cb90:5f84%en0 prefixlen 64 secured scopeid 0x6
     inet 192.168.100.101 netmask 0xffffff00 broadcast 192.168.100.255
     inet6 fe80::7ceb:9fff:fe93:555c%awdl0 prefixlen 64 scopeid 0x7
     inet6 fe80::7ceb:9fff:fe93:555c%llw0 prefixlen 64 scopeid 0x8
Start a Vault dev server with
rootas the root token and IP address copied from the previous step.$ vault server -dev -dev-root-token-id root -dev-listen-address <copied-address>:8200The Vault dev server defaults to running at the provided IP address on port 8200. The server is initialized and unsealed.
Open another terminal session, and export an environment variable for the
vaultCLI to address the Vault server.$ export VAULT_ADDR=http://<ip-address-copied-from-previous-step>:8200Export an environment variable for the
vaultCLI to authenticate with the Vault server.$ export VAULT_TOKEN=root
The Vault server is ready.
Start Ubuntu
Open another terminal session and initialize a new Ubuntu Vagrant box.
$ vagrant init generic/ubuntu2204To complete this tutorial, your Ubuntu box needs to be on the same network as your workstation. Edit the
Vagrantfileto connect to your local network.$ sed -ibak "s/# config.vm.network \"public_network\"/config.vm.network \"public_network\"/g" VagrantfileStart the Ubuntu box.
$ vagrant upWhen prompted, select the number that corresponds to your active network interface. For example, if you are connected to your local network via your Wi-Fi (Wireless) adapter, enter the number 1 and press enter.
Example output:
==> default: Available bridged network interfaces:
1) en0: Wi-Fi (Wireless)
2) en5: USB Ethernet(?)
3) awdl0
4) llw0
5) en2: Thunderbolt 2
6) en1: Thunderbolt 1
7) en3: Thunderbolt 3
8) en4: Thunderbolt 4
9) bridge0
==> default: When choosing an interface, it is usually the one that is
==> default: being used to connect to the internet.
==> default:
    default: Which interface should the network bridge to?
You are ready to proceed with the tutorial.
Setup the SSH secrets engine
(Persona: operations)
On the Vault server, you must enable the SSH secrets engine and create a role.
Return to the terminal session where you created the
VAULT_ADDRenvironment variable.Enable the SSH secrets engine.
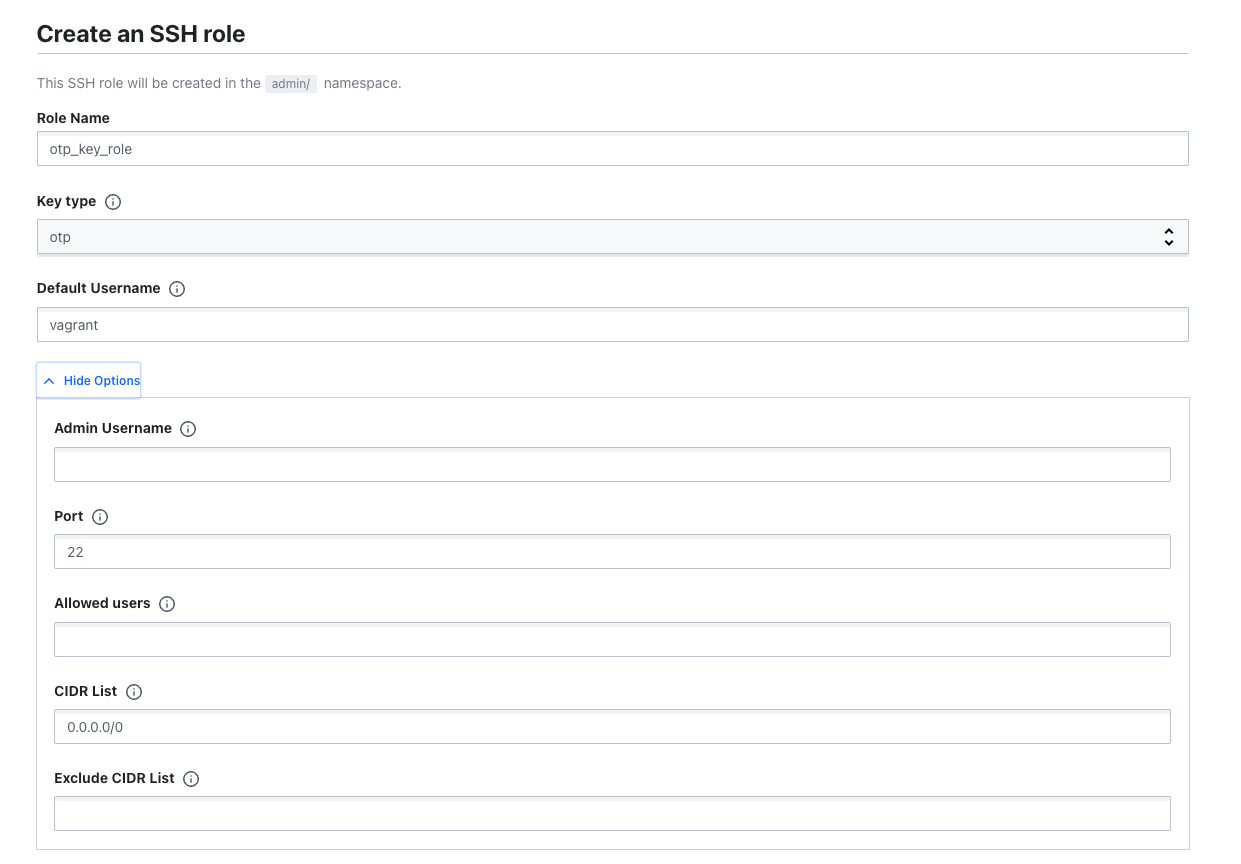
$ vault secrets enable ssh
Success! Enabled the ssh secrets engine at: ssh/
Create a role named
otp_key_rolewithkey_typeset tootp.$ vault write ssh/roles/otp_key_role \ key_type=otp \ default_user=vagrant \ cidr_list=0.0.0.0/0This role defaults to creating credentials for the
vagrantuser and will allow all remote hosts whose IP addresses fit within this CIDR range.
Setup the client authentication
(Persona: operations)
On the Vault server, you must create a policy to allow access to the SSH OTP role and then attach the policy to an authentication method.
Create a policy file named,
test.hcl, that provides access to thessh/creds/otp_key_rolepath.$ tee test.hcl <<EOF # To list SSH secrets paths path "ssh/*" { capabilities = [ "list" ] } # To use the configured SSH secrets engine otp_key_role role path "ssh/creds/otp_key_role" { capabilities = ["create", "read", "update"] } EOFThe path
ssh/creds/otp_key_roleis the path to the role created in the Setup the SSH secrets engine section.Create a policy named
testwith the policy defined intest.hcl.$ vault policy write test ./test.hclEnable the
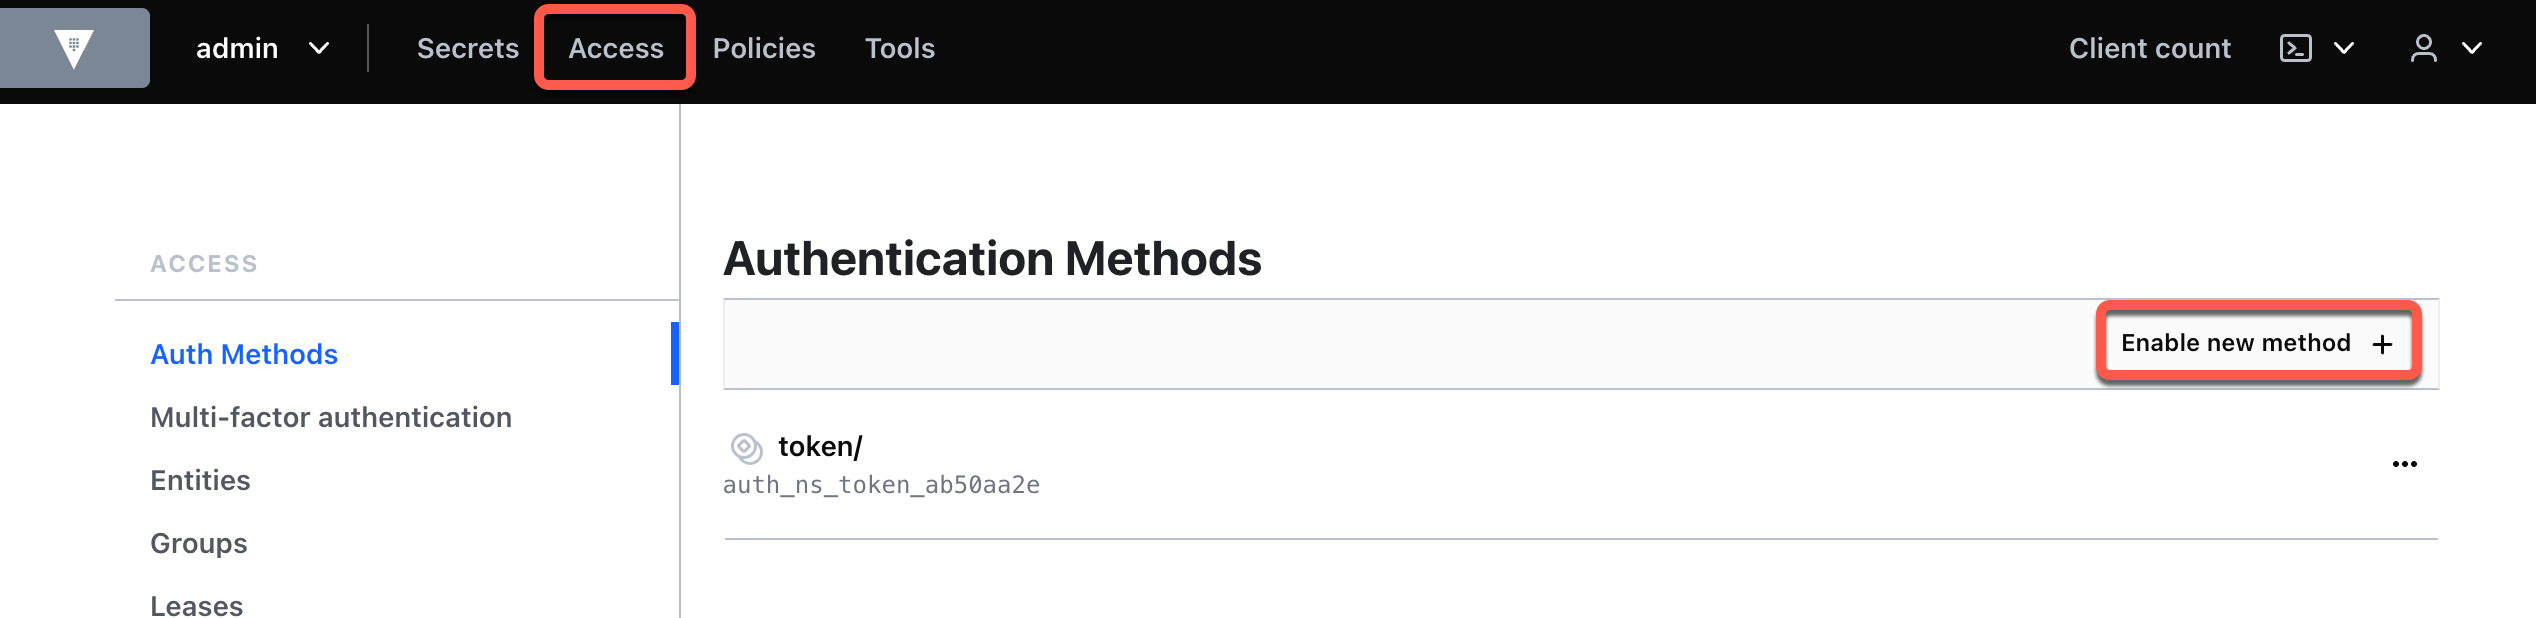
userpassauth method.$ vault auth enable userpassCreate a user named
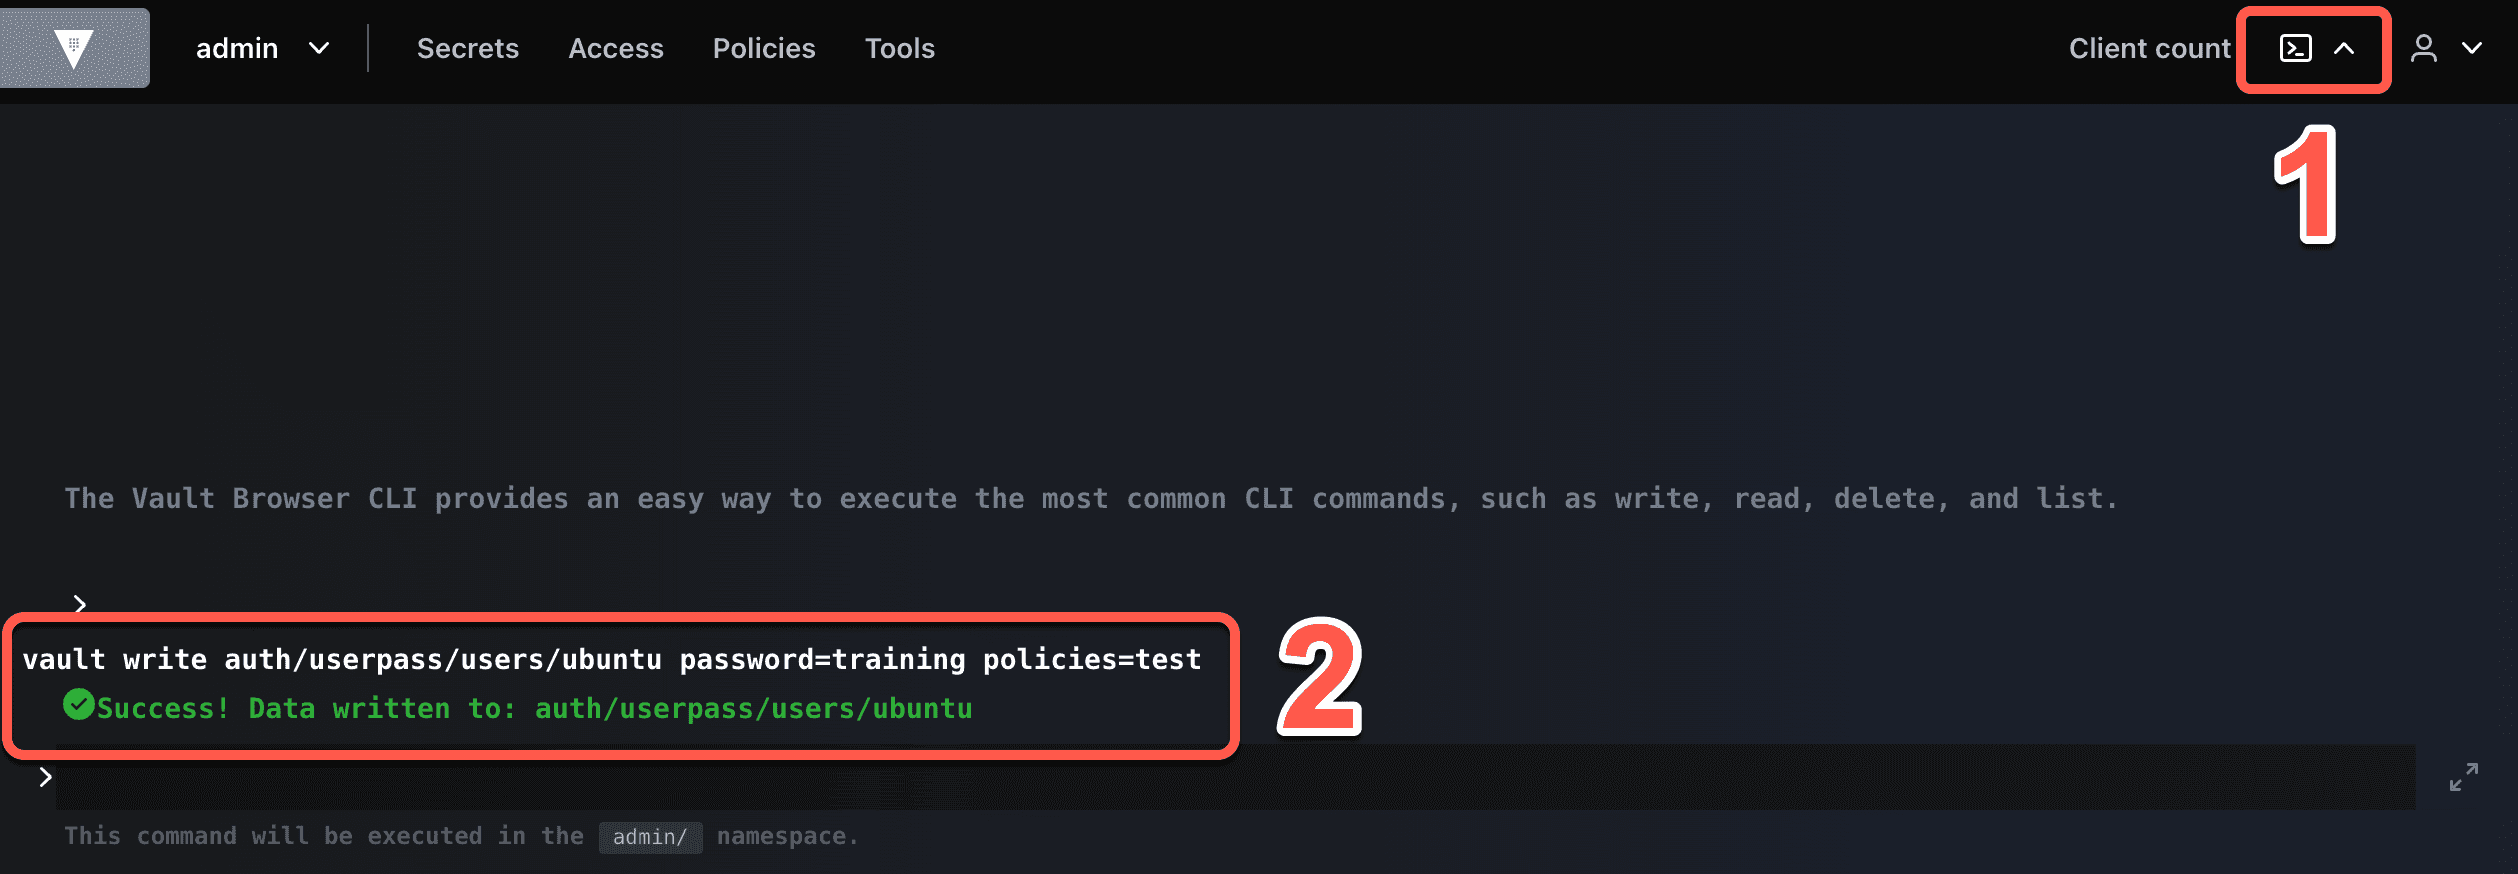
ubuntuwith the password "training" assigned thetestpolicy.$ vault write auth/userpass/users/ubuntu password="training" policies="test"
Install vault-ssh-helper
(Persona: operations)
On each Remote host, you must:
- Install vault-ssh-helper.
- Create a configuration file for the vault-ssh-helper.
- Edit both the Pluggable Authentication Module (PAM) sshd configuration file and the sshd configuration file.
- Restart the sshd service.
Return to the terminal where you performed
vagrant upand connect to Ubuntu.$ vagrant sshDownload and install version
0.2.1ofvault-ssh-helperfrom releases.hashicorp.com.$ wget https://releases.hashicorp.com/vault-ssh-helper/0.2.1/vault-ssh-helper_0.2.1_linux_amd64.zipUnzip the binary from the archive into
/usr/local/bin.$ sudo unzip -q vault-ssh-helper_0.2.1_linux_amd64.zip -d /usr/local/binSet the
vault-ssh-helperbinary's permissions to executable.$ sudo chmod 0755 /usr/local/bin/vault-ssh-helperSet the
vault-ssh-helperbinary's user and group toroot.$ sudo chown root:root /usr/local/bin/vault-ssh-helperCreate a directory to store the configuration file.
$ sudo mkdir /etc/vault-ssh-helper.d/The Vault SSH Helper reads a configuration at the path
/etc/vault-ssh-helper.d/config.hclwith this format:vault_addr = "<VAULT_EXTERNAL_ADDR>" tls_skip_verify = false ca_cert = "<PEM_ENCODED_CA_CERT>" ssh_mount_point = "ssh" namespace = "my_namespace" allowed_roles = "*"The
vault_addris the network address of the Vault server configured to generate the OTP.tls_skip_verifyenables or disables TLS verification.ca_certis the path to the PEM-encoded CA certificate files used to verify the Vault server's TLS certificate. When you runvault-ssh-helperwith the-devflag, it ignores this setting.ssh_mount_pointis the Vault server path where the SSH secrets engine is enabled.namespaceis the namespace of the SSH mount point (Vault Enterprise and Vault Dedicated)allowed_rolesdefines all*or a comma-separated list of allowed roles defined in the SSH secrets engines.Refer to the documentation for the entire list of configuration properties.
Return to the terminal session where you created the
VAULT_ADDRenvironment variable.Retrieve and copy the value for
VAULT_ADDR.$ echo $VAULT_ADDRReturn to the terminal connected to the Ubuntu box.
Create a variable named
VAULT_EXTERNAL_ADDRthat contains the Vault server's external network address copied in the previous step.$ VAULT_EXTERNAL_ADDR=<VAULT_EXTERNAL_ADDR>Example:
$ VAULT_EXTERNAL_ADDR=https://vault-cluster-public-vault-abcdefg.123456.z1.hashicorp.cloud:8200Create a Vault SSH Helper configuration file
/etc/vault-ssh-helper.d/config.hcl.$ sudo tee /etc/vault-ssh-helper.d/config.hcl <<EOF vault_addr = "$VAULT_EXTERNAL_ADDR" tls_skip_verify = false ssh_mount_point = "ssh" allowed_roles = "*" EOFBackup the original PAM sshd configuration configuration file.
$ sudo cp /etc/pam.d/sshd /etc/pam.d/sshd.origOpen the file in your preferred text editor.
$ sudo nano /etc/pam.d/sshdYou must comment out or remove
common-authto disable the standard Unix authentication, and replace with authentication throughvault-ssh-helper. This example also includes a workaround for a bug that exists with some versions ofpam_exec.so.Refer to the documentation for details about these parameter settings.
Example:
# PAM configuration for the Secure Shell service

# Standard Un*x authentication.
#@include common-auth
auth requisite pam_exec.so quiet expose_authtok log=/var/log/vault-ssh.log /usr/local/bin/vault-ssh-helper -dev -config=/etc/vault-ssh-helper.d/config.hcl
auth optional pam_unix.so not_set_pass use_first_pass nodelay

...
This example configures
vault-ssh-helperto run in development mode using the-devparameter. The example also uses the-configparameter to specify the configuration fileconfig.hcl, and uses the-logparameter to send log output to/var/log/vault-ssh.log.Backup the original
sshd_configconfiguration file.$ sudo cp /etc/ssh/sshd_config /etc/ssh/sshd_config.origModify the sshd configuration file.
$ sudo nano /etc/ssh/sshd_configAdd or set the following:
KbdInteractiveAuthentication yes
UsePAM yes
PasswordAuthentication no
This enables the keyboard-interactive authentication and PAM authentication modules while disabling password authentication.
Restart the
sshdservice.$ sudo systemctl restart sshdVerify the configuration.
$ vault-ssh-helper -verify-only -dev -config /etc/vault-ssh-helper.d/config.hcl ==> WARNING: Dev mode is enabled! [INFO] using SSH mount point: ssh [INFO] vault-ssh-helper verification successful!Determine the IP address of the Ubuntu box.
$ ip -4 address show eth1 | grep inet | awk '{print $2}' | cut -d'/' -f1 192.168.100.102Copy the IP address for
eth1.Disconnect from Ubuntu.
$ exit
Generate an OTP
(Persona: client)
A client configured to target a Vault server may now authenticate with the Vault server, generate an OTP and then use that OTP to establish an SSH connection.
Return to the terminal configured with the
VAULT_ADDRenvironment variable.Create a variable named
REMOTE_HOST_IPthat stores the Ubuntu box's IP address.$ REMOTE_HOST_IP=<REMOTE_HOST_IP>Example:
$ REMOTE_HOST_IP=192.168.100.102
Authenticate with Vault using the
userpassauth method with the usernameubuntuand passwordtraining. Store the token in an environment variable.$ UBUNTU_TOKEN=$(vault login -method=userpass username=ubuntu password=training -format=json | jq -r '.auth | .client_token')Generate an OTP, through the
otp_key_role, for remote host given its IP address.$ VAULT_TOKEN=$UBUNTU_TOKEN vault write ssh/creds/otp_key_role ip=$REMOTE_HOST_IPExample Output:
$ vault write ssh/creds/otp_key_role ip=$REMOTE_HOST_IP
Key                Value
---                -----
lease_id           ssh/creds/otp_key_role/234bb081-d22e-3762-3ae5-744110ea4d0a
lease_duration     768h
lease_renewable    false
ip                 192.168.100.102
key                f1cb47ad-6255-0be8-6bd8-5c4b3b01c8df
key_type           otp
port               22
username           vagrant
The output displays a
key. Its value is the OTP to use during SSH authentication.
Initiate an SSH session
Connect to the Ubunut box as the
vagrantuser and the one time password provided by Vault.$ ssh -o PubkeyAuthentication=no vagrant@$REMOTE_HOST_IPWhen prompted enter
yesto accept the fingerprint and for aPassword:enter the OTP key from the previous step.Example:
$ ssh -o PubkeyAuthentication=no vagrant@$REMOTE_HOST_IP

The authenticity of host '192.168.100.102 (192.168.100.102)' can't be established.
ECDSA key fingerprint is SHA256:N8CjNy6ahilQ3xvOO6FZKA3NkvpIOPi1LxpLvNx7xbQ.
Are you sure you want to continue connecting (yes/no/[fingerprint])? yes

Password: <Enter OTP>
Last login: Tue Aug 16 13:20:22 2022 from 10.0.2.2
vagrant@ubuntu2204:~$
You are now connected to the Ubuntu box using the one time password from Vault.
Knowledge checks
A quiz to test your knowledge.
Why does Vault SSH OTP improve SSH access security compared to a standard static password?
Vault generates a one-time password for each login attempt and deletes it after validation. This reduces the risk of reuse if someone captures or guesses a credential.
What must the
operationspersona configure before a client can request an OTP for a remote host?🔘 Only the
vault-ssh-helperbinary on the remote host🔘 An SSH secrets engine role, a policy for
ssh/creds/otp_key_role, and an auth method for the client🔘 Only a
VAULT_ADDRenvironment variable on the client workstation🔘 A signed SSH certificate authority for the
vagrantuser❌ Only the
vault-ssh-helperbinary on the remote host✅ An SSH secrets engine role, a policy for
ssh/creds/otp_key_role, and an auth method for the client❌ Only a
VAULT_ADDRenvironment variable on the client workstation❌ A signed SSH certificate authority for the
vagrantuserHow does the remote host verify that the password entered during SSH login is valid?
🔘 The SSH daemon compares it against the local
vagrantaccount password🔘 Vault stores the OTP permanently and the client checks it locally
🔘
vault-ssh-helperreceives the OTP through PAM and validates it with the Vault server🔘 The
userpassauth method on the remote host validates the OTP without contacting Vault❌ The SSH daemon compares it against the local
vagrantaccount password❌ Vault stores the OTP permanently and the client checks it locally
✅
vault-ssh-helperreceives the OTP through PAM and validates it with the Vault server❌ The
userpassauth method on the remote host validates the OTP without contacting Vault
Cleanup
Disconnect from the Ubuntu box.
$ exitSwitch to the terminal where you performed
vagrant upand destroy the Ubuntu box.$ vagrant destroy --forceStop the Vault dev mode server or delete your Vault Dedicated server.