Generate cloud provider credentials with Vault
Dynamic secrets are a core feature in Vault. A class of dynamic secrets is on-demand, revocable, time-limited access credentials for cloud providers and database platforms. For example, the Dynamic secrets foundations tutorial demonstrates the database secrets engine to dynamically generate credentials.
Challenge
To consume cloud provider services (for example, Azure Kubernetes service or GCP Kubernetes engine), the client must have valid credentials. Each cloud provider has a unique process to manage the full lifecycle of credentials, adding to the complexity of multi-cloud environments.
Solution
Automate the full lifecycle of credential management by integrating your applications with Vault's dynamically generated credentials. The applications request credential from Vault with a time-to-live (TTL) enforcing its validity so that the credentials are automatically revoked when they are no longer used.
In this tutorial, you will deploy Vault and configure Vault's Azure secrets engine to dynamically generate Azure service principals. Vault supports multiple different cloud providers, including Azure, AWS, and GCP.

Benefits
Each app instance can request unique, short-lived credentials. Unique credentials ensures isolated, auditable access and enable revocation of a single client. While short-lived reduces the time in which they are valid.
Personas
The end-to-end scenario described in this tutorial involves two personas:
Prerequisites
To perform the tasks described in this tutorial, you need to have:
- You have a Microsoft Azure account
- Vault installed
Policy requirements
Each persona requires a different set of capabilities. Vault policies allow you to limit the capabilities of each persona following the principle of least privilege. If you are not familiar with policies, complete the policies tutorial.
The admin tasks require these capabilities.
# Mount secrets engines
path "sys/mounts/*" {
  capabilities = [ "create", "read", "update", "delete", "list" ]
}

# Configure the azure secrets engine and create roles
path "azure/*" {
  capabilities = [ "create", "read", "update", "delete", "list" ]
}

# Write ACL policies
path "sys/policies/acl/*" {
  capabilities = [ "create", "read", "update", "delete", "list" ]
}

# Manage tokens for verification
path "auth/token/create" {
  capabilities = [ "create", "read", "update", "delete", "list", "sudo" ]
}
The apps tasks require these capabilities.
path "azure/creds/edu-app" {
  capabilities = [ "read" ]
}
Lab setup
Open a new terminal window and start a Vault dev server with
rootas the root token.$ vault server -dev -dev-root-token-id root -log-level=debugThe Vault dev server starts initialized and unsealed, and defaults to running at
127.0.0.1:8200.The
-log-level=debugis optional, and used in Automated root rotation step.In a separate window, export an environment variable for the
vaultCLI to address the Vault server.$ export VAULT_ADDR=http://127.0.0.1:8200Export an environment variable for the
vaultCLI to authenticate with the Vault server.$ export VAULT_TOKEN=root
The Vault server is ready.
Create an Azure service principal and resource group
(Persona: admin)
To delegate the credential generation task to Vault, you need to give Vault privileged Azure credentials to perform the task. The following demonstrates the creation of a service principal.
Launch the Microsoft Azure Portal and sign in.
Select Microsoft Entra ID and select Properties.

Copy the Tenant ID.

In a terminal, set the variable
TENANT_IDto the Tenant ID.$ export TENANT_ID=<Tenant ID>From the side navigation, select App registrations.
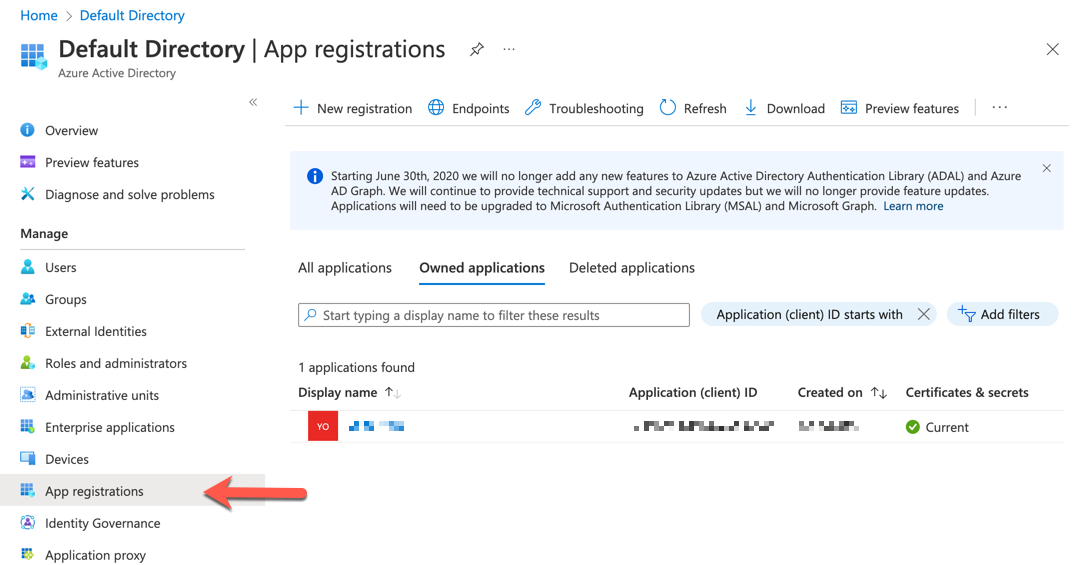
Select New registrations.

Enter a desired name in the Name field (
vault-education).Click Register.
Copy the Application (client) ID.
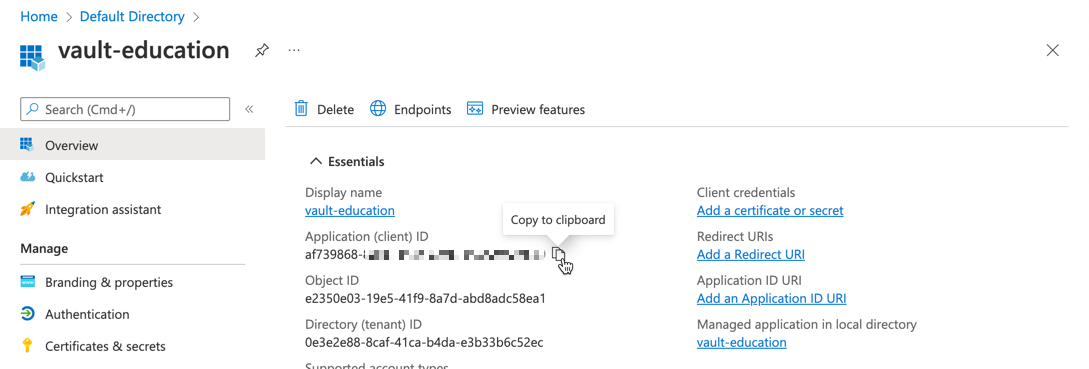
In a terminal, set the variable
CLIENT_IDto the Application (client) ID.$ export CLIENT_ID=<Client ID>Next set the variable
OBJECT_IDto the Object ID.$ export OBJECT_ID=<Object ID>From the side navigation, select Certificate & secrets.
Under the Client secrets, click New client secret.
Enter a description in the Description field.
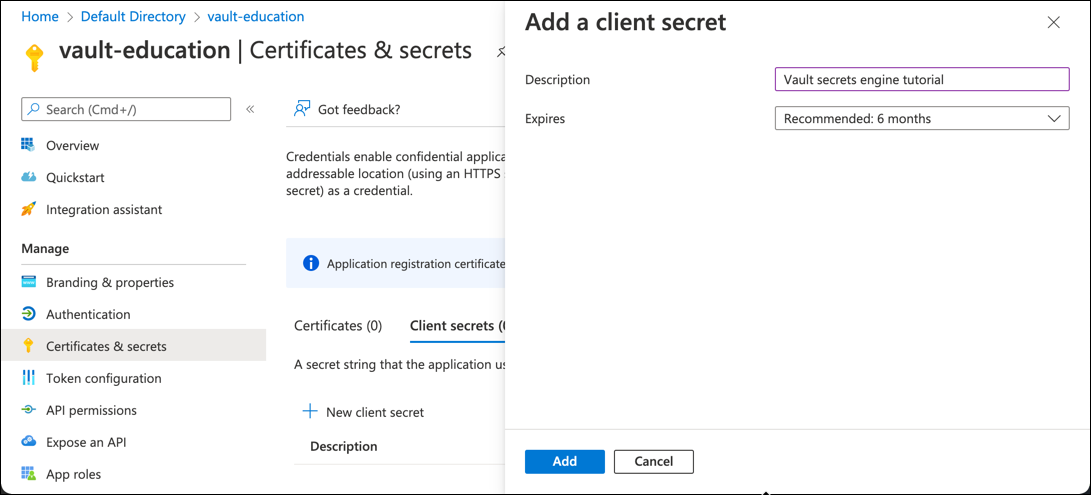
Click Add.
Copy the client secret value.
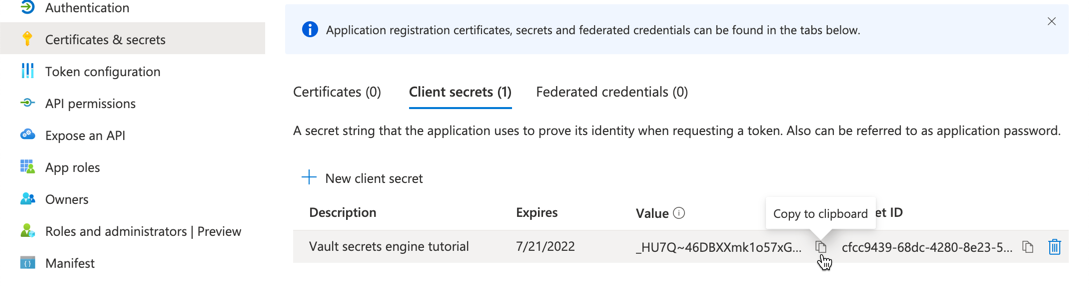
In a terminal, set the variable
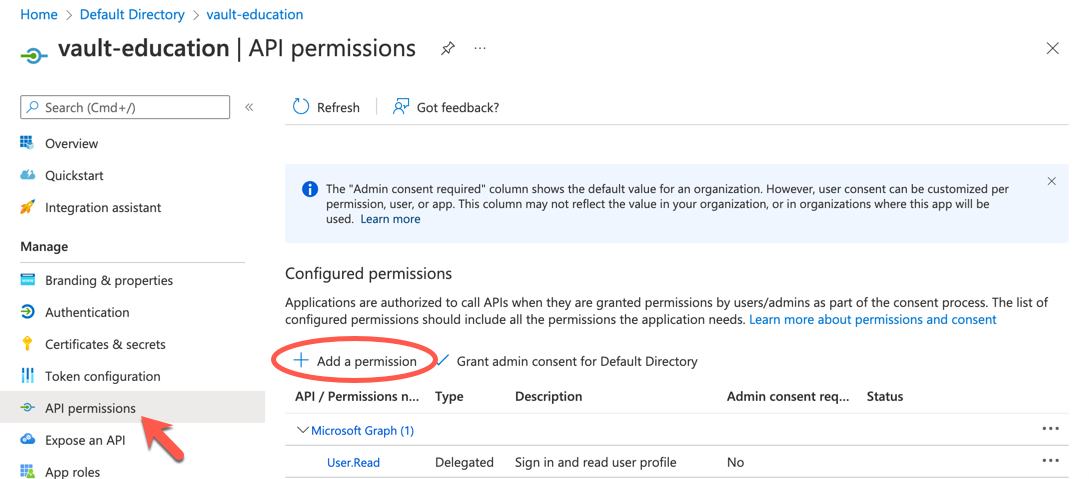
CLIENT_SECRETto the client secret value.$ export CLIENT_SECRET=<Client secret>From the side navigation, click API permissions.
Under Configured permissions, click Add a permission.
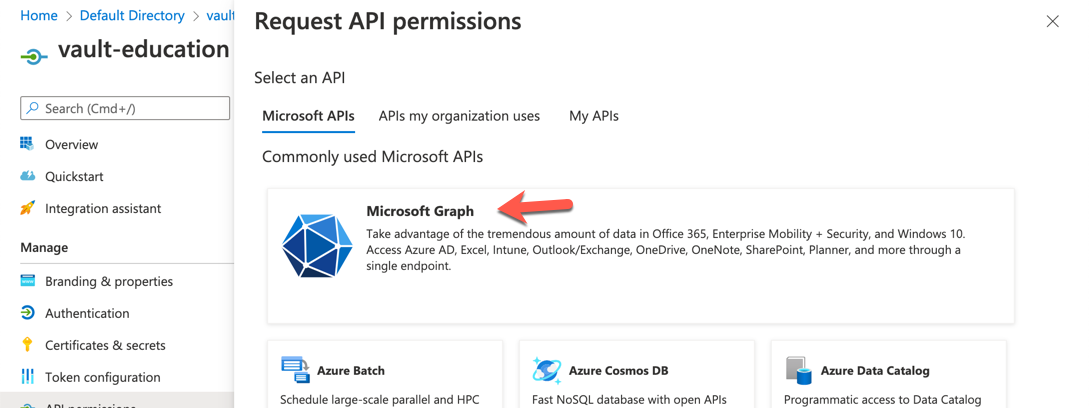
The Azure Secrets Engine documentation lists the required Azure permissions.
Click Microsoft Graph.
Select Application permissions.
Add the following permissions.
Permission Name Type Application.ReadWrite.OwnedBy Application GroupMember.ReadWrite.All Application Click Add permissions.
Click Grant admin consent for azure to grant the permissions.
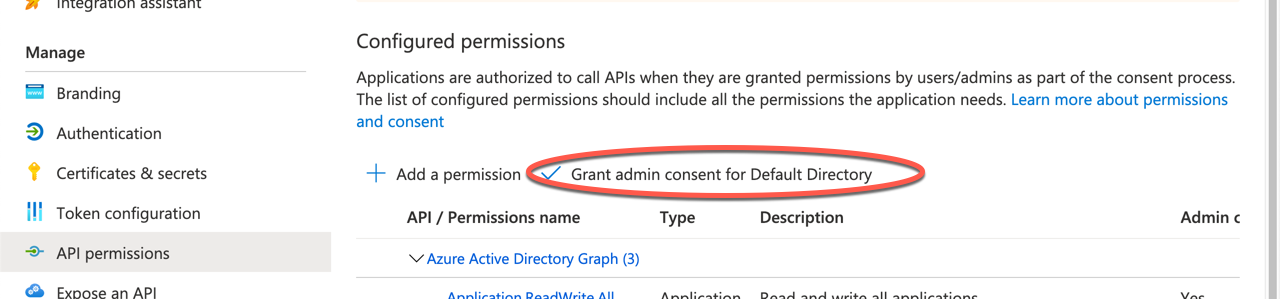
Click Yes to confirm consent.
Navigate to the Subscriptions blade.
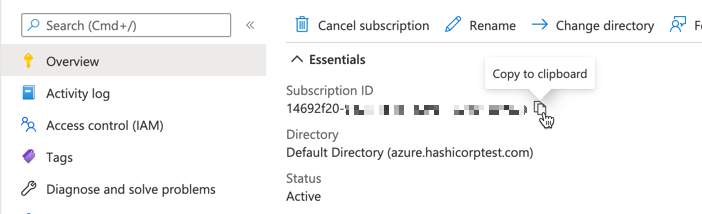
Click the name of your subscription.
Copy the Subscription ID.
In a terminal, set the variable
SUBSCRIPTION_IDto the Subscription ID.$ export SUBSCRIPTION_ID=<Subscription ID>From the side navigation, click Access control (IAM).
Click Add > Add a role assignment.
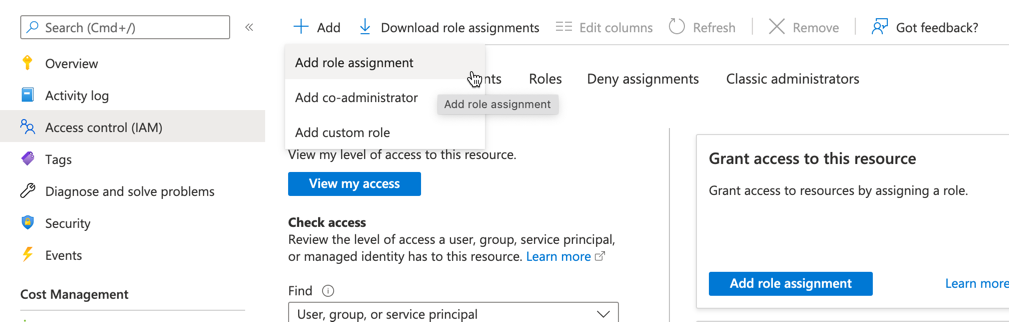
Under the
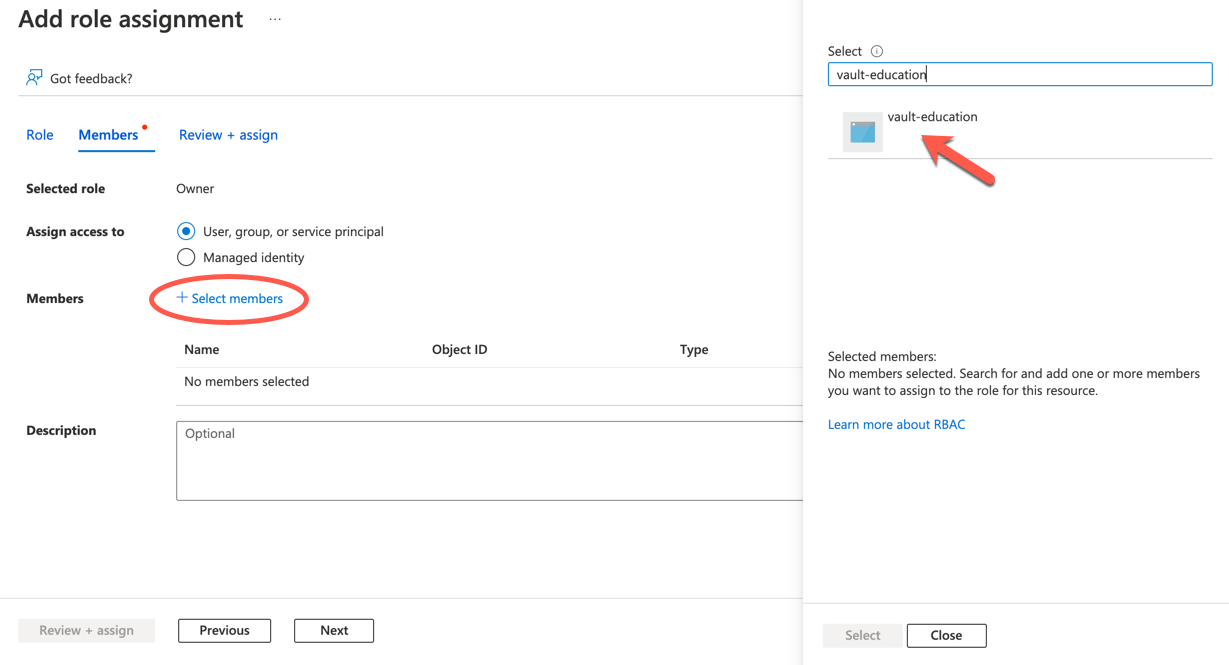
Privileged administrator rolestab, selectUser Access Administratorand click Next.In the Members tab, click Select members.
Enter your application name or application id in the Select field.
After the applcation appears on the list, click to add it to the Members list.
Click Next to move to the Conditions tab.
Choose the radio button for Allow user to assign all roles (highly privileged) and click on Next.
Click Review + assign tab, and then Review + assign gain.
You created the application with the correct capabilities and you have these identifiers and credentials:
- Tenant ID
- Client ID
- Client Secret
- Subscription ID
You created and configured a service principal, app registration, client secret and granted it the required permissions.
Resource group
The secrets engine generates credentials within an Azure resource group.
Navigate to the Resource groups blade.
Click Create.
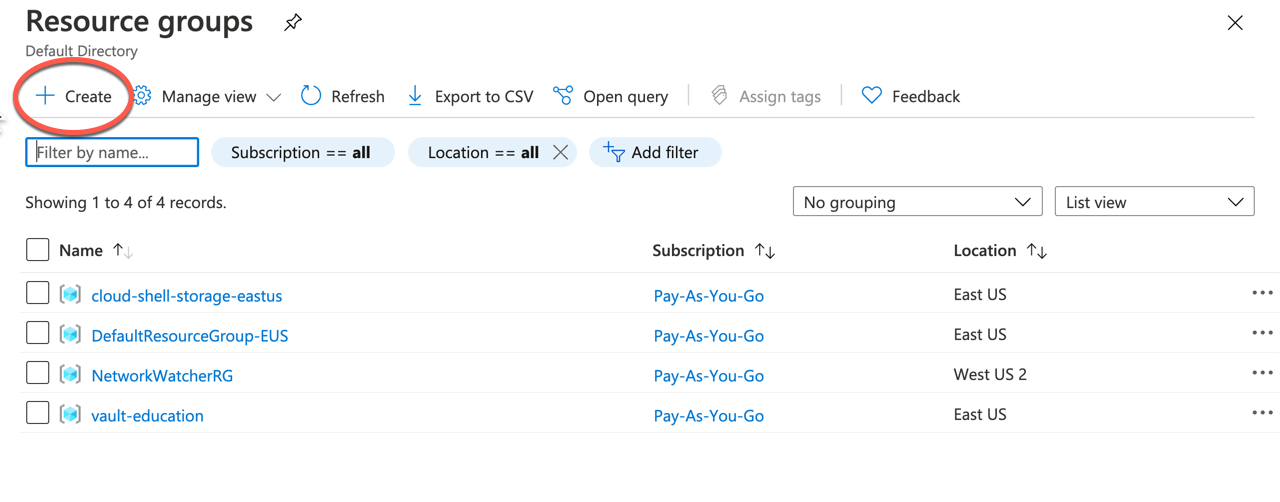
Choose the subscription from the Subscription select field.
Enter
vault-educationin the Resource group field.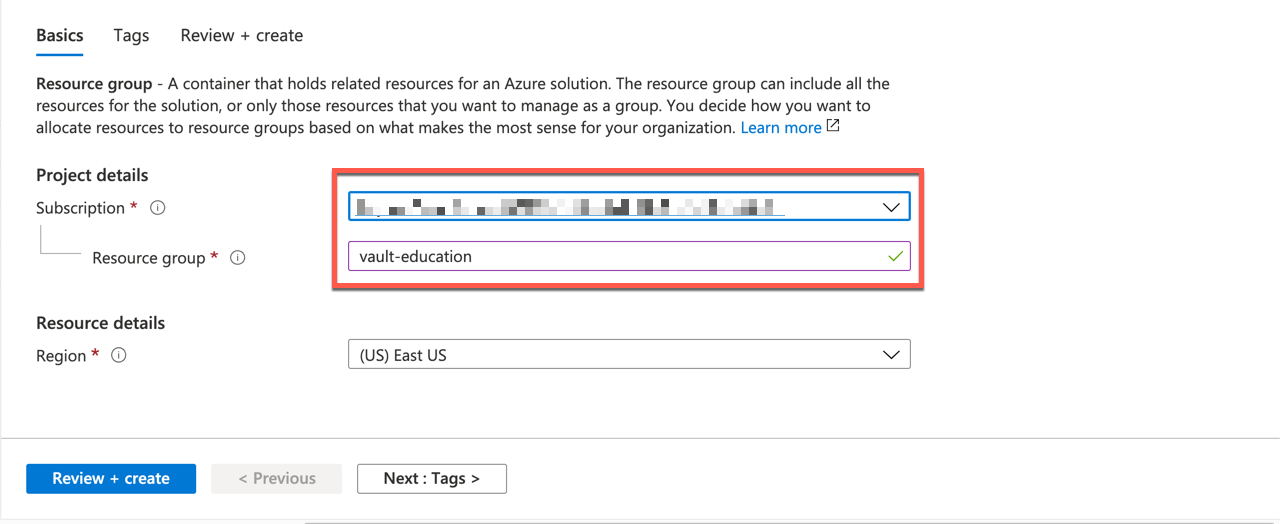
Click Review + create.
The view changes to display the review page.
Click Create.
You created the vault-education resource group.
Configure Vault
With the necessary resources configured in Azure, you can configure the Azure secrets engine to dynamically generate Azure service principals.
Enable the Azure secrets engine
Enable the azure secrets engine at its default path.
$ vault secrets enable azure
You enabled the secrets engine at the path azure/. To enable the secrets engine
at a different path requires that you use the -path parameter and the desired
path.
Configure the Azure secrets engine
(Persona: admin)
The Azure secrets engine requires the credentials you generated in the create an Azure service principal and resource group step to communicate with Azure and generate service principals.
Verify that you set Azure subscription ID, client ID, client ID, and tenant ID as environment variables.
$ echo $SUBSCRIPTION_ID; echo $CLIENT_ID; echo $CLIENT_SECRET; echo $TENANT_ID
If any of those variables are missing their value, refer to the previous step and set them before proceeding.
Configure the Azure secrets engine with the Azure credentials.
$ vault write azure/config \
     subscription_id=$SUBSCRIPTION_ID  \
     client_id=$CLIENT_ID \
     client_secret=$CLIENT_SECRET \
     tenant_id=$TENANT_ID \
Create a role
(Persona: admin)
A Vault role lets you configure either an existing service principal or a set of Azure roles.
Create a Vault role named, edu-app mapped to the Azure role named,
Contributor in the vault-education resource group.
$ vault write azure/roles/edu-app ttl=1h azure_roles=-<<EOF
    [
      {
        "role_name": "Contributor",
        "scope": "/subscriptions/$SUBSCRIPTION_ID/resourceGroups/vault-education"
      }
    ]
EOF
You enabled and configured the azure secrets engine with your subscription ID, client ID, secrets ID and tenant ID. Then you created the edu-app role.
Request Azure credentials
The role generates credentials with a time-to-live (TTL) of 1 hour and max TTL of 24 hours.
Read credentials from the
edu-appazure role.$ vault read azure/creds/edu-appExample output:
Key                Value
---                -----
lease_id           azure/creds/edu-app/EA2uTB98qAPR2BRSaasnmnja
lease_duration     1h
lease_renewable    true
client_id          074421c4-60b7-477c-9c5f-07e0925ba6a6
client_secret      Vw17Q~3u3ZRRUd.M4pP-Bl487.i4Fe1~jLpLT
The results display the credentials, its TTL, and the lease ID.
For applications (apps persona) to request credentials, it requires a Vault policy that grants access to this role. Define a policy named
apps.$ vault policy write apps - <<EOF path "azure/creds/edu-app" { capabilities = [ "read" ] } EOFThe apps policy grants the
readcapability for requests to the pathazure/creds/edu-app.Create a variable named
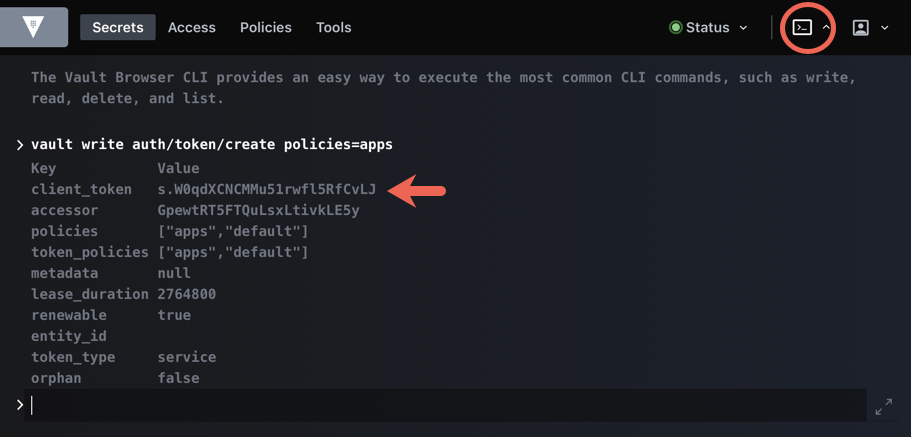
APPS_TOKENto capture the token created with theappspolicy attached.$ APPS_TOKEN=$(vault token create -policy=apps -field=token)Read credentials from the
edu-appazure role with theAPPS_TOKEN.$ VAULT_TOKEN=$APPS_TOKEN vault read azure/creds/edu-appExample output:
Key                Value
---                -----
lease_id           azure/creds/edu-app/W24u6d77acJbBzzf02iq6YHd
lease_duration     1h
lease_renewable    true
client_id          b43b4e84-5568-4efd-8ba5-cbd40936ba12
client_secret      iXK7Q~mFGn-MJjcXhGbevQCQPRhB2Hkg1QGAq
The results display the credentials, its TTL, and the lease ID. The credentials
for this application (service principal) in the Azure Portal searching by its
client_id.
Manage leases
(Persona: admin)
The primary use of the lease ID is to manage the credentials. The credentials remain valid for the lease duration (TTL) or until revoked. Once revoked the credentials are no longer valid.
List the existing leases.
$ vault list sys/leases/lookup/azure/creds/edu-app
Example output:
Keys
----
o2F4EA3hU8Fpjgc39XyQpjtU
fRFeCtlMnoPqelTrjf5j5kGA
This command displays a list of valid leases for Azure credentials.
Create a variable that stores the first lease ID.
$ LEASE_ID=$(vault list -format=json sys/leases/lookup/azure/creds/edu-app | jq -r ".[0]")
Renew a lease
If you need to extend the use of the generated Azure credentials, you can renew the lease by passing its lease ID.
$ vault lease renew azure/creds/edu-app/$LEASE_ID
Example output:
Key                Value
---                -----
lease_id           azure/creds/edu-app/EA2uTB98qAPR2BRSaasnmnja
lease_duration     1h
lease_renewable    true
You set the TTL of the renewed lease to 1h.
Revoke the leases
When the Azure credentials are no longer needed, you can revoke the lease without waiting for its expiration.
Revoke the least associated with the
$LEASE_IDenvironment variable.$ vault lease revoke azure/creds/edu-app/$LEASE_ID All revocation operations queued successfully!List the existing leases.
$ vault list sys/leases/lookup/azure/creds/edu-app

fRFeCtlMnoPqelTrjf5j5kGA
The first lease is no longer valid.
Read new credentials from the
edu-approle.$ vault read azure/creds/edu-appRevoke all the leases with the prefix
azure/creds/edu-app.$ vault lease revoke -prefix azure/creds/edu-appThe
prefixflag matches all valid leases with the path prefix ofazure/creds/edu-app.List the existing leases.
$ vault list sys/leases/lookup/azure/creds/edu-app
No value found at sys/leases/lookup/azure/creds/edu-app
This verifies the revocation of all the leases with this path as a prefix.
Automated root rotation
Rotating static root credentials makes using cloud credentials more efficient and secure. It enforces a finite lifespan for the initial root credentials and in the case of a leaked secret, a limited window of use. The new root credential is only known by Vault, and not viewed by a user.
On the Azure side ensure that the Application permissions for Microsoft Graph include the following.
| Permission Name | Type |
|---|---|
| Application.ReadWrite.All | Application |
| GroupMember.ReadWrite.All | Application |
If the IAM Graph API permissions do not match these, update the secret to include them.
The role configuration for azure/roles/edu-app need not change, but this feature requires adding two fields in azure/config.
Reconfigure the Azure secrets engine with the
rotation_scheduleandrotaion windowparameters.$ vault write azure/config \ subscription_id=$SUBSCRIPTION_ID \ client_id=$CLIENT_ID \ client_secret=$CLIENT_SECRET \ tenant_id=$TENANT_ID \ use_microsoft_graph_api=true \ rotation_schedule="*/1 * * * *" \ rotation_window=60The
rotation_scheduleparameter is a standardcronschedule expression. The fields in the string represent the minute, hour, day of month, month, and day of week.In this example,
"*/1 * * * *"the secret rotates every minute. For"* */1 * * *"the secret would rotate every hour.Check the window with the Vault server running. The log should include some entries with a
[DEBUG]entries that resemble the following.2025-02-27T12:04:18.351-0600 [DEBUG] secrets.azure.azure_374be79b.azure.vault-plugin-secrets-azure: starting periodic func: timestamp=2025-02-27T12:04:18.351-0600 2025-02-27T12:05:18.350-0600 [DEBUG] secrets.azure.azure_374be79b.azure.vault-plugin-secrets-azure: starting periodic func: timestamp=2025-02-27T12:05:18.349-0600Disable automated root rotation use the
disable_automated_rotationparameter.$ vault write azure/config disable_automated_rotation=true Success! Data written to: azure/config
You configured and validated automated root rotation, then disabled it.
Static role rotation
Vault also supports static roles for the Azure secrets engines. Static roles are a 1-to-1 mapping of Vault roles to application registrations in Azure AD. Vault always returns the same client secret for a static role, but can revoke the current secrets value and generate a new one on demand.
See the Azure secrets engine - static roles documentation for more information.
Using the
OBJECT_IDvariable, create a new static role.$ vault write azure/static-roles/dev-role \ application_object_id=$OBJECT_ID \ metadata='{"static":"true"}' \ ttl=8760hThe
application_object_idis the object ID of the service principal created earlier. Thettlis 1 year (8760 hours). Arbitrary metadata is also attached to the role.Examine the
client_secretfor the static role.$ vault read azure/static-creds/dev-roleExample output:
Key                    Value
---                    -----
client_id              XXX30d32-8abc-407c-NnNN-YYYYaa962f1b
client_secret          XXXX~xxXxXXXxXXX_XxxxxxXXxXpXlmhoU-ycJ9
expiration             2026-10-21T18:31:57.06755Z
last_vault_rotation    2025-10-21T18:31:57.06755Z
metadata               map[static:true]
secret_id              11072f51-8a67-4adc-a7c5-ba7ef18ea032
Rotate the static credentials.
$ vault write -f azure/rotate-role/dev-role
Success! Data written to: azure/rotate-role/dev-role
This invalidates the current
client_secretand generates a new one.Read the static credentials again to see the updated credentials.
$ vault read azure/static-creds/dev-roleExample output:
Key                    Value
---                    -----
client_id              XXX30d32-8abc-407c-NnNN-YYYYaa962f1b
client_secret          YYYY~yyYyYYYyYYY_YyyyyyYYyYyYyyyyY-yyyy
expiration             2026-10-21T18:35:59.348009Z
last_vault_rotation    2025-10-21T18:35:59.348009Z
metadata               map[static:true]
secret_id              a82200dd-df4a-45c3-9b8b-33cdeed3eccf
You created a static role, requested it's credentials, rotated the credentials, and verified the rotation of the credentials.
Knowledge checks
A quiz to test your knowledge.
Why does this tutorial configure Vault with a privileged Azure service principal before creating the
edu-approle?Vault needs a privileged Azure identity so the Azure secrets engine can create and manage service principals on your behalf. After that setup, Vault can generate short-lived credentials for less-privileged application access through the
edu-approle.What does the
edu-approle define in this tutorial?🔘 A static Azure client secret that every application shares permanently.
🔘 A Vault role that maps to the Azure
Contributorrole in thevault-educationresource group.🔘 A Vault auth method that signs users in with Microsoft Entra ID.
🔘 A policy that lets the
adminpersona manage all Vault leases.❌ A static Azure client secret that every application shares permanently.
✅ A Vault role that maps to the Azure
Contributorrole in thevault-educationresource group.❌ A Vault auth method that signs users in with Microsoft Entra ID.
❌ A policy that lets the
adminpersona manage all Vault leases.How do lease renewal and lease revocation change the lifecycle of Azure credentials generated by Vault?
Lease renewal extends how long the generated credentials remain valid, while lease revocation invalidates them before their TTL expires. This lets you keep access when you still need it or remove access as soon as it is no longer required.
Summary
You enabled and configured the Azure secrets engine and requested a secret. You also learned how to list, renew, and revoke credential leases. Finally, you enabled automated root rotation and static role rotation.
Learn more by exploring the Azure secrets engine documentation and Azure secrets engine API documentation.
Clean up
If they are no longer required, delete the Azure credentials created to configure the secrets engine.
Launch the Microsoft Azure Portal and sign in.
Navigate to Azure Entra ID.
From the side navigation, select App registrations.
Click the vault-education application (or whatever the name you set for the application).
From the application overview, click delete.
Select Yes to delete the application.
Navigate to Resource groups.
Click the vault-education resource group.
From the resource group overview, click Delete resource group.
Enter
vault-educationin theTYPE THE RESOURCE GROUP NAME:field.Click Delete to remove the resource group.
Stop the Vault server
Unset the
VAULT_TOKENenvironment variable.$ unset VAULT_TOKENUnset the
VAULT_ADDRenvironment variable.$ unset VAULT_ADDRIf you ran the automated root rotation section of this tutorial, unset the environment variables use for that section.
$ unset CLIENT_ID TENANT_ID SUBSCRIPTION_ID CLIENT_SECRET OBJECT_IDIf you are running Vault locally in
devmode, stop the Vault dev server by pressing Ctrl+C where the server is running. Or, execute the following command.$ pgrep -f vault | xargs kill