Authenticate providers with dynamic credentials
HCP Terraform's dynamic provider credentials let you establish a trust relationship between HCP Terraform and your cloud provider. They limit the blast radius of compromised credentials by using unique, short-lived credentials for each Terraform run. Dynamic credentials also give you fine-grained control over the resources that each of your HCP Terraform projects and workspaces can manage. HCP Terraform supports dynamic credentials for AWS, Google Cloud Platform, Azure, and Vault.
When you use dynamic credentials, HCP Terraform begins each run by authenticating with your cloud provider, passing it details about the workload, including your organization and workspace name. Your cloud provider then responds with temporary credentials which HCP Terraform uses to provision your resources for the run. This workflow is based on the OpenID Connect protocol (OIDC), an open source standard for verifying identity across different systems.
In this tutorial, you will set up a trust relationship between HCP Terraform and your cloud provider, and configure a workspace with dynamic credentials. Then you will use dynamic credentials to provision infrastructure for that workspace.
If you use Vault to manage your secrets, you can also use it to manage your dynamic provider credentials. Refer to the Authenticate Providers with Vault-Backed Dynamic Credentials tutorial for details.
Prerequisites
This tutorial assumes that you are familiar with the Terraform and HCP Terraform workflows. If you are new to Terraform, complete the Get Started collection first. If you are new to HCP Terraform, complete the HCP Terraform Get Started tutorials first.
For this tutorial, you will need:
- Terraform v1.5+ installed locally.
- an HCP Terraform account and organization.
- An account with one of the supported cloud providers: AWS, Google Cloud Platform, Microsoft Azure, or Vault.
We recommend you use a non-production HCP Vault cluster to complete this tutorial.
Visit your Vault instance's Overview page in HCP, and create a new admin token,
and use it to set the VAULT_TOKEN environment variable in your local
environment.
$ export VAULT_TOKEN=<YOUR_TOKEN>
Find your vault cluster's public URL in HCP, and use it to set the VAULT_ADDR
environment variable.
$ export VAULT_ADDR=https://<YOUR_CLUSTER>.hashicorp.cloud:8200
Set your Vault namespace to admin.
$ export VAULT_NAMESPACE=admin
Note: If you are using Vault Community Edition or Vault Enterprise, set these three environment variables to the appropriate values for your installation.
Create example repository
Visit the template
repository
for this tutorial. Click the Use this template button and select Create a
New Repository. Choose the GitHub owner that you use with HCP Terraform, and
name the new repository learn-terraform-dynamic-credentials. Leave the rest of
the settings at their default values.
Clone example repository
Clone the new repository, which contains Terraform configuration to create the trust relationship between your cloud provider and HCP Terraform. Find the URL to your repository by clicking the Code button on GitHub, or customize the following command.
$ git clone https://github.com/<YOUR_USERNAME>/learn-terraform-dynamic-credentials
Replace <YOUR_USERNAME> with your GitHub user name.
Change into the example repository directory.
$ cd learn-terraform-dynamic-credentials
The example repository includes Terraform configuration to create trust relationships for each supported cloud provider. Change into the appropriate subdirectory for your cloud provider.
$ cd vault/trust
Configure trust with your cloud provider
To use dynamic credentials, you must first establish a trust relationship between your cloud provider and HCP Terraform. You will also create the roles and policies that define the resources and services the dynamic credentials can manage.
In this tutorial, you will create the trust relationship by running Terraform commands locally. In production, you may prefer to manage your trust relationships in their own HCP Terraform workspaces.
Review trust relationship configuration
Open main.tf and review the configuration for your trust relationship.
The configuration first defines the Vault provider.
main.tf
provider "vault" {}
Vault will use HCP Terraform's TLS certificate to verify that requests for dynamic credentials come from HCP Terraform.
Next, the configuration sets up a JWT auth backend to establish a trust relationship with HCP Terraform. Vault will validate Terraform's TLS certificate before accepting any requests for dynamic credentials.
main.tf
resource "vault_jwt_auth_backend" "tfc_jwt" {
  path               = var.jwt_backend_path
  type               = "jwt"
  oidc_discovery_url = "https://${var.tfc_hostname}"
  bound_issuer       = "https://${var.tfc_hostname}"
}
Next the configuration defines a role for the trust relationship. If the request meets the role's conditions, Vault will provide HCP Terraform with dynamic credentials that assume this role. The role is attached to a policy which you will review in the next section. The configuration also sets a unique identifier for your cloud provider called an audience.
main.tf
resource "vault_jwt_auth_backend_role" "tfc_role" {
  backend        = vault_jwt_auth_backend.tfc_jwt.path
  role_name      = "tfc-role"
  token_policies = [vault_policy.tfc_policy.name]

  bound_audiences = [var.tfc_vault_audience]

  bound_claims_type = "glob"
  bound_claims = {
    sub = "organization:${var.tfc_organization_name}:project:${var.tfc_project_name}:workspace:${var.tfc_workspace_name}:run_phase:*"
  }

  user_claim = "terraform_full_workspace"
  role_type  = "jwt"
  token_ttl  = 1200
}
This configuration ensures that your cloud provider will check that requests for dynamic credentials satisfy the following OIDC claims:
aud: The audience of the token, a unique case-sensitive string that identifies your cloud provider. This ensures that a request for dynamic credentials intended for one cloud provider is invalid for other providers. You may want to customize the audience for certain advanced use cases, such as using multiple sets of dynamic credentials with a single cloud provider. For this tutorial, use the default value for the audience.
sub: The subject of the token, which includes the HCP Terraform organization name, project, and workspace that can use this trust relationship. This ensures that your cloud provider only authenticates requests for the specified projects and workspaces in your organization, and lets you scope permissions on a per-project or per-workspace basis.
The sub claim includes four parts separated by colons (:):
| Claim | Value | Purpose |
|---|---|---|
organization | ${var.tfc_organization_name} | Your TFC organization name |
project | ${var.tfc_project_name} | Your TFC project name |
workspace | ${var.tfc_workspace_name} | Your TFC workspace name |
run_phase | plan or apply | The Terraform workflow phase |
The example configuration uses the bound claims type glob and the glob
character (*) to allow any workflow phase. When you define your trust
relationships, you can also use * to allow requests from any workspace within
a named project, or any project in your organization. Depending on your
organization's needs, you can configure a single trust relationship for each
cloud provider, or separate trust relationships for each project or workspace.
For each run, after your cloud provider verifies that the request is signed by HCP Terraform with the provided TLS certificate, HCP Terraform will provide a Terraform Workload Identity (TWI) token that includes information about the run, such as the organization, project, and workspace. Your cloud provider will then use HCP Terraform's OIDC metadata and public signing key to verify that the token was generated by HCP Terraform and the information it contains has not been tampered with. Once verified, if the token matches the conditions for your trust relationship, your cloud provider will respond with a set of dynamic credentials that use the configured role. HCP Terraform will then use those dynamic credentials to provision your resources.
Warning: Always include the audience and the name of your HCP Terraform organization when you configure claims. They make sure the claims are only valid for your intended cloud provider, and prevent unauthorized access from other HCP Terraform organizations.
Finally, the configuration defines the policy that specifies which resources your dynamic credentials can manage.
main.tf
resource "vault_policy" "tfc_policy" {
  name = "tfc-policy"

  policy = <<EOT
# Allow tokens to query themselves
path "auth/token/lookup-self" {
  capabilities = ["read"]
}

# Allow tokens to renew themselves
path "auth/token/renew-self" {
    capabilities = ["update"]
}

# Allow tokens to revoke themselves
path "auth/token/revoke-self" {
    capabilities = ["update"]
}

path "sys/mounts" {
  capabilities = ["list", "read"]
}

path "sys/mounts/example" {
  capabilities = ["create", "read", "update", "patch", "delete", "list"]
}

path "example/*" {
  capabilities = ["create", "read", "update", "patch", "delete", "list"]
}
EOT
}
This policy allows full access to the example path. Policies give you
fine-grained control over the permissions granted by your dynamic credentials.
You can configure the policies attached to your trust relationships to be as restrictive or permissive as you need.
Configure organization and workspace name
In the trust directory for your cloud provider, copy the example .tfvars
file to configure your organization and workspace name.
$ cp terraform.tfvars.example terraform.tfvars
Open terraform.tfvars and set your organization and workspace name. These
values are used to define the OIDC subject for your trust relationship's policy.
terraform.tfvars
tfc_organization_name = "<YOUR_ORG>"
tfc_workspace_name    = "learn-terraform-dynamic-credentials"
Replace <YOUR_ORG> with your HCP Terraform organization name. Use the given
workspace name for this tutorial.
Initialize configuration
Initialize your Terraform configuration.
$ terraform init
Apply configuration
Apply this configuration to create your trust relationship. Respond to the
confirmation prompt with a yes.
$ terraform apply
terraform apply

Terraform used the selected providers to generate the following execution plan.
Resource actions are indicated with the following symbols:
  + create

Terraform will perform the following actions:

  # vault_jwt_auth_backend.tfc_jwt will be created
  + resource "vault_jwt_auth_backend" "tfc_jwt" {
##...
Plan: 3 to add, 0 to change, 0 to destroy.

Changes to Outputs:
  + openid_claims = {
      + "sub" = "organization:<YOUR_ORG>:project:Default Project:workspace:learn-terraform-dynamic-credentials:run_phase:*"
    }
  + run_role      = "tfc-role"

Do you want to perform these actions?
  Terraform will perform the actions described above.
  Only 'yes' will be accepted to approve.

  Enter a value: yes

vault_policy.tfc_policy: Creating...
vault_jwt_auth_backend.tfc_jwt: Creating...
vault_policy.tfc_policy: Creation complete after 0s [id=tfc-policy]
vault_jwt_auth_backend.tfc_jwt: Creation complete after 1s [id=jwt]
vault_jwt_auth_backend_role.tfc_role: Creating...
vault_jwt_auth_backend_role.tfc_role: Creation complete after 0s [id=auth/jwt/role/tfc-role]

Apply complete! Resources: 3 added, 0 changed, 0 destroyed.

Outputs:

openid_claims = tomap({
  "sub" = "organization:<YOUR_ORG>:project:Default Project:workspace:learn-terraform-dynamic-credentials:run_phase:*"
})
run_role = "tfc-role"
You will use the run_role output value in the next section.
HCP Terraform can now use this trust relationship to request dynamic
credentials when it provisions infrastructure for the
learn-terraform-dynamic-credentials workspace in your default project.
Provision infrastructure with dynamic credentials
Use your trust relationship to provision infrastructure in HCP Terraform.
First, navigate to the infra directory and review the example configuration.
cd ../infra
This configuration defines a single secret in an example mount.
main.tf
provider "vault" {}

resource "vault_mount" "example" {
  path    = "example"
  type    = "kv-v2"
  options = { version = "2" }
}

resource "vault_kv_secret_v2" "example" {
  mount = vault_mount.example.path

  name                = "unsecret"
  cas                 = 1
  delete_all_versions = true
  data_json = jsonencode(
    {
      foo = "bar"
    }
  )
}
Create infrastructure workspace
Create a new workspace:
- Log in to your HCP Terraform organization.
- Navigate to the Workspaces page.
- Click the New dropdown and select Workspace.
- Select your organization's Default Project and create the workspace.
Configure it with the following settings.
Choose "Version control workflow".
Choose the
learn-terraform-dynamic-credentialsGitHub repository that you created earlier in this tutorial. If you have not yet connected your GitHub account to HCP Terraform, follow the prompts to do so. Refer to the Trigger HCP Terraform runs from VCS changes tutorial for detailed instructions.On the Configure settings step, expand the Advanced options interface, and set the Terraform Working Directory to the appropriate one for your cloud provider.
vault/infraLeave the rest of the settings on the Configure settings step at their default values, then click Create Workspace.
Configure trust variables
After you create your workspace, navigate to its Variables page and add the following workspace variables:
| Variable category | Key | Value | Sensitive |
|---|---|---|---|
| Environment variable | TFC_VAULT_PROVIDER_AUTH | true | No |
| Environment variable | TFC_VAULT_ADDR | The address of your Vault instance | No |
| Environment variable | TFC_VAULT_RUN_ROLE | vault_run_role output from previous run | No |
| Environment variable | TFC_VAULT_NAMESPACE | admin | No |
The TFC_VAULT_PROVIDER_AUTH variable configures the workspace to use dynamic
credentials for the Vault provider, and the other variables identify your Vault
instance and the role Vault will use to provision resources with dynamic
credentials.
The provider checks for environment variables to determine whether to request dynamic credentials. You can create these as workspace variables, or as variable sets. To support a self-service workflow where teams can create workspaces without having to manage variables, consider using a project with a project-scoped variable set. Current and future workspaces in the project will automatically access the variable set and take advantage of dynamic credentials. See Manage variable sets in HCP Terraform.
Apply configuration
From your workspace's Actions menu, select Start new run. Choose the Plan and apply run type. Then click Start run.
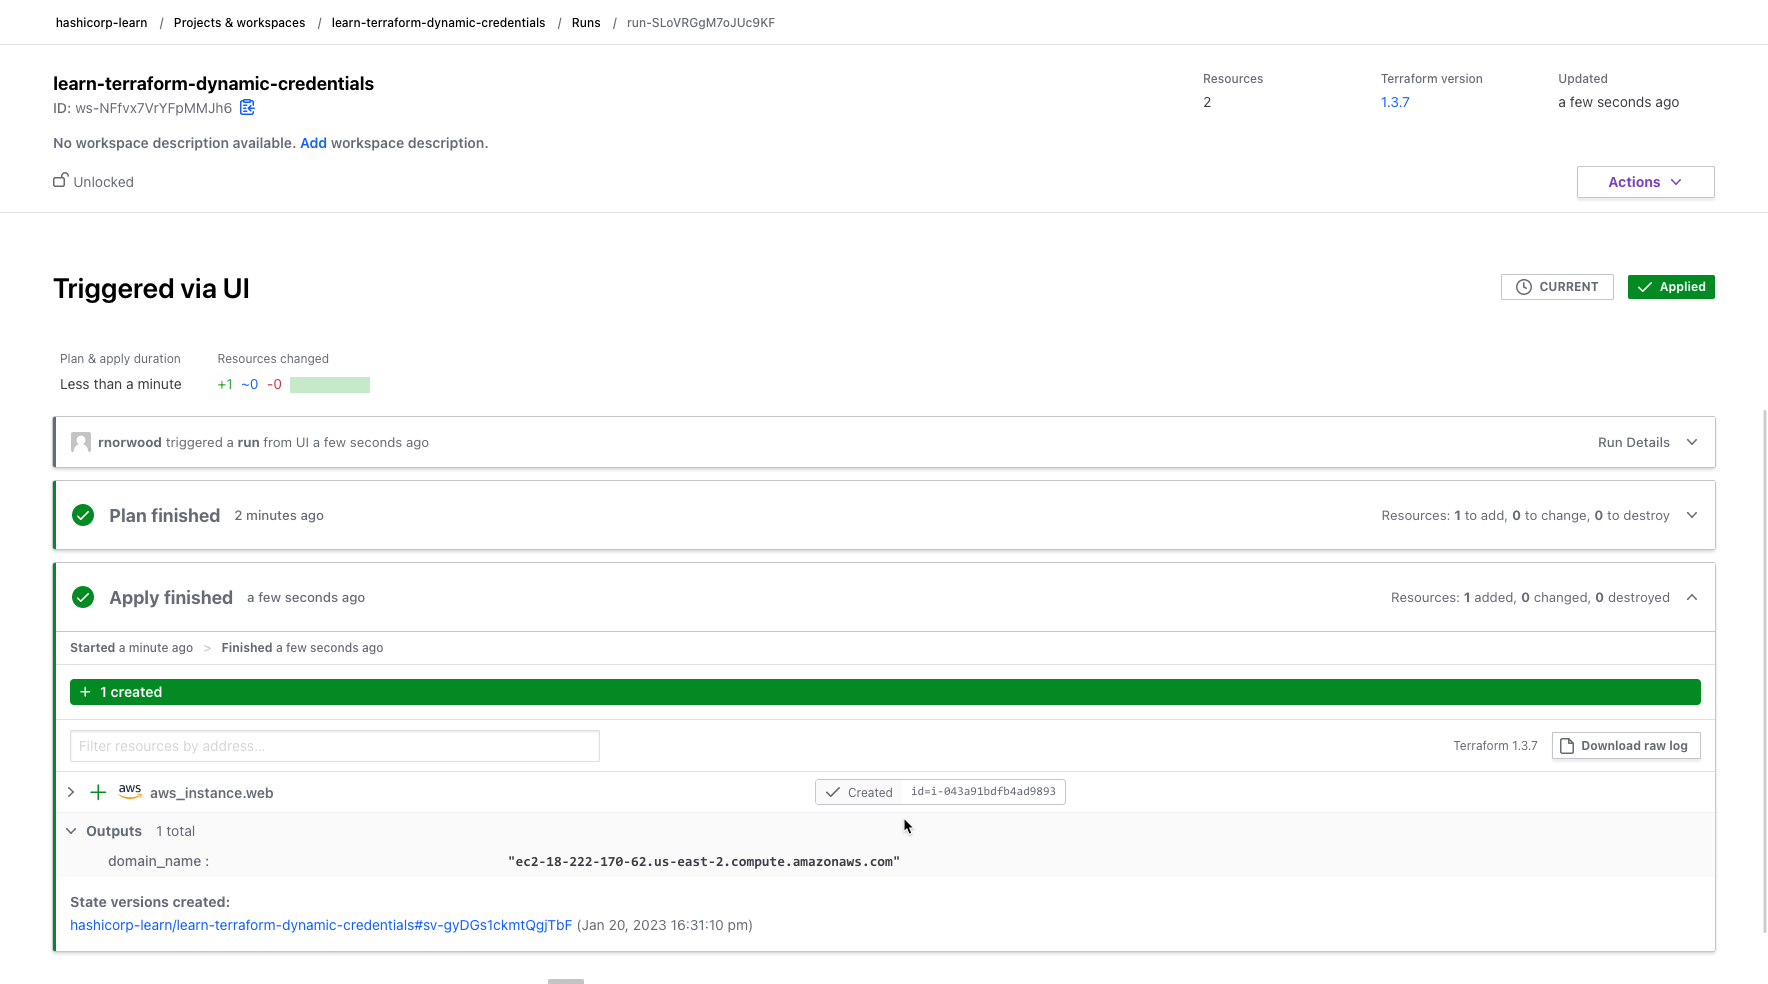
HCP Terraform requests dynamic credentials from your cloud provider, and uses them to perform a speculative plan. Once the plan is complete, click the Confirm & Apply button, then Confirm Plan to apply it. HCP Terraform will request another set of dynamic credentials and use them for the apply step.
Once the plan and apply steps are complete, review the results.
Now you have provisioned infrastructure with HCP Terraform using dynamic credentials instead of long-lived credentials. Since you do not need to store the credentials themselves in HCP Terraform, this reduces the potential for accidental exposure. Defining the role and permissions for the dynamic credentials lets you specify exactly which operations those keys can be used for.
In your organization, different teams may be responsible for managing trust relationships and deploying infrastructure. For example, a security team could configure and manage the workspaces that define trust relationships, while infrastructure teams configure and manage downstream workspaces that use the trust relationships from the security team. When different teams manage trust and infrastructure, consider how you will coordinate changes to maintain scoped trust relationships while still enabling the downstream teams that rely on them.
Remember that trust relationships reference your organization, project, and workspace names, so changing any of those values within HCP Terraform can potentially break your trust relationships.
Clean up your infrastructure
Remove the infrastructure and trust relationship that you created in this tutorial.
Destroy infrastructure
First, remove the infrastructure you created in this tutorial. In HCP Terraform, navigate to Settings > Destruction and Deletion. From there, select the Queue destroy plan button and follow the prompts to plan and apply a destroy workflow, which also uses dynamic credentials.
Delete infrastructure workspace
After destroying your infrastructure, delete the workspace from HCP Terraform. From the Settings > Destruction and Deletion page, select the Delete from HCP Terraform button and follow the prompts to delete the workspace.
Destroy trust relationship
Destroy the trust relationship you created in this tutorial.
In your terminal window, navigate to the trust directory.
cd ../trust
Use Terraform to destroy these resources. Respond to the confirmation prompt
with a yes.
$ terraform destroy
data.tls_certificate.tfc_certificate: Reading...
data.tls_certificate.tfc_certificate: Read complete after 1s [id=896bd9f2e4b99335cca9e93921664e636e35cab3]
aws_iam_openid_connect_provider.tfc_provider: Refreshing state... [id=arn:aws:iam::812345678901:oidc-provider/app.terraform.io]
aws_iam_policy.tfc_policy: Refreshing state... [id=arn:aws:iam::812345678901:policy/tfc-policy]
aws_iam_role.tfc_role: Refreshing state... [id=tfc-role]
aws_iam_role_policy_attachment.tfc_policy_attachment: Refreshing state... [id=tfc-role-20230123163910381200000001]

Terraform used the selected providers to generate the following execution plan. Resource actions are indicated with the following symbols:
  - destroy

Terraform will perform the following actions:

  # aws_iam_openid_connect_provider.tfc_provider will be destroyed
  - resource "aws_iam_openid_connect_provider" "tfc_provider" {
##...
Plan: 0 to add, 0 to change, 4 to destroy.

Changes to Outputs:
  - openid_claims = {
      - StringEquals = {
          - "app.terraform.io:aud" = "aws.workload.identity"
        }
      - StringLike   = {
          - "app.terraform.io:sub" = "organization:<YOUR_ORG>:project:Default Project:workspace:learn-terraform-dynamic-credentials:run_phase:*"
        }
    } -> null
  - role_arn      = "arn:aws:iam::812345678901:role/tfc-role" -> null

Do you really want to destroy all resources?
  Terraform will destroy all your managed infrastructure, as shown above.
  There is no undo. Only 'yes' will be accepted to confirm.

  Enter a value: yes

aws_iam_role_policy_attachment.tfc_policy_attachment: Destroying... [id=tfc-role-20230123163910381200000001]
aws_iam_role_policy_attachment.tfc_policy_attachment: Destruction complete after 0s
aws_iam_policy.tfc_policy: Destroying... [id=arn:aws:iam::812345678901:policy/tfc-policy]
aws_iam_role.tfc_role: Destroying... [id=tfc-role]
aws_iam_policy.tfc_policy: Destruction complete after 0s
aws_iam_role.tfc_role: Destruction complete after 0s
aws_iam_openid_connect_provider.tfc_provider: Destroying... [id=arn:aws:iam::812345678901:oidc-provider/app.terraform.io]
aws_iam_openid_connect_provider.tfc_provider: Destruction complete after 0s

Destroy complete! Resources: 4 destroyed.
Next steps
In this tutorial, you created a trust relationship between HCP Terraform and your cloud provider. Then you used that trust relationship to provision infrastructure with dynamic credentials.
Refer to the following resources to learn more about dynamic credentials.
Instead of creating workspaces manually, you can use HashiCorp's TFE provider to provision them. Refer to the terraform-dynamic-credentials-setup-examples GitHub repository for example configuration.
Read the dynamic credentials documentation for more details about how to configure your trust relationships.
You can also manually generate custom auth tokens for custom authentication workflows or providers that do not natively support dynamic credentials.