Vault installation to minikube via Helm with Consul
Challenge
Running Vault on Kubernetes is generally the same as running it anywhere else. Kubernetes, as a container orchestration engine, eases some of the operational burdens and Helm charts provide the benefit of a refined interface when it comes to deploying Vault in a variety of different modes.
Solution
In this tutorial, you will set up Vault and its dependencies on Kubernetes with a Helm chart. Then you will integrate a web application that uses the Kubernetes service account token to authenticate with Vault and retrieve a secret.
Prerequisites
This tutorial requires the Kubernetes command-line interface (CLI), Helm CLI , minikube, Vault and Consul Helm charts, jq, the sample web application, and additional configuration to bring it all together. Instructions on how to install these are below.
This tutorial was last tested 23 May 2022 on a macOS 12.3.1 using the following configuration:
Docker:
$ docker -v                                       9:43:11
Docker version 20.10.14, build a224086
Kubernetes-cli:
$ kubectl version --short                       9:44:24
Flag --short has been deprecated, and will be removed in the future. The --short output will become the default.
Client Version: v1.24.0
Kustomize Version: v4.5.4
Server Version: v1.23.3
Helm:
$ helm version                                    9:45:14
version.BuildInfo{Version:"v3.9.0", GitCommit:"7ceeda6c585217a19a1131663d8cd1f7d641b2a7", GitTreeState:"clean", GoVersion:"go1.18.2"}
minikube:
minikube version                                9:46:06
minikube version: v1.25.2
commit: 362d5fdc0a3dbee389b3d3f1034e8023e72bd3a7
These are recommended software versions and the output displayed may vary depending on your environment and the software versions you use.
If you do not already have these tools installed, please see below on how to insall them.
Install kubectl with Homebrew.
$ brew install kubernetes-cli
Install helm with Homebrew.
$ brew install helm
Install minikube with Homebrew.
$ brew install minikube
Install jq with Homebrew.
$ brew install jq
Next, retrieve the web application and additional configuration by cloning the learn-vault-kubernetes-consul repository from GitHub.
$ git clone https://github.com/hashicorp-education/learn-vault-kubernetes-consul
This repository contains supporting content for all of the Vault learn guides. The content specific to this tutorial can be found within a sub-directory.
Go into the learn-vault-kubernetes-consul directory.
$ cd learn-vault-kubernetes-consul
Start minikube
minikube is a CLI tool that provisions and manages the lifecycle of single-node Kubernetes clusters running inside Virtual Machines (VM) on your local system.
Start a Kubernetes cluster.
$ minikube start
😄  minikube v1.11.0 on Darwin 10.15.5
✨  Automatically selected the hyperkit driver
👍  Starting control plane node minikube in cluster minikube
🔥  Creating hyperkit VM (CPUs=2, Memory=4000MB, Disk=20000MB) ...
🐳  Preparing Kubernetes v1.18.3 on Docker 19.03.8 ...
🔎  Verifying Kubernetes components...
🌟  Enabled addons: default-storageclass, storage-provisioner
🏄  Done! kubectl is now configured to use "minikube"
The initialization process takes several minutes as it retrieves any necessary dependencies and executes various container images.
Verify the status of the minikube cluster.
$ minikube status
minikube
type: Control Plane
host: Running
kubelet: Running
apiserver: Running
kubeconfig: Configured
The host, kubelet, and apiserver report that they are running. The kubectl, a
CLI for running commands against Kubernetes cluster, is also configured to
communicate with this recently started cluster.
minikube provides a visual representation of the status in a web-based dashboard. This interface displays the cluster activity in a visual interface that can be used to explore the issues affecting it.
In another terminal, launch the minikube dashboard.
$ minikube dashboard
🤔  Verifying dashboard health ...
🚀  Launching proxy ...
🤔  Verifying proxy health ...
🎉  Opening ... in your default browser...
The operating system's default browser opens and displays the dashboard.
Install the Consul Helm chart
Consul is a service mesh solution that launches with a key-value store. Vault requires a storage backend like Consul to manage its configuration and secrets when it is run in high-availability.
The recommended way to run Consul on Kubernetes is via the Helm chart. Helm is a package manager that installs and configures all the necessary components to run Consul in several different modes. A Helm chart includes templates that enable conditional and parameterized execution. These parameters can be set through command-line arguments or defined in YAML.
Consul's Helm chart by default starts more services than required to act as Vault's storage backend.
Display the parameters in helm-consul-values.yml.
$ cat manifests/helm-consul-values.yml
global:
  datacenter: vault-kubernetes-tutorial

client:
  enabled: true

server:
  replicas: 1
  bootstrapExpect: 1
  disruptionBudget:
    maxUnavailable: 0
Add the HashiCorp Helm repository.
$ helm repo add hashicorp https://helm.releases.hashicorp.com
"hashicorp" has been added to your repositories
Update all the repositories to ensure helm is aware of the latest versions.
$ helm repo update
Hang tight while we grab the latest from your chart repositories...
...Successfully got an update from the "hashicorp" chart repository
Update Complete. ⎈Happy Helming!⎈
Install the latest version of the Consul Helm chart with parameters
helm-consul-values.yml applied.
$ helm install consul hashicorp/consul --values manifests/helm-consul-values.yml
NAME:   consul
## ...
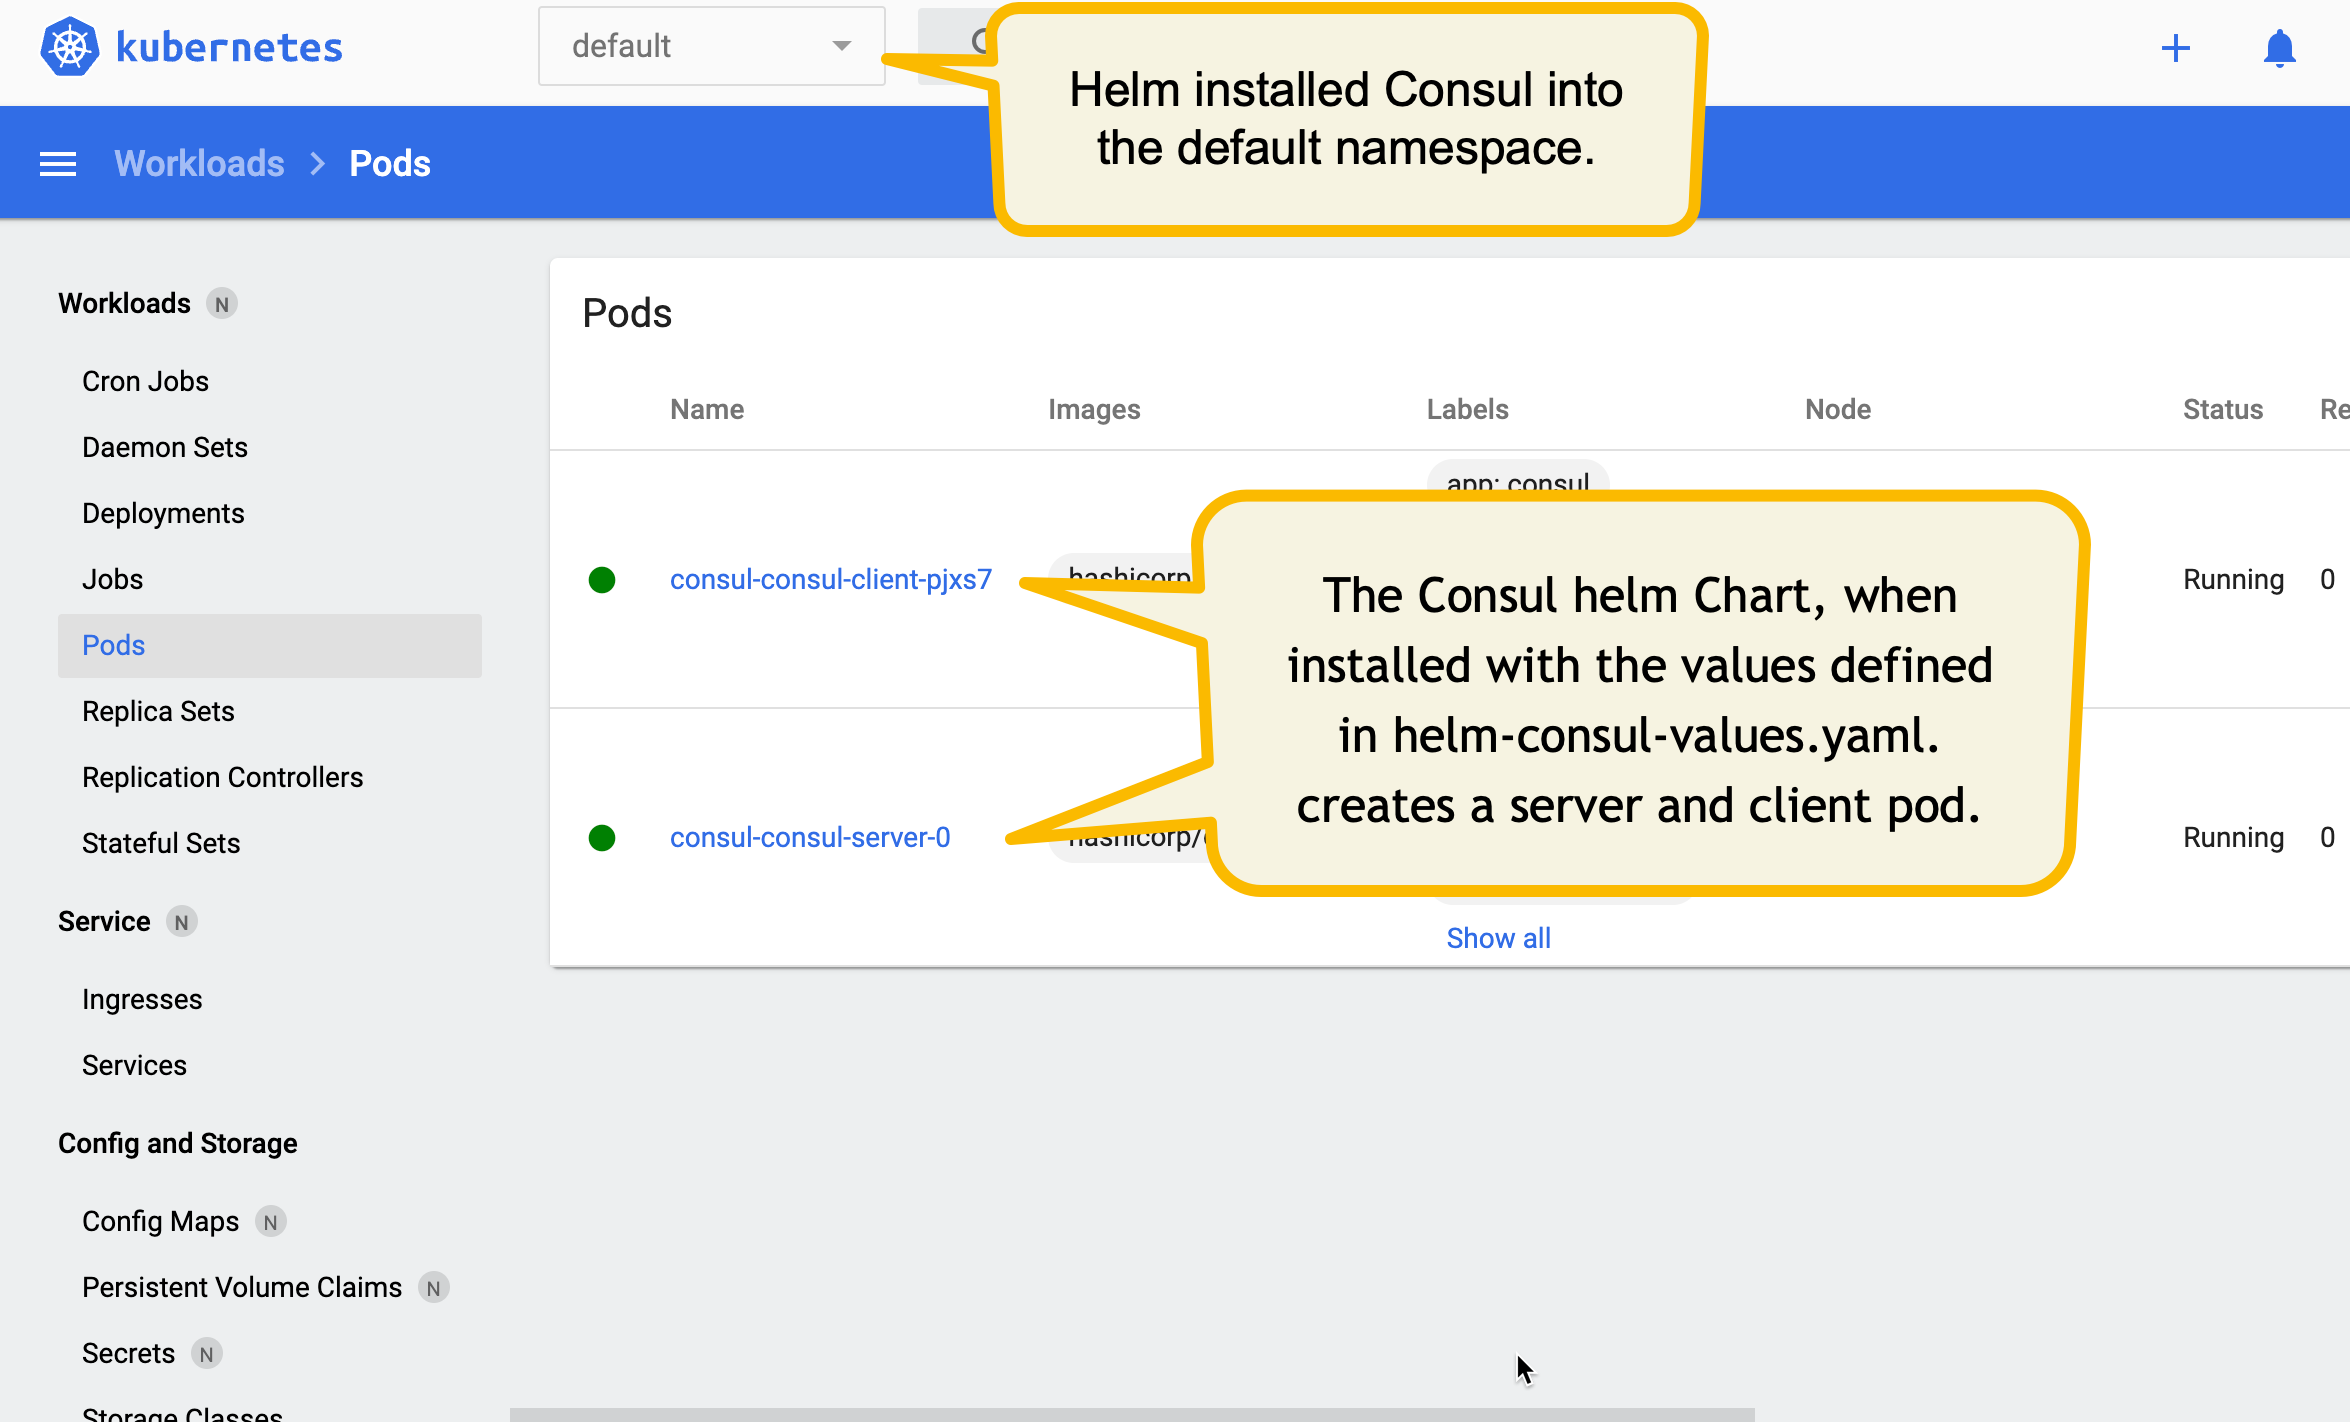
The installation of the Helm chart displays the name, namespace, status, and resources created. The server and client pods are deployed in the default namespace because no namespace was specified or configured as the default.
Get all the pods within the default namespace.
$ kubectl get pods
NAME                                                 READY   STATUS    RESTARTS   AGE
consul-consul-client-lqr92                           0/1     Running   0          80s
consul-consul-connect-injector-6dc5585bc6-tlbk2      0/1     Running   0          80s
consul-consul-server-0                               0/1     Running   0          80s
consul-consul-webhook-cert-manager-595847699-8cmf8   1/1     Running   0          80s
The Consul client and server pods are displayed here prefixed with consul.
Wait until the server and client pods report that they are
Running
and ready (1/1).
For more information refer to the Installing Consul to minikube via Helm tutorial
Install the Vault Helm chart
The recommended way to run Vault on Kubernetes is via the Helm chart. This installs and configures all the necessary components to run Vault in several different modes.
Vault's Helm chart by default launches with a file storage backend. To utilize the Consul cluster as a storage backend requires Vault to be run in high-availability mode.
Display the parameters in helm-vault-values.yml.
$ cat manifests/helm-vault-values.yml
server:
  affinity: ""
  ha:
    enabled: true
Install the latest version of the Vault Helm chart with parameters
helm-vault-values.yml applied.
$ helm install vault hashicorp/vault --values manifests/helm-vault-values.yml
NAME: vault

...
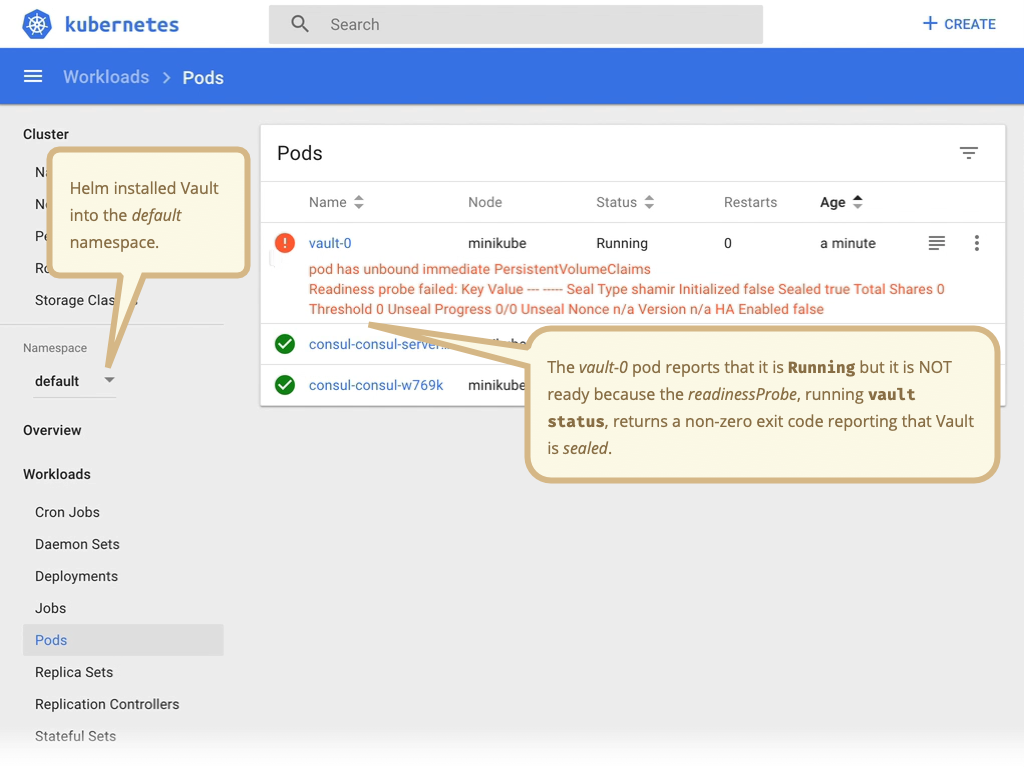
The Vault pods and Vault Agent Injector pod are deployed in the default namespace.
Get all the pods within the default namespace.
$ kubectl get pods
NAME                                                 READY   STATUS              RESTARTS   AGE
consul-consul-client-lqr92                           1/1     Running             0          3m58s
consul-consul-connect-injector-6dc5585bc6-tlbk2      1/1     Running             0          3m58s
consul-consul-server-0                               1/1     Running             0          3m58s
consul-consul-webhook-cert-manager-595847699-8cmf8   1/1     Running             0          3m58s
vault-0                                              0/1     ContainerCreating   0          23s
vault-1                                              0/1     ContainerCreating   0          23s
vault-2                                              0/1     ContainerCreating   0          23s
vault-agent-injector-7655d66c96-s2lgc                1/1     Running             0          23s
The vault-0, vault-1, vault-2, and vault-agent-injector pods are
deployed. The Vault servers report that they are Running but they are not
ready (0/1). That is because Vault in each pod is executes a status check
defined in a
readinessProbe.
Retrieve the status of Vault on the vault-0 pod.
$ kubectl exec vault-0 -- vault status
Key                Value
---                -----
Seal Type          shamir
Initialized        false
Sealed             true
Total Shares       0
Threshold          0
Unseal Progress    0/0
Unseal Nonce       n/a
Version            1.14.0
Build Date         2023-06-19T11:40:23Z
Storage Type       consul
HA Enabled         true
command terminated with exit code 2
The status command reports that Vault is not initialized and that it is sealed.
The web interface reports the same results.
The Vault server can be reached via the CLI and the web UI outside of the Kubernetes cluster if the Vault service running on port 8200 is forwarded.
In another terminal, port
forward
all requests made to http://localhost:8200 to the vault-0 pod on port 8200.
$  kubectl port-forward vault-0 8200:8200
Forwarding from 127.0.0.1:8200 -> 8200
Forwarding from [::1]:8200 -> 8200
In a browser window, navigate to the UI at http://localhost:8200/ui
Initialize and unseal Vault
Vault starts uninitialized and in the sealed state. Prior to initialization the storage backend, Consul, is not prepared to receive data.
Initialize Vault with one key share and one key threshold.
$ kubectl exec vault-0 -- vault operator init -key-shares=1 -key-threshold=1 -format=json > cluster-keys.json
The operator init command
generates a root key that it disassembles into key shares -key-shares=1 and
then sets the number of key shares required to unseal Vault -key-threshold=1.
These key shares are written to the output as unseal keys in JSON format
-format=json. Here the output is redirected to a file named
cluster-keys.json.
Display the unseal key found in cluster-keys.json.
$ cat cluster-keys.json | jq -r ".unseal_keys_b64[]"
rrUtT32GztRy/pVWmcH0ZQLCCXon/TxCgi40FL1Zzus=
Create a variable named VAULT_UNSEAL_KEY to capture the Vault unseal key.
$ VAULT_UNSEAL_KEY=$(cat cluster-keys.json | jq -r ".unseal_keys_b64[]")
After initialization, Vault is configured to know where and how to access the storage, but does not know how to decrypt any of it. Unsealing is the process of constructing the root key necessary to read the decryption key to decrypt the data, allowing access to the Vault.
Unseal Vault running on the vault-0 pod.
$ kubectl exec vault-0 -- vault operator unseal $VAULT_UNSEAL_KEY
Key             Value
---             -----
Seal Type       shamir
Initialized     true
Sealed          false
Total Shares    1
Threshold       1
Version         1.10.3
Storage Type    consul
Cluster Name    vault-cluster-aade883c
Cluster ID      afcb3955-32e2-726d-9dda-bfdd15093b8c
HA Enabled      true
HA Cluster      https://vault-0.vault-internal:8201
HA Mode         active
Active Since    2022-05-26T00:49:46.849082587Z
The operator unseal command reports that Vault is initialized and unsealed.
Unseal Vault running on the vault-1 pod.
$ kubectl exec vault-1 -- vault operator unseal $VAULT_UNSEAL_KEY
## ...
Unseal Vault running on the vault-2 pod.
$ kubectl exec vault-2 -- vault operator unseal $VAULT_UNSEAL_KEY
## ...
Verify all the Vault pods are running and ready.
$ kubectl get pods
NAME                                    READY   STATUS    RESTARTS   AGE
consul-consul-server-0                  1/1     Running   0          10m
consul-consul-sxpbj                     1/1     Running   0          10m
vault-0                                 1/1     Running   0          5m49s
vault-1                                 1/1     Running   0          5m48s
vault-2                                 1/1     Running   0          5m47s
vault-agent-injector-5945fb98b5-vzbqv   1/1     Running   0          5m50s
The vault-0, vault-1, and vault-2 pods report that they are Running and
ready (1/1).
Set a secret in Vault
The web application that you deploy in the Launch a web
application section, expects Vault to store a
username and password at the path secret/webapp/config. To create this secret
requires you to login with the root token, enable the key-value secret
engine, and store a
secret username and password at that defined path.
Vault generated an initial root token when it was initialized.
Display the root token found in cluster-keys.json.
$ cat cluster-keys.json | jq -r ".root_token"
s.VgQvaXl8xGFO1RUxAPbPbsfN
First, start an interactive shell session on the vault-0 pod.
$ kubectl exec --stdin=true --tty=true vault-0 -- /bin/sh
/ $
Your system prompt is replaced with a new prompt / $.
Vault is now ready for you to login with the initial root token.
Vault requires clients to authenticate first before it allows any further actions. An unsealed Vault starts with the Token Auth Method enabled and generates an initial root token.
Login with the root token when prompted.
$ vault login
Success! You are now authenticated. The token information displayed below
is already stored in the token helper. You do NOT need to run "vault login"
again. Future Vault requests will automatically use this token.

Key                  Value
---                  -----
token                s.g3dGqNy5IYrj8E4EU8mSPeL2
token_accessor       JVsMJHVu6rTWbPLlYmWQTq1R
token_duration       ∞
token_renewable      false
token_policies       ["root"]
identity_policies    []
policies             ["root"]
Enable kv-v2 secrets at the path secret.
$ vault secrets enable -path=secret kv-v2
Success! Enabled the kv-v2 secrets engine at: secret/
Create a secret at path secret/webapp/config with a username and password.
$ vault kv put secret/webapp/config username="static-user" password="static-password"
Key              Value
---              -----
created_time     2020-03-24T19:13:06.72377543Z
deletion_time    n/a
destroyed        false
version          1
Verify that the secret is defined at the path secret/webapp/config.
$ vault kv get secret/webapp/config
====== Secret Path ======
secret/data/webapp/config

======= Metadata =======
Key                Value
---                -----
created_time       2022-05-26T01:13:08.877319916Z
custom_metadata    <nil>
deletion_time      n/a
destroyed          false
version            1

====== Data ======
Key         Value
---         -----
password    static-password
username    static-user
You successfully created the secret for the web application.
Lastly, exit the vault-0 pod.
$ exit
Configure Kubernetes authentication
The initial root token is a privileged user that can perform any operation at any path. The web application only requires the ability to read secrets defined at a single path. This application should authenticate and be granted a token with limited access.
Vault provides a Kubernetes authentication method that enables clients to authenticate with a Kubernetes Service Account Token.
First, start an interactive shell session on the vault-0 pod.
$ kubectl exec --stdin=true --tty=true vault-0 -- /bin/sh
/ $
Your system prompt is replaced with a new prompt / $.
Enable the Kubernetes authentication method.
$ vault auth enable kubernetes
Success! Enabled kubernetes auth method at: kubernetes/
Vault accepts this service token from any client within the Kubernetes cluster. During authentication, Vault verifies that the service account token is valid by querying a configured Kubernetes endpoint.
Configure the Kubernetes authentication method to use the location of the Kubernetes API.
For the best compatibility with recent Kubernetes versions, ensure you are using Vault v1.10.3 or greater.
$ vault write auth/kubernetes/config \
    kubernetes_host="https://$KUBERNETES_PORT_443_TCP_ADDR:443"
Successful output from this command resembles this example:
Success! Data written to: auth/kubernetes/config
The environment variable KUBERNETES_PORT_443_TCP_ADDR is defined and references
the internal network address of the Kubernetes host.
For a client to access the secret data defined, at secret/webapp/config,
requires that the read capability be granted for the path
secret/data/webapp/config. This is an example of a
policy. A policy
defines a set of capabilities.
Write out the policy named webapp that enables the read capability for
secrets at path secret/data/webapp/config.
$ vault policy write webapp - <<EOF
path "secret/data/webapp/config" {
  capabilities = ["read"]
}
EOF
Successful output from this command resembles this example:
Success! Uploaded policy: webapp
To apply this policy requires the authentication engine to define a role. A role binds policies and environment parameters together to create a login for the web application.
Create a Kubernetes authentication role, named webapp, that connects the
Kubernetes service account name and webapp policy.
$ vault write auth/kubernetes/role/webapp \
        bound_service_account_names=vault \
        bound_service_account_namespaces=default \
        policies=webapp \
        ttl=24h
Successful output from this command resembles this example:
Success! Data written to: auth/kubernetes/role/webapp
The role connects the Kubernetes service account, vault, and namespace,
default, with the Vault policy, webapp. The tokens returned after
authentication are valid for 24 hours.
Lastly, exit the vault-0 pod.
$ exit
Launch a web application
We've created a web application, published it to DockerHub, and created a Kubernetes deployment that will run the application in your existing cluster. The example web application performs the single function of listening for HTTP requests. During a request it reads the Kubernetes service token, logs into Vault, and then requests the secret.
Display the webapp deployment definition in deployment-01-webapp.yml.
$ cat manifests/deployment-01-webapp.yml
manifests/deployment-01-webapp.yml
---
apiVersion: apps/v1
kind: Deployment
metadata:
  name: webapp
  labels:
    app: webapp
spec:
  replicas: 1
  selector:
    matchLabels:
      app: webapp
  template:
    metadata:
      labels:
        app: webapp
    spec:
      serviceAccountName: vault
      containers:
        - name: app
          image: hashieducation/simple-vault-client:latest
          imagePullPolicy: Always
          env:
            - name: VAULT_ADDR
              value: 'http://vault:8200'
            - name: JWT_PATH
              value: '/var/run/secrets/kubernetes.io/serviceaccount/token'
            - name: SERVICE_PORT
              value: '8080'
The web application deployment defines a list of environment variables.
JWT_PATHsets the path of the JSON web token (JWT) issued by Kubernetes. This token is used by the web application to authenticate with Vault.VAULT_ADDRsets the address of the Vault service. The Helm chart defined a Kubernetes service namedvaultthat forwards requests to its endpoints (i.e. The pods namedvault-0,vault-1, andvault-2).SERVICE_PORTsets the port that the service listens for incoming HTTP requests.
Deploy the webapp in Kubernetes by applying the file deployment-01-webapp.yml.
$ kubectl apply --filename manifests/deployment-01-webapp.yml
deployment.apps/webapp created
The webapp runs as a pod within the default namespace.
Get all the pods within the default namespace.
$ kubectl get pods
NAME                                    READY   STATUS    RESTARTS   AGE
consul-consul-6jcfj                     1/1     Running   0          19m
consul-consul-server-0                  1/1     Running   0          19m
vault-0                                 1/1     Running   0          14m
vault-1                                 1/1     Running   0          14m
vault-2                                 1/1     Running   0          14m
vault-agent-injector-5945fb98b5-thczv   1/1     Running   0          14m
webapp-5c76d96c6-r4mcq                  1/1     Running   0          2m43s
The webapp pod is displayed here as the pod prefixed with webapp.
Wait until the webapp pod is running and ready (1/1).
The webapp pod runs an HTTP service that is listening on port 8080.
In another terminal, port
forward
all requests made to http://localhost:8080 to the webapp pod on port 8080.
$ kubectl port-forward \
    $(kubectl get pod -l app=webapp -o jsonpath="{.items[0].metadata.name}") \
    8080:8080
In the original terminal, perform a curl request at http://localhost:8080.
$ curl http://localhost:8080
"password:static-secret username:static-user
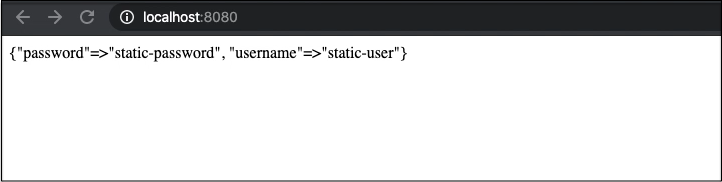
The web application running on port 8080 in the webapp pod:
- authenticates with the Kubernetes service account token
- receives a Vault token with the read capability at the
secret/data/webapp/configpath - retrieves the secrets from
secret/data/webapp/configpath - displays the secrets as JSON
Clean up
First, stop the running local Kubernetes cluster.
$ minikube stop
This deactivates minikube, and all pods still exist at this point.
Delete the local Kubernetes cluster.
$ minikube delete
🔥  Deleting "minikube" in docker ...
🔥  Deleting container "minikube" ...
🔥  Removing /Users/mrken/.minikube/machines/minikube ...
💀  Removed all traces of the "minikube" cluster.
Next steps
You launched Vault in high-availability mode with a Helm chart. Learn more about the Vault Helm chart by reading the documentation or exploring the project source code.
Vault running on Kubernetes also supports Integrated Storage. Explore setting up Vault in high-availability with Integrated Storage in the Vault Installation to Google Kubernetes Engine via Helm tutorial.
Then you deployed a web application that authenticated and requested a secret directly from Vault. Explore how pods can retrieve secrets through the Vault Injector service via annotations or secrets mounted on ephemeral volumes.
Finally, Consul is more than a storage backend for Vault. Explore running Consul on minikube via Helm and its integrations with Kubernetes (including multi-cloud, service sync, and other features) in the Consul documentation.