Assigning scopes, principals, roles and grants
Scopes
In Boundary, scopes help in structuring and managing principals. They provide a framework for organizing resources and permissions that enables effective identity and access management. There are three hierarchical levels of scopes.
- Global - the highest-level scope of Boundary where administrators configure and manage Boundary for the entire company.
- Organization - The global scope contains organization scopes and are typically used to represent business units, organizations, or departments. Use organization scopes to also contain multiple production-level auth methods in separate scopes.
- Project - Organization scopes contain project scopes. Use these to separate different business workflows. For example, represent different teams, products, or environments with projects.
Assigning principals
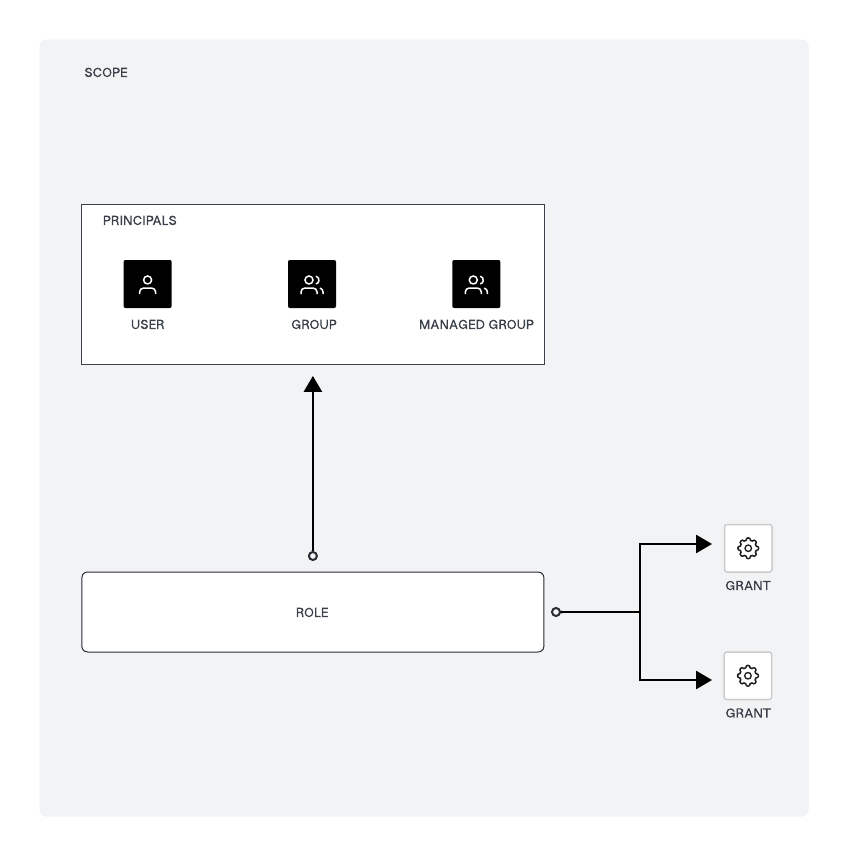
In Boundary, assign entities roles and grant them permissions, and then refer to these with principals. The main types of principals in Boundary are:
- Users: These are individual accounts representing human users or machines. Associate users with one or more accounts via authentication methods.
- Groups: These are collections of users. A group can include multiple users, allowing for easier management of permissions by assigning roles to the group rather than individual users.
- Managed Groups: Managed groups are typically used in conjunction with identity providers like LDAP or OIDC, which determines membership based on authentication attributes.
Assign these principals to roles, which define the permissions they have within Boundary. A unique ID identifies each principal, and this ID used to assign principals to roles.

Assigning roles to managed groups
We recommend adding a user to a group, and then adding the group to the role(s), instead of adding the user directly to the role(s). This way, you can manage multiple users at the same time, and it is easier to change the permissions of the user by adding/removing them from groups. You can manage OIDC/LDAP users and managed groups the same way, directly in the identity provider.
Roles are collections of capability grants, which are permissions allow roles to take actions and access resources.
- Create a role
- First, create a role within Boundary, defining them at the global, organization, or project scopes. A role contains grants that you assign to principals, including their associated managed groups.
- Assign principals to the role
- Second, assign managed groups as principals to that role. Do this by adding the unique ID of the managed group to the role's principal IDs. This step effectively links the managed group to the role, allowing its members to inherit the permissions defined by the role.
Grant permissions to roles
With the managed group created and automatically managing group membership based on auth methods configured, the next step is to define grants for those principals which are your managed groups.
Define grants using grant strings, which specify the actions principals can perform on resources. When you define grants permissions, please consider RBAC and principle of least privilege (PoLP) in mind. This task adds grant strings to the role. All grants take one of four forms: ID only, type only, pinned ID, or wildcards. The following is an example of a grant string:
ids=<id>;type=<type>;actions=<action list>;output_fields=<fields list>ids: Specifies the resource IDs the grant applies to. Use wildcards to apply the grant to all resources of a type.type: Specifies the type of resource, such as host-catalog, auth-method, group, etc.actions: Specifies the actions allowed on the resources, such as read, list, create, etc.output_fields: Specifies which fields of the resource should be visible.
Assign grants to the role by specifying the grant strings in the role configuration. The managed group (as a principal) then has permissions to perform the specified actions on the resources.
Example scenario
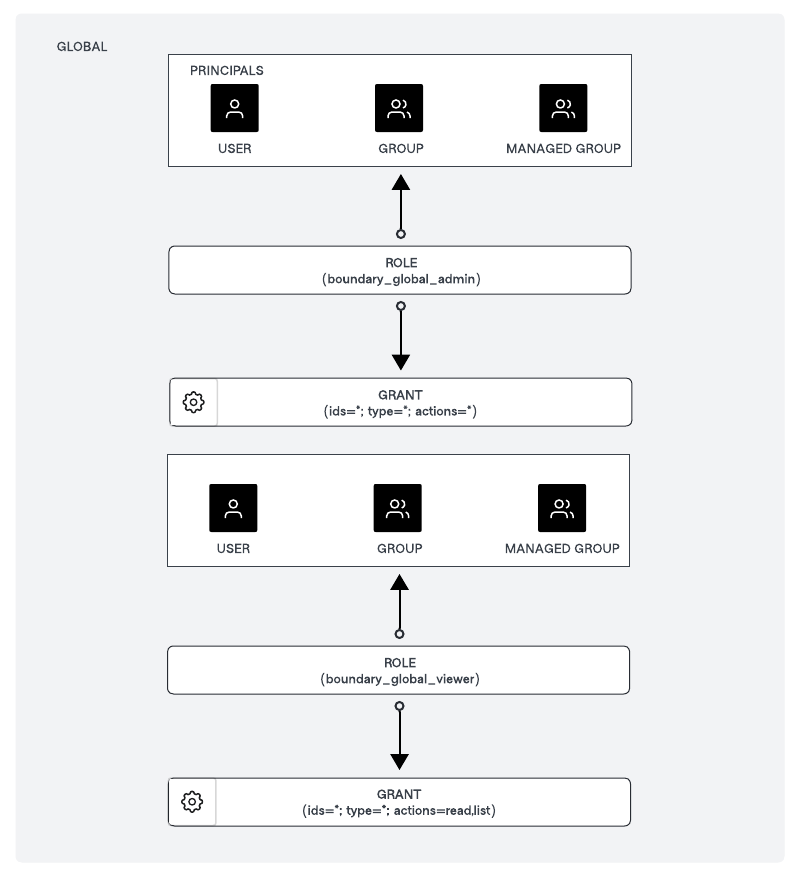
Start by creating the following roles at the global scope level for Boundary administrators and Boundary viewers:
Global scope roles:
boundary_global_adminrole has the grant of:ids=*;type=*;actions=*boundary_global_viewerrole has the grant of:ids=*;type=*;actions=read,list

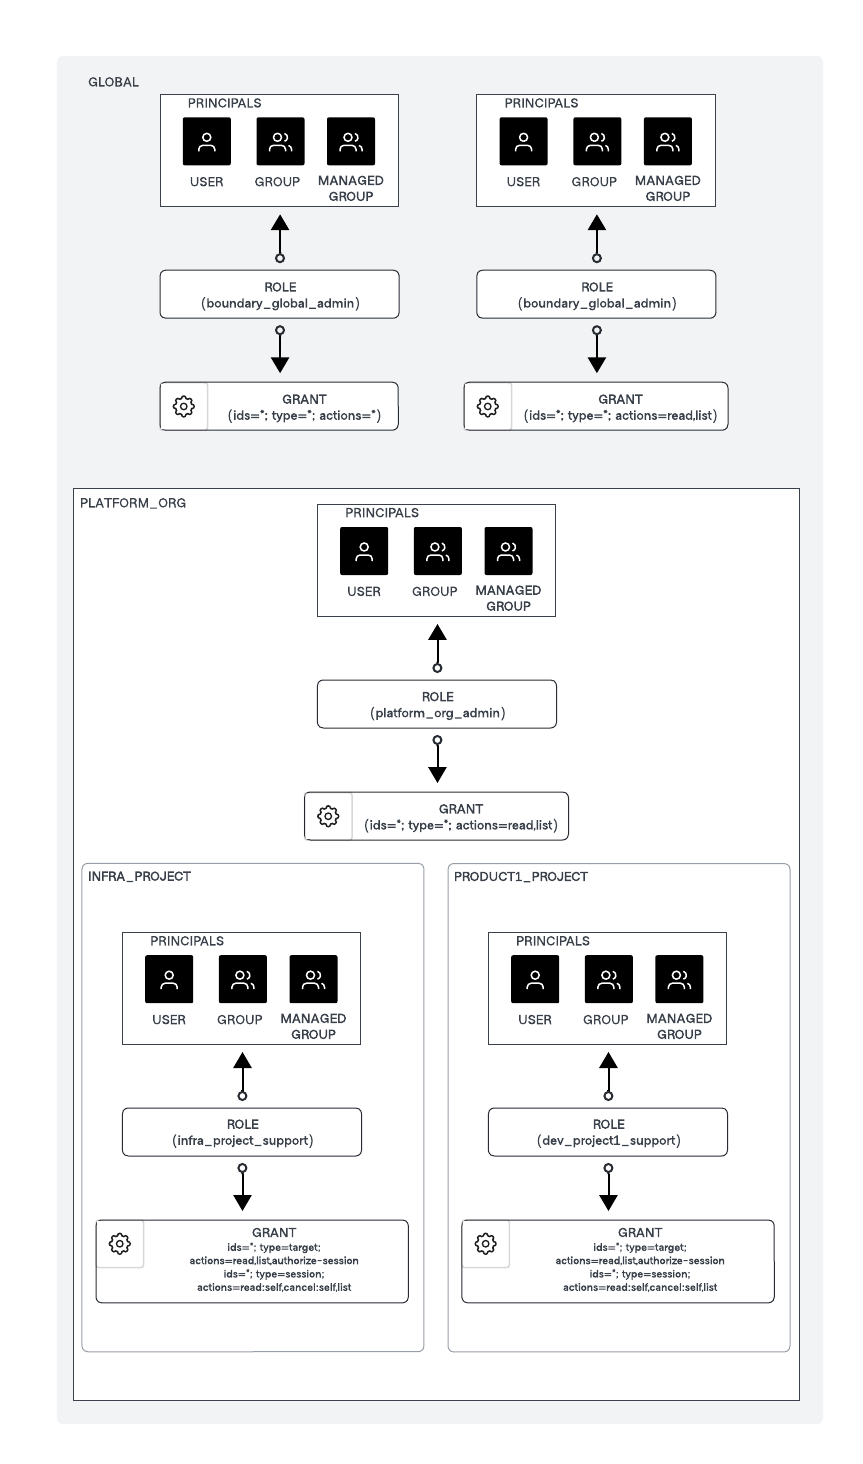
Next, create a role at the Organization level scope to manage the organization and roles at the Project level scope for multiple projects within an organization, and also the roles to access the targets. (Note: You can scale multiple organizations, and multiple projects based on your organizational structures.)

Organization scope role for PLATFORM_ORG:
platform_org_adminrole has the grant of:ids=*;type=*;actions=*
Project scope role for INFRA_PROJECT:
infra_project_supportrole has the grant of:ids=*;type=target;actions=list,read,authorize-session ids=*;type=session;actions=read:self,cancel:self,list
Project scope role for PRODUCT1_PROJECT:
dev_project1_supportrole has the grant of:ids=*;type=target;actions=list,read,authorize-session ids=*;type=session;actions=read:self,cancel:self,list
Useful resources
- Refer to Assignable permissions for more information about the permissions you can assign to Boundary principals.
- Refer to Permission grant formats for more information about grant strings and example formats.
- Refer to Manage roles and permissions for instructions to configure roles and grant scopes for principals.
- Refer to the Resource table for a cheat sheet to help you manage your permissions.