Set up RBAC
Role-based access control (RBAC) lets you restrict access to specific functionality based on a user's role. In HCP Waypoint, RBAC allows platform engineers to manage templates and add-ons, and allows developers to use them to create applications and install add-ons.
HCP roles and permissions
HCP Waypoint maps permissions to the admin, contributor, and viewer HCP roles. The permissions related to templates and add-ons in HCP Waypoint map to the three HCP roles as follows:
| Permission | Admin | Contributor | Viewer |
|---|---|---|---|
| Create template | ✅ | ❌ | ❌ |
| Create application from template | ✅ | ✅ | ❌ |
| View list of applications | ✅ | ✅ | ✅ |
| Create add-on definition | ✅ | ❌ | ❌ |
| Install add-on to application | ✅ | ✅ | ❌ |
| View list of add-ons | ✅ | ✅ | ✅ |
Based on the permission associated with each roles, we recommend you assign platform engineers the admin role and application developers the contributor role.
In general, developers can use templates and add-ons but not create, edit, or delete the underlying definitions while platform engineers can modify the underlying definitions.
Assign roles to users
Log in to HCP with an account that has the admin role.
Navigate to the Organizations page and click on the organization where you would like to manage users.
Click on the Access control (IAM) option from the left navigation to open the Users page.
The Users page lists all of the users with access to this organization, their email address, role, and method of authentication.
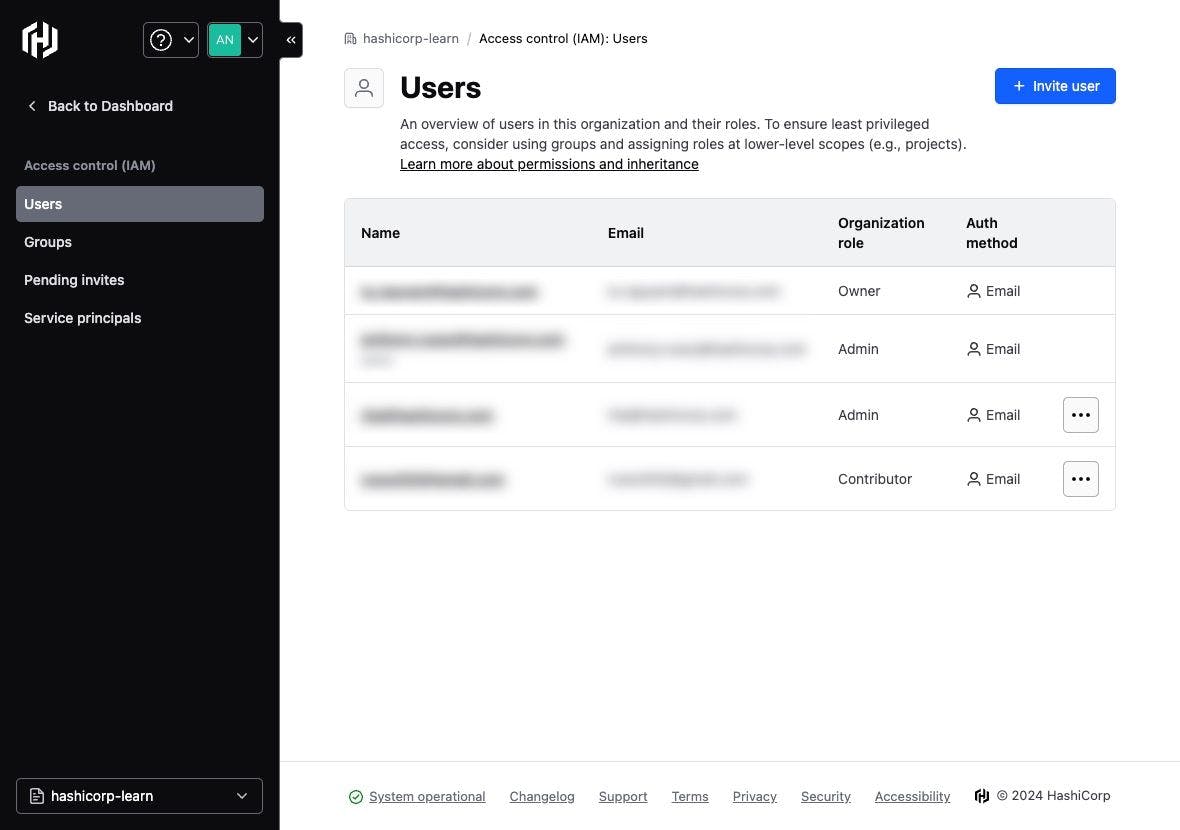
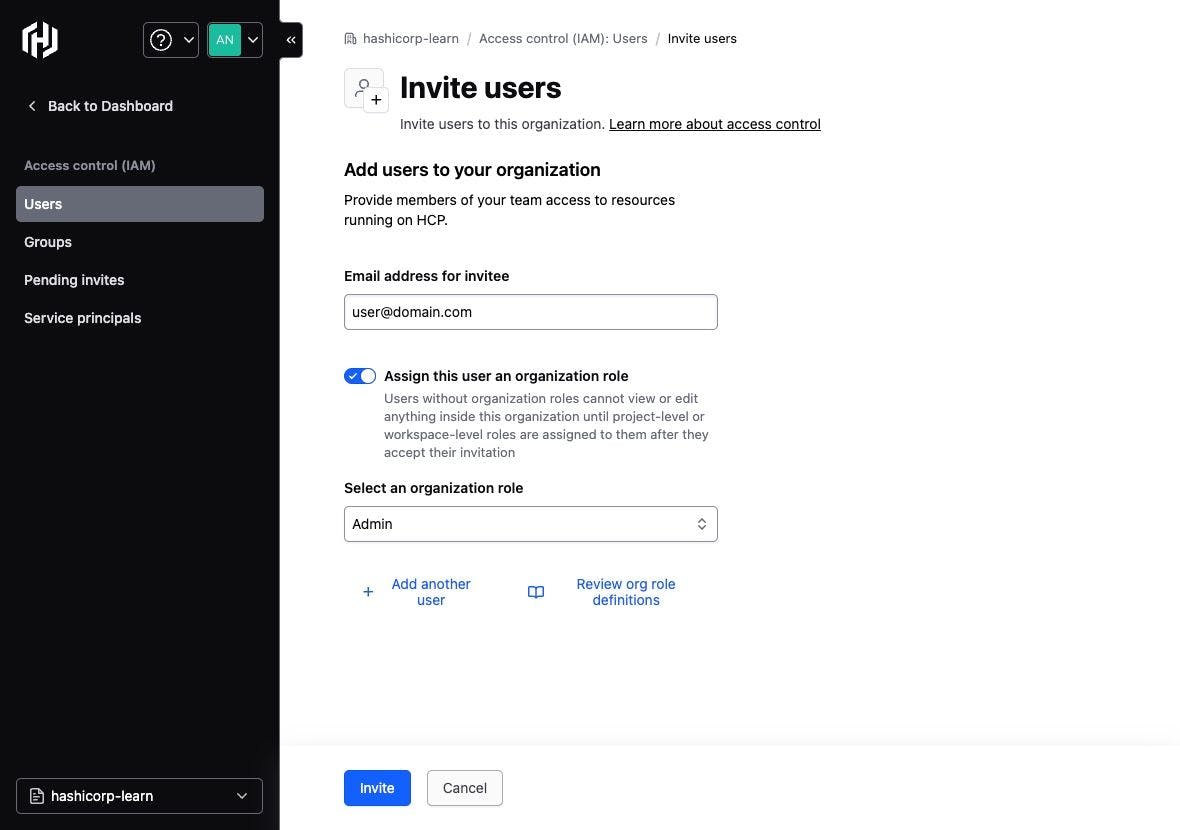
Click on the Invite user button.
Enter the email address of the user, click the Assign this user an organization role option, select the role you want to assign the user from the dropdown selection, and then click the Invite button to complete the process.
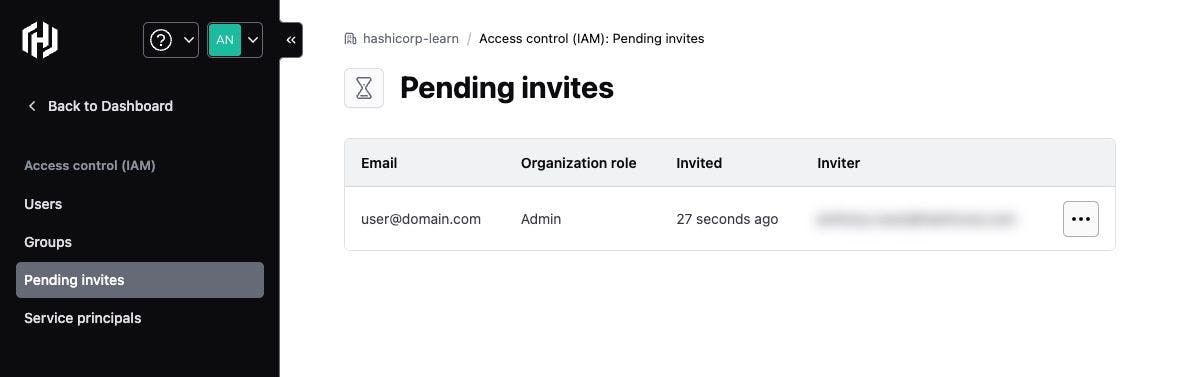
HCP Waypoint will redirect you back to the Users page and display a message that lets you know that you can review pending invites on the Pending invites page.
Click on the Pending invites option from the left navigation and note that the invitation to the user contains the assigned role.
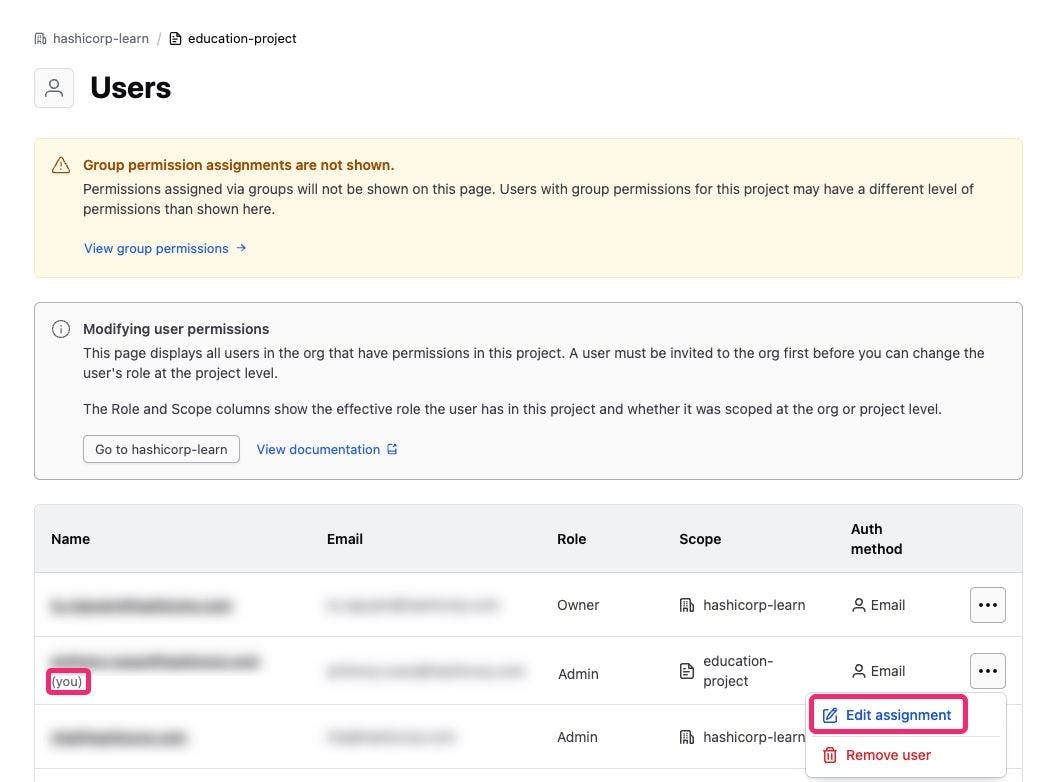
Edit user roles
Navigate to the Users page and click on the user whose role you want to update. Click on the Manage button, and then click on the Edit assignment option.
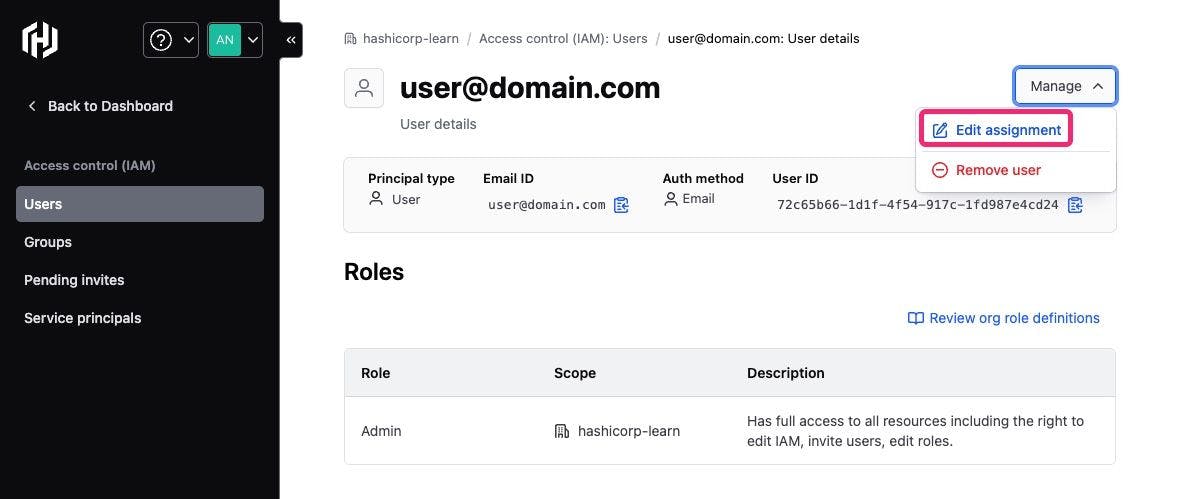
Select the new role that you want to assign to the user and then click the Save changes button to complete the process.
Set up your user role
To complete HCP Waypoint tutorials, your user account must have the admin role assigned to it at either the organization or project level. You will now update your user with a project-scoped admin role.
Navigate to the Organizations page in HCP, click on your organization's name, then click on Projects from the left navigation, and click on your project's name from the list. From the project page, click on the Access control (IAM) option, then click the three dots button to the right of your user in the list, and click on the Edit user button.
On the user page, assign the Project Admin role from the dropdown. Click the Save button.
Next steps
In this tutorial, you learned about RBAC in HCP Waypoint and how to assign user roles in HCP.
Continue on to the next tutorial to learn how to create a Waypoint template.