Manage Kubernetes native secrets with the Vault Secrets Operator
Challenge
Vault offers a complete solution for secrets lifecycle management, but that requires developers and operators to learn a new tool. Instead, developers want a cloud native way to access the secrets through Kubernetes and have no need to understand Vault in great depth. Vault Secrets Operator (VSO) updates Kubernetes native secrets. The user accesses Kubernetes native secrets managed on the back end by HashiCorp Vault.
Solution
A Kubernetes operator is a software extension that uses custom resources to manage applications hosted on Kubernetes.
The Vault Secrets Operator is a Kubernetes operator that syncs secrets between Vault and Kubernetes natively without requiring the users to learn details of Vault use.
The Vault secrets operator supports kv-v1 and kv-v2, TLS certificates in PKI and full range of static and dynamic secrets. Learn about working with dynamic database credentials in the Manage Dynamic Database Credentials tutorial and PKI certificates in the Build Your Own Certificate Authority tutorial.
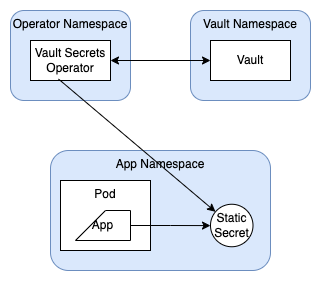
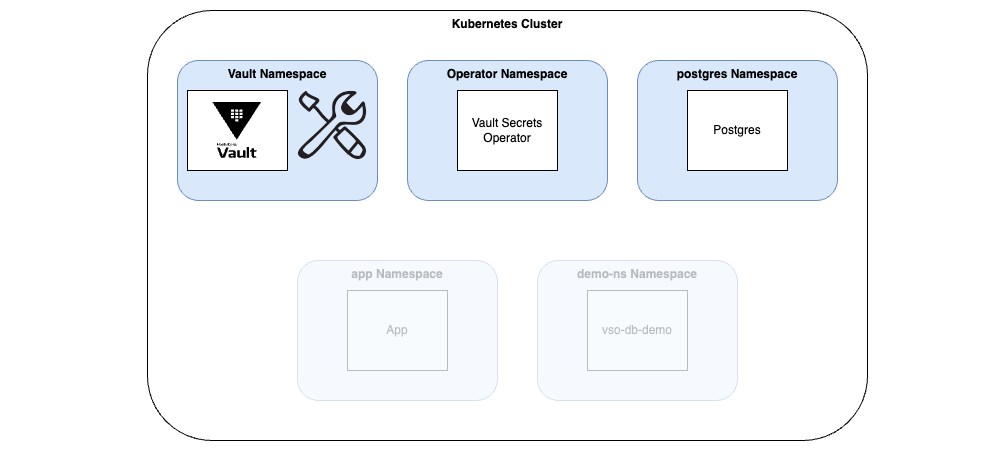
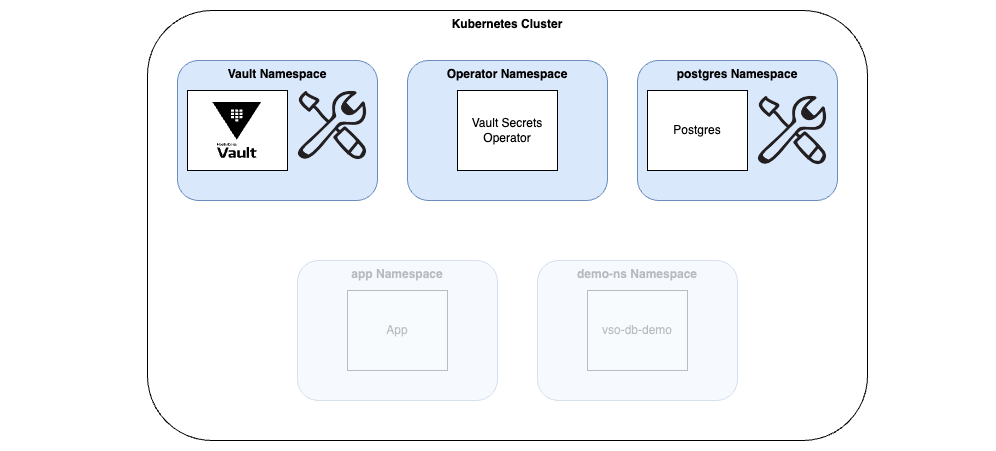
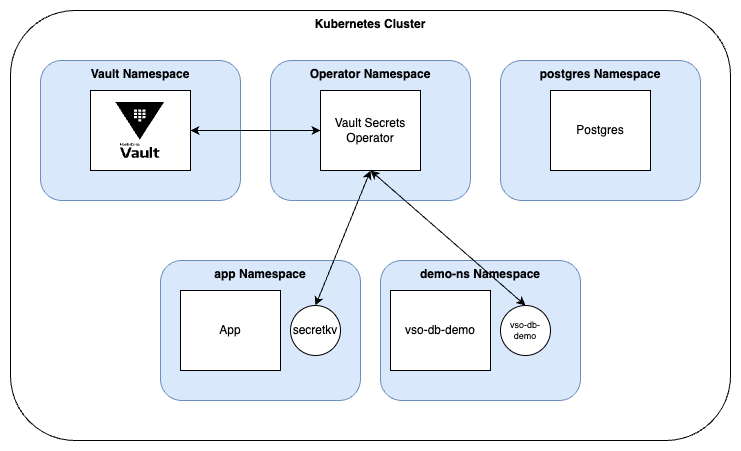
The Vault Secrets Operator syncs the secrets between Vault and the Kubernetes secrets in a specified namespace. Within that namespace, applications have access to the secrets. The secrets are still managed by Vault, but accessed through the standard way on Kubernetes.
Launch Terminal
This tutorial includes a free interactive command-line lab that lets you follow along on actual cloud infrastructure.

Prerequisites
- Docker
- Helm CLI
- k9s
- Kubernetes command-line interface (CLI)
- minikube
- Recent version of the Vault binary installed. Refer to the Vault install
guide, and confirm you are using a version that supports VSO: please see Supported Vault versions.
- Vault Enterprise requires a valid license.
Install supporting tools
This tutorial was last tested 27 June 2023 on a macOS 13.3.1 using the following software versions.
$ docker version
Client:
Cloud integration: v1.0.25
Version:           20.10.16
## ...
$ helm version
version.BuildInfo{Version:"v3.12.0", GitCommit:"c9f554d75773799f72ceef38c51210f1842a1dea", GitTreeState:"clean", GoVersion:"go1.20.4"}
$ k9s version
____  __.________
|    |/ _/   __   \______
|      < \____    /  ___/
|    |  \   /    /\___ \
|____|__ \ /____//____  >
      \/            \/

Version:    0.27.3
Commit:     7c76691c389e4e7de29516932a304f7029307c6d
Date:       n/a
$ kubectl version --short
Client Version: v1.27.1
Kustomize Version: v5.0.1
Server Version: v1.26.3
$ minikube version
minikube version: v1.30.1
commit: 08896fd1dc362c097c925146c4a0d0dac715ace0
Clone the GitHub repository
Clone the repository at learn-vault-secrets-operator.
$ git clone https://github.com/hashicorp-education/learn-vault-secrets-operator
Cloning into 'learn-vault-secrets-operator'...
remote: Enumerating objects: 15, done.
remote: Counting objects: 100% (15/15), done.
remote: Compressing objects: 100% (11/11), done.
remote: Total 15 (delta 0), reused 15 (delta 0), pack-reused 0
Receiving objects: 100% (15/15), done.
Move into that folder.
$ cd learn-vault-secrets-operator
Start minikube
minikube allows you to run a miniature Kubernetes cluster on your local machine.
Create a minikube cluster.
$ minikube startThe output should resemble the following:
😄  minikube v1.30.1 on Darwin 13.4 (arm64)
✨  Automatically selected the docker driver
📌  Using Docker Desktop driver with root privileges
👍  Starting control plane node minikube in cluster minikube
🚜  Pulling base image ...
🔥  Creating docker container (CPUs=2, Memory=4000MB) ...
🐳  Preparing Kubernetes v1.26.3 on Docker 23.0.2 ...
   ▪ Generating certificates and keys ...
   ▪ Booting up control plane ...
   ▪ Configuring RBAC rules ...
🔗  Configuring bridge CNI (Container Networking Interface) ...
   ▪ Using image gcr.io/k8s-minikube/storage-provisioner:v5
🔎  Verifying Kubernetes components...
🌟  Enabled addons: storage-provisioner, default-storageclass
🏄  Done! kubectl is now configured to use "minikube" cluster and "default" namespace by default
You have created a Kubernetes cluster running on Docker.
Install Vault cluster
Using Helm install Vault on a local instance of minikube. In Kubernetes, install Vault on it's own virtual cluster called a namespace.
If you have not already, add the HashiCorp repository.
$ helm repo add hashicorp https://helm.releases.hashicorp.comUpdate to the latest version of the HashiCorp Helm charts, update the repository.
$ helm repo update
Hang tight while we grab the latest from your chart repositories...
...Successfully got an update from the "hashicorp" chart repository
...Successfully got an update from the "open" chart repository
...Successfully got an update from the "bitnami" chart repository
Update Complete. ⎈Happy Helming!⎈
Details of the output might differ, the important thing is the Update Complete message.
Determine the latest version of Vault.
$ helm search repo hashicorp/vault
NAME                                    CHART VERSION   APP VERSION     DESCRIPTION
hashicorp/vault                         0.28.1          1.17.2          Official HashiCorp Vault Chart
hashicorp/vault-secrets-operator        0.7.1           0.8.0           Official Vault Secrets Operator Chart
Vault Secrets Operator supports the latest three versions of Vault. Please see Supported Vault versions for details.
Using the YAML file in the appropriate sub-folder, install Vault on your minikube cluster
$ helm install vault hashicorp/vault -n vault --create-namespace --values vault/vault-values.yamlThe output should resemble the following:
NAME: vault
LAST DEPLOYED: Fri Mar 31 09:37:42 2023
NAMESPACE: vault
STATUS: deployed
REVISION: 1
NOTES:
Thank you for installing HashiCorp Vault!

Now that you have deployed Vault, you should look over the docs on using
Vault with Kubernetes available here:

https://www.vaultproject.io/docs/

Your release is named vault. To learn more about the release, try:
$ helm status vault
$ helm get manifest vault
Wait until the Vault pods are Ready 1/1 and status is Running.
$ kubectl get pods -n vault
NAME      READY   STATUS    RESTARTS   AGE
vault-0   1/1     Running   0          3m
Configure Vault
Here you connect to the Vault instance on minikube, enable and configure Kubernetes authentication, KV secrets engine, a role and policy for Kubernetes, and create a static secret.
Connect to the Vault instance. Until you
exityou will be executing from inside the Vault instance.$ kubectl exec --stdin=true --tty=true vault-0 -n vault -- /bin/shMove into the
tmpdirectory.$ cd tmpEnable the Kubernetes auth method.
$ vault auth enable -path demo-auth-mount kubernetes
Success! Enabled kubernetes auth method at: demo-auth-mount/
Configure the auth method.
$ vault write auth/demo-auth-mount/config \
   kubernetes_host="https://$KUBERNETES_PORT_443_TCP_ADDR:443"
The output should resemble the following:
Success! Data written to: auth/demo-auth-mount/configEnable the kv v2 Secrets Engine.
$ vault secrets enable -path=kvv2 kv-v2
Success! Enabled the kv-v2 secrets engine at: kvv2/
Create a JSON file with a Vault policy.
$ tee webapp.json <<EOF
path "kvv2/data/webapp/config" {
   capabilities = ["read", "list"]
}
EOF
After uploading the Vault policy, it allows reading of the
webapp/configsecret in thekvv2secrets engine mount.$ vault policy write webapp webapp.json Success! Uploaded policy: webappCreate a role in Vault to enable access to secrets within the kv v2 secrets engine.
$ vault write auth/demo-auth-mount/role/role1 \ bound_service_account_names=demo-static-app \ bound_service_account_namespaces=app \ policies=webapp \ audience=vault \ ttl=24hThe output should resemble the following:
Success! Data written to: auth/demo-auth-mount/role/role1Notice that the
bound_service_account_namespacesis app, limiting the sync to specific namespaces.Create a secret.
$ vault kv put kvv2/webapp/config username="static-user" password="static-password"
===== Secret Path =====
kvv2/data/webapp/config

======= Metadata =======
Key                Value
---                -----
created_time       2023-04-03T16:35:56.1103993Z
custom_metadata    <nil>
deletion_time      n/a
destroyed          false
version            1
Exit the Vault instance.
$ exit
Install the Vault Secrets Operator
Use Helm to deploy the Vault Secrets Operator.
$ helm install vault-secrets-operator hashicorp/vault-secrets-operator -n vault-secrets-operator-system --create-namespace --values vault/vault-operator-values.yaml NAME: vault-secrets-operator LAST DEPLOYED: Fri Mar 31 10:00:29 2023 NAMESPACE: vault-secrets-operator-system STATUS: deployed REVISION: 1Examine the file
vault-operator-values.yamlfor the values that this tutorial uses for VSO:$ cat vault/vault-operator-values.yaml defaultVaultConnection: enabled: true address: "http://vault.vault.svc.cluster.local:8200" skipTLSVerify: false ...For more details on these values see the
values.yamlfile for the Vault Secrets Operator Helm chart.
Deploy and sync a secret

In this section you will set up a namespace with a Kubernetes secret, and configure the Vault Secrets Operator to manage that secret.
Create a namespace called app on your Kubernetes cluster.
$ kubectl create ns app
namespace/app created
Set up Kubernetes authentication for the secret.
$ kubectl apply -f vault/vault-auth-static.yaml vaultauth.secrets.hashicorp.com/static-auth createdCreate the secret names
secretkvin the app namespace.$ kubectl apply -f vault/static-secret.yaml vaultstaticsecret.secrets.hashicorp.com/vault-kv-app createdIf you examine the
static-secret.yamljust used, look near the bottom.Either version you will find a field called
refreshAfter. That fields determines how often to check the secret for updates. In the Vault community edition example, it set up to refresh after 30 seconds.In the Vault enterprise example the
refreshAfterfield is a fallback option, set to 1 hour. Since theinstantUpdatesis true, so therefreshAfterfield is not used.
   ...
   syncConfig:
    instantUpdates: true
   ..
Rotate the static secret
In this section you use the k9s tool to display the secret. Then you use Vault to manually rotate the secret, and k9s to verify rotation of the Kubernetes secret.
Open a new terminal and start up
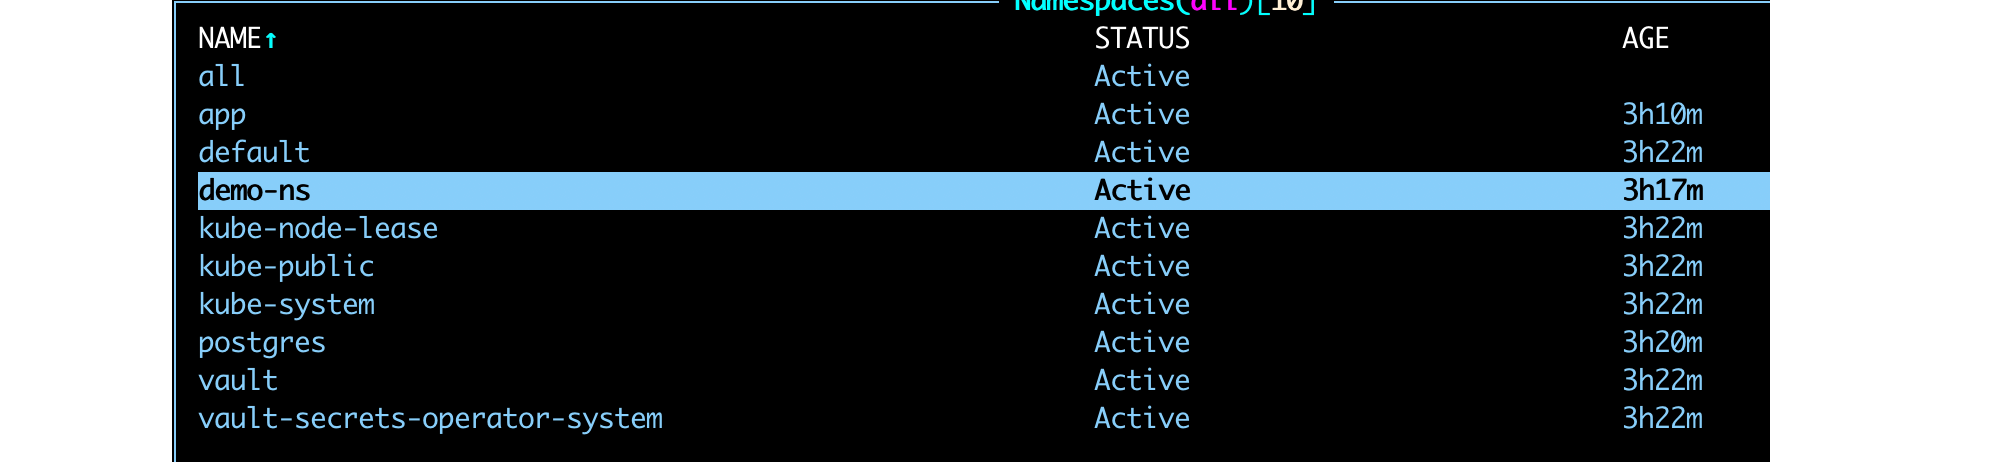
k9s.$ k9sIf not already displayed, list the namespaces by typing
:ns.
Use the up and down arrows to choose the app namespace and press
enter.
This area is blank, so type in
:secretsand press enter.
Highlight the secret named secretkv.

Display the secret by pressing the
xkey.
In the original terminal, connect to the Vault instance.
$ kubectl exec --stdin=true --tty=true vault-0 -n vault -- /bin/sh
/ $
Rotate the secret.
$ vault kv put kvv2/webapp/config username="static-user2" password="static-password2"
===== Secret Path =====
kvv2/data/webapp/config

======= Metadata =======
Key                Value
---                -----
created_time       2023-04-03T16:40:31.274411719Z
custom_metadata    <nil>
deletion_time      n/a
destroyed          false
version            2
Wait about 30 seconds before continuing to the next step, to allow for the secret to refresh.
Return to
k9s, and escape back to the secret page and pressxagain to display the updated secret.
The secret has changed, and now will be different than noted earlier.
At the first window, exit Vault.
$ exit
Dynamic secrets
Manually rotating secrets is cumbersome and prone to human error. Vault dynamic secrets provides a solution for this.
Now you will create a dynamic secret with the database secrets engine. Vault manages the Dynamic secrets lifecycle by Vault and will be automatically rotated. The lifecycle management includes deleting and recreating the secrets. In this section you will use the Vault Secrets Operator to rotate the Kubernetes secret every 1 minute.
Install PostgreSQL pod
You will create a pod and install PostreSQL. PostgreSQL will later generate credentials for the database secrets engine.
Create a namespace for the PostgreSQL pod.
$ kubectl create ns postgresAdd the Bitnami repository to your local Helm.
$ helm repo add bitnami https://charts.bitnami.com/bitnamiInstall PostgreSQL.
$ helm upgrade --install postgres bitnami/postgresql --namespace postgres --set auth.audit.logConnections=true --set auth.postgresPassword=secret-passThe output should resemble the following:
Release "postgres" does not exist. Installing it now.
NAME: postgres
LAST DEPLOYED: Wed Jun  7 05:56:05 2023
NAMESPACE: postgres
STATUS: deployed
REVISION: 1
TEST SUITE: None
NOTES:
CHART NAME: postgresql
CHART VERSION: 12.5.6
APP VERSION: 15.3.0

...
Setup PostgreSQL
Connect to the Vault instance, and set up a database secrets engine in Vault with a corresponding role and policy.
Connect to the Vault instance.
$ kubectl exec --stdin=true --tty=true vault-0 -n vault -- /bin/shEnable an instance of the Database Secrets Engine.
$ vault secrets enable -path=demo-db database
Success! Data written to: demo-db/config/demo-db
Configure the Database Secrets Engine.
$ vault write demo-db/config/demo-db \
   plugin_name=postgresql-database-plugin \
   allowed_roles="dev-postgres" \
   connection_url="postgresql://{{username}}:{{password}}@postgres-postgresql.postgres.svc.cluster.local:5432/postgres?sslmode=disable" \
   username="postgres" \
   password="secret-pass"
The output should resemble the following:
Success! Data written to: demo-db/config/demo-dbCreate a role for the PostgreSQL pod.
$ vault write demo-db/roles/dev-postgres \
   db_name=demo-db \
   creation_statements="CREATE ROLE \"{{name}}\" WITH LOGIN PASSWORD '{{password}}' VALID UNTIL '{{expiration}}'; \
      GRANT ALL PRIVILEGES ON DATABASE postgres TO \"{{name}}\";" \
   revocation_statements="REVOKE ALL ON DATABASE postgres FROM  \"{{name}}\";" \
   backend=demo-db \
   name=dev-postgres \
   default_ttl="1m" \
   max_ttl="1m"
The output should resemble the following:
Success! Data written to: demo-db/roles/dev-postgresCreate the
demo-auth-policy-dbpolicy.$ vault policy write demo-auth-policy-db - <<EOF path "demo-db/creds/dev-postgres" { capabilities = ["read"] } EOFThe output should resemble the following:
Success! Uploaded policy: demo-auth-policy-dbDisconnect to the Vault instance.
$ exit
Transit encryption
You can configure Vault Secrets Operator to maintain an internal, encrypted persistent cache of client tokens.
This is helpful for being able to transparently renew leases for dynamic secrets should the operator restart. Without using the client cache, the operator would need to fetch new client tokens on restarts, and re-issue credentials for dynamic secrets, causing downtime for applications. With transit encryption configured and enabled, the client token cache is end-to-end encrypted using Transit Encryption. You cannot access the persisted tokens.
The Helm chart
vault-operator-values.yamlalready set up the Vault secrets operator for client token cache.$ cat vault/vault-operator-values.yaml ... controller: manager: ... clientCache: persistenceModel: direct-encrypted storageEncryption: enabled: true mount: demo-auth-mount keyName: vso-client-cache transitMount: demo-transit kubernetes: role: auth-role-operator serviceAccount: demo-operatorMuch of the remaining tutorial is setting up Vault to these specifications already present in
vault-operator-values.yaml.The
clientCachesection has settings for the cache to use the direct encrypted mode.The
storageEncryptionsub-section specifies details of the transit secrets engine, and authentication used by the transit secrets engine.transitMountsets the transit secrets engine mount nameddemo-transit.mountsets the Kubernetes auth method engine nameddemo-auth-transitused by thedemo-transit.keyNamespecifies a key namedvso-client-cacheused for encrypt/decrypt operations.kubernetessub-section configures the Vault Kubernetes auth method, specifying the role and the service account.
Refer to Vault Secrets Operator Helm chart section on
storageEncryptiondocumentation for details.Connect back to the Vault instance.
$ kubectl exec --stdin=true --tty=true vault-0 -n vault -- /bin/shEnable an instance of the Transit Secrets Engine at the path
demo-transit.$ vault secrets enable -path=demo-transit transit Success! Enabled the transit secrets engine at: demo-transit/Create a encryption key.
$ vault write -force demo-transit/keys/vso-client-cache
Success! Data written to: demo-transit/keys/vso-client-cache
Create a policy for the operator role to access the encryption key.
$ vault policy write demo-auth-policy-operator - <<EOF
path "demo-transit/encrypt/vso-client-cache" {
   capabilities = ["create", "update"]
}
path "demo-transit/decrypt/vso-client-cache" {
   capabilities = ["create", "update"]
}
EOF
The output should resemble the following:
Success! Uploaded policy: demo-auth-policy-operatorCreate Kubernetes auth role for the operator.
$ vault write auth/demo-auth-mount/role/auth-role-operator \
   bound_service_account_names=vault-secrets-operator-controller-manager \
   bound_service_account_namespaces=vault-secrets-operator-system \
   token_ttl=0 \
   token_period=120 \
   token_policies=demo-auth-policy-operator \
   audience=vault
The output should resemble the following:
Success! Data written to: auth/demo-auth-mount/role/auth-role-operator
Setup dynamic secrets
Vault includes a number of dynamic secrets engines capable of generating temporary credentials for various applications. In this tutorial, Vault's dynamic secrets engine for PostgreSQL to generate temporary client credentials to the PostgreSQL database.
Create a role to allow access to the Kubernetes secrets engine for the demo-ns.
Create a new role for the dynamic secret.
$ vault write auth/demo-auth-mount/role/auth-role \
   bound_service_account_names=demo-dynamic-app \
   bound_service_account_namespaces=demo-ns \
   token_ttl=0 \
   token_period=120 \
   token_policies=demo-auth-policy-db \
   audience=vault
The output should resemble the following:
Success! Data written to: auth/demo-auth-mount/role/auth-roleExit the shell.
$ exit
Create the application
In this section you create a namespace demo-ns that has a dynamic secret available, and an application to access it. By using this secret the application has access to PostgreSQL. Later you will use k9s to examine the variable and verify that it automatically rotates.
Create a new namespace.
$ kubectl create ns demo-ns
namespace/demo-ns created
Create the app, Vault connection, authentication, service account and corresponding secrets.
$ kubectl apply -f dynamic-secrets/.
deployment.apps/vso-db-demo created
secret/vso-db-demo created
vaultauth.secrets.hashicorp.com/default configured
vaultauth.secrets.hashicorp.com/demo-operator created
vaultconnection.secrets.hashicorp.com/default configured
vaultdynamicsecret.secrets.hashicorp.com/vso-db-demo-create created
vaultdynamicsecret.secrets.hashicorp.com/vso-db-demo created
serviceaccount/demo-operator created
Examine the dynamic secret
Using k9s, examine the dynamic secret and confirm the secrets change every minute.
Go back to the window with k9s and display all the available namespaces with the
:nscommand.Find and choose the demo-ns by highlighting it and pressing return.
Display the secrets in the demo-ns pod by typing
:secretsand enter.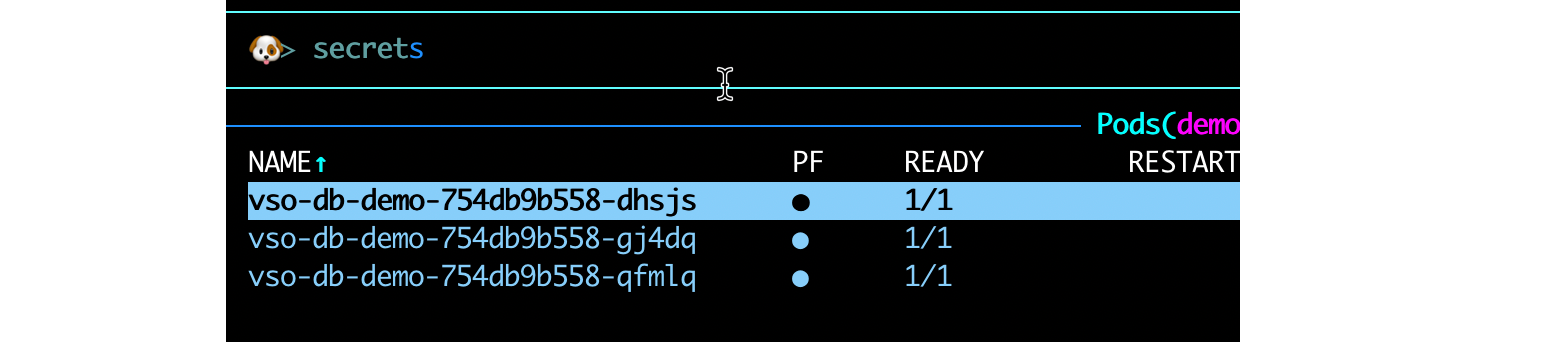
Choose the first secret displayed and press
x.
The secrets should resemble the following, remember to note down the password displayed

Exit screen with escape key and wait a minimum of 60 seconds, and check the values once again with
x. Notice the password has automatically changed.
Knowledge checks
A quiz to test your knowledge.
What does the Vault Secrets Operator sync between Vault and Kubernetes?
🔘 Vault policies and authentication methods
🔘 Kubernetes pods and services to Vault namespaces
🔘 Secrets stored in Vault to Kubernetes native secrets
🔘 Vault encryption keys to Kubernetes ConfigMaps
❌ Vault policies and authentication methods
❌ Kubernetes pods and services to Vault namespaces
✅ Secrets stored in Vault to Kubernetes native secrets
❌ Vault encryption keys to Kubernetes ConfigMaps
Why do dynamic secrets provide better security than static secrets?
Dynamic secrets are temporary credentials that Vault generates on-demand and automatically revokes, eliminating the security risks of long-lived static credentials that can be compromised or leaked.
How does transit encryption help the Vault Secrets Operator maintain dynamic secrets after a restart?
🔘 It protects the client token cache so VSO can renew leases without re-authenticating
🔘 It encrypts all Kubernetes secrets in the cluster
🔘 It automatically rotates the PostgreSQL database password
🔘 It configures TLS certificates for the Vault cluster
✅ It protects the client token cache so VSO can renew leases without re-authenticating
❌ It encrypts all Kubernetes secrets in the cluster
❌ It automatically rotates the PostgreSQL database password
❌ It configures TLS certificates for the Vault cluster
Clean up
Delete the minikube cluster.
$ minikube delete
🔥  Deleting "minikube" in docker ...
🔥  Deleting container "vault-secrets-operator" ...
🔥  Removing /Users/mrken/.minikube/machines/vault-secrets-operator ...
💀  Removed all traces of the "vault-secrets-operator" cluster.
Additional discussion
A Kubernetes operator is a software extension that uses custom resources to manage applications hosted on Kubernetes. The Vault Secret Operator leverages HashiCorp Vault as a complete secrets management solution.
Secrets exist within Namespaces, which are virtual clusters with a Kubernetes Cluster. The secrets operator allows you to administer the secrets through Vault, but access them as a native Kubernetes primitive.
In this tutorial you began to learn about the Vault Secrets Operator by setting up a minikube cluster with a Vault instance and a Vault Secrets Operator controller. Then you created a secret in a namespace called app. You displayed the secret in k9s, and used Vault to rotate the secret. You then validated the change in the Vault secret value also changed the Kubernetes secret.
In the dynamic secrets section you set up a PostgreSQL pod, placeholder application and created a dynamic secret. Then, using k9s you watched the secret rotate automatically.
The Vault Secrets Operator is a Kubernetes operator pattern for use with HashiCorp Vault. It is responsible for syncing Vault secrets to Kubernetes Secrets natively.
Features of the Vault Secrets Operator include support for all secrets engines and Kubernetes, AWS, JWT and AppRole authentication to Vault.
References
- Vault Secrets Operator
- Vault Secrets Operator
- Dynamic Secrets Sync demo of the Vault Secret Operator
- Vault Secrets Operator: A new method for Kubernetes integration
- Vault on Kubernetes Deployment Guide
- Install Vault to Red Hat OpenShift
- Kubernetes Operator pattern
- Manage secrets by injecting a Vault Agent container
- Retrieve secrets for Kubernetes workloads with Vault Agent
- Kubernetes Secrets Engine