HashiCorp Cloud Platform
Correlate HCP Vault Radar findings with Vault Enterprise
In the Install HCP Vault Radar agent tutorial, you installed the Vault Radar agent in your Kubernetes environment. With the agent set up, you configured the agent to scan a GitHub repository.
In this tutorial, you will learn how to correlate findings from Vault Radar scans with Vault Enterprise clusters.
Scenario
Oliver and the operations team deployed and configured the HCP Vault Radar agent in the HashiCups Kubernetes environment. The agent scans the HashiCups GitHub repositories for leaked secrets.
The CISO wants to know if HashiCups stores any of the leaked secrets in their HashiCorp Vault environment. In this tutorial, Oliver will configure correlation between HCP Vault Radar and HashiCorp Vault.
You can configure the Vault Radar agent to authenticate with Vault using the Kubernetes, AppRole, or token auth methods. When deploying the Vault Radar agent in a Kubernetes cluster, the recommendation is to configure the Kubernetes auth method in Vault. Alice from the architect team selected the Kubernetes auth method to support correlating secrets between Vault Radar and Vault.
If you are not familiar with Vault or Vault's auth methods, follow the Vault foundations series of tutorials.
You will take on the role of Oliver to complete the configuration of the Vault Radar agent to correlate findings with HashiCorp Vault.
Prerequisites
- Complete the Install HCP Vault Radar agent tutorial.
- Access to the HCP Portal with a user assigned the admin role.
- Access to an HCP Vault Dedicated cluster.
- Access to a GitHub account with an organization configured.
- Permission to create a GitHub personal access token.
- Docker installed and running.
- minikube installed on your local machine.
- Vault binary installed and configured in your system PATH.
- ngrok installed, and configured with an auth token.
Set up the lab
In this tutorial, you will configure the Vault Radar agent to connect to an HCP Vault Dedicated cluster, HashiCorp's managed Vault Enterprise deployment.
Configure Kubernetes
Vault needs to connect to the Kubernetes API to authenticate workloads using the Kubernetes auth method. These steps expose the Kubernetes API so HCP Vault Dedicated can connect to the minikube Kubernetes cluster running on your local machine.
Open a new terminal and start a proxy to expose the Kubernetes API.
$ kubectl proxy --disable-filter=true
W0822 12:57:23.605710   10659 proxy.go:177] Request filter disabled, your proxy is vulnerable to XSRF attacks, please be cautious
Starting to serve on 127.0.0.1:8001
This command exposes the Kubernetes API to your local machine. This terminal must remain open during the tutorial.
Open another new terminal, and create an ngrok endpoint to the proxy listening on port
8001.$ ngrok http --url http:// 127.0.0.1:8001Example output:
ngrok                                                                                                                                                              (Ctrl+C to quit)

Session Status                online
Account                       username (Plan: Free)
Update                        update available (version 3.x.x, Ctrl-U to update)
Version                       3.x.x
Region                        United States (us)
Latency                       32.791235ms
Web Interface                 http://127.0.0.1:4040
Forwarding                    http://super-rad-sudomain.ngrok-free.app -> 127.0.0.1:8001

Connections                   ttl     opn     rt1     rt5     p50     p90
                              0       0       0.00    0.00    0.00    0.00
This terminal must remain open during the tutorial.
ngrok simplifies exposing the Kubernetes API from the minikube Kubernetes cluster to the internet. In a production Kubernetes cluster, you might use a load balancer to expose the API or managed services such as AKS or EKS that expose the API by default.
Copy the forwarding address and return to the terminal where you exported the GitHub personal access token in the previous tutorial.
Export an environment variable for the Kubernetes API address using the ngrok forwarding address. This address will be unique to your system.
$ export K8S_URL=<ngrok-address>The Kubernetes cluster is now accessible by an external Vault cluster.
Configure your system for HCP Vault Dedicated
Launch the HCP Portal and login.
Click Vault in the left navigation pane.
In the Vault clusters pane, click vault-cluster.
Under Cluster URLs, click Public Cluster URL.
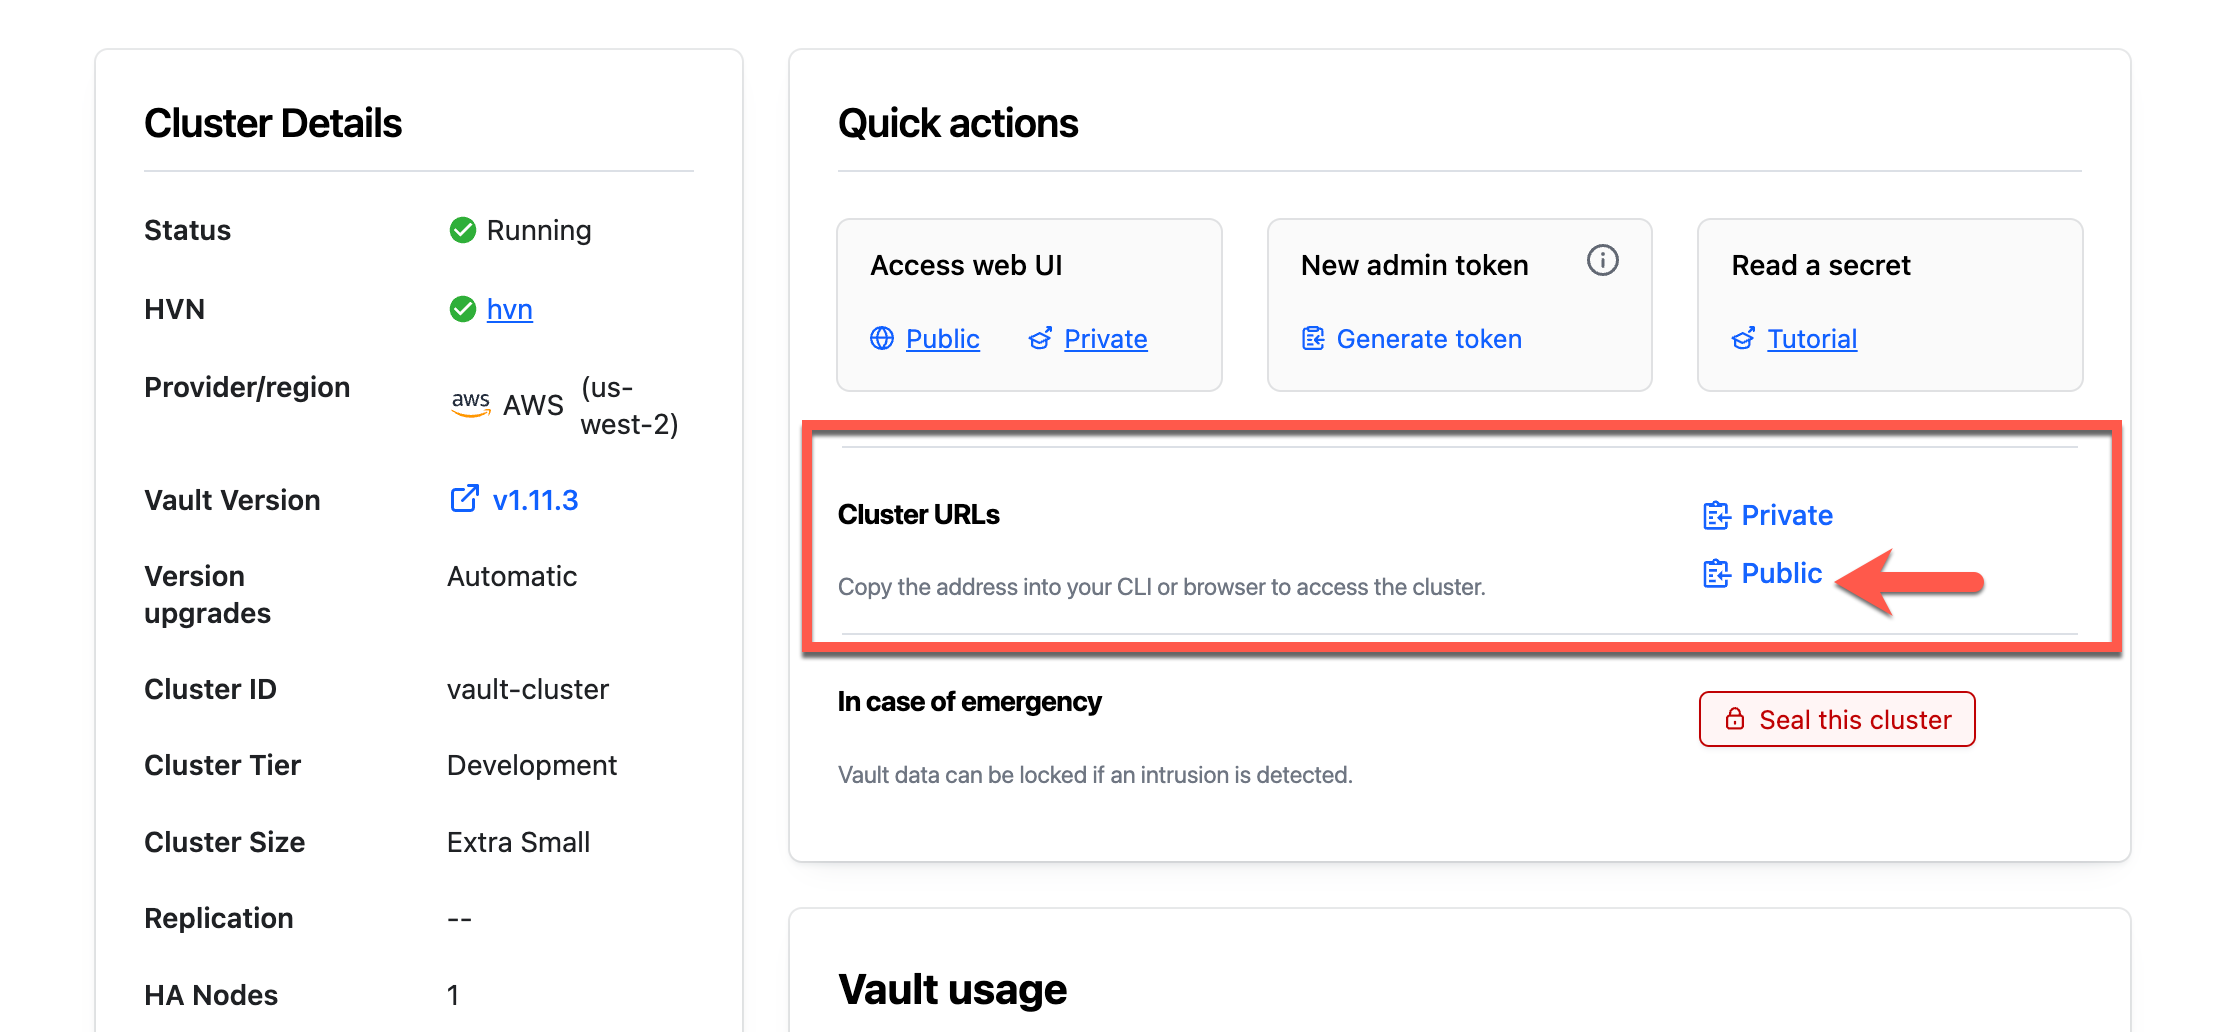
In a terminal, set the
VAULT_ADDRenvironment variable to the copied address.$ export VAULT_ADDR=<Public_Cluster_URL>Return to the Overview page and click Generate token.
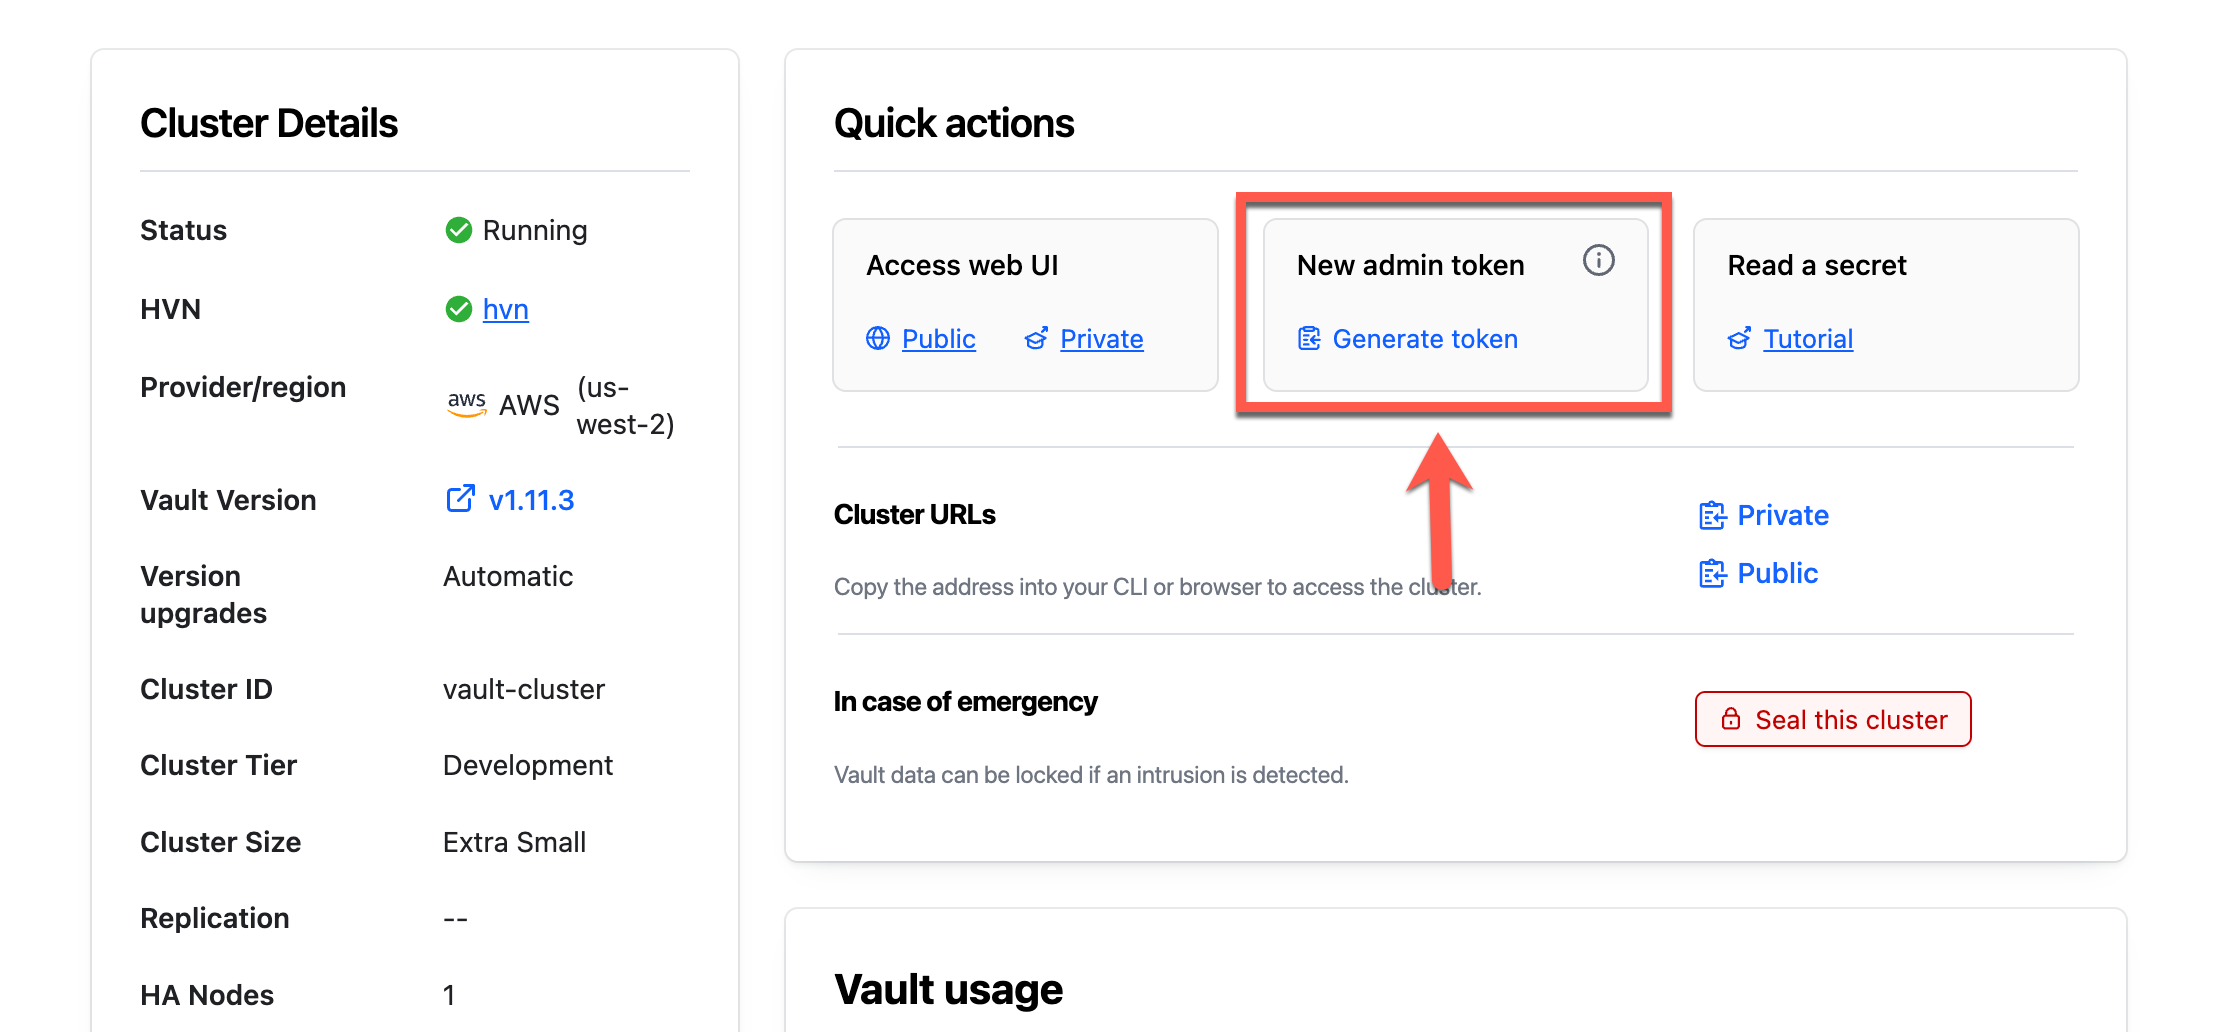
Within a few moments, a new token will be generated.
Copy the Admin Token.
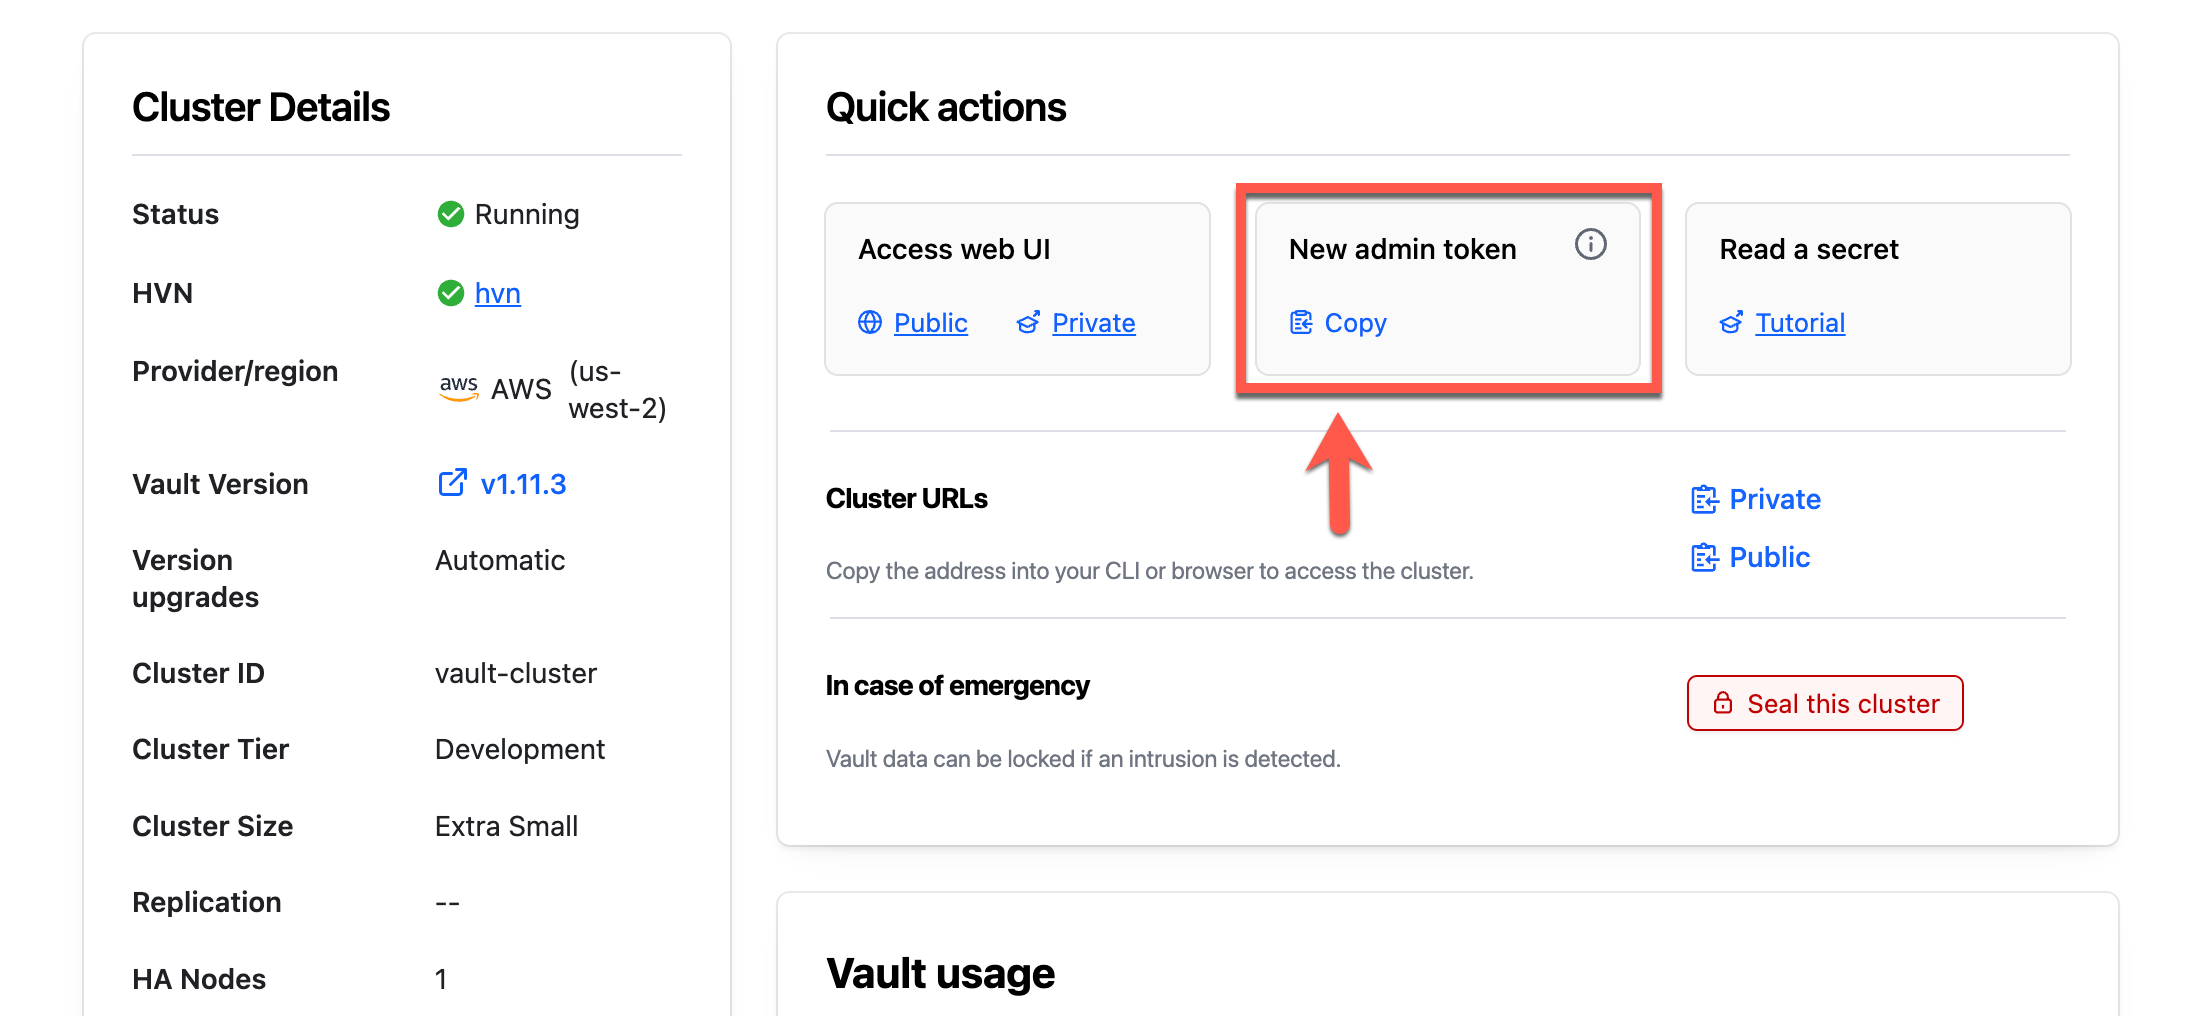
Return to the terminal and set the
VAULT_TOKENenvironment variable.$ export VAULT_TOKEN=<token>Set the
VAULT_NAMESPACEenvironment variable toadmin.$ export VAULT_NAMESPACE=adminType
vault statusto verify your connectivity to the Vault cluster.$ vault status Key Value --- ----- Recovery Seal Type shamir Initialized true Sealed false Total Recovery Shares 1 Threshold 1 Version 1.18.4+ent Storage Type raft ...snipped...With the
VAULT_TOKENenvironment variable set, you can now explore your Vault cluster. Typevault auth listto view the list of available auth methods.$ vault auth list Path Type Accessor Description ---- ---- -------- ----------- token/ ns_token auth_ns_token_d6310fa6 token based credentialsAll new Vault clusters will have the
tokenauth method enabled.
Enable KV secrets engine
Configure the KV secrets engine for the Vault Radar agent to correlate findings with.
Enable the KV secrets engine.
$ vault secrets enable -version=2 -path=static kv
Success! Enabled the kv secrets engine at: static/
HashiCups uses the the KV secrets engine to store static secrets.
Create a secret at path
static/exampleapp/credswith ausernameandpassword.$ vault kv put static/exampleapp/creds \ username='jalbertson' \ password='b3stp@stw00rd3vA!'Example output:
======== Secret Path ========
static/data/exampleapp/creds

======= Metadata =======
Key                Value
---                -----
created_time       2024-08-22T16:49:33.977869448Z
custom_metadata    <nil>
deletion_time      n/a
destroyed          false
version            1
The KV secrets engine is ready to proceed with the tutorial.
Configure Kubernetes service account
Create a Kubernetes role binding for the
vault-radar-agentservice account to allow access to the Kubernetes API.$ kubectl create -f - << EOF apiVersion: rbac.authorization.k8s.io/v1 kind: ClusterRoleBinding metadata: name: vault-radar-agent roleRef: apiGroup: rbac.authorization.k8s.io kind: ClusterRole name: system:auth-delegator subjects: - kind: ServiceAccount name: vault-radar-agent namespace: vault-radar EOFExample output:
clusterrolebinding.rbac.authorization.k8s.io/vault-radar-agent createdThe role binding allows the
vault-radar-agentservice account to query the Kubernetes API. This role binding allows the Vault Kubernetes auth method to authenticate workloads in the Kubernetes cluster when used as part of the auth method configuration.Create a Kubernetes Secret for the
vault-radar-agentKubernetes service account.$ kubectl create -f - <<EOF apiVersion: v1 kind: Secret metadata: name: vault-radar-agent namespace: vault-radar annotations: kubernetes.io/service-account.name: vault-radar-agent type: kubernetes.io/service-account-token --- EOFExample output:
secret/vault-radar-agent createdRetrieve the
vault-auth-secretsecret and store it as an environment variable.$ VAULTSA_SECRET=$(kubectl get secret --namespace vault-radar vault-radar-agent --output json | jq -r '.data') \ && echo $VAULTSA_SECRETExample output:
{
  "ca.crt": "LS0tLS1CRUdJTiBDRVJUSUZJQ0FURS0tLS0tCk1JSURC..<snip>..lwNGN6cmFpb0E9PQotLS0tLUVORCBDRVJUSUZJQ0FURS0tLS0tCg==",
  "namespace": "ZGVmYXVsdA==",
  "token": "ZXlKaGJHY2lPaUpTVXpJMU5pSXNJbXRwWkNJNkl..<snip>..TWR3T0kwRVlxcE0zZGJ1d3JMUW5vMjNhSnJWaU5SaEp3"
}
The secret includes the Kubernetes public key
ca.crtand thetokenas base64 encoded strings.Decode the ca.crt certificate and store it as an environment variable.
$ K8S_CA_CRT=$(echo $VAULTSA_SECRET | jq -r '."ca.crt"' | base64 -d) && echo $K8S_CA_CRTExample output:
-----BEGIN CERTIFICATE-----
MIIDBjCCAe6gAwIBAgIBATANBgkqhkiG9w0BAQsFADAVMRMwEQYDVQQDEwptaW5p
a3ViZUNBMB4XDTIyMDQyNjE0MDE0NVoXDTMyMDQyNDE0MDE0NVowFTETMBEGA1UE
...snip...
tIS6p2TV6cW+Fa6VFvRYcjb4hfPovAB5gjhm36YravcjgP9rt+h0rFbQEc5oTtMa
hThaYp4czraioA==
-----END CERTIFICATE-----
Decode the token and store it as an environment variable.
$ VAULTSA_TOKEN=$(echo $VAULTSA_SECRET | jq -r '.token' | base64 -d) && echo $VAULTSA_TOKENExample output:
eyJhbGciOiJSUzI1NiIsImtpZCI6Im1xay1Mb3ZRWndUNXowV3hLZnVsdERfTXZYU1hGZXhaNmRMS29NcDhVRU0ifQ.eyJpc3MiOiJrd
WJlcm5ldGVzL3NlcnZpY2VhY2NvdW50Iiwia3ViZXJuZXRlcy5pby9zZXJ2aWNlYWNjb3VudC9uYW1lc3BhY2UiOiJkZWZhdWx0Iiwia
...snip...
W4KlKrAHUxmWfkmqn-TOg6adqM6gpZ86t3hpNKLieui4k7jIn6MRfvJasuAV7POJ9ZrdKMYWnOE4Hob7H-_Jck0IVBOEpSCd4YIyLU5e
cxOIm9gYnyz7W0P2D4EnWonqPzpAn3YGi5wilRMQ6f6thN8KDz__zYn0Bqx4ioSQ
You have collected the necessary information to configure the Vault Kubernetes auth method.
Enable the Kubernetes auth method
Enable the Kubernetes auth method.
$ vault auth enable kubernetes

Success! Enabled kubernetes auth method at: kubernetes/
Create a Vault policy that permits the Vault Radar agent to access Vault.
$ vault policy write vault-radar-agent-policy - << EOF
path "*" {
    capabilities = ["read", "list"]
}
EOF
Example output:
Success! Uploaded policy: vault-radar-agent-policyThis policy is a permissive policy. Refer to the Vault Radar documentation for examples of more restrictive policies.
Configure the Kubernetes auth method to connect to the Kubernetes API using the
vault-radar-agentservice account token.$ vault write auth/kubernetes/config \ token_reviewer_jwt=$VAULTSA_TOKEN \ kubernetes_host=$K8S_URL \ kubernetes_ca_cert=$K8S_CA_CRTExample output:
Success! Data written to: auth/kubernetes/configCreate a Vault role for the Kubernetes auth method.
$ vault write auth/kubernetes/role/vault-radar-agent-role \
bound_service_account_names=vault-radar-agent \
bound_service_account_namespaces=vault-radar \
policies=vault-radar-agent-policy \
ttl=1h
Example output:
Success! Data written to: auth/kubernetes/role/vault-radar-agent-roleThe
bound_service_account_namespacesparameter is a list of Kubernetes namespaces allowed to call the Vaultvault-radar-agent-rolerole.The
bound_service_account_namesparameter is a list of Kubernetes service accounts allowed to call the Vaultvault-radar-agent-rolerole.You have configured the Kubernetes auth method and are ready to proceed with the tutorial.
Configure HCP Vault Radar agent
Return to the HCP Portal (and log in if you have been automatically logged-out).
Click Vault Radar.
Click Settings.
Click Secret Managers.
Click Connect new secret manager.
In the Vault type pull-down menu, select HCP Vault Dedicated.
Click Next.
In the Vault URL text box, enter the public URL of your HCP Vault Dedicated. Remove the
https://prefix.You can retrieve this URL from the
VAULT_ADDRenvironment variable.$ echo $VAULT_ADDR | cut -c 9-In the Authentication method pull-down menu, select Kubernetes.
In the Authentication path text box, enter
kubernetes.In a production environment, use the path where you enabled the Kubernetes auth method.
In the Role Name text box, enter
vault-radar-agent-role.Click Next.
You have added Vault as a secret manager in Vault Radar to correlate findings from Vault Radar scans with secrets stored in Vault. The Vault cluster Access level shows Read access. This matches the Vault policy you created earlier in this tutorial.
Correlate findings
Click Overview.
Under Resource, click hcp-vault-radar-foundations.
Under Category, click Secrets.
Expand the HIGH severity finding.

Observe the Managed Location(s) section. You can now review if any of the Vault Radar findings are stored in Vault.

Clean up
In the next tutorial, you will update the Vault Radar agent to copy secrets into HashiCorp Vault. If you plan to continue with the next tutorial, do not perform these clean up steps.
Delete the minikube cluster.
$ minikube deleteStop ngrok.
Stop the Kubernetes proxy.
Delete the HCP Vault Dedicated cluster.
Delete the forked GitHub repository from your GitHub organization.
Delete the GitHub personal access token created in this tutorial.
Summary
In this tutorial, you learned how to configure the HCP Vault Radar agent to correlate findings with HashiCorp Vault. You configured the Vault Kubernetes auth method and added Vault as a secret manager in Vault Radar.