Service Principals
HashiCorp Cloud Platform (HCP) uses service principals to authenticate service requests from applications, hosted services, and automated tools. Service principals can only be associated with one organization, and you can assign role-based permissions to service principals so that they can perform specific actions in HCP. Refer to the User Permissions for details.
Service Principals come in two types: Organization-level Service Principals and Project-level Service Principals.
This page explains how to create and delete both types of service principals in HCP as well as how to generate a service principal key for authentication.
Organization-level Service Principals
Organization-level service principals are scoped to interact with every resource and project within an organization. For example, an organization-level service principal with viewer permissions can view all resources across all projects within an organization.
Note
Organization-level service principals are very powerful and should be used sparingly.Project-level Service Principals
Project-level service principals are scoped to interact with every resource within a particular project within an organization. They can not interact with resources outside the project they were created in. For example, an project-level service principal with viewer permissions can ONLY view resources within the project it was created.
Create a Service Principal
Organization-level service principals
Organization-level service principals can be created by navigating to Organization Access Control within the Portal. From your HashiCorp Portal, click your organization name in the upper left navitigation breadcrumb. Next select Access control (IAM) in the left navigation, and then click Service principals. You may see the following screen if there were no service principals previously created.
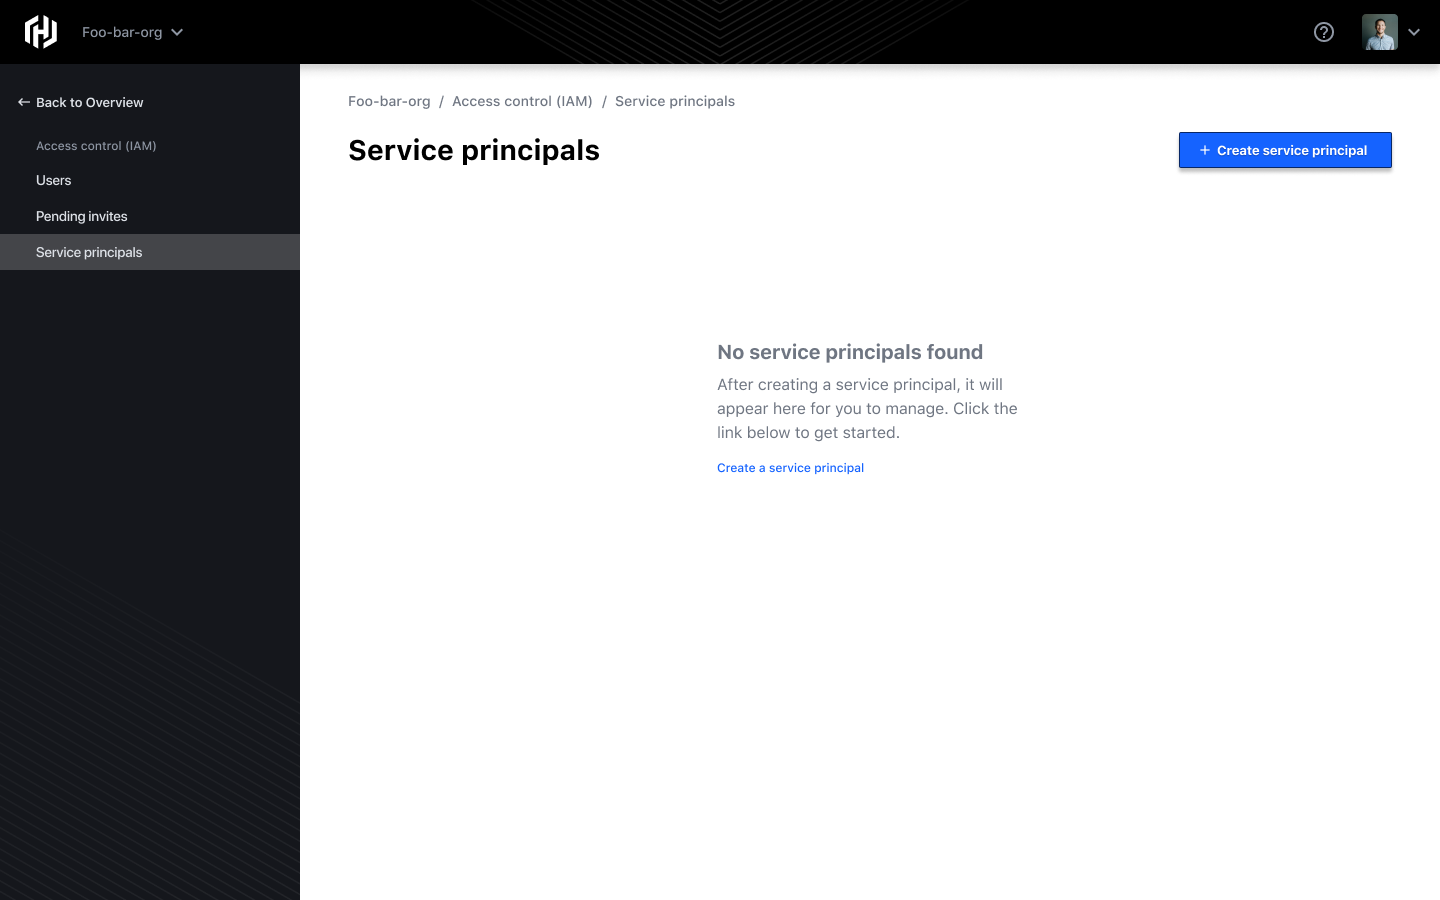
Click + Create service principal. The following screen opens.
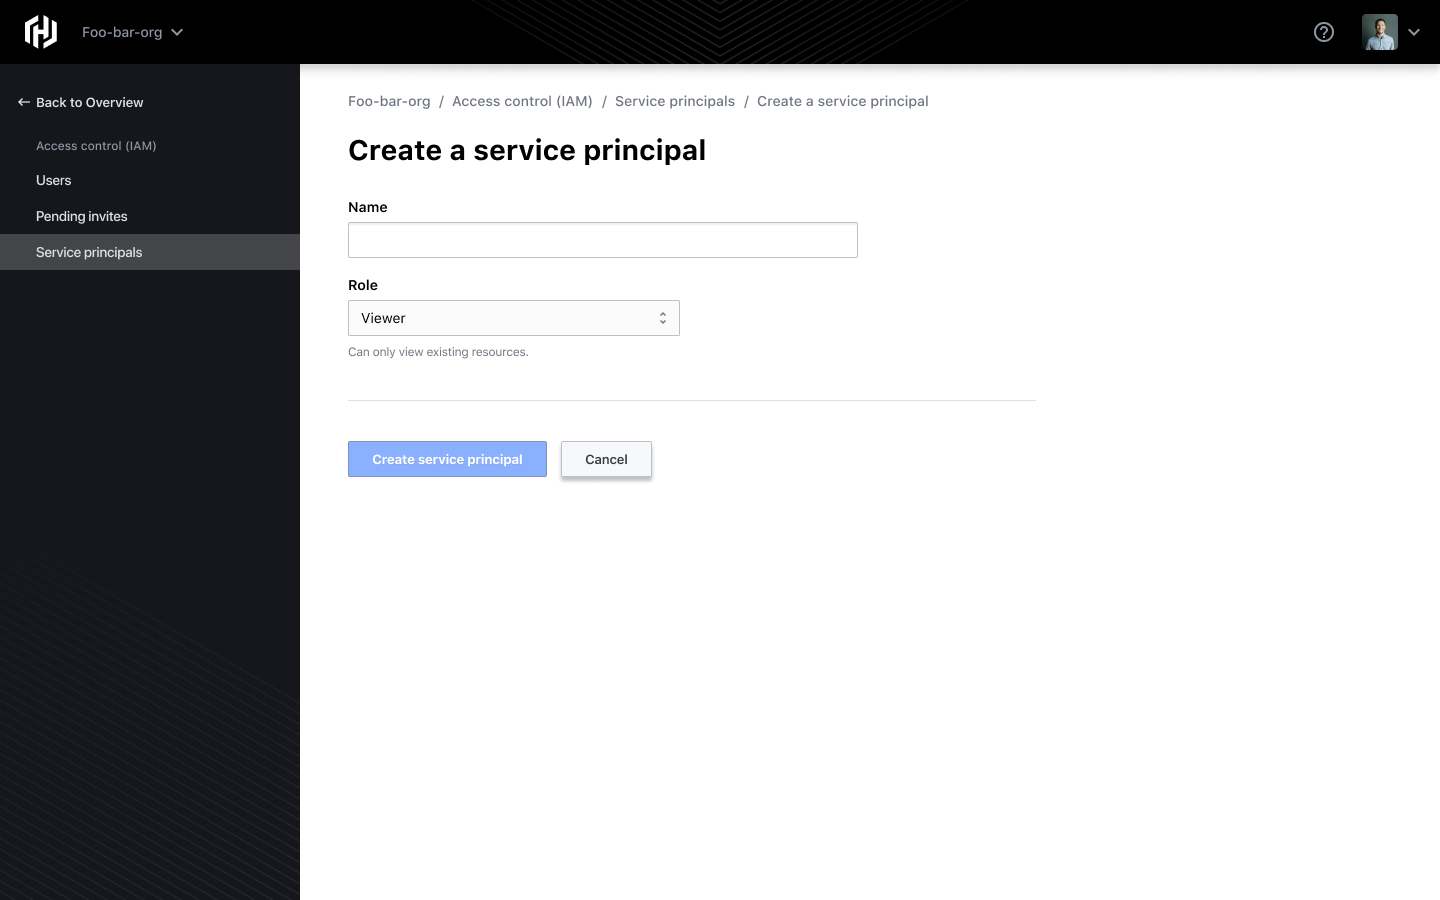
Type in a name and select a role. The following roles can be assigned to the service principal.
Admin: Full access to all resources including editing IAM, invite users, and edit roles.
Contributor: Create and manage all types of resources, but cannot grant access to others.
Viewer: View existing resources only.
To view additional permissions for these roles, refer to the HCP Platform Permissions document.
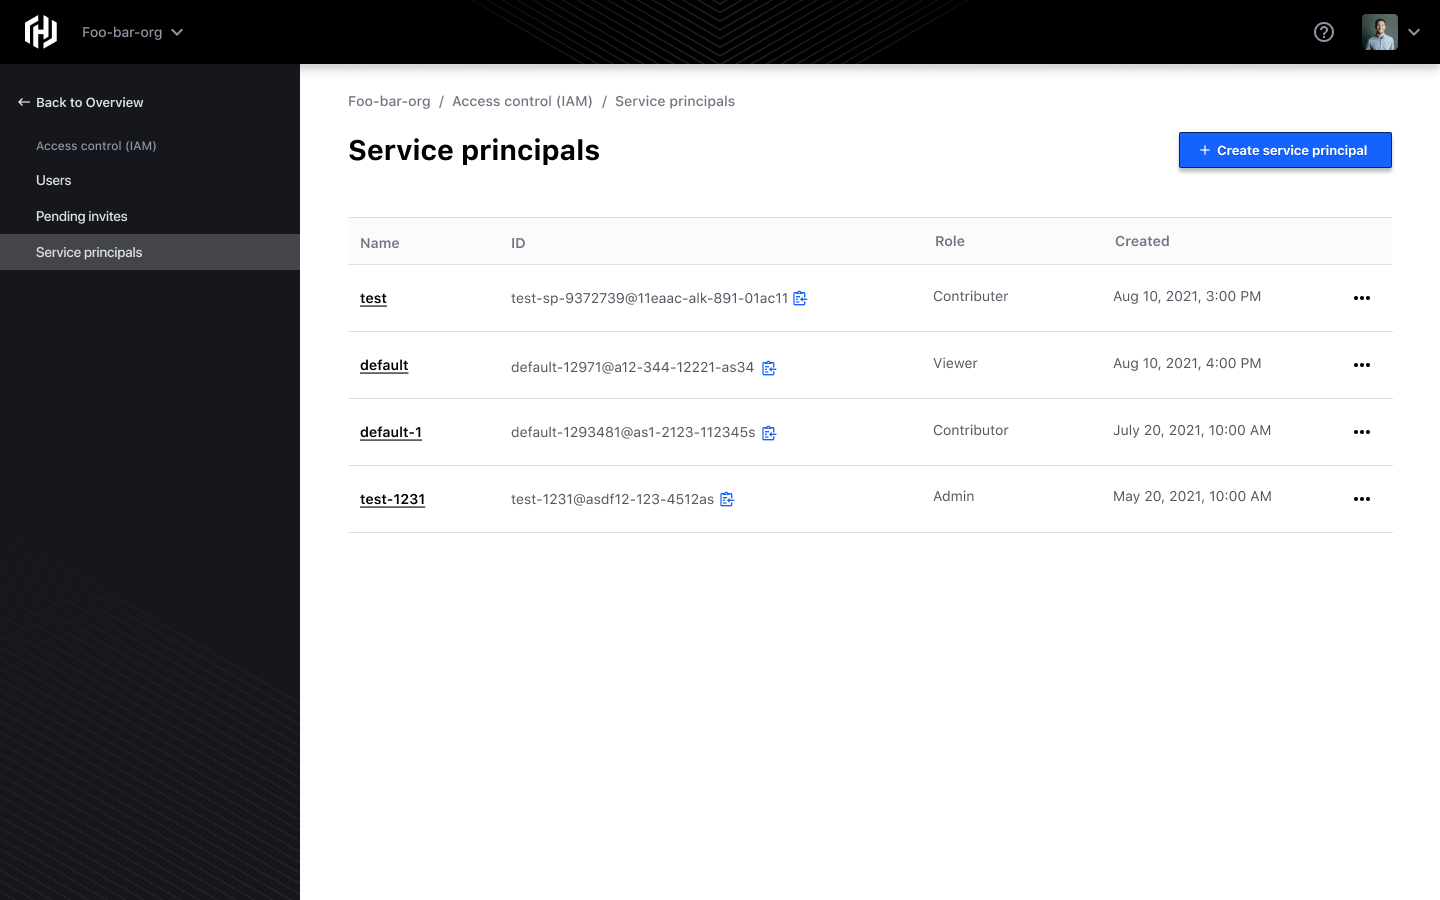
Click Create service principal. Your service principal will appear in a listed format.
Project-level service principals
Project-level service principals can be created by navigating to Project Access control for the particular project you are interested in. From your HashiCorp Portal, ensure you are within the project you want to create the service principal in, then select Access control (IAM) in the left navigation under your project name, and then click Service principals. You may see the following screen if there were no service principals previously created.
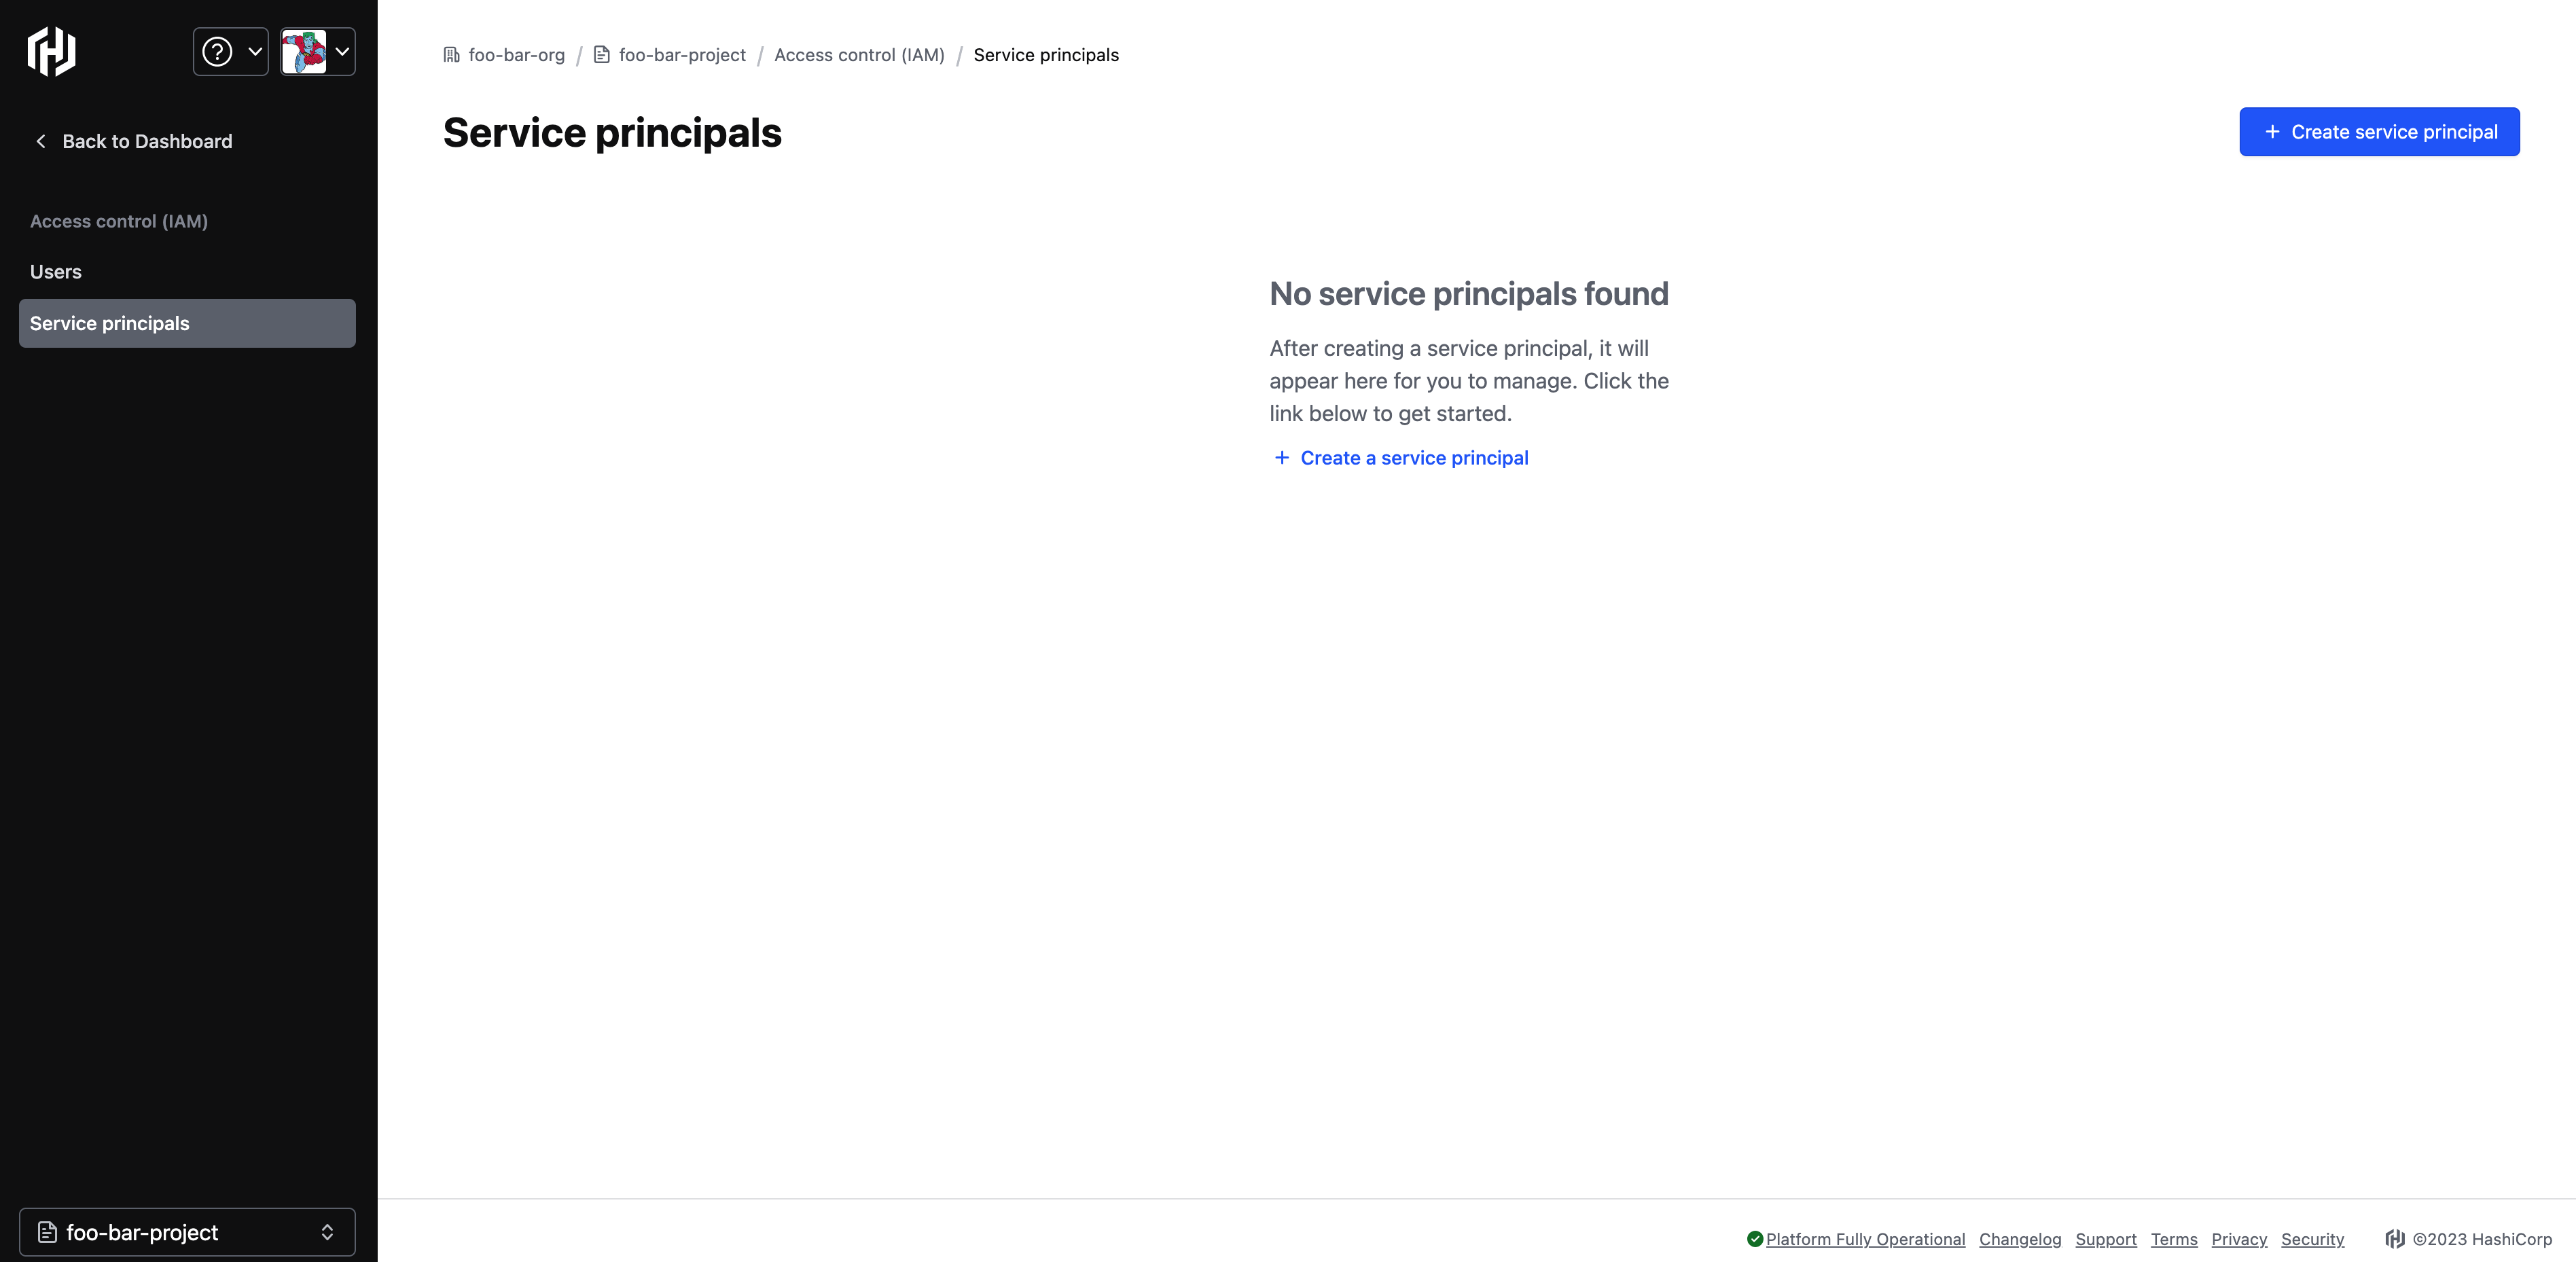
Click + Create service principal. The following screen opens.
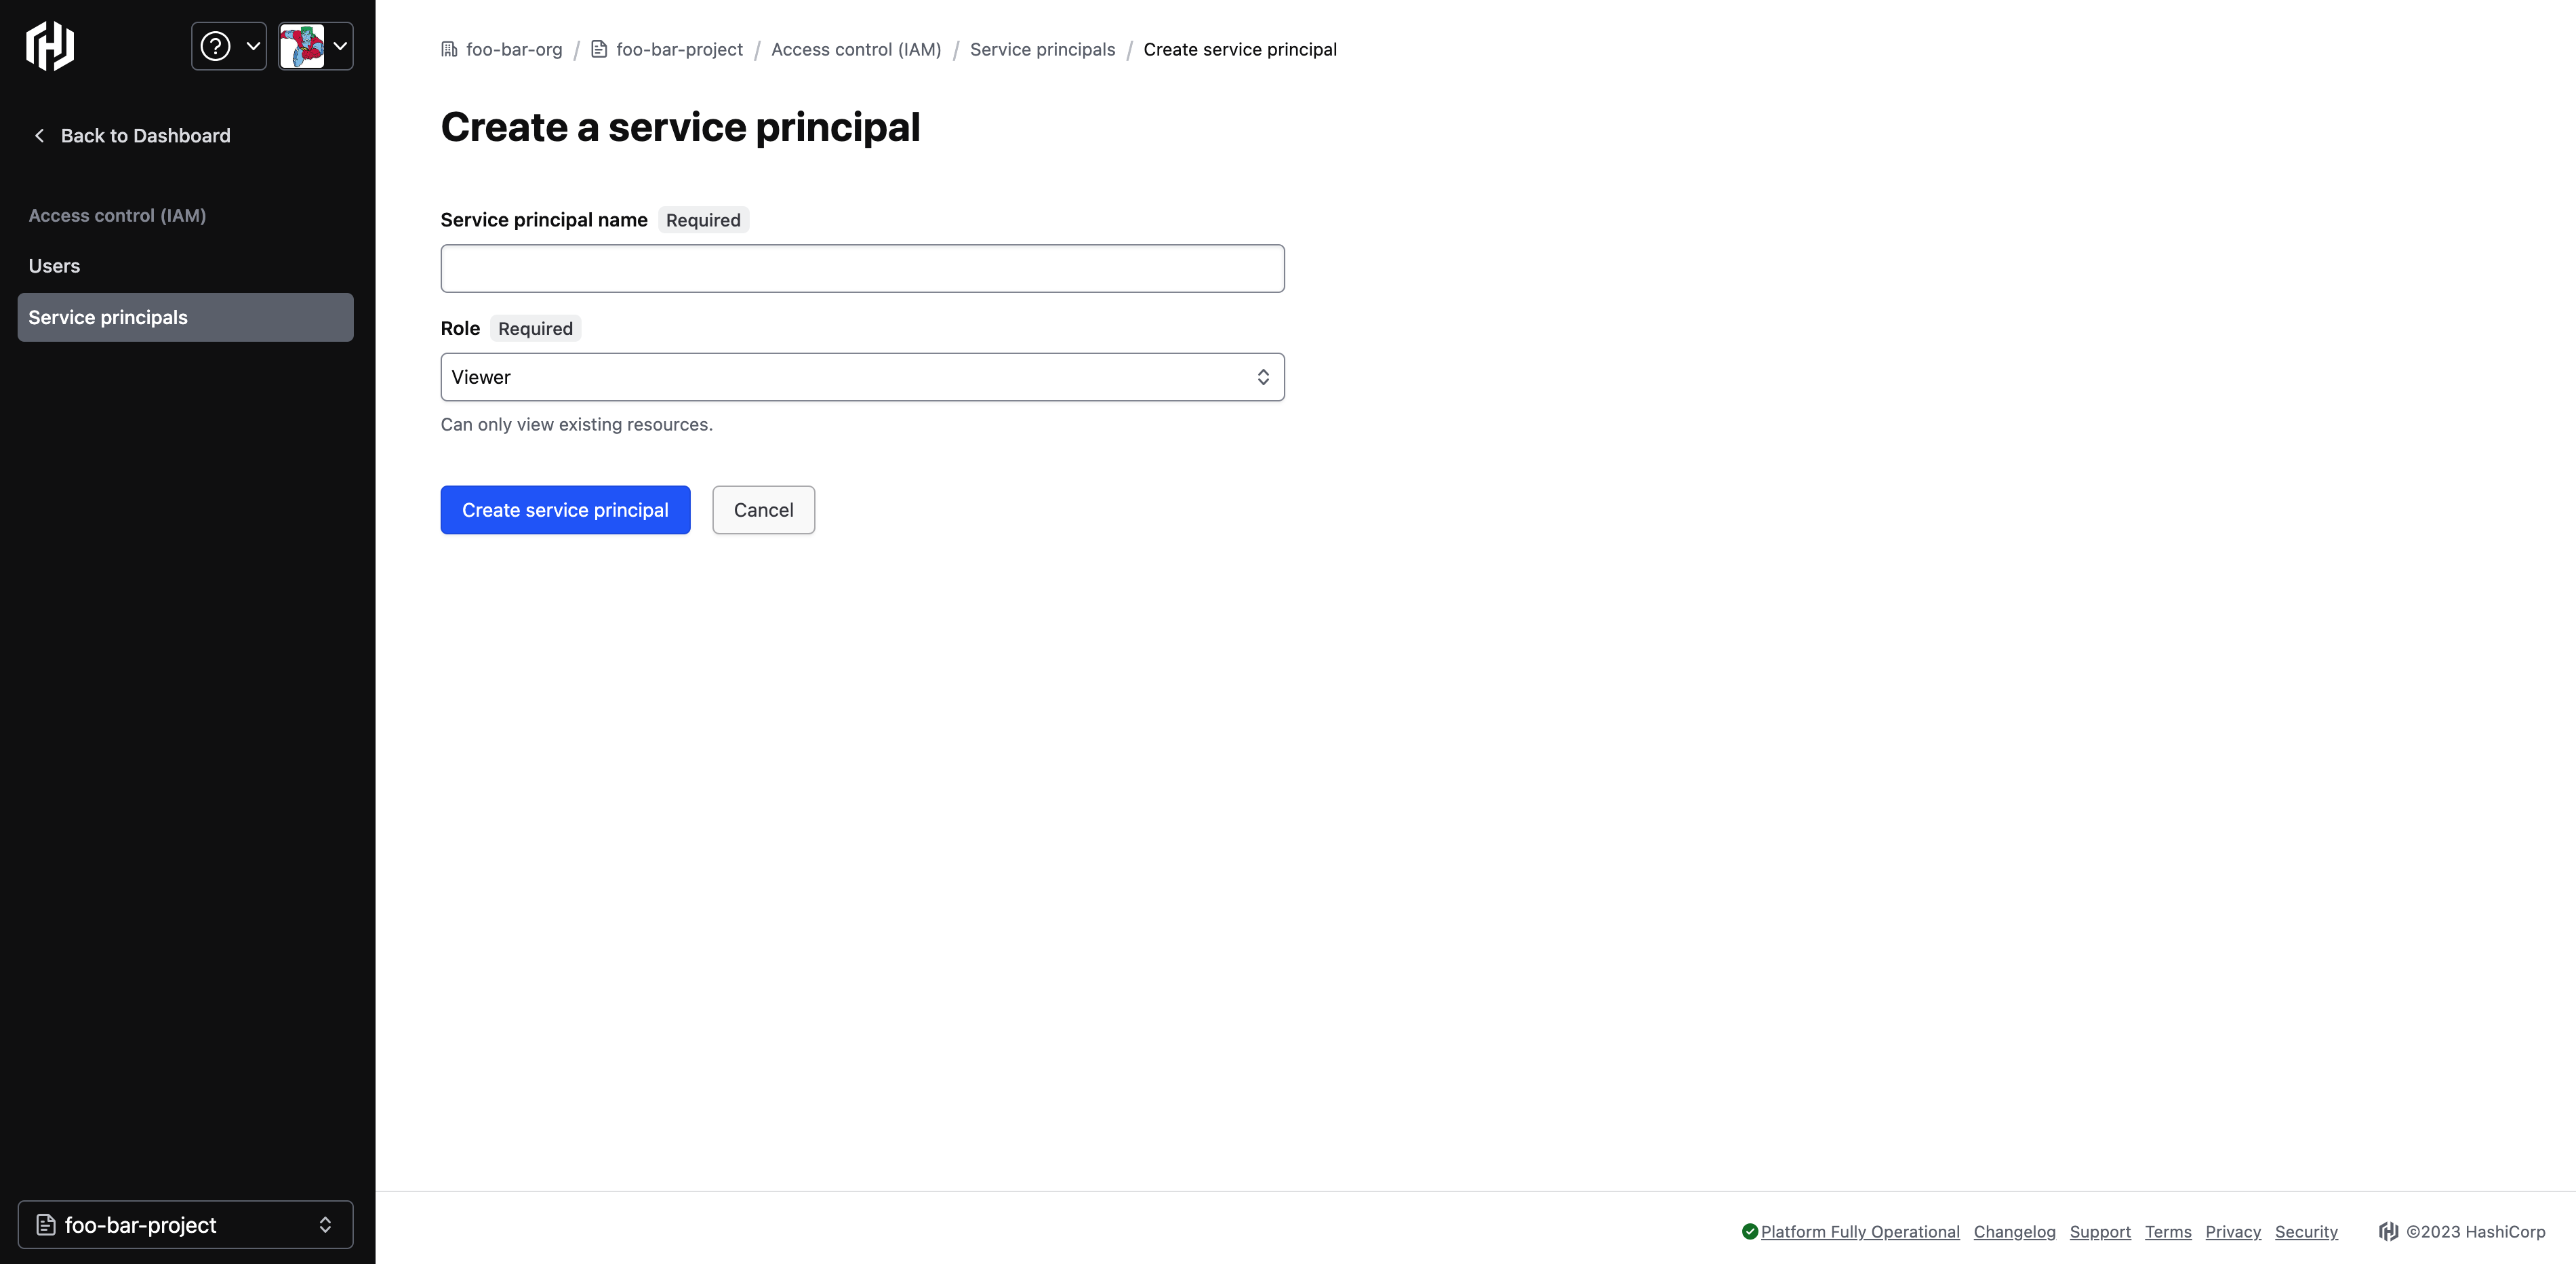
Type in a name and select a role. The following roles can be assigned to the service principal.
Admin: Full access to all resources within a project including editing IAM, user project members, and edit roles.
Contributor: Create and manage all types of resources within a project, but cannot grant access to others.
Viewer: View existing resources within a project only.
To view additional permissions for these roles, refer to the HCP Platform Permissions document.
Click Create service principal. Your service principal will appear in a listed format.
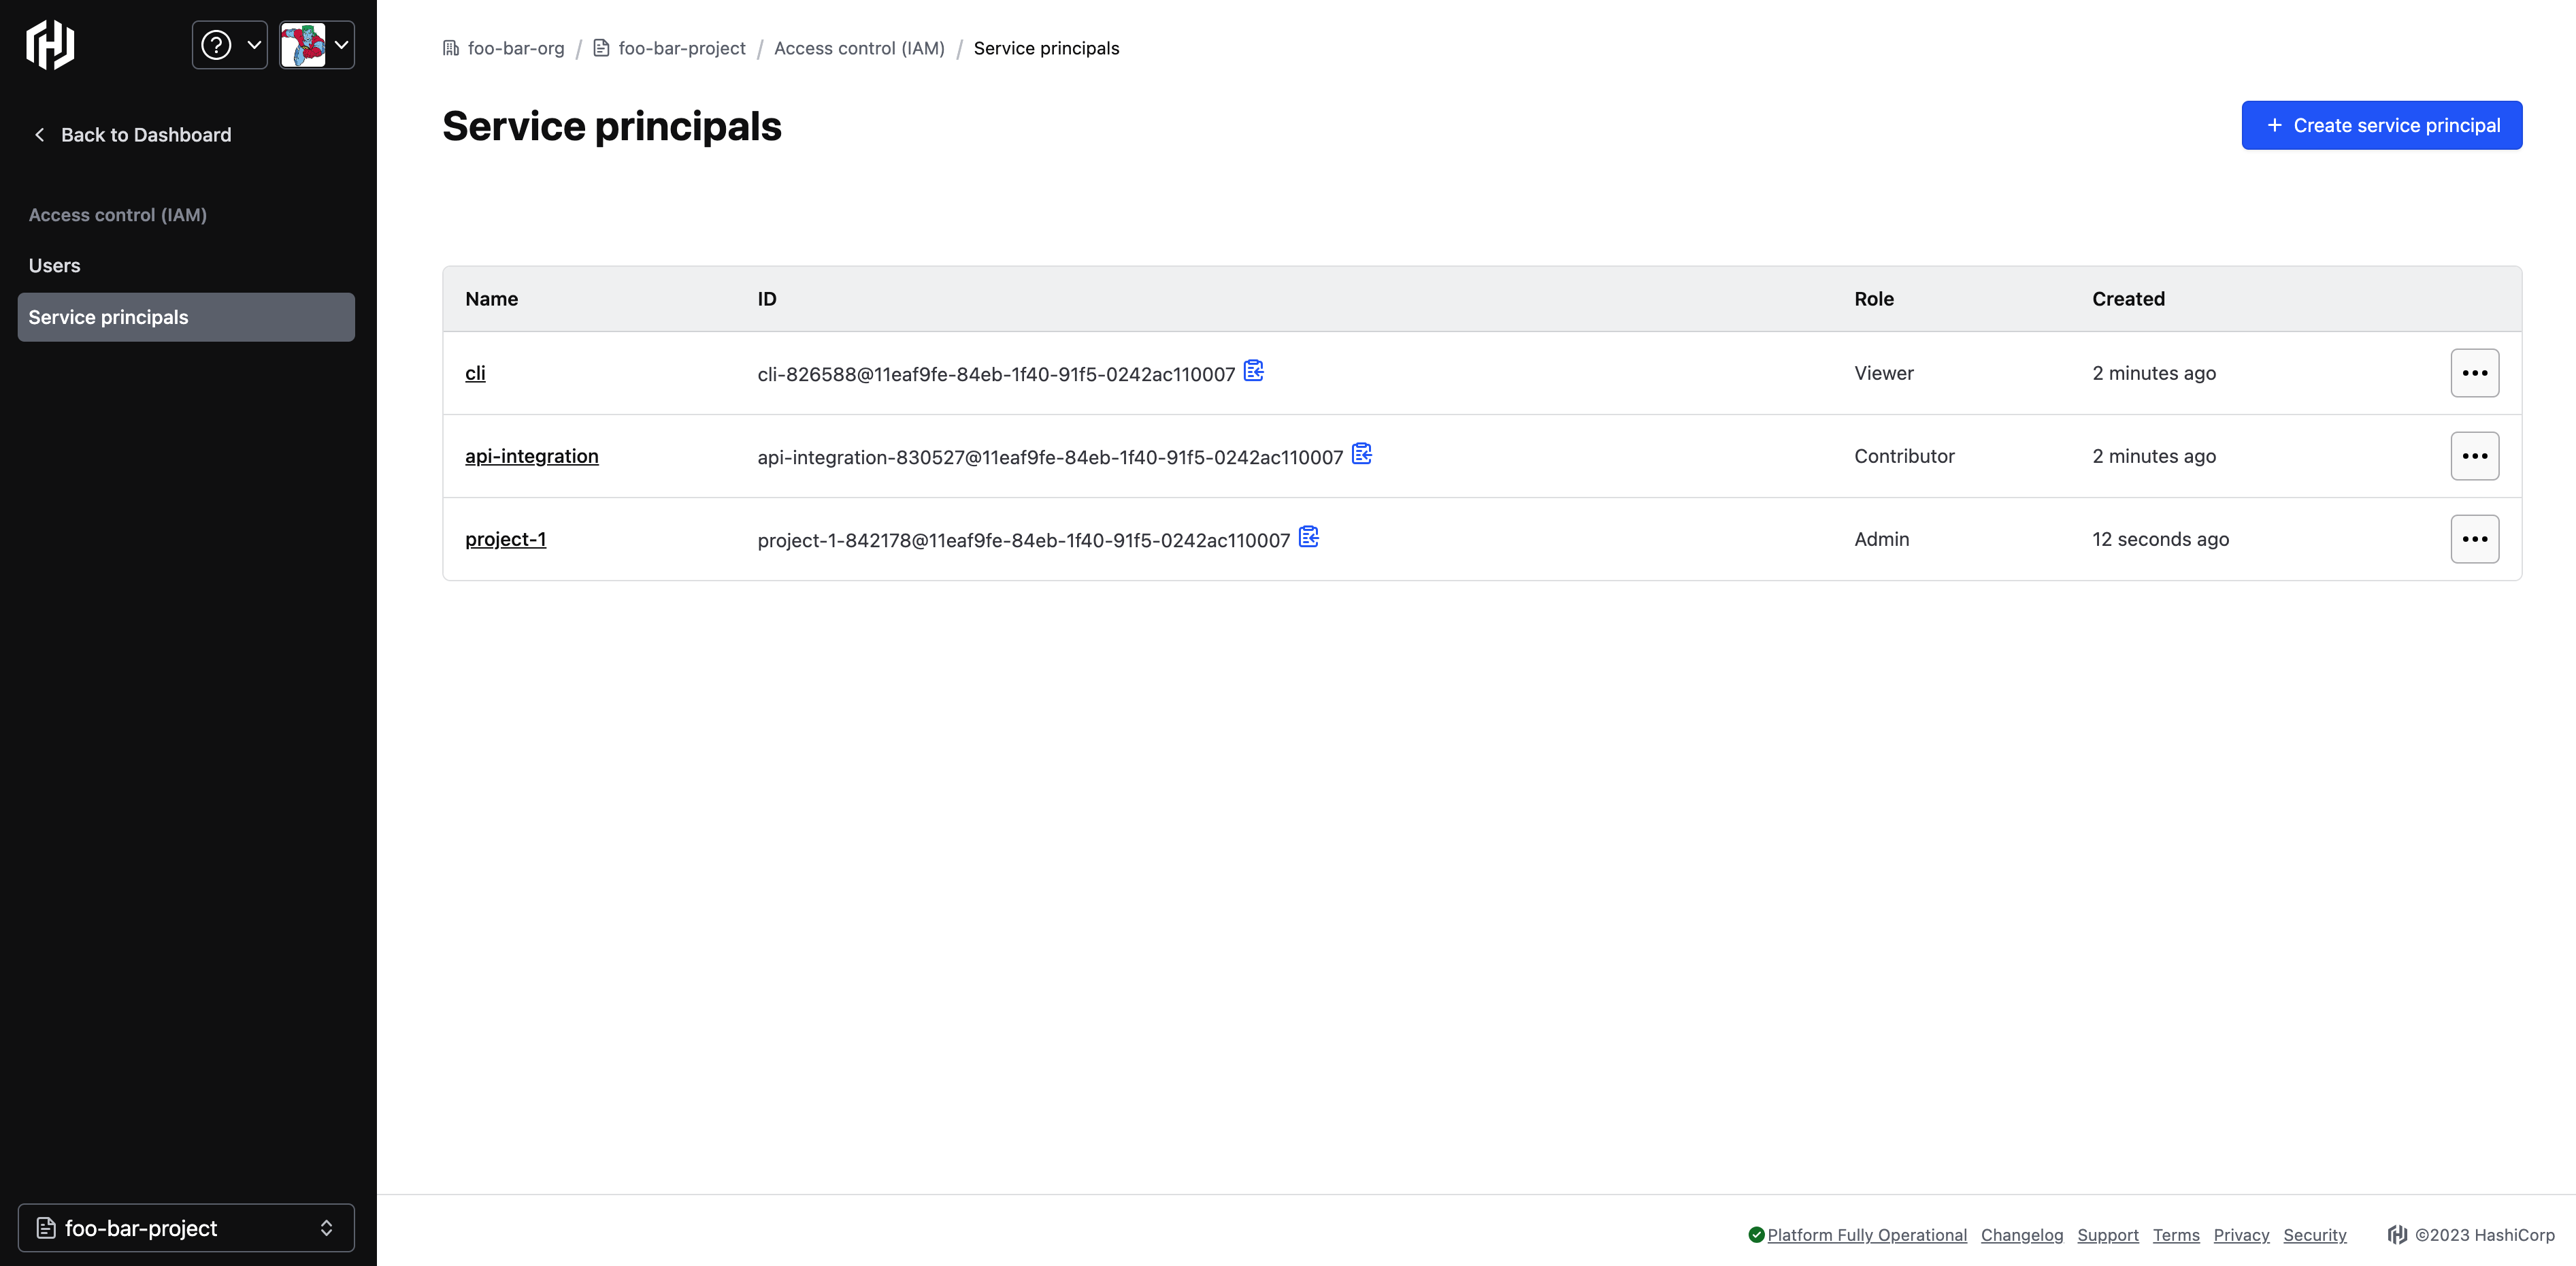
Generate a Service Principal Key
To authenticate service requests performed by non-human clients, you must generate a key for authentication. A service principal key includes a pair value-- Client ID and the Client secret--to be used by the external client to authenticate with the HCP public API.
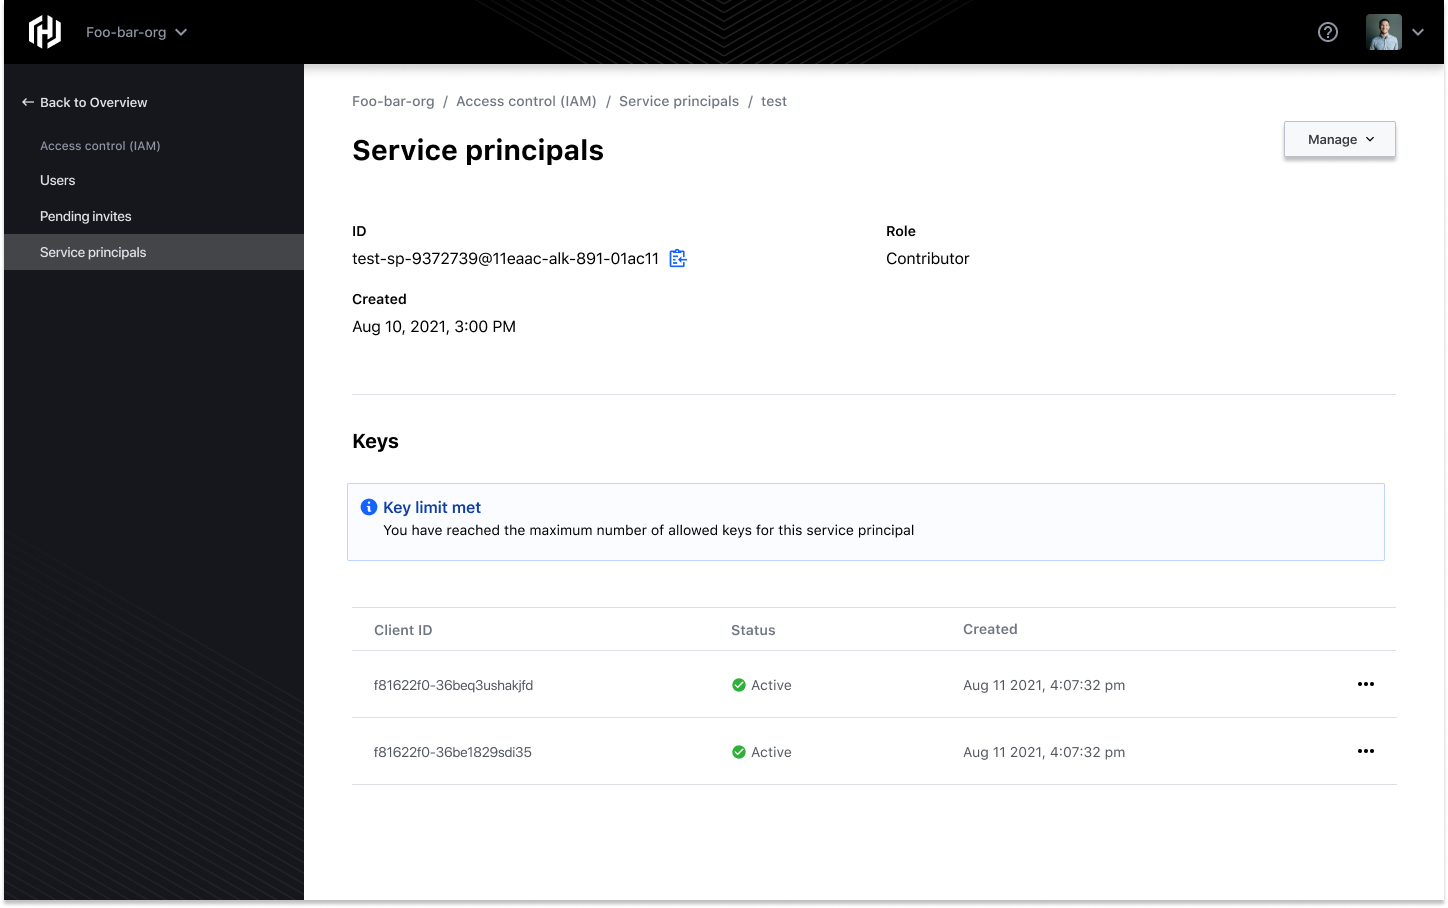
The maximum allowed keys for each service principal is two, which allows for key rotation.
Service principal keys have a status that should always be “active”. Their status might be something other than “active” only during key provisioning and deletion.
Click the service principal to open the detailed view screen.
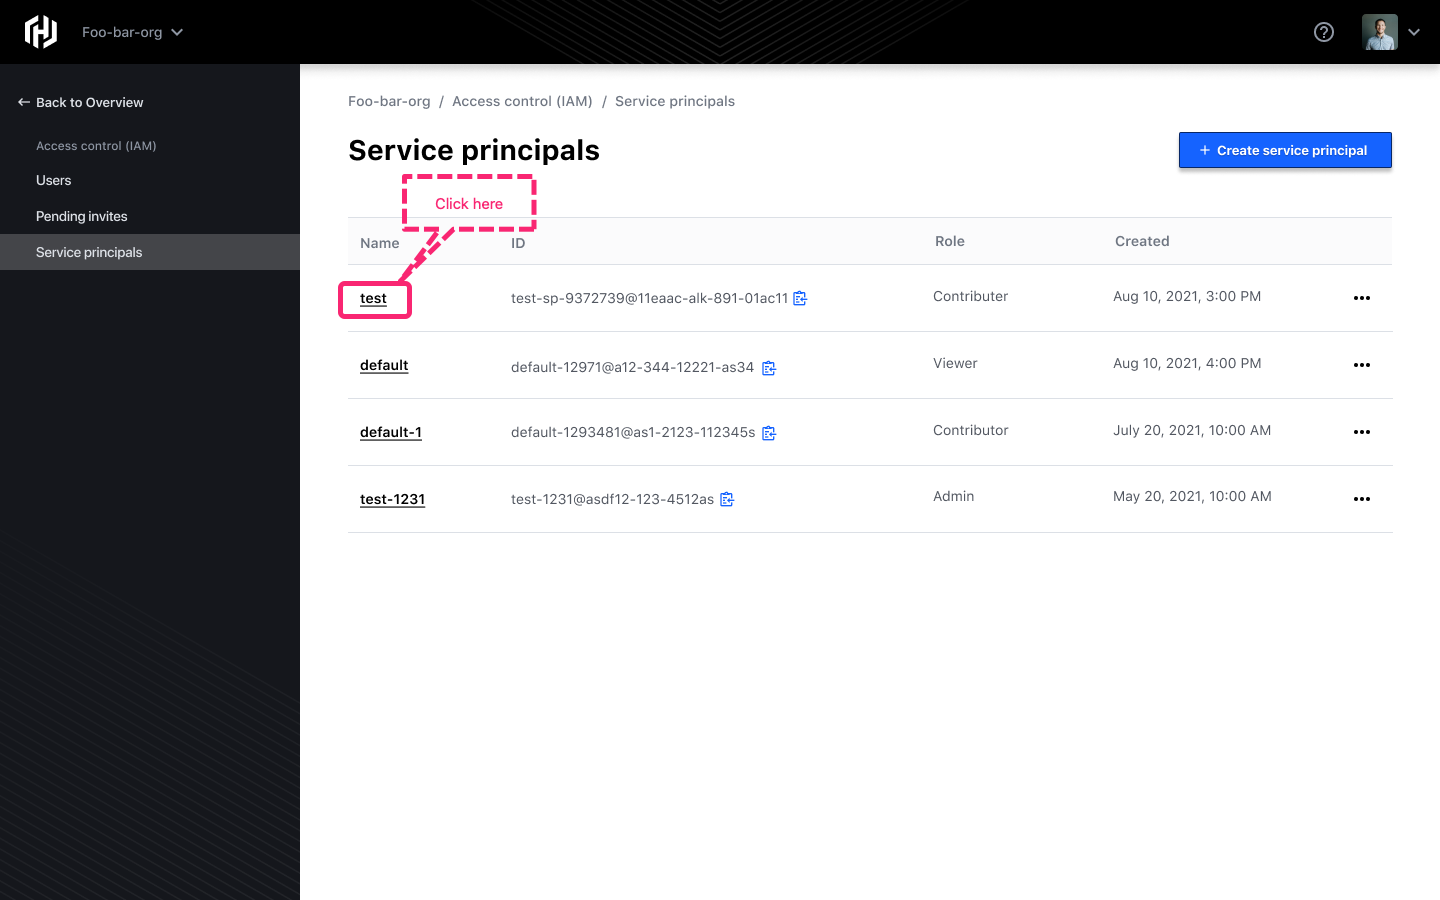
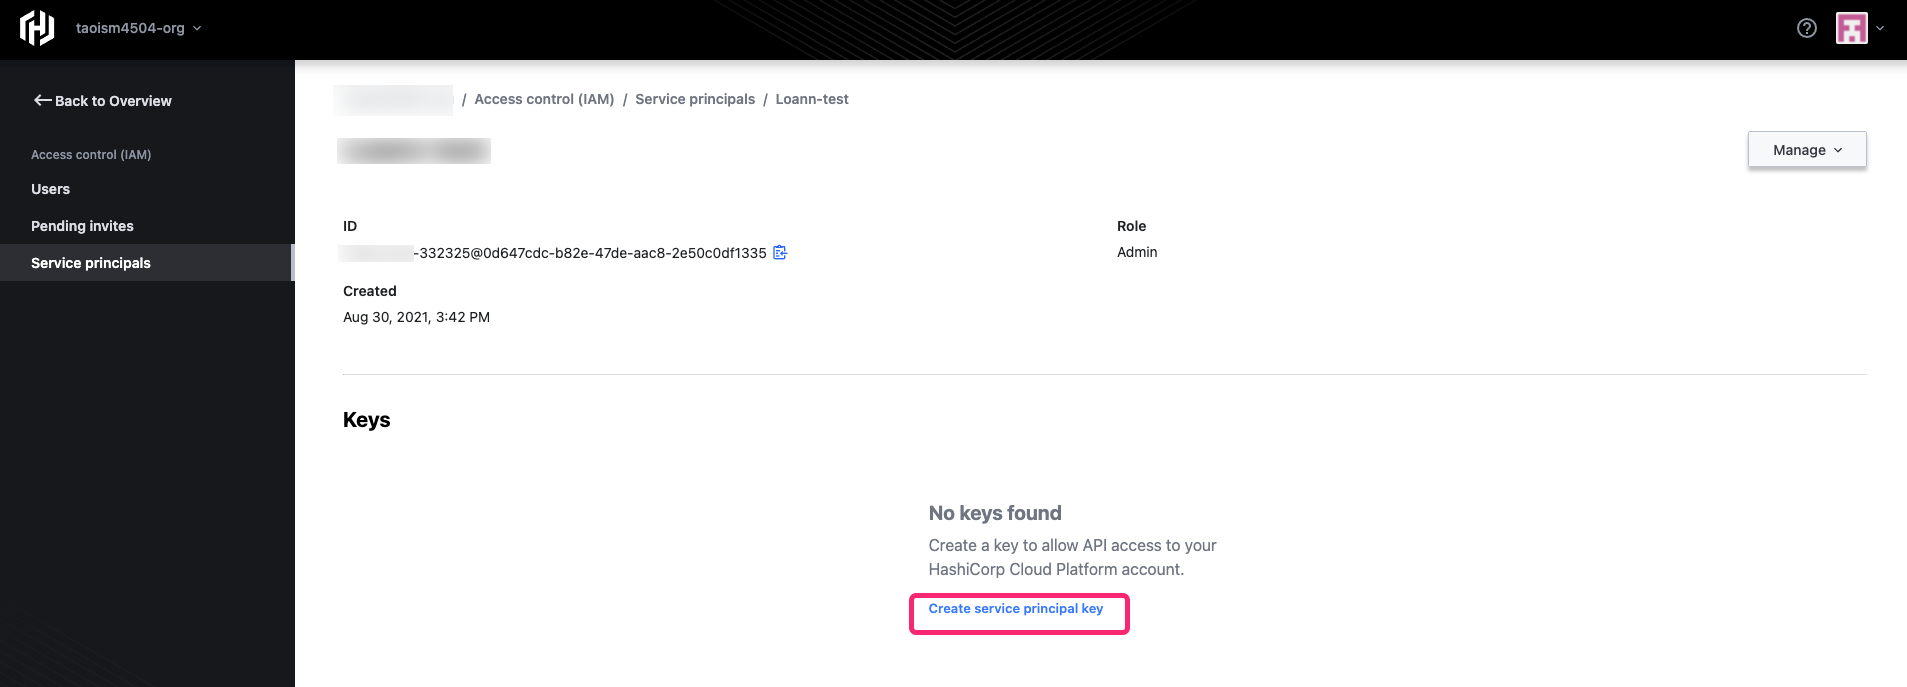
Once you are in the detailed view screen, scroll down and click Create service principal key. It will take a few seconds to generate the key.
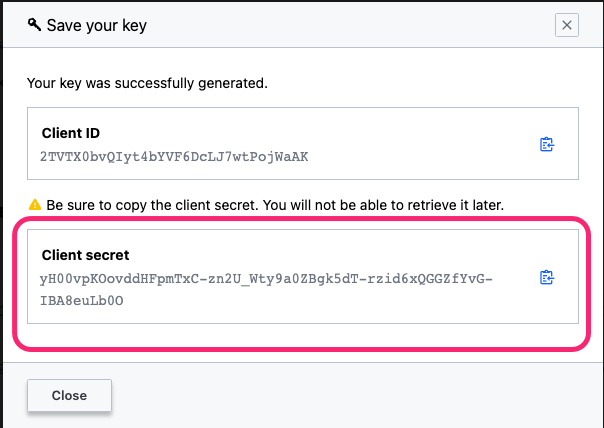
WARNING: HCP is unable to retrieve a service principal's Client secret after the key has been generated. Therefore, it is important that you do not misplace your Client secret once you copy it. Otherwise, you will need to regenerate a new key and delete the old one.
Once the follow screen appears, copy the Client secret and save it to a secure location for later use.
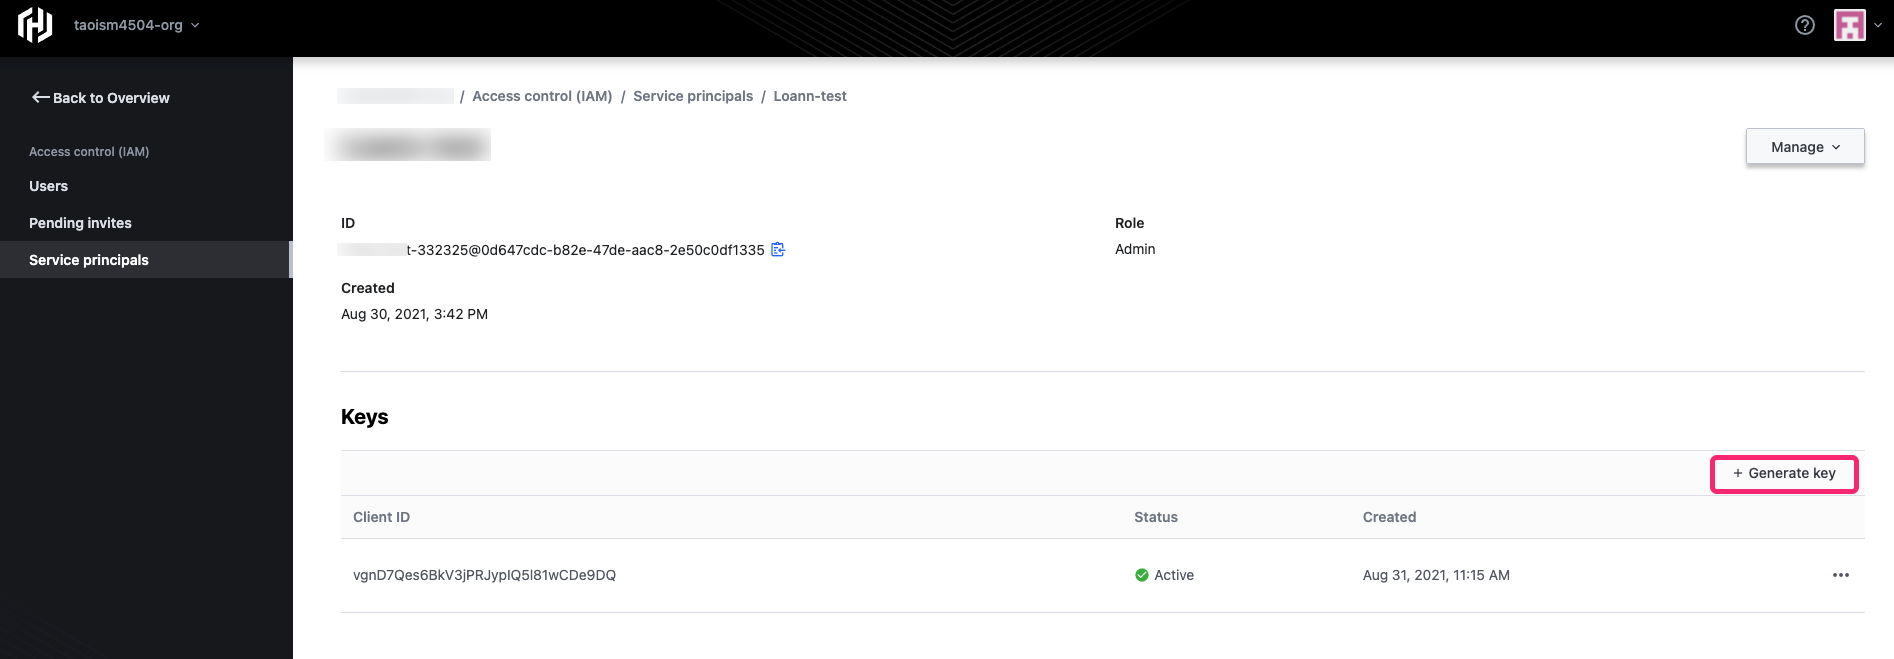
Click Close. You will be brought back to the Keys table. Under the Keys heading table, click + Generate key to generate a second key. You will need the second key to perform key rotation.
Once the second key is generated, follow the same procedure to copy your Client secret for your second key. Click Close. Both keys will appear in the Keys table.
Delete a Service Principal Key
To preserve and maintain the security lifecycle of your keys, it's considered good practice to periodically delete your keys and generate new ones. You can delete a service principal key by navigating to the Keys table, identify the key you wish to delete, and select the Delete option from the drop-down.
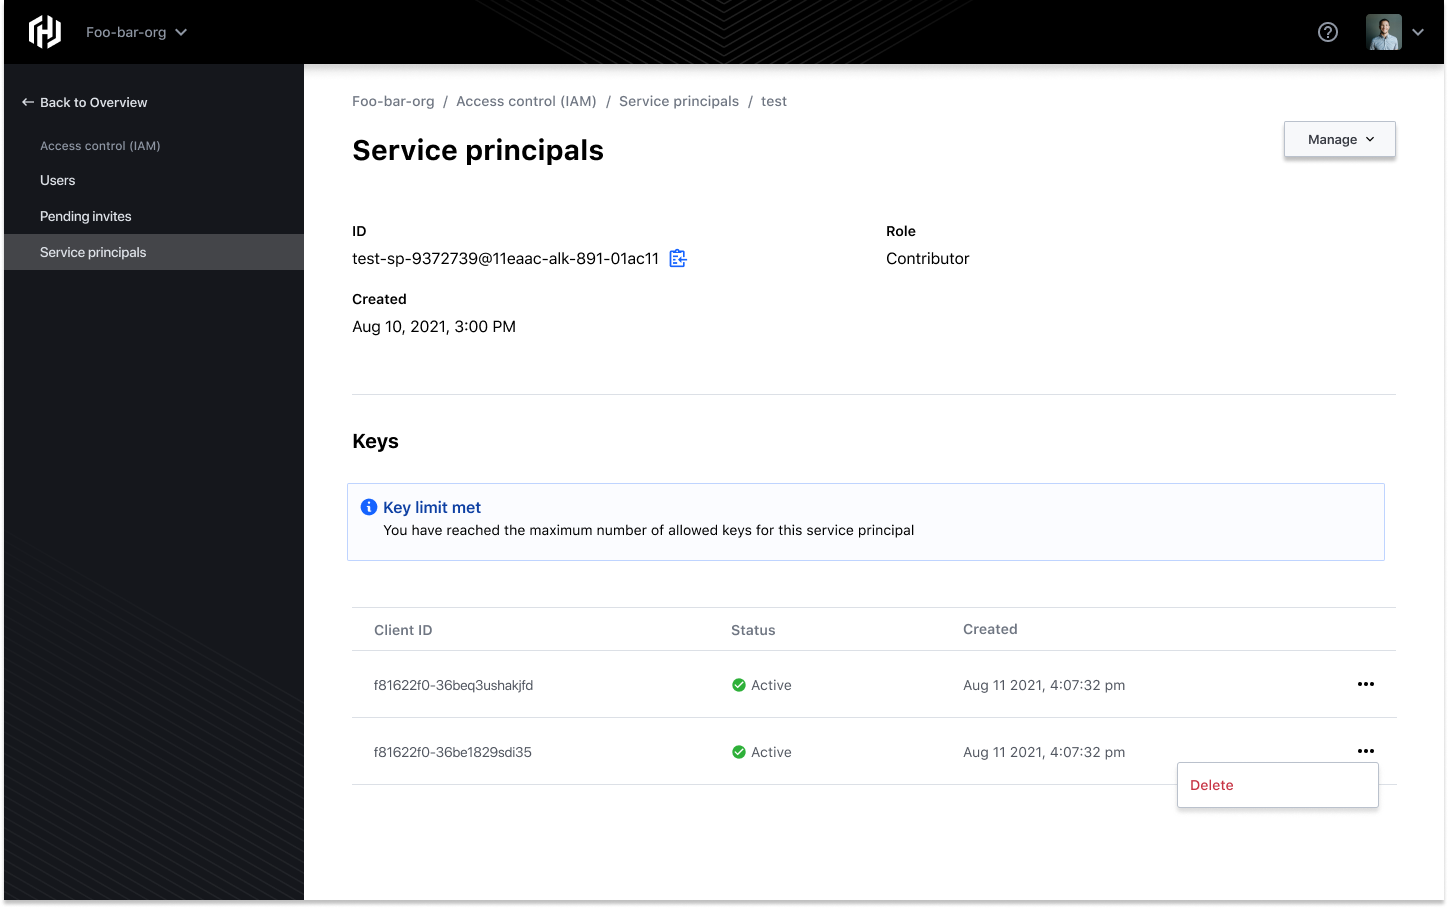
Delete a Service Principal
Attention: You will need to first delete all associated keys belonging to the service principal before you can actually delete the service principal. Neglecting to perform this step first will generate an error message.
Click the service principal to access the detailed view, and then select the Delete option from the drop-down.
