Gateways Overview
This topic provides an overview of the gateway features shipped with Consul. Gateways provide connectivity into, out of, and between Consul service meshes. You can configure the following types of gateways:
- Mesh gateways enable service-to-service traffic between Consul datacenters or between Consul admin partitions. They also enable datacenters to be federated across wide area networks.
- Ingress gateways enable connectivity within your organizational network from services outside the Consul service mesh to services in the mesh.
- Terminating gateways enable connectivity within your organizational network from services in the Consul service mesh to services outside the mesh.

Mesh Gateways
Mesh gateways enable service mesh traffic to be routed between different Consul datacenters and admin partitions. The datacenters or partitions can reside in different clouds or runtime environments where general interconnectivity between all services in all datacenters isn't feasible.
They operate by sniffing and extracting the server name indication (SNI) header from the service mesh session and routing the connection to the appropriate destination based on the server name requested.
Mesh gateways enable the following scenarios:
- Federate multiple datacenters across a WAN. Since Consul 1.8.0, mesh gateways can forward gossip and RPC traffic between Consul servers. See WAN federation via mesh gateways for additional information.
- Service-to-service communication across WAN-federated datacenters. Refer to Enabling Service-to-service Traffic Across Datacenters for additional information.
- Service-to-service communication across admin partitions. Since Consul 1.11.0, you can create administrative boundaries for single Consul deployments called "admin partitions". You can use mesh gateways to facilitate cross-partition communication. Refer to Enabling Service-to-service Traffic Across Admin Partitions for additional information.
- Bridge multiple datacenters using Cluster Peering. Since Consul 1.14.0, mesh gateways can be used to route peering control-plane traffic between peered Consul Servers. See Mesh Gateways for Peering Control Plane Traffic for more information.
- Service-to-service communication across peered datacenters. Refer to Establish cluster peering connections for more information.
Mesh gateway tutorial: Follow the mesh gateway tutorial to learn concepts associated with mesh gateways.
API Gateways
API gateways enable network access, from outside a service mesh, to services running in a Consul service mesh. The systems accessing the services in the mesh, may be within your organizational network or external to it. This type of network traffic is commonly called north-south network traffic because it refers to the flow of data into and out of a specific environment.
API gateways solve the following primary use cases:
- Control access at the point of entry: Set the protocols of external connection requests and secure inbound connections with TLS certificates from trusted providers, such as Verisign and Let's Encrypt.
- Simplify traffic management: Load balance requests across services and route traffic to the appropriate service by matching one or more criteria, such as hostname, path, header presence or value, and HTTP method.
Refer to the following documentation for information on how to configure and deploy API gateways:
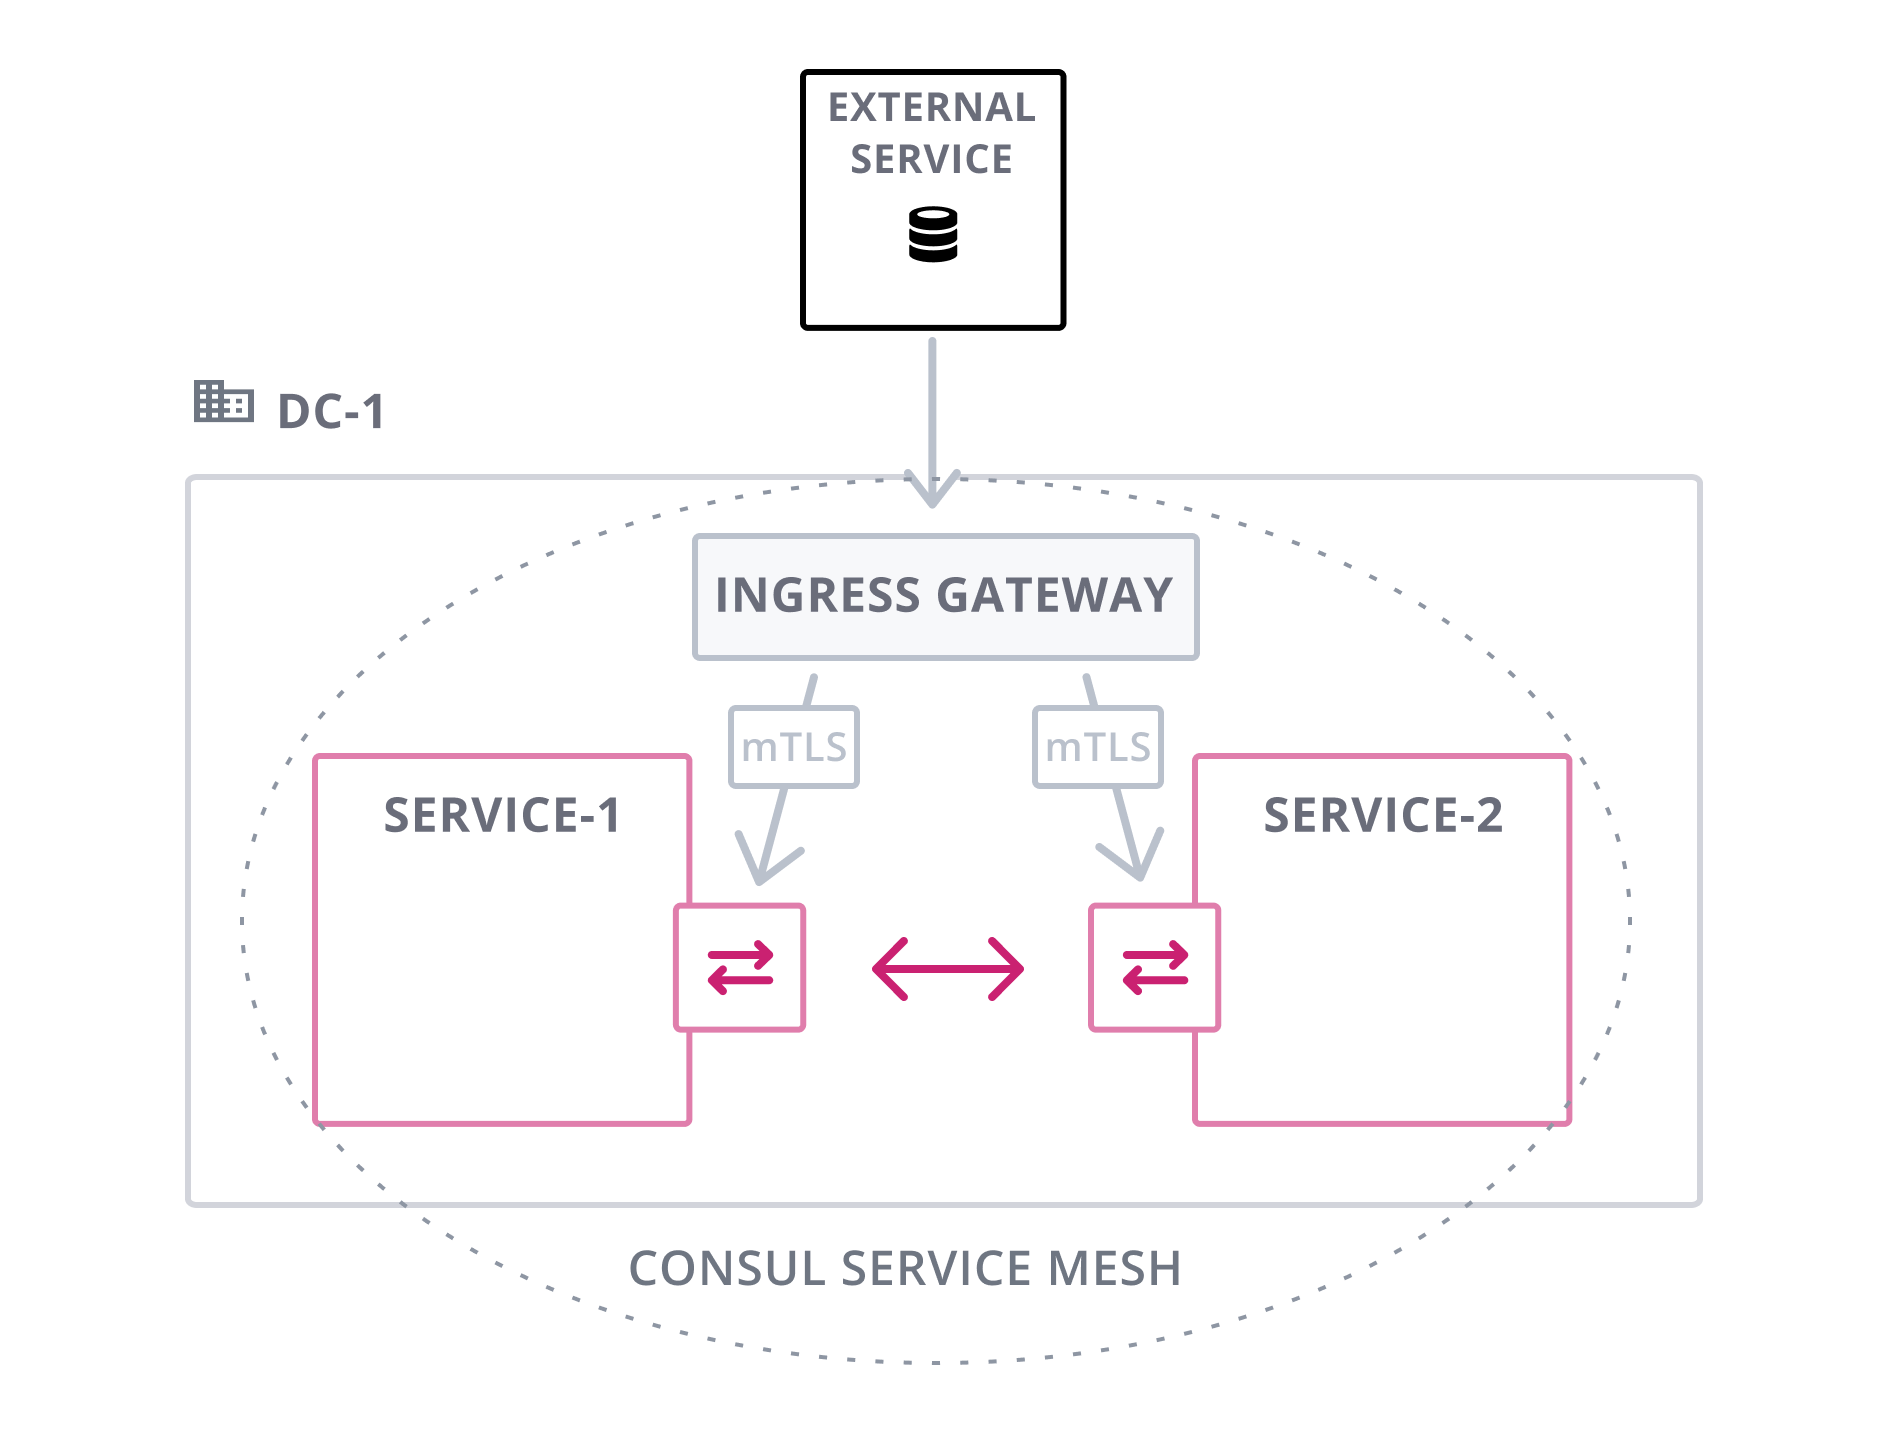
Ingress Gateways
Note
Ingress gateway is deprecated and will not be enhanced beyond its current capabilities. Ingress gateway is fully supported in this version but will be removed in a future release of Consul.
Consul's API gateway is the recommended alternative to ingress gateway.
Ingress gateways enable connectivity within your organizational network from services outside the Consul service mesh to services in the mesh. To accept ingress traffic from the public internet, use Consul's API Gateway instead.
These gateways allow you to define what services should be exposed, on what port, and by what hostname. You configure an ingress gateway by defining a set of listeners that can map to different sets of backing services.
Ingress gateways are tightly integrated with Consul's L7 configuration and enable dynamic routing of HTTP requests by attributes like the request path.
For more information about ingress gateways, review the complete documentation and the ingress gateway tutorial.
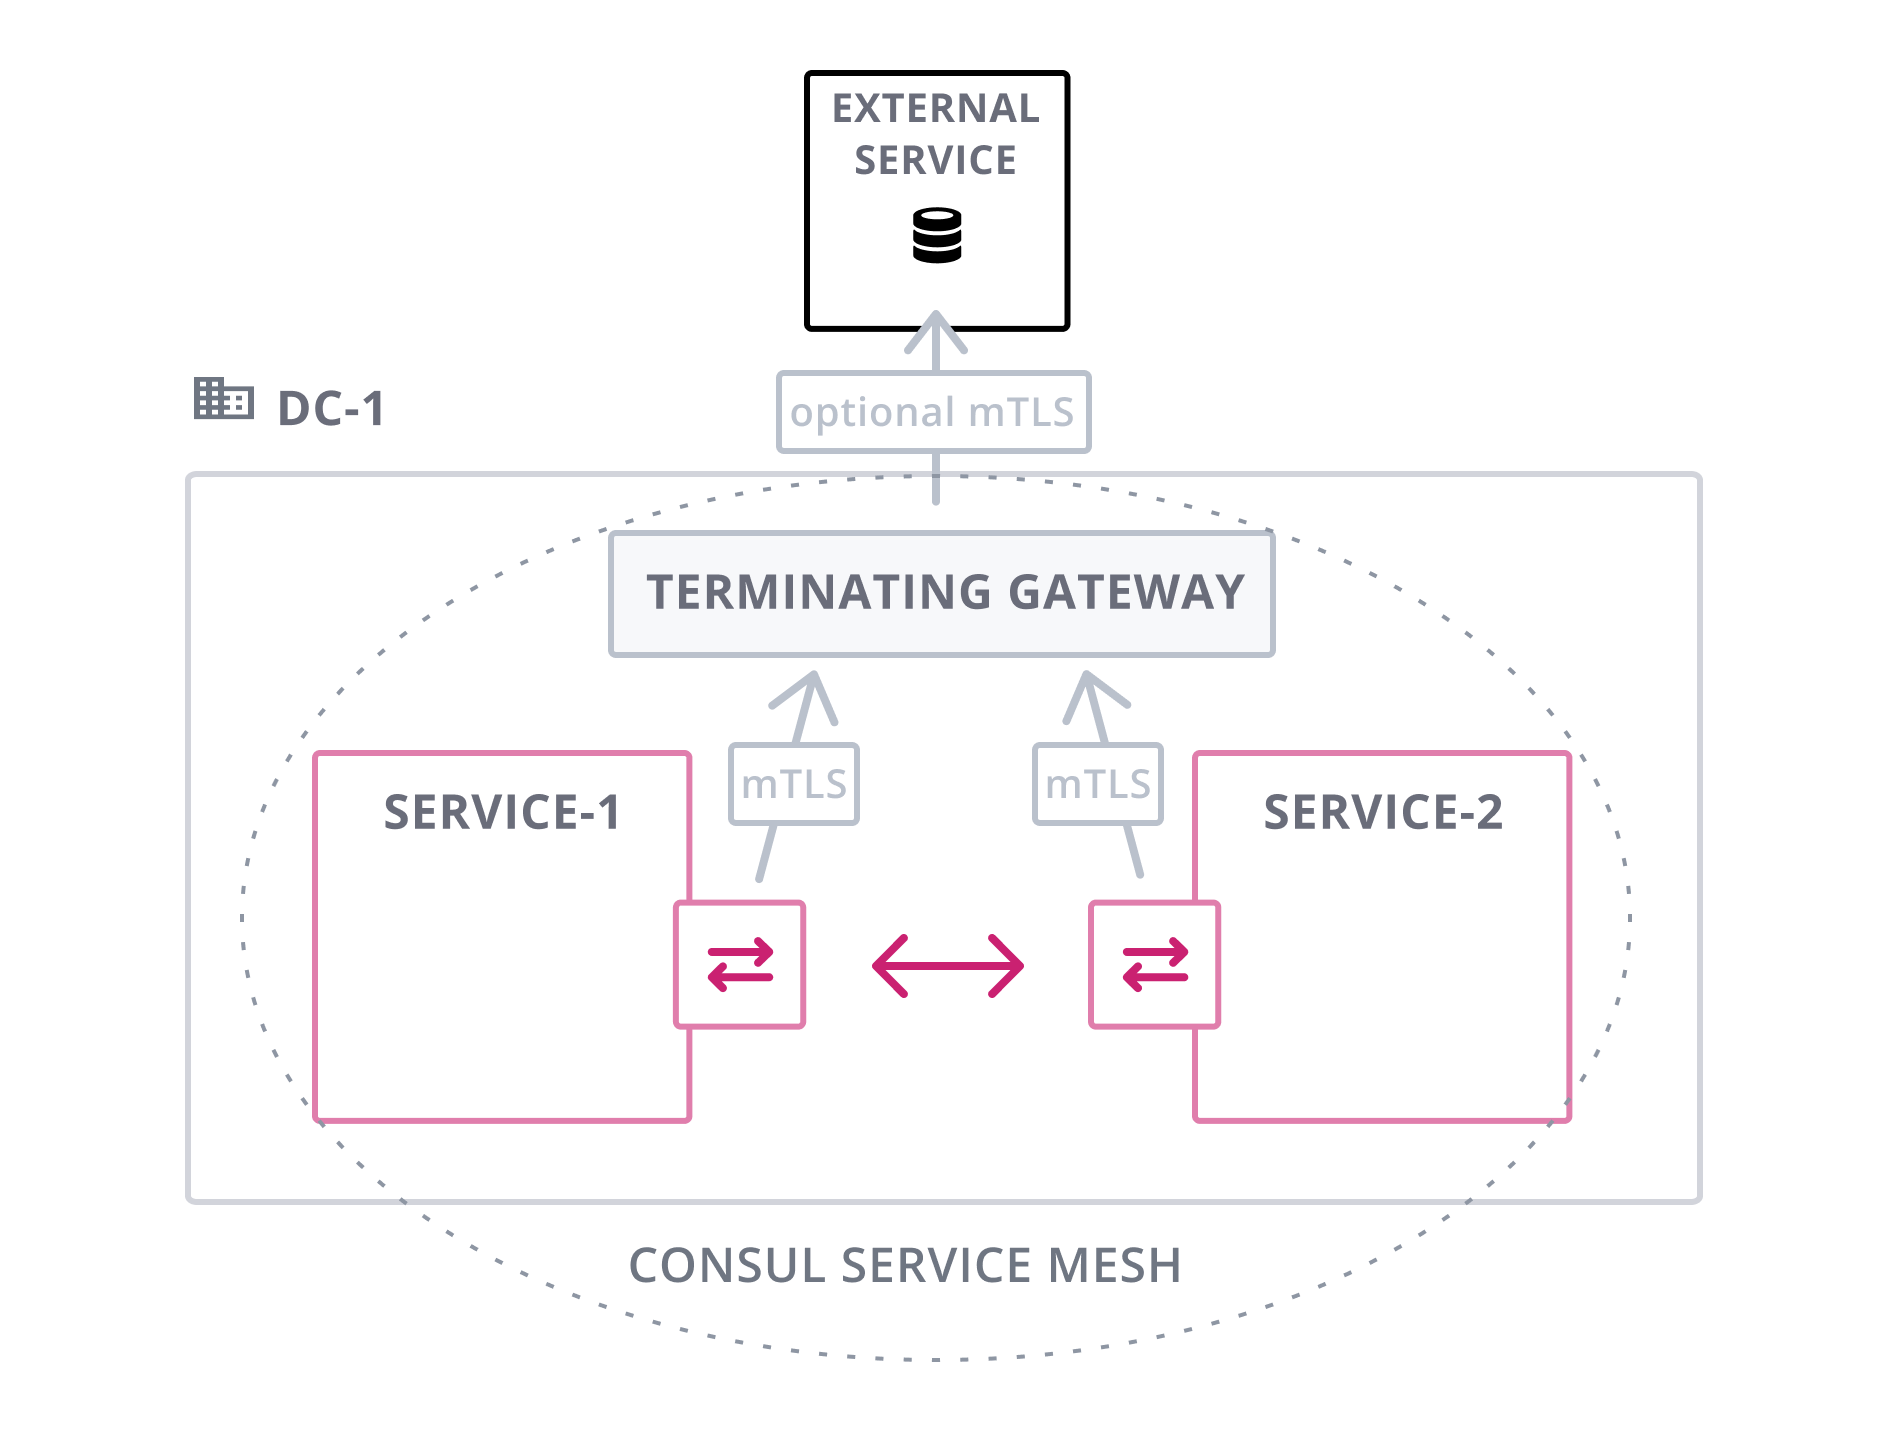
Terminating Gateways
Terminating gateways enable connectivity within your organizational network from services in the Consul service mesh to services outside the mesh. Services outside the mesh do not have sidecar proxies or are not integrated natively. These may be services running on legacy infrastructure or managed cloud services running on infrastructure you do not control.
Terminating gateways effectively act as egress proxies that can represent one or more services. They terminate service mesh mTLS connections, enforce Consul intentions, and forward requests to the appropriate destination.
These gateways also simplify authorization from dynamic service addresses. Consul's intentions determine whether connections through the gateway are authorized. Then traditional tools like firewalls or IAM roles can authorize the connections from the known gateway nodes to the destination services.
For more information about terminating gateways, review the complete documentation and the terminating gateway tutorial.